Sharing your Mac's screen is a core part of improving your movies, media, and productivity experience. Fortunately, Macs offer a handful of ways to use this feature.
Below, we'll cover the different methods you can use to share your Mac's screen with others, but depending on the devices your participants use, your options may be limited. So, let's get started.
1. Use the Native Screen Sharing App
Unknown to many people, macOS has a built-in screen-sharing app, unimaginatively called Screen Sharing. It's pretty easy to use. All you need to have is your Apple ID email address, and you can easily share your screen with another device.
When sharing your screen this way, both devices must have good and strong internet access. Otherwise, it won't work, or the playback will be choppy.
Follow the steps below on the target device to share your screen with the Screen Sharing app:
- Launch Spotlight (Cmd + Space) on the target Mac, type in Screen Sharing, and hit Return.
- Type in your Apple ID into the small window that appears.
-
Now return to your Mac, where you should see a Screen Sharing prompt.
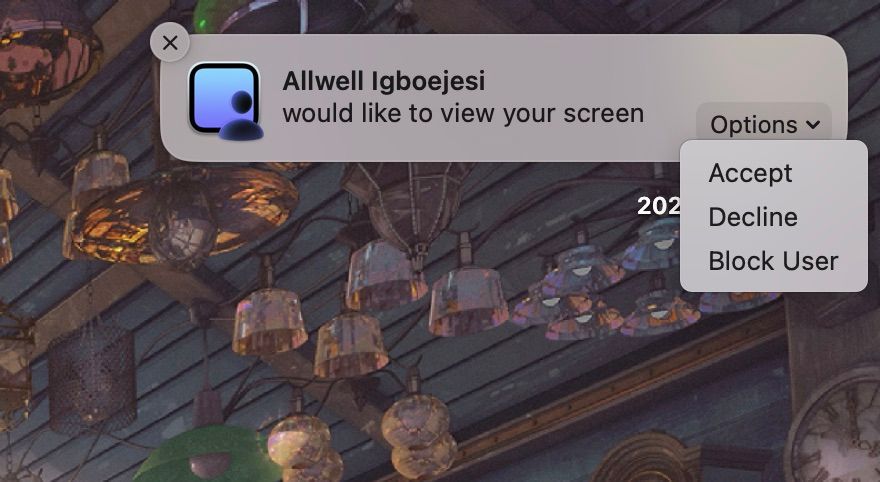
- Select Options and click Accept.

Once that's complete, your computer's screen will appear as a new window on the target Mac's desktop.
2. Screen Share During a FaceTime Call
Thanks to Apple's SharePlay feature, FaceTime is one of the easiest methods to share your Mac's screen with other Apple users. Here's how to use it on your Mac:
- Start a FaceTime call.
- Mouse up to the menu bar and click the FaceTime icon (represented by a white video camera in a green rectangle).
- Select the SharePlay icon (represented by a screen with a person in the right corner).
-
You can choose to share a specific window or the entire screen.
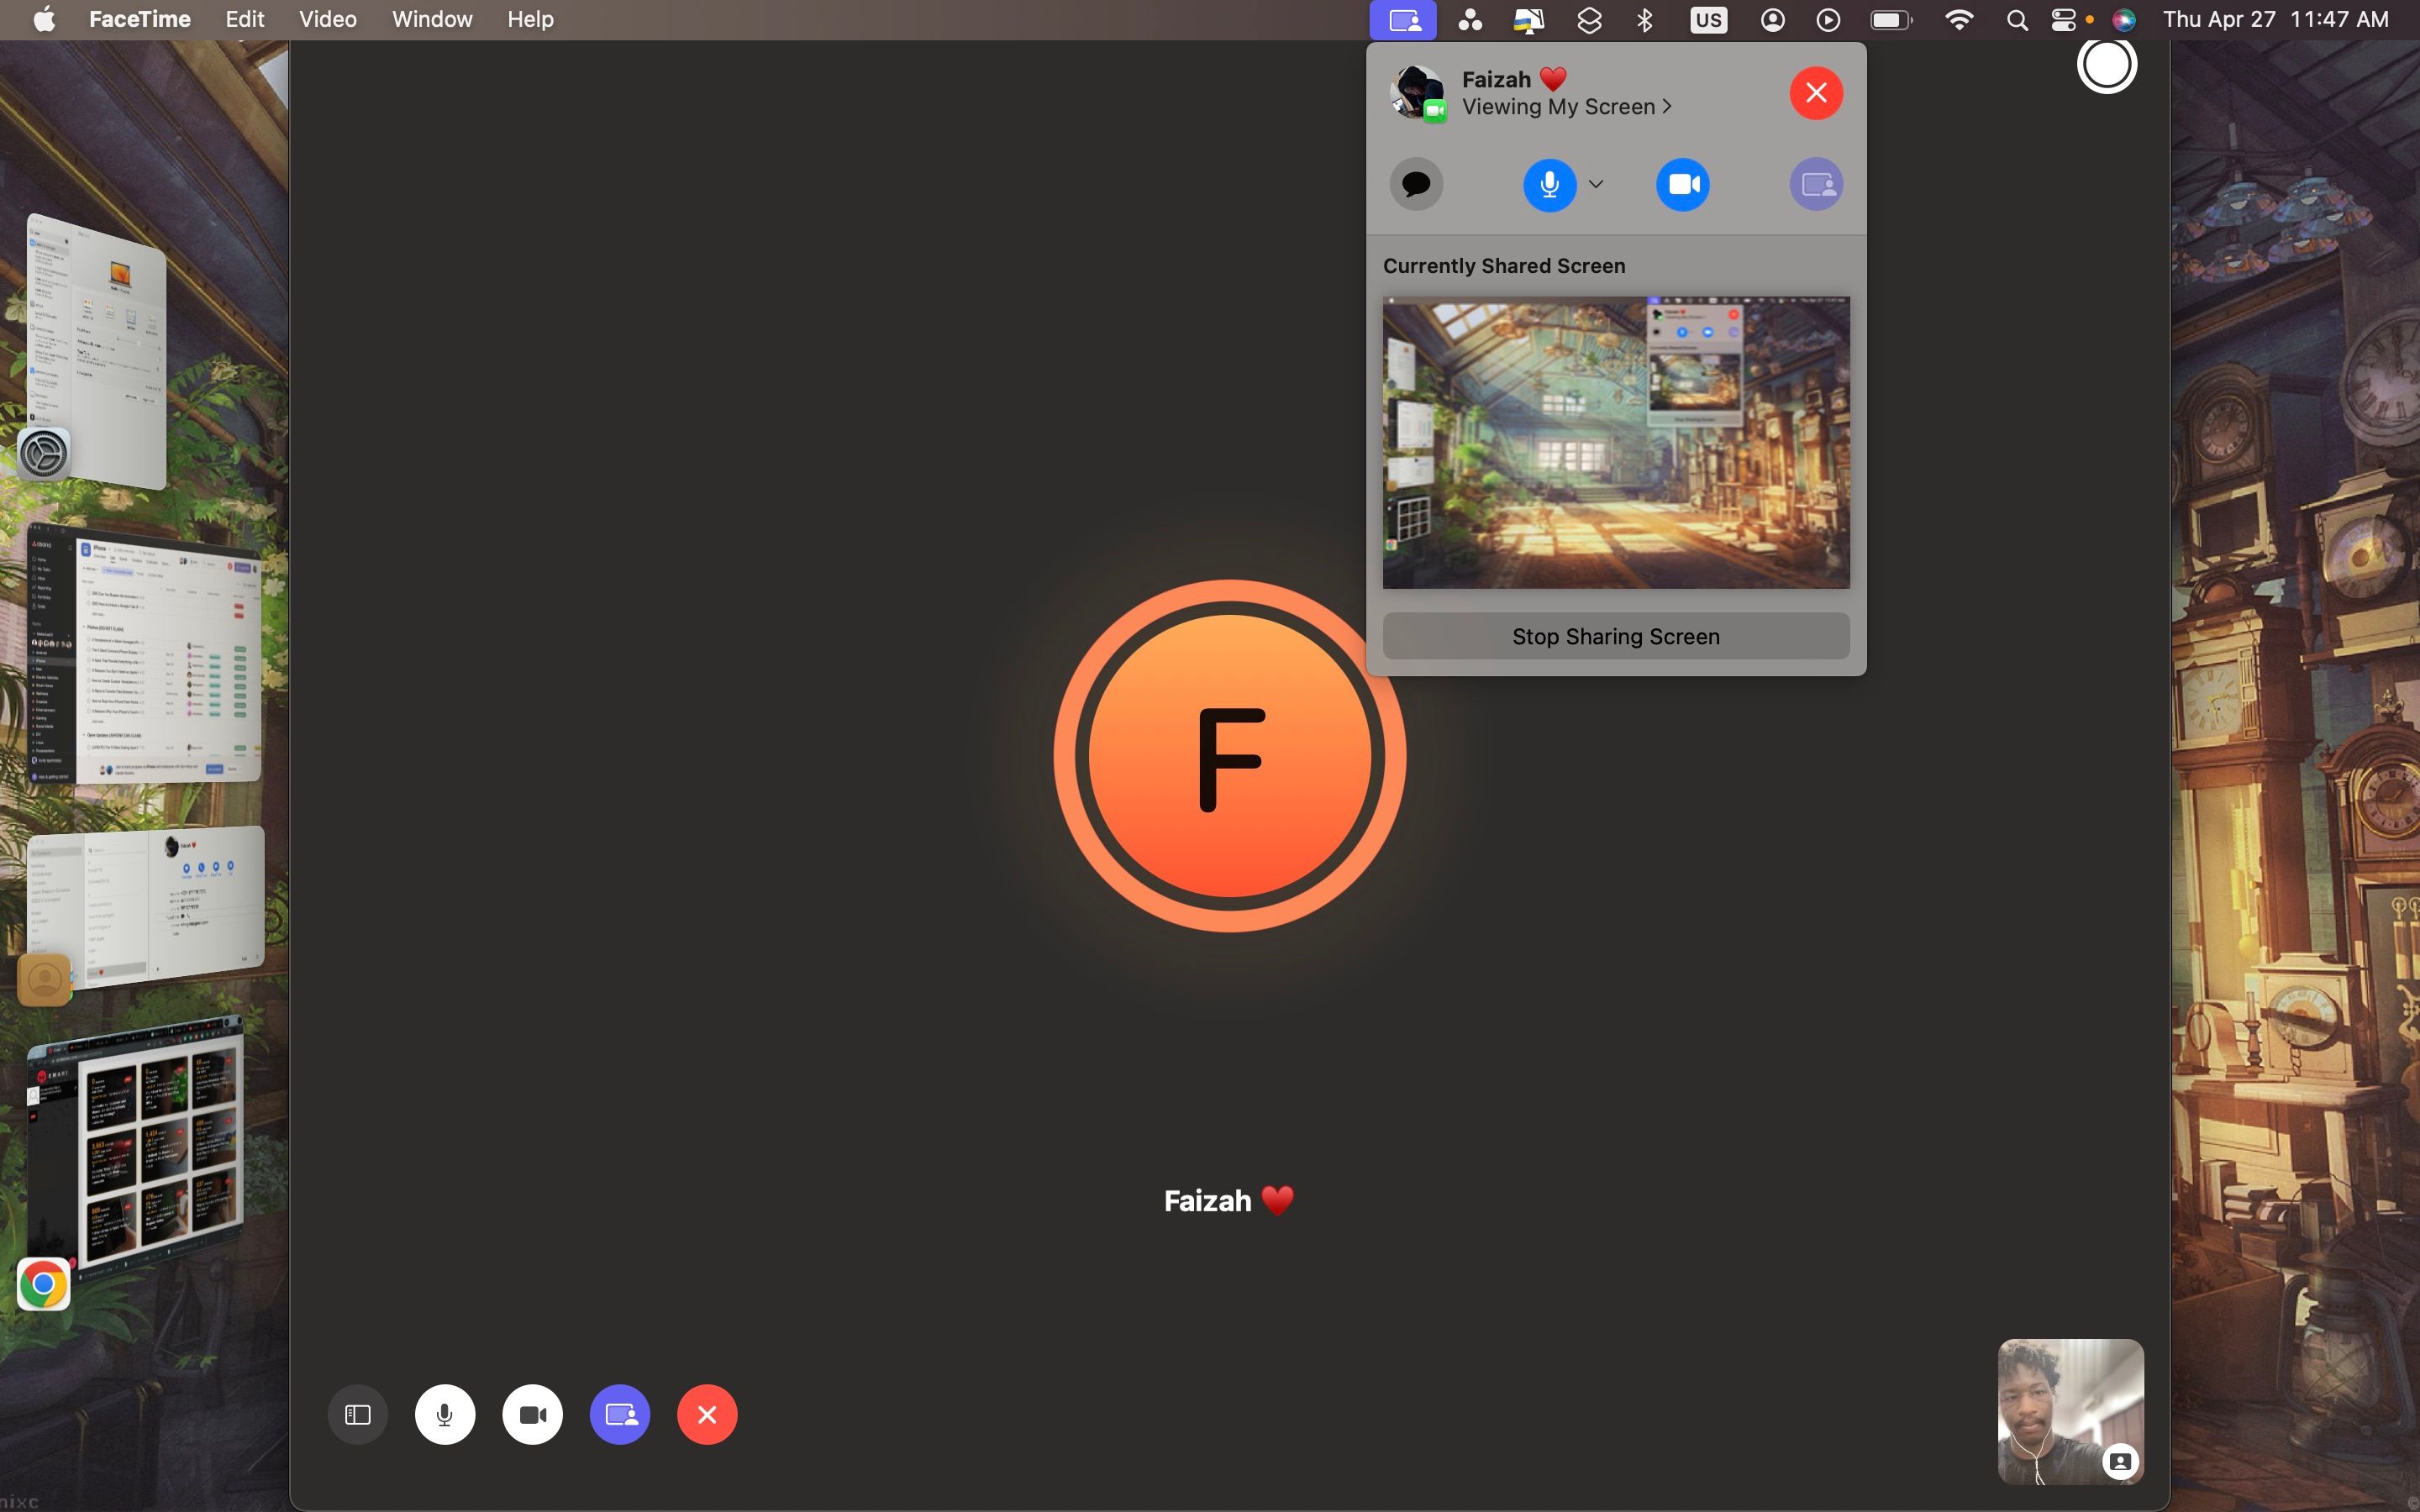
- Upon selecting, the other person on the call should be able to see what's on your screen.

While this method doesn't grant the other user control of your Mac, it's more accessible since you don't need hostnames or Apple IDs. You can also use SharePlay to host movie-watching parties with friends.
This feature is only available on macOS Monterey and later.
3. Share Your Mac's Screen With AirPlay
You can take advantage of the built-in AirPlay feature to mirror your Mac's screen on an AirPlay-compatible Smart TV, iPad, or another Mac connected to the same Wi-Fi. Here's what you need to do:
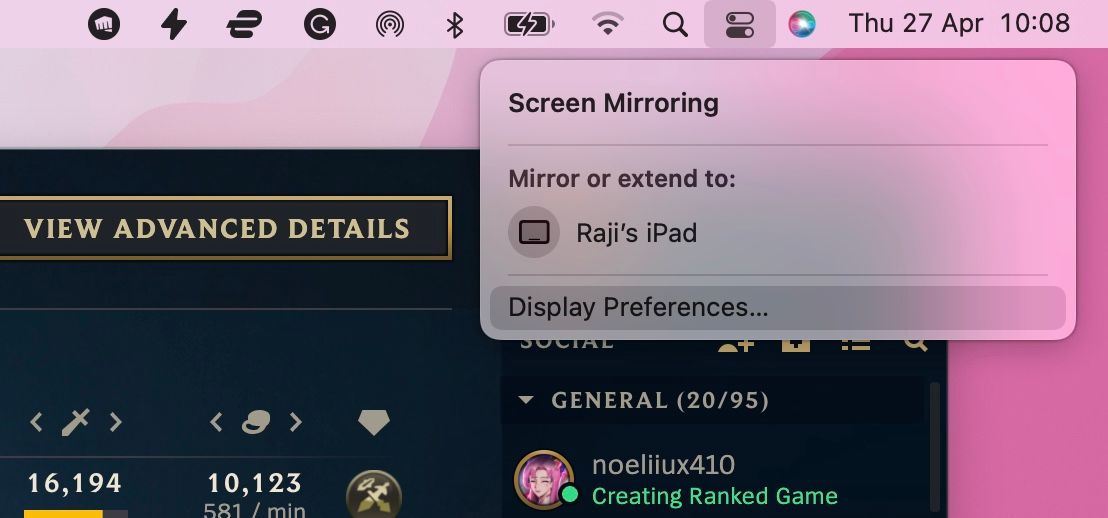
- Open Control Center from the menu bar.
-
Select Screen Mirroring, then pick the available output device from the list.
- Select Mirror Built-in Display to share your screen with the other device.

Modern Macs can also act as AirPlay receivers, meaning you can AirPlay videos from your iPhone or iPad to a Mac.
4. Use iMessage for Screen Sharing
You can also use the built-in Messages app to share your Mac's screen with iMessage users. It works with Screen Sharing previously mentioned in this article but automatically connects you through Apple ID instead of asking for a hostname.
Here's how to use it:
- Open Messages from the Dock and find who you would like to share your screen with.
- Start a conversation with them.
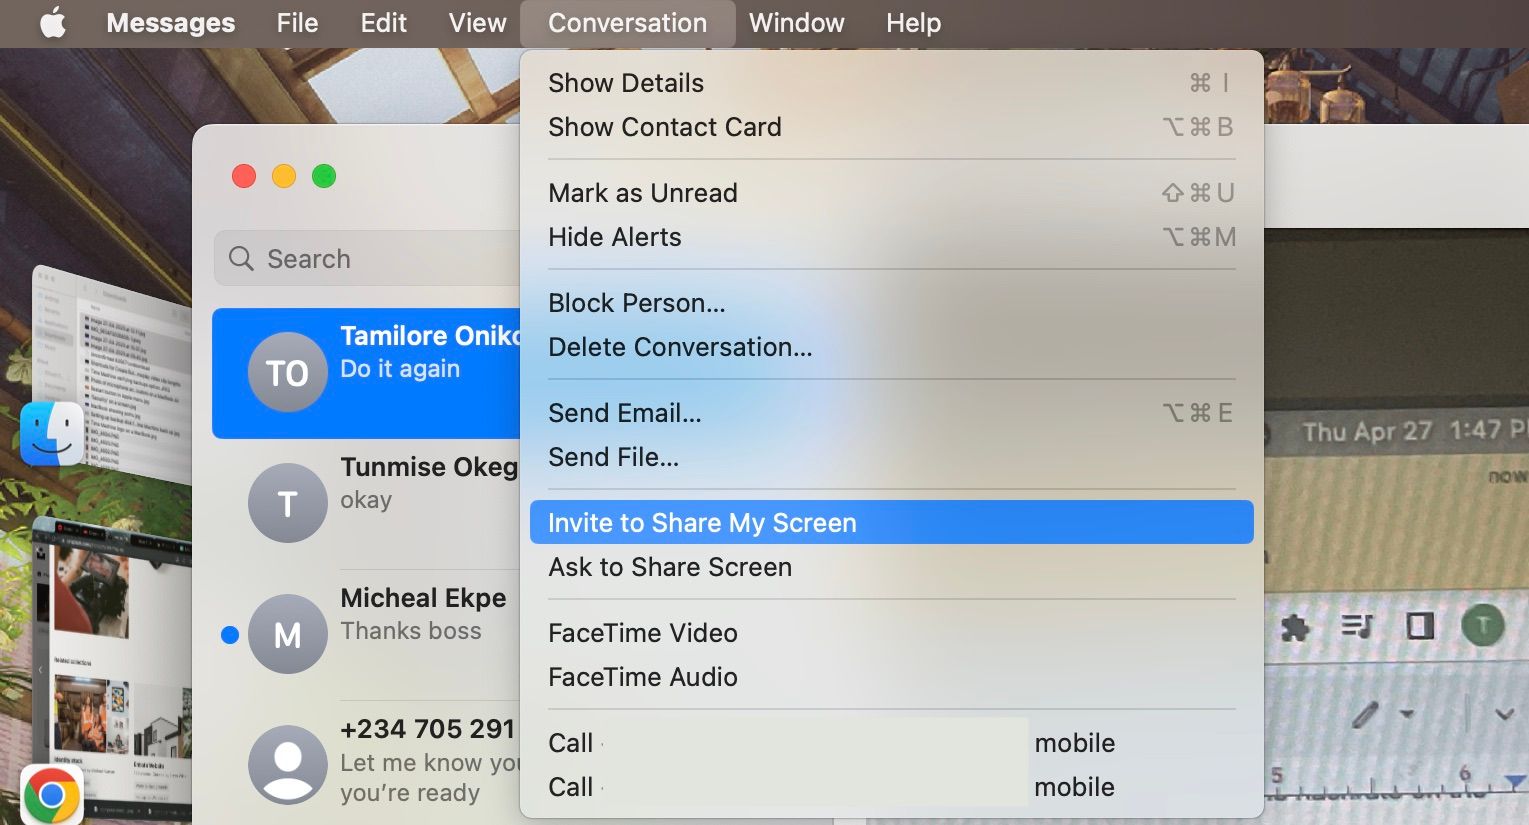
- Mouse up to the menu bar and select Conversation.
-
Click Invite to Share My Screen and wait for the person to accept.
- When they accept, you'll see the screen sharing notifier highlighted on the menu bar. You can select options from there to set your screen-sharing preferences.

5. Screen Share via Third-Party Apps
Besides built-in solutions, you can rely on third-party apps to share your Mac's screen. Most of them also have a web version that works similarly. Three such apps we recommend are Zoom, Discord, and Google Meet. However, they all need permission to access your Mac's screen.
So, once you install any of these apps, follow these instructions on your Mac first:
- Launch System Settings and select Privacy & Security from the left pane.
- Click Screen Recording and toggle on all the applications you wish to give permission.
Zoom
Here's how to share your screen during a Zoom meeting:
- Launch Zoom and create or join a meeting.
- Click the Share Screen button at the bottom of the window.
- Select what desktop or window you would like to share and click Share.

Discord
Starting a screen-sharing session over Discord on your Mac is pretty easy. Just follow these steps:
- Join or start a call on Discord (if you're unsure, read our beginner's guide to Discord)
- Find and select the Share Your Screen icon located right above your username. It's represented by a monitor with an arrow inside
- Choose whether to share by application windows or by screens.
- After you choose your resolution and frame rate, click Go Live.

Google Meet
Google Meet is entirely browser-based, but you can still share your screen by doing the following:
- Head over to https://meet.google.com/ in your browser.
- Sign in and click New Meeting > Start an Instant Meeting.
- Select Present now at the bottom of the window (represented by an upward-facing arrow in a rectangle).
- Choose a window or your entire screen and click Share when you're finished.

Use Screen Sharing to Enjoy Media With Friends
Whether it's a game, a movie, or some kind of presentation, sharing your screen can make people far away feel closer. It's reassuring to know that screen sharing is easy on a Mac and there are multiple built-in solutions.
If, for whatever reason, you prefer to use third-party solutions, the three apps recommended here should help share your screen with whatever target device you want. However, you should note that such apps might impose limitations on their free versions.