With Google Docs, sharing and collaborating on documents is a cinch. But if you’re working with a variety of them, you’ll want a number of ways to share your links and adjust permissions.
It’s easy to switch off these settings so that anyone with the link can quickly access the file and get to work. But sometimes that can mean oversharing or allowing people to edit that you’d prefer didn’t. In this article, you can read about different ways to share links to your Google Docs and how they work.
1. Use the Share Settings to Share Your Google Docs
Unless you’re working in a shared drive, Google sets documents you create to Restricted by default. That means you’ll need to adjust the share settings before others can view it using the link. Otherwise, your viewers will come to a page that prompts them to request access, which could mean a lot of extra work and notifications for you and a wait for them.
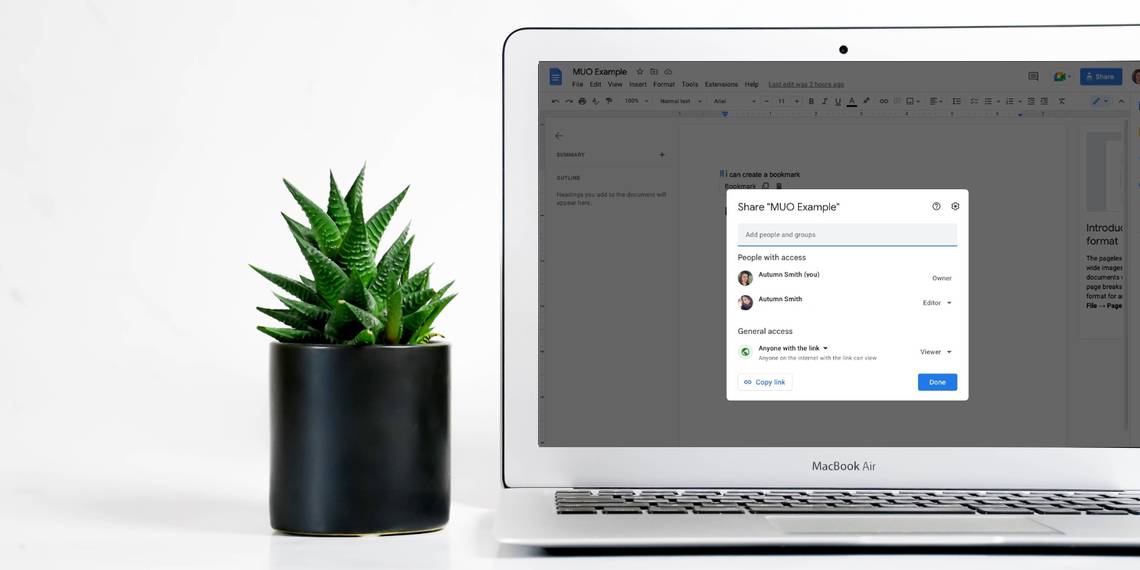
To adjust the permissions settings on your file, click Share in the top-right corner of your screen to bring up share settings. Within this menu, you can see a quick overview of who has access to the document. You can also grant access to others. Here’s how each section in this menu works.
Add People and Groups
If you want to restrict who has access to your Google Docs, you can add specific people using this field at the top of the menu. Type in their email address here. The next step is to assign their role, choose whether you’d like to notify them, and add an optional message.

They’ll get an email letting them know you’ve shared it with them, including a link that will take them to it. They can also find it again later in the Shared with me tab in their own Google Drive.
People With Access
Under the People with access heading, you can see who has access to the document. You can also adjust their role by clicking the arrow next to it—these are:
- Viewer—these people can see the document, download, print, or copy it.
- Commenter—they can share and use comments or suggestions to communicate with you.
- Editor—they have the second-most control to the Owner (you, if you created the document). They can change it, work with others’ suggestions, and even share the file with other people and adjust its permissions.
Additionally, you can use this menu to Transfer file ownership or Remove access.
You can make additional adjustments to your share settings by clicking the gear in the top-left corner of the panel. Here you can turn off the ability for Editors to share or change permissions of a document. You can also prevent viewers and commenters from downloading, printing, or copying the document.
General Access
Within General access, you can decide whether you want to keep the document restricted or if you want to grant access to Anyone with the link. To do so, click the fly menu beside Restricted and make the swap.
Once you switch, you can edit the settings to allow those with the link to view, comment, or edit. Keep in mind, that if you have your file open for those with the link, you can’t prevent others from sharing the link.
Copy Link
When you’re all set, you can quickly grab the link by clicking Copy link in the bottom-left corner of the panel. Now you can paste it wherever you’d like. For quick access, you could visually bookmark and organize your links in software like Notion to help you find and share them later.
Additionally, you can copy the link right from the address bar. Highlight everything up until the forward slash after the long string of numbers and letters to do so.
2. Publish Your Google Docs and Share the Link
You can publish your Google Docs for anyone to view by clicking File in the top-left corner of your screen, hovering over Share, and selecting Publish to web. From there, all you need to do is click the Publish button.

This may seem the same as setting your share settings to Anyone with the link. It is, except that the information is view only, and the changes you make to the document aren’t live. So, once your file is ready for viewing, you can hit publish and grant others access.
But if you need to keep working on the document, you can adjust the setting so that no one will see your changes until you hit Publish again. To do so, click the fly menu beside Published content & settings once you make it public, and uncheck Automatically republish when changes are made.
Once you publish it, you can share the link or embed it into other documents or web pages. To take your file down, all you need to do is go back into the same menu and select Stop publishing. This is a great way to share information without building a website or worrying about domain and hosting.
3. Link to a Specific Section by Creating a Bookmark Within Your Google Docs
Creating a bookmark within your Google Docs will bring your readers to a specific place on the page. To do so:
- Place your cursor where you want the bookmark to show up.
- Go to Insert and Bookmark.
- Once you select Bookmark, the symbol will appear in your document.
- Click the symbol to copy the link or delete it.

Keep in mind, that those you share the bookmark link with will also need access to the rest of the document. This also means they can view the whole thing.
So Many Ways to Share Your Google Docs Links
There are many ways for you to share your Google Docs links:
- Using the share settings, you can keep it exclusive or make it widely accessible to viewers, commenters, or editors.
- Publishing allows you to share your work in a public format.
- Bookmarks let you get more specific.
Which you choose is up to you and the type of document you want to link to. Remember to double-check your documents before sharing.