Organization is the most important tool in any video editor’s arsenal, especially as footage builds up and workflows become more complex. The ability to catalog your footage and respond quickly to requests for changes and content is crucial, particularly if you are working to tight deadlines.
Thankfully, Adobe Premiere Pro has a myriad of features that can help you keep your project organized and ensure your workflow is functional. Let’s take a look at the best tools for the job...
1. Create Bins
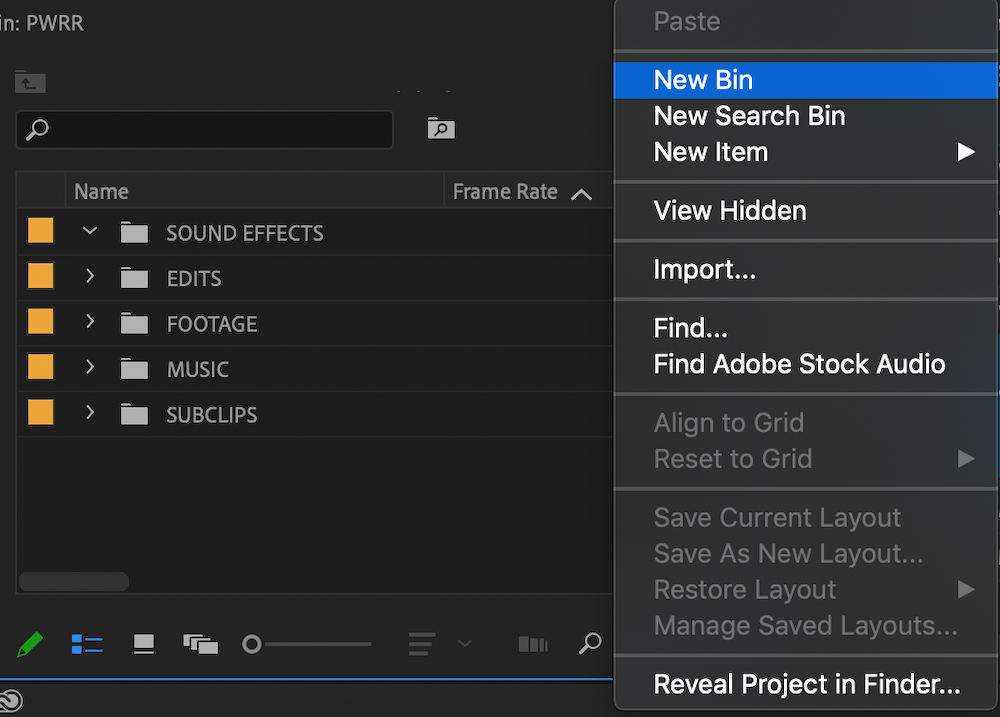
A simple one, but if you’re just starting out with Premiere Pro, you might not be aware of the ability to create Bins. Bins are folders you can create in your Project Window, allowing you to organize your footage.
As a baseline, you should be ensuring your sequences and footage are organized in bins. Separate bins for music tracks, graphics, and sound effects help you find items that you need more efficiently.
As edits get more complex and as you begin to pull in footage from multiple cameras and sources, organizing your footage further in bins becomes crucial. The last thing you want is to be searching through a long list of jumbled files for a sought-after shot.
To create a bin, simply right—click in your Project Window and select New Bin. Drag files in the Project Window onto bins to place them inside.
2. Use Labels
Color coordinating is a tried and tested method of organization, and Premiere Pro allows you to incorporate it into your workflow.
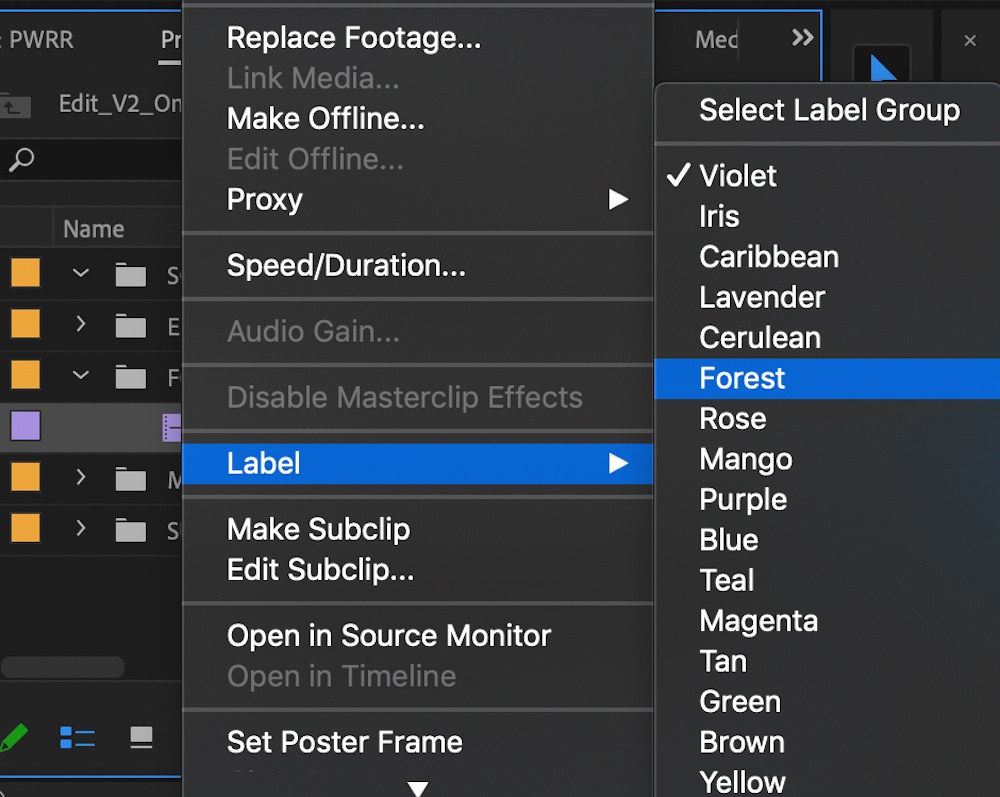
Make sure you are in the List View in your Project Window by clicking the List View icon in the bottom left of the panel. You see your files in a list, and a colored square in the far left column indicates the color label they are set to.
Select one or more clips in your Project Window, right click and find Label. You’re given a range of preset color options to choose from—selecting these changes your clips to that color label.
Best of all, these color changes are reflected in your clips in your timeline—so you can make sure that the right footage is being used correctly in your sequence.
3. Track Names
Maintaining a neat and tidy timeline allows you to spot errors in your edit quicker and makes collaborative work far easier. Another feature which is easy to miss in Premiere is the ability to rename your tracks in your timeline.
Naming your tracks allows you to be consistent in deciding what goes where. For example, having an audio track dedicated solely to sound effects means that they are all in one place.
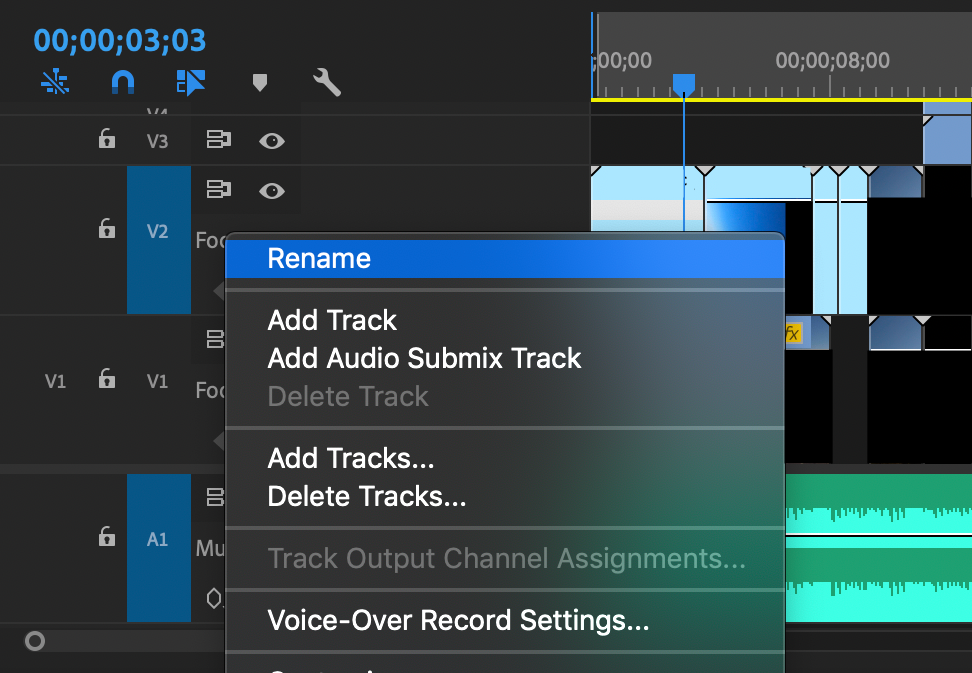
To rename your tracks, double-click the space next to the visible "eye" icon to expand the details, right-click, select Rename, and type in your chosen name.
4. Utilize the Project Manager
While editing, you are likely to be importing footage and audio from a wide range of locations on your computer, or even from external devices or servers. This puts your project at a risk of ending up with Offline Media.
Simply put, when files are moved or become unavailable without informing Premiere Pro of the new location, any files used in your project are thrown Offline.
If you’re moving a project to another machine, or migrating it over an internet connection to send for more editing, the risk of Offline Media becomes even greater. One missing file can potentially render your edit useless on the other end.
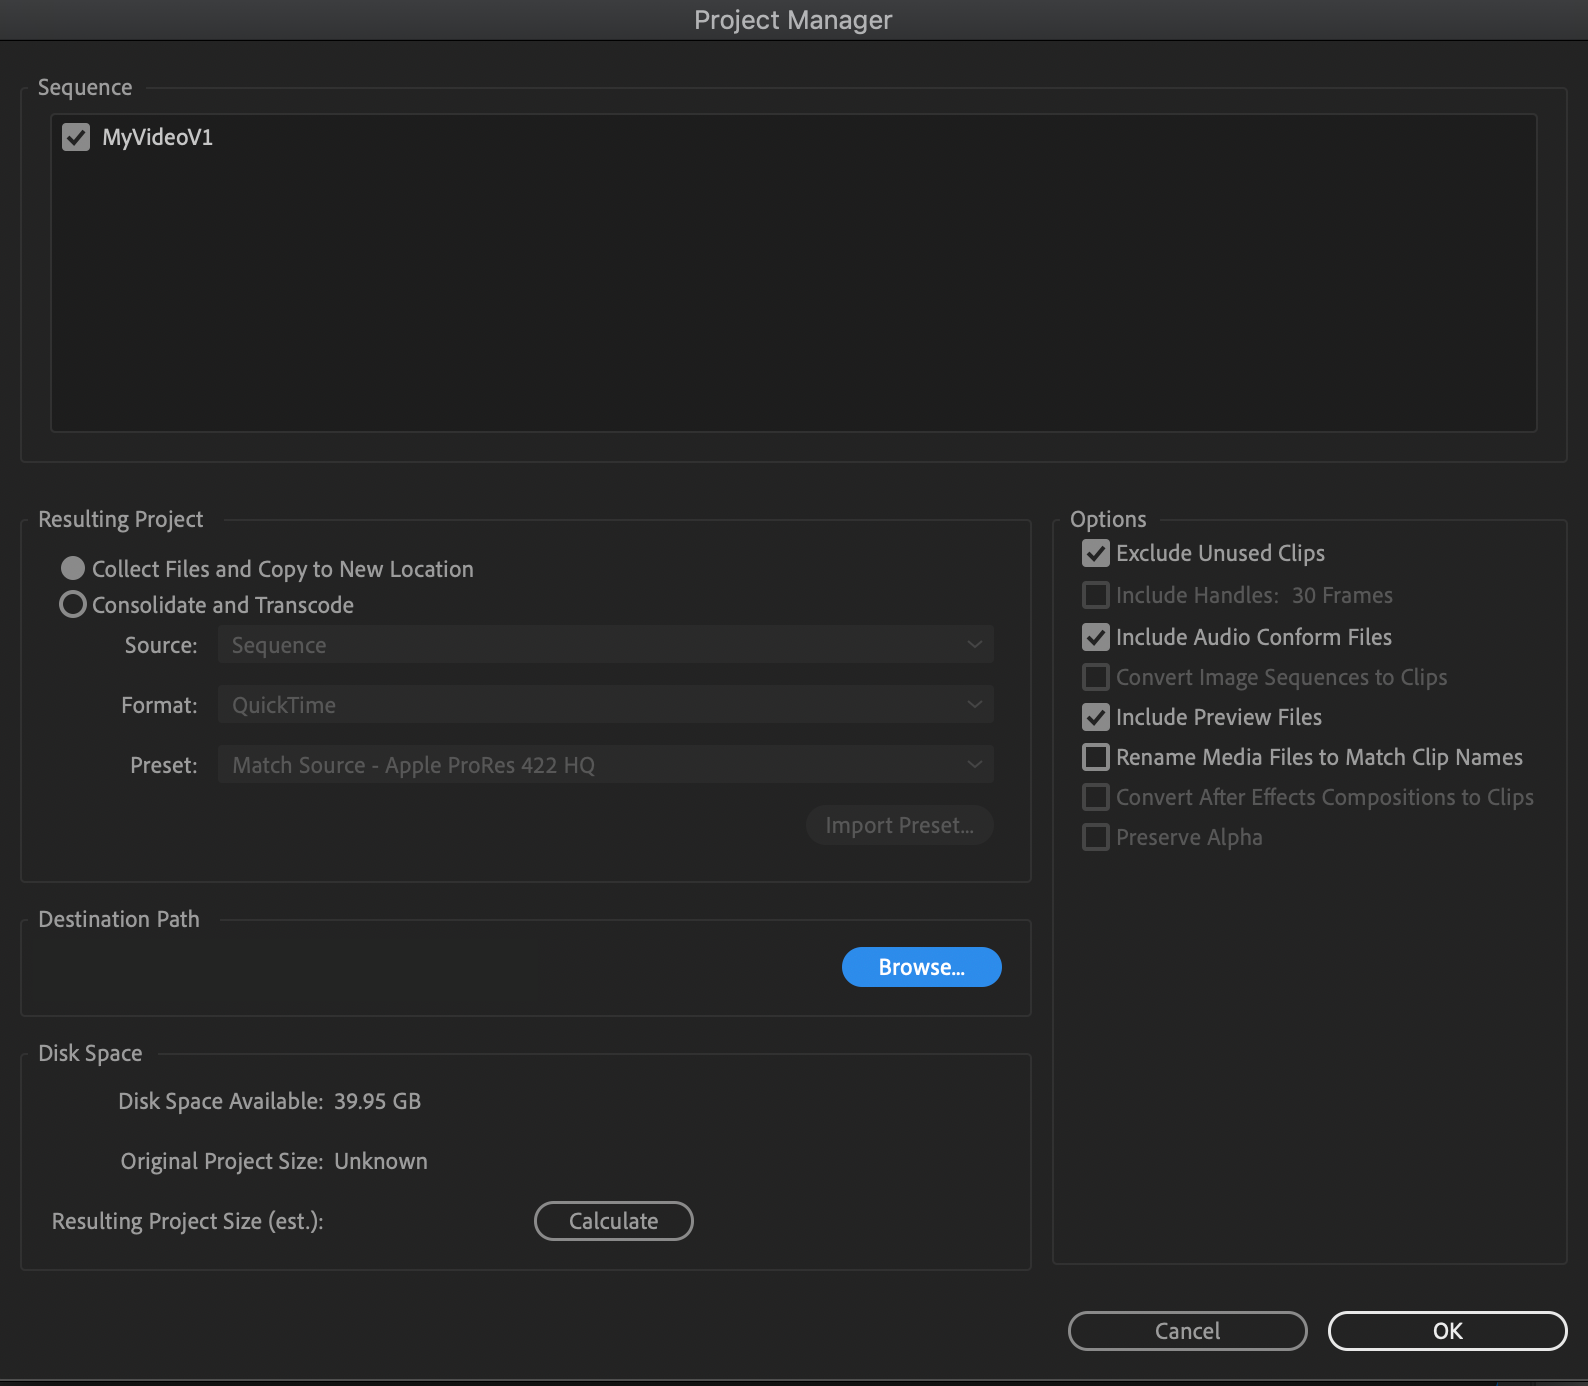
This is where the Project Manager can come in useful. It looks at the sequences in your project, determines what files are being used, and copies everything to one location for you.
Simply click File, then Project Manager. You get a new window where you can set a range of options for how your project’s footage is migrated, including which edits to pick and the option to convert footage.
This also creates a new Premiere project file in the folder, so your whole edit can be sent to someone without fear of missing media.
5. Use Subclips
Of all the organizational tools at the hands of any Premiere Pro user, few are as useful as the humble subclip. Using these correctly can vastly improve the quality and speed at which you can edit video content.
Quoting chapters and verses of a book allows someone to find a specific passage without having to skim—read the whole thing. Very similarly, subclips let you define and find specific moments in your footage to catalog and refer to later.
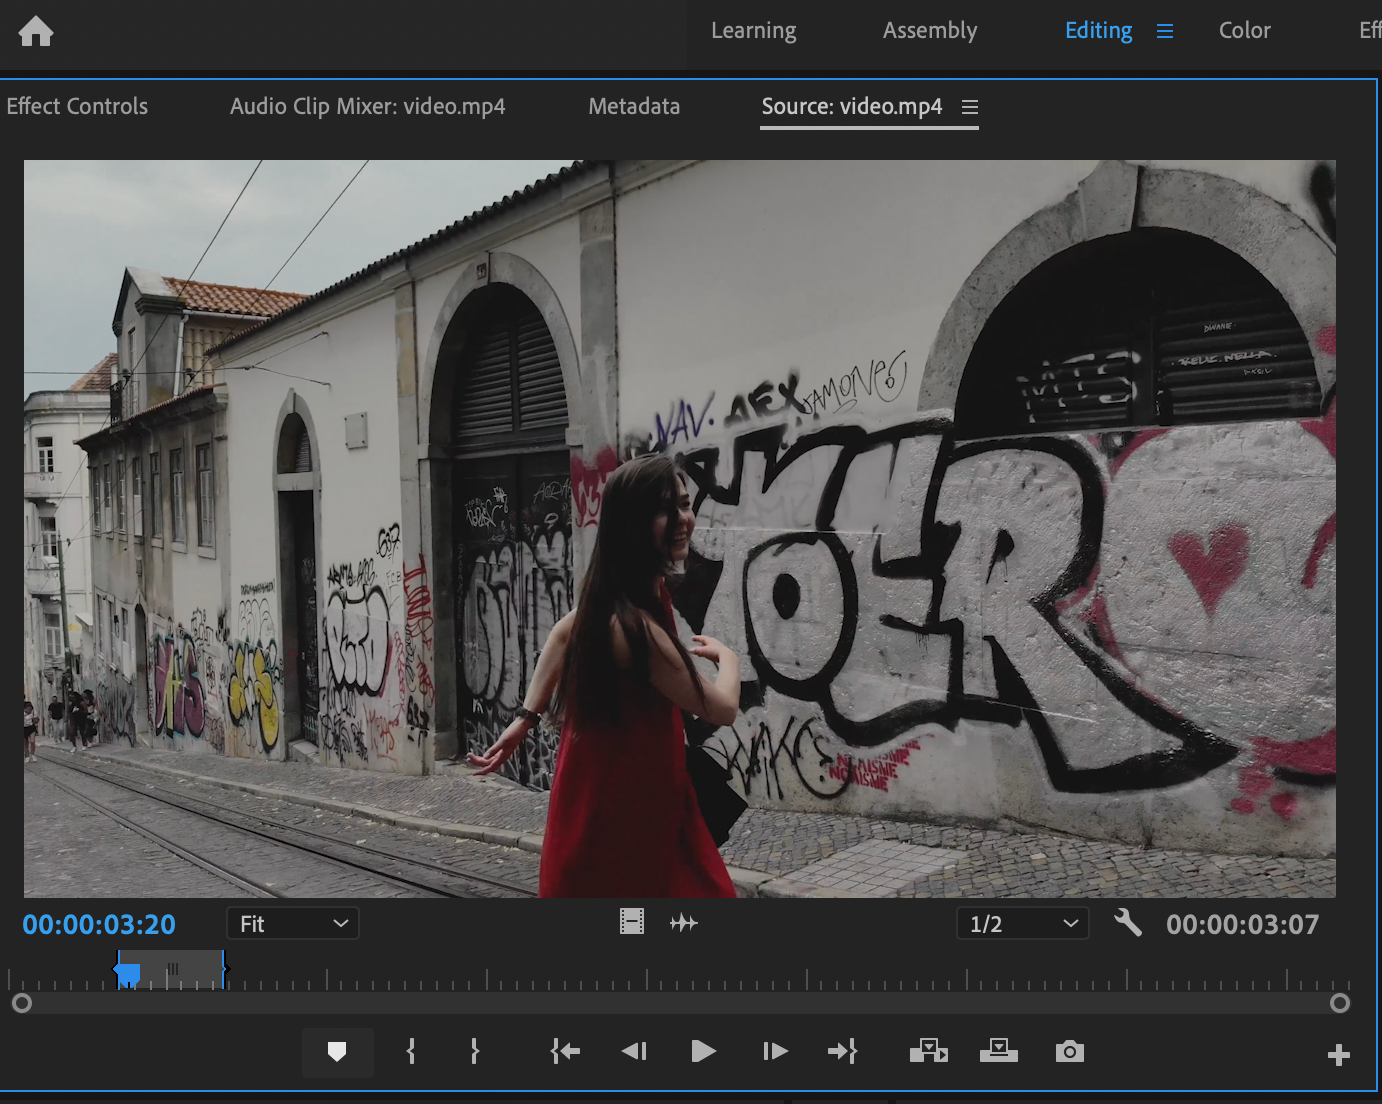
Let’s use this free-to-use piece of footage from Pexels, as an exercise. There are many more websites for free stock footage that you can use instead.
Drag your footage from your Project Window into the Source Monitor. Then find the moment you want to create a subclip of. In this case, let’s isolate the moment in which the female subject whirls around in the street.
Mark an "In" where you want the clip to start, with the "I" key. Mark an "Out" where you want the clip to end with the "O" key. These are the default key commands so if you have difficulties, check your keyboard settings.
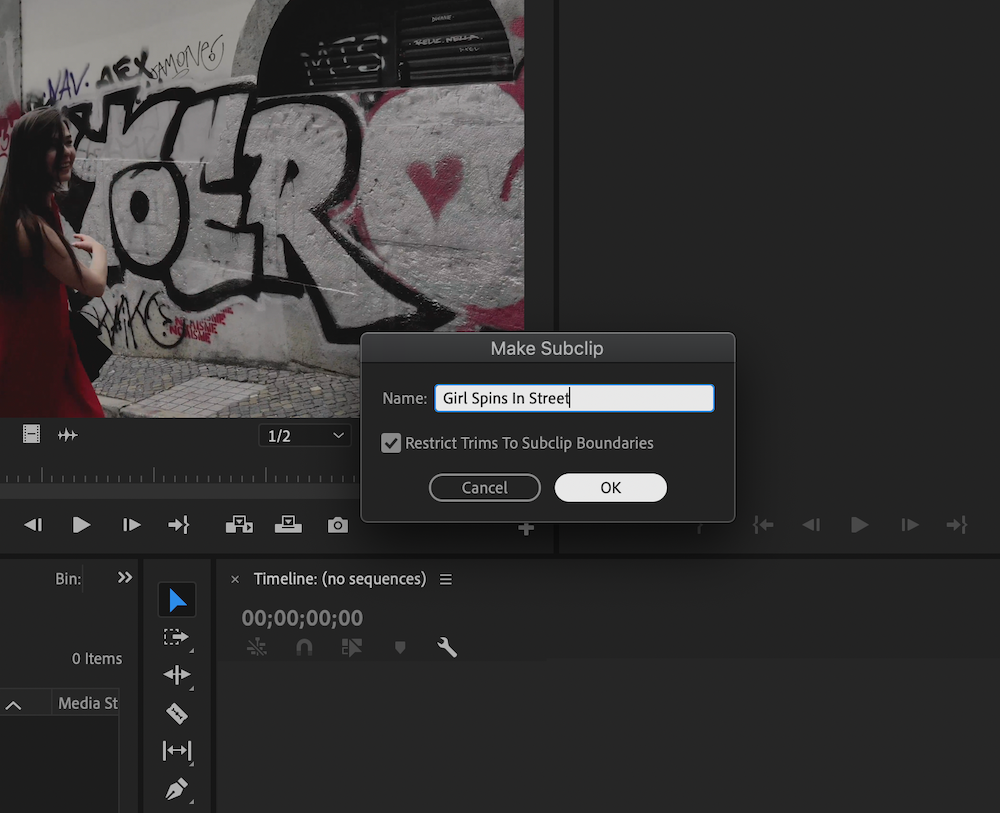
Finally, click and drag from your Source Monitor to your Project Window, while holding down the CTRL (Windows) or CMD key (Mac). When you release, a pop—up Make Subclip window should appear.
In this window, you can rename the subclip to whatever you want. In this case, we'll call it "Girl Spins In Street". Et voila, we now have a reference to this exact moment to catalog and use later. It'll appear in your Project Window and acts like any video clip.
Using subclips drastically reduces the time needed to search through footage and also allows you to have the best clips and moments to hand for quick use. The process of going through your footage and making subclips is highly recommended before you start editing.
Harnessing Your Organized Project in Premiere Pro
Keeping your Premiere Pro projects tidy allows you to make the most of your time while editing. And these simple methods will help you do just that.


