Even if you already know how to create a folder in Windows, knowing how to do it quickly and efficiently can help you be more productive and efficient when working with your computer.
Whether you prefer the simplicity of using the context menu or the speed of a keyboard shortcut, there are several ways to create new folders in Windows 11. This post will discuss four easy methods for creating new folders in Windows 11.
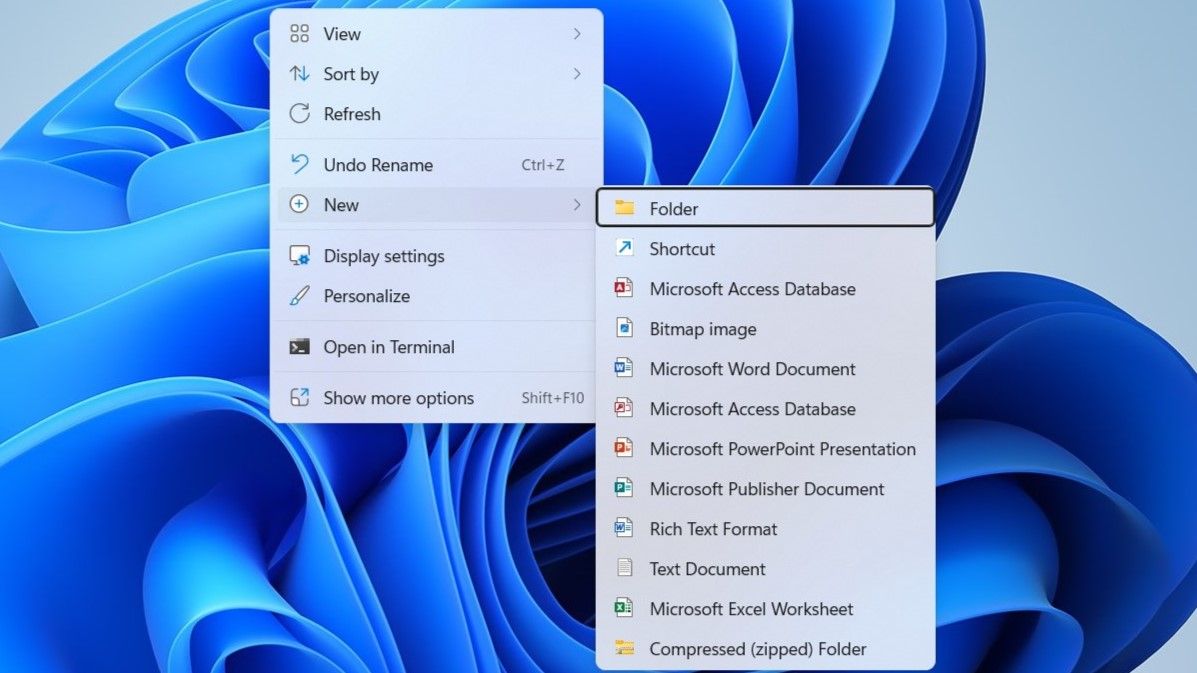
1. Create a New Folder Using the Context Menu
The easiest and most well-known way to create a new folder on Windows is through the context menu. You can use this method to create folders nearly anywhere in Windows. Here are the steps you can follow:
- Head over to the location where you want to create the folder.
- Right-click anywhere on an empty space to open the context menu.
- Select New > Folder.
-
Type in a suitable name for your folder and then press Enter.

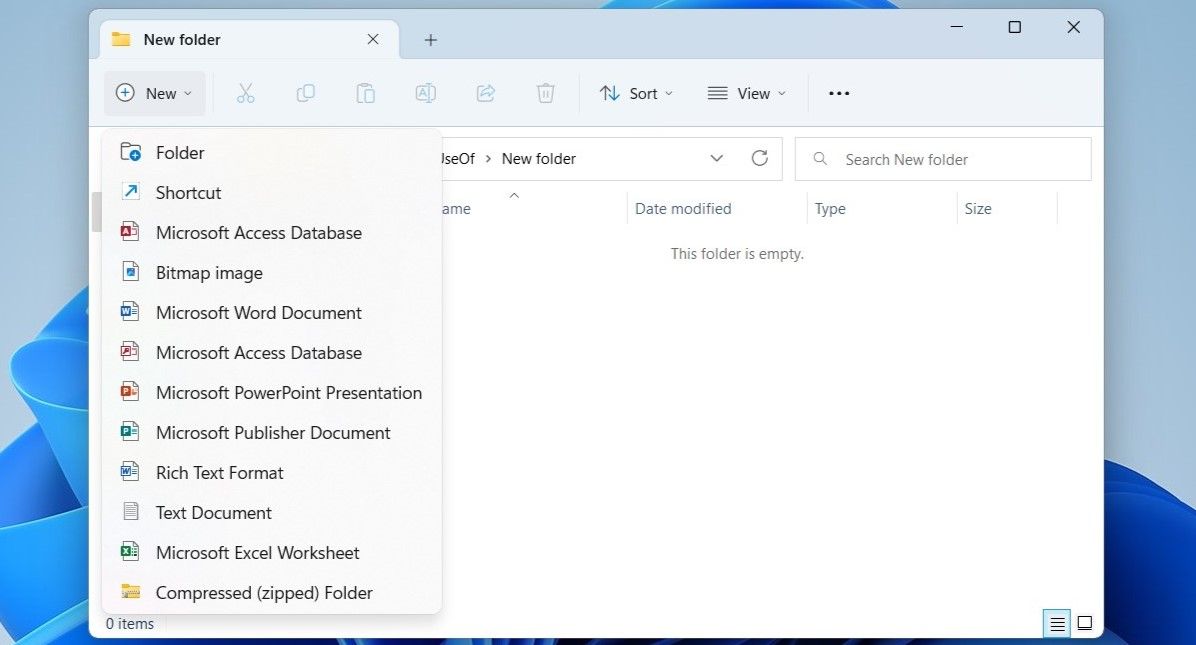
2. Create a New Folder Using File Explorer
File Explorer's menu bar provides access to many useful options. One of them also lets you create a new folder with a couple of mouse clicks.
To create a new folder using File Explorer's menu:
- Press Win + E or use one of many ways to open File Explorer.
- Navigate to the location where you want to create a new folder.
- Click the New button in the top-left corner of File Explorer and select Folder from the list.
-
Give your folder a suitable name, and then press Enter.

3. Create a New Folder With a Keyboard Shortcut
If you prefer to work with the keyboard rather than a mouse, or if you simply want to create a new folder faster, you can use the Ctrl + Shift + N keyboard shortcut on Windows.
Simply head to the location where you want to create the folder and press Ctrl + Shift + N together on your keyboard. Once the folder is created, you can rename it to anything you want.

For more such useful shortcuts, why not check our ultimate guide on Windows 11 keyboard shortcuts?
4. Create a New Folder With Command Prompt or PowerShell
Another way to create folders on Windows is via a command-line utility. While it may not be as quick as the other methods mentioned above, it can certainly come in handy if you need to create multiple folders at once.
You can use Command Prompt or Windows PowerShell to create new folders on Windows. Here are the steps you need to follow:
- Use the Win + S keyboard shortcut to open Windows Search.
- Type Command Prompt or PowerShell in the search box and select Run as administrator.
- Select Yes when the User Account Control (UAC) prompt appears.
-
In the console, type the following command and press Enter to navigate to the location where you want to create a new folder. Make sure you replace Directory in the following command with the actual directory location where you want to create the folder.
cd Directory -
Next, type mkdir followed by the name of the folder you wish to create and press Enter. For instance, if you were to create a folder named Work, you'd type the following command:
mkdir Work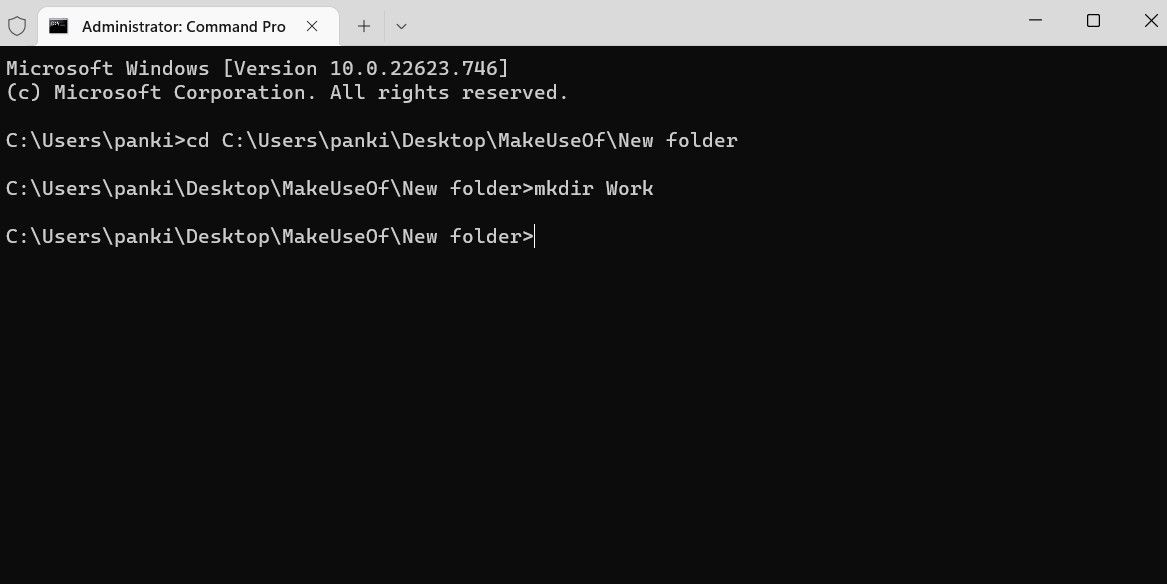
-
Likewise, if you want to create multiple folders, type mkdir followed by the names of your folders. For instance, if you wanted to create three folders named Android, iPhone, and Windows, you'd enter this command:
mkdir Android iPhone Windows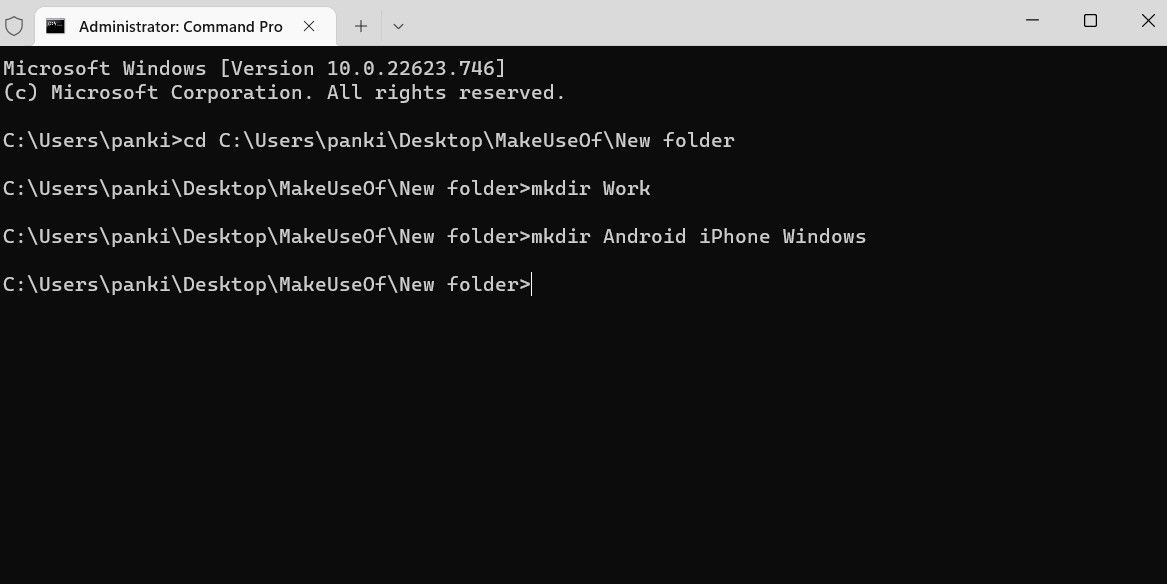


Creating Folders in Windows 11 Quickly
Whether you use the keyboard shortcut or the command line method, creating folders in Windows 11 is pretty easy. Now that you've created your folders, it might be a good idea to customize them so that you can tell them apart quickly.