While Google Docs is great for sharing documents and real-time collaboration, it lacks a feature that allows you to add captions to images. If you have encountered this problem during your work or homework assignments and had to open another editor, we have good news. You can add captions to images in Google Docs in a few simple ways.
1. Use the Drawing Feature
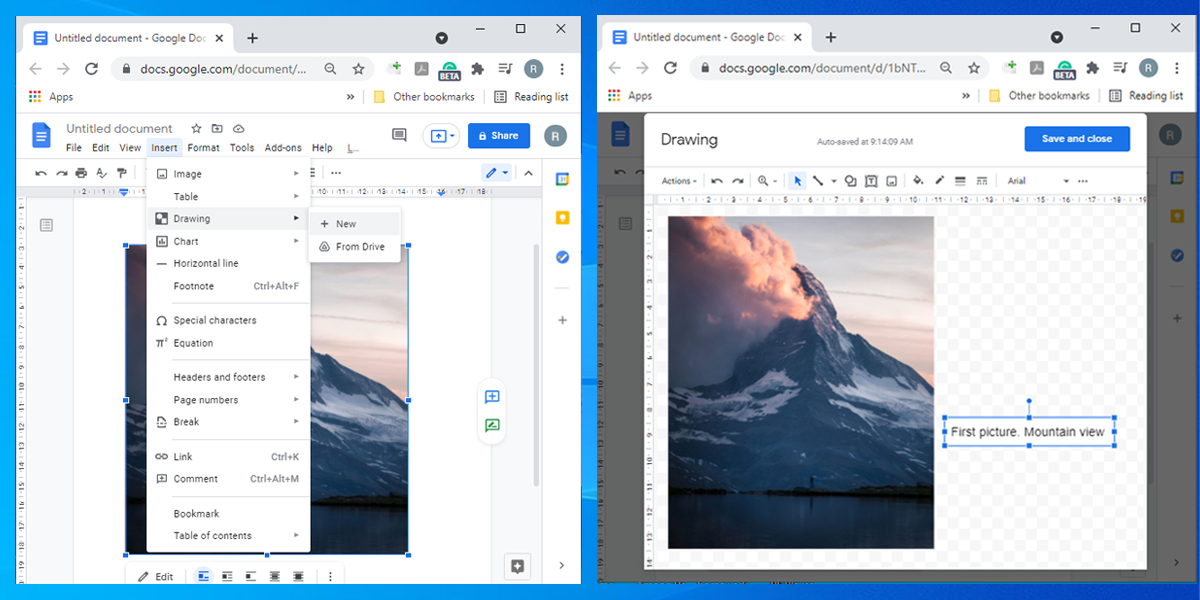
To access the Drawing feature, open the Insert menu, then click Drawing > New. This will open a window that allows you to create a new drawing using shapes, callouts, lines, or arrows, amongst other tools.
Now, you have to insert the image. You can do this by copying a URL or by uploading it to Google Drive from your device or account.
Once you upload and resize the image, click the Text box icon from the top menu and add the text. You can move the text around using the Select tool.
Also, you can use several text formatting options such as size, font, color, alignment, italic, bold, bullets, and so on. Finally, when you are done editing the image and the caption, select the Save and Close button.
Note: If you want to edit the caption, click the drawing and select Edit from the toolbar.
2. Create a Table
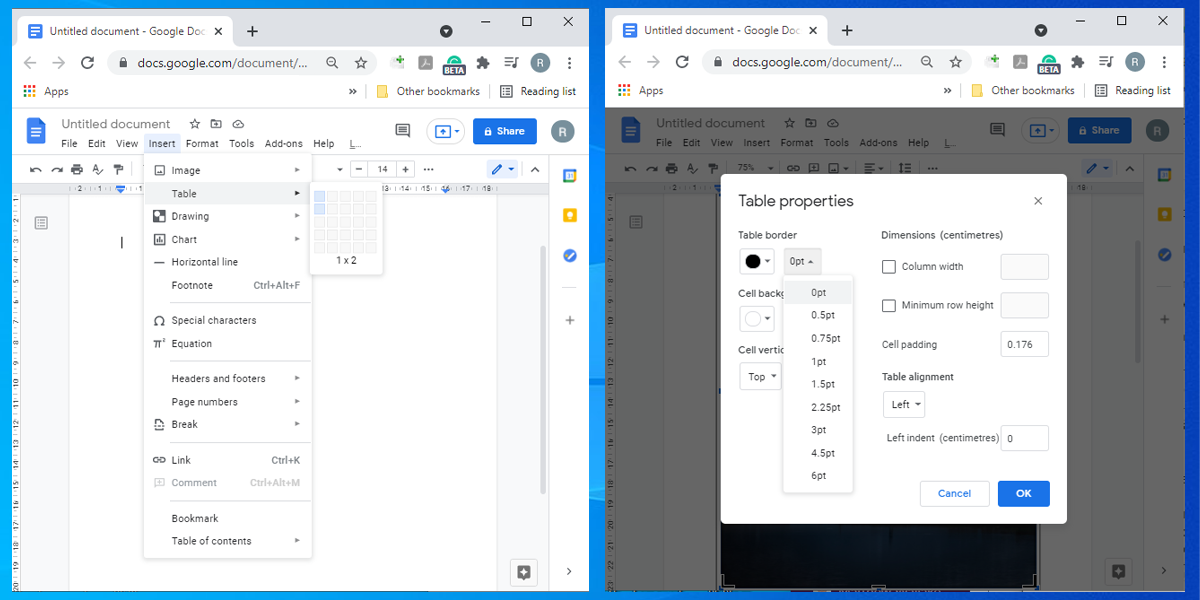
If you are in a rush and need a way to save time while using Google Docs, creating a table could be the right solution for you. All you have to do is insert a table, add the image, and write the caption. Now, let’s take a closer look at how you can do this.
- Open the Insert menu, click Table, and select a 1 x 2 grid size.
- Drag and drop the image to the top cell.
- Enter the caption in the bottom cell and use Google Docs’ features to edit it as you want.
- Right-click the table and select Properties.
- Set Table border to opt so the table’s lines are not visible anymore.
- Click OK to save the changes.
3. Use an Add-On
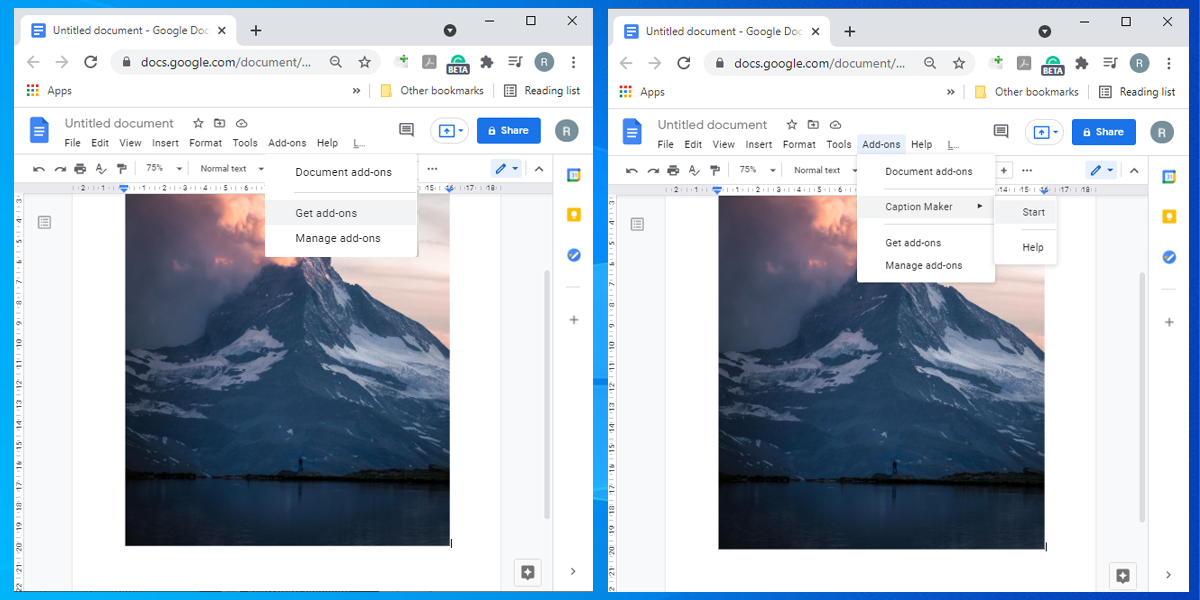
If you have to insert captions often in Google Docs, you should install an add-on to make your Google docs look more professional. Head to Google Workspace Marketplace by opening the Add-ons menu placed at the top and select Get add-ons.
We recommend using Caption Maker, but there are other available options as well.
Note: Caption Maker will also insert captions for drawing and tables.
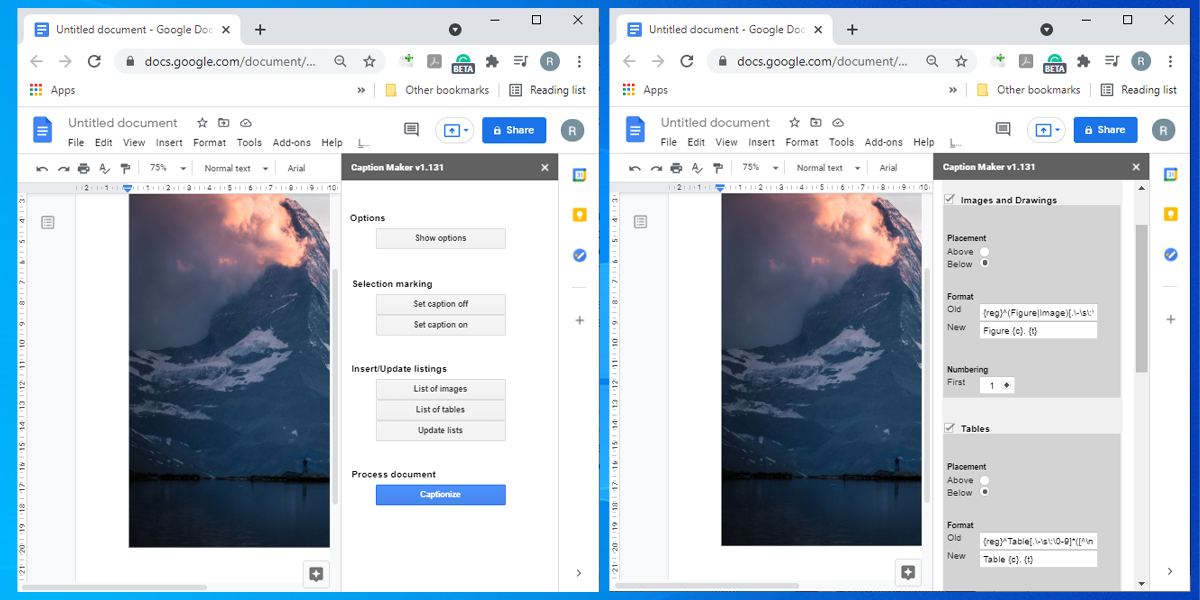
Once you have inserted, resized, and arranged your images, click Add-ons > Caption Maker > Start. Then, select the Captionize button.
By default, Caption Maker will label the pictures as Figure 1, 2, and so on. However, there’s no need to worry since you can easily edit the caption’s text by double-clicking it.
How to use Caption Maker to speed up your editing:
- If you need to insert captions to a specific part of your document, select that part and click Set caption before clicking Captionize. Or you can select the part that you don’t want to insert captions to and select Set caption off.
- If you need to create a list containing the captioned images or tables, select List of images or List of tables. Furthermore, if you need to refresh these lists, click Update lists.
Add Captions Without Struggle
If you have to add captions to many images, using an add-on could be the best solution. However, if you are in a rush and need only a quick edit, the first or second method will get the job done.
If you make changes to a Google doc you don't want, press Ctrl + Z to undo them. You can also go to File > Version history > Show version history to restore an earlier version.


