There are certain files on your PC that you can’t afford to lose. But since mistakes happen, you might find yourself accidentally deleting some of those important files. In addition to this, people who have access to your PC might end up removing your important data.
To prevent this, you need to secure your files. Read on to learn the best ways to protect your Windows 10 files so that they don’t get deleted.
Why You Should Consider Protecting Your Files
When it comes to keeping your data safe, it’s always wise to consider several security measures. The chances are that you’ve already taken measures to secure your PC from unauthorized access. But, you also need to secure your individual files and folders too.
In case you accidentally delete your files, you can recover your lost data in various ways. However, data recovery can often be quite complicated—especially for permanently deleted files.
As you use your PC, new data overwrites permanently deleted files. This makes your chances of recovering permanently deleted files very slim. For this reason, it’s best to be safe by protecting your files from being deleted.
Here's how you can protect your files in Windows 10.
1. Configure the Permissions Settings
One of the best ways to secure your files is by configuring the permissions settings. This allows you to grant or deny file access to other users.
Here’s how you can configure these settings.
- Right-click the file or folder that you want to protect and select the Properties option.
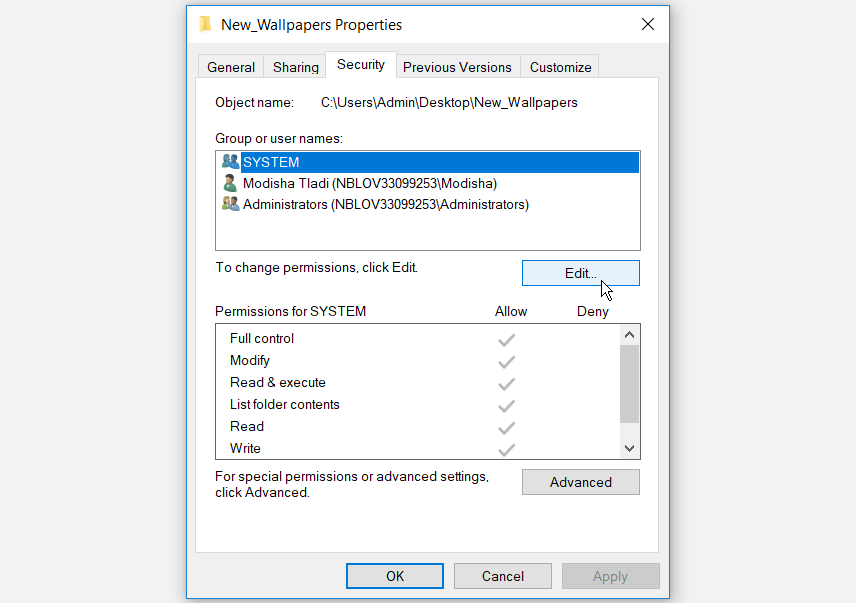
- When a dialog box pops up, select the Security tab and press Edit to change permissions.
The Permissions window will pop up. Select the Add button on this window.
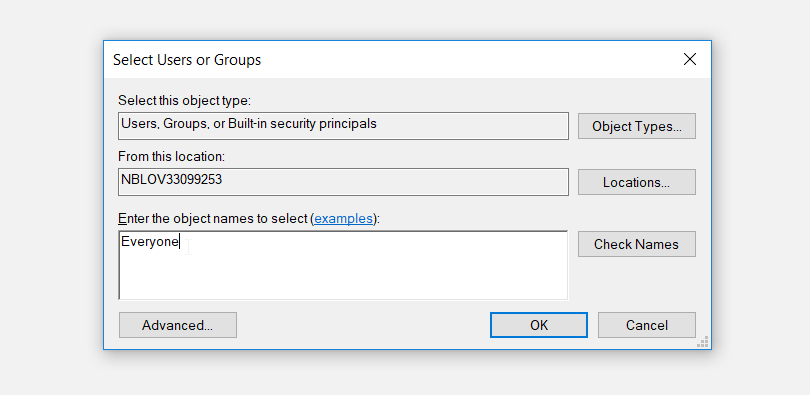
This will open another window named "Select Users or Groups." In this window, type Everyone in the Enter the object names to select box. Press OK to continue. This will take you back to the Permissions window.
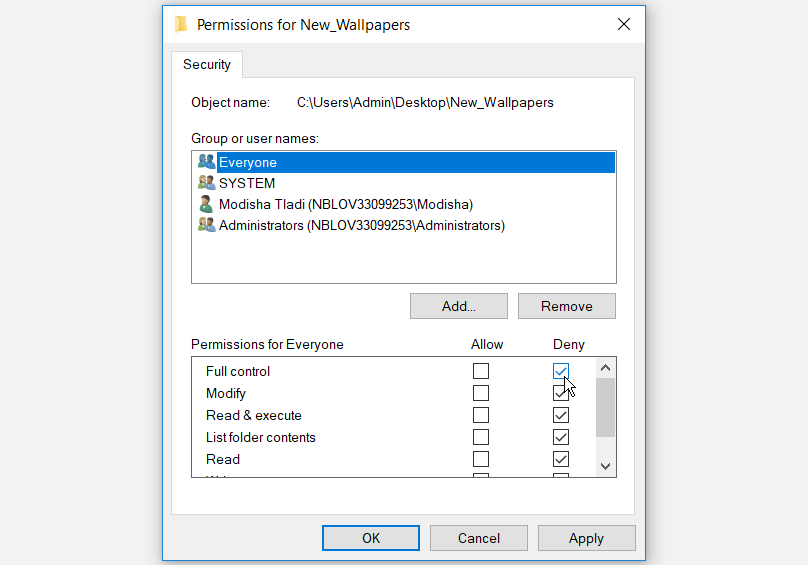
In the Permissions window, select the Everyone user name. From here, go to the Permissions for Everyone section. Check the Deny box next to the Full control option. Hit Apply > OK.
Your file or folder will now be secured. As long as you don’t change the permissions settings, no one will be able to delete the file or folder.
2. Hide Your Files
You can also protect your files by simply hiding them. Here’s how you can do this.
- Locate the file or folder that you want to hide and right-click on it.
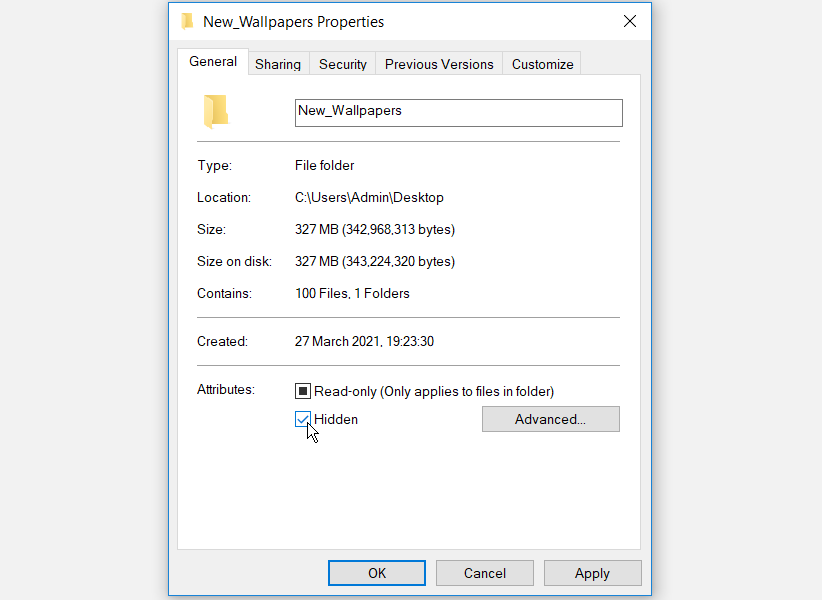
- Select the Properties option and navigate to the General tab.
- Check the Hidden box, then press Apply > OK.
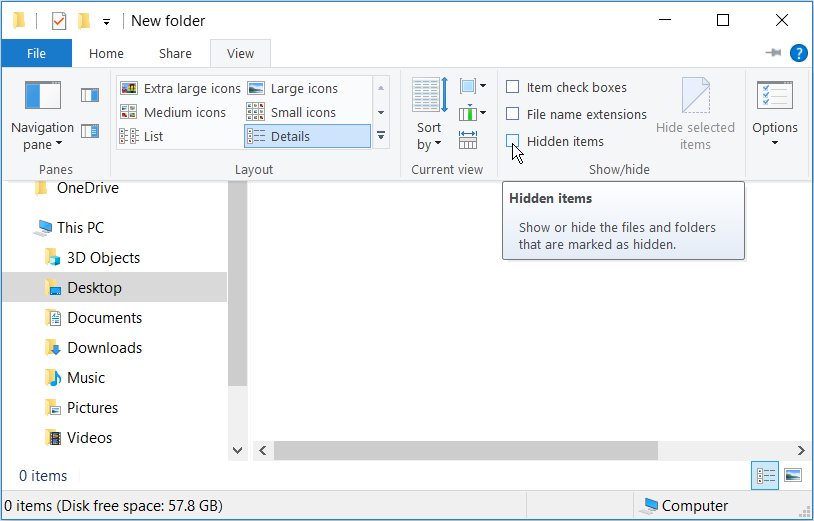
To ensure that your hidden files don’t appear in Windows File Explorer, here’s what you need to do.
- Open Windows File Explorer.
- Select the View tab near the top-left corner of the window.
- Uncheck the Hidden items box.
When you do this, your files won’t be accessible unless you unhide them. This will ensure that you, or other users, don’t end up deleting those files by mistake.
3. Secure Your Files Via the Command Prompt
You can secure your files using the Command Prompt too. This method actually provides more protection than the other methods. Not only will it deny other users from deleting your files, but it'll also restrict them from viewing those files.
Here’s how you can get started with securing your files via the Command Prompt.
- Press the Windows Key + R and type CMD.
- Click Ctrl + Shift + Enter to open an elevated Command Prompt.
- To lock a file or folder, type the following command in the Command Prompt:
cacls File_or_Folder_Path /P everyone:n
Replace the File_or_Folder_Path command with a relevant file or folder path. Here's how you can get your file or folder path.
- Go to the file or folder that you want to secure and right-click on it.
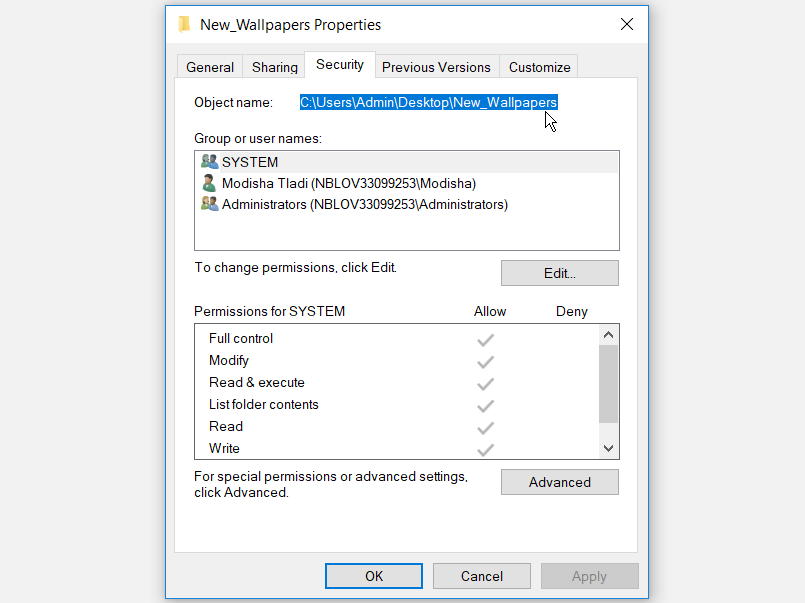
- Open Properties and navigate to the Security tab.
- Copy the file path that appears as the Object name.
Paste the file path in the relevant section of the command.
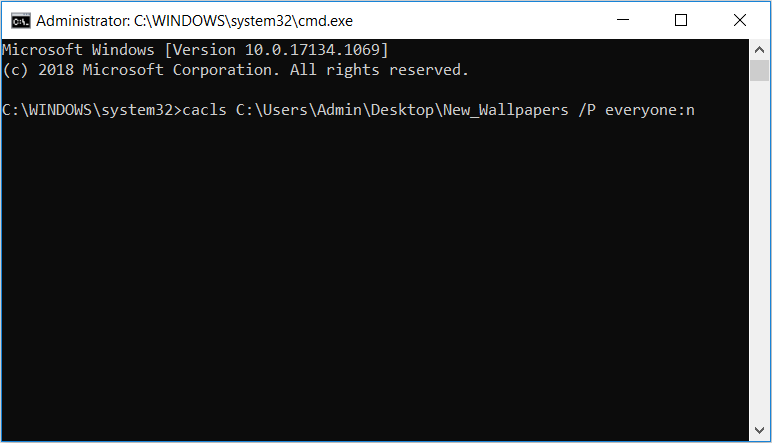
Here’s an example of what the command will look like:
cacls C:\Users\Admin\Desktop\New_Wallpapers /P everyone:n
There shouldn't be any spaces between the names of your files or folders for this command to work. You can separate long file names with hyphens or underscores.
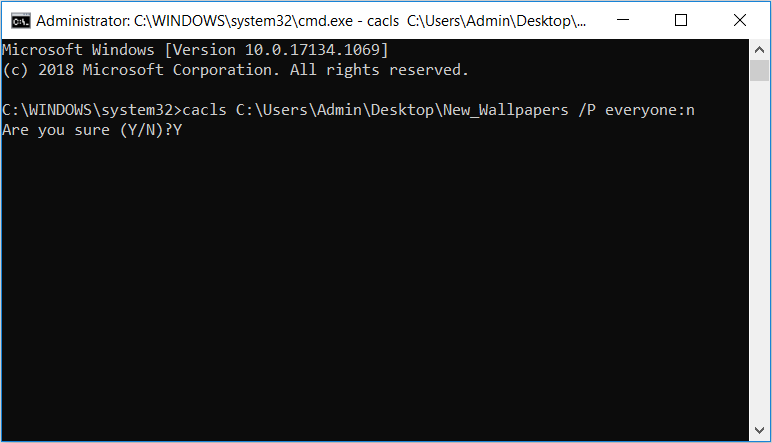
When you've typed the correct command in the Command Prompt, press Enter. When you get a command that says, “Are you sure (Y/N)?”, type Y and hit Enter. Your file or folder should now be locked.
If you want to unlock the file or folder, type the following command into the Command Prompt and press Enter:
cacls File_or_Folder_Path /P everyone:f
Again, replace the File_or_Folder_Path command with a relevant file or folder path.
4. Password-Protect Your Files Using a Third-Party Software Program
If you prefer using a third-party tool, you can give IObit Protected Folder a try. This program is intuitive and easy to use. What makes it stand out is that it also protects your data from spyware, viruses, and other kinds of malware.
Here’s how you can get started with IObit Protected Folder.
- Download and install IObit Protected Folder.
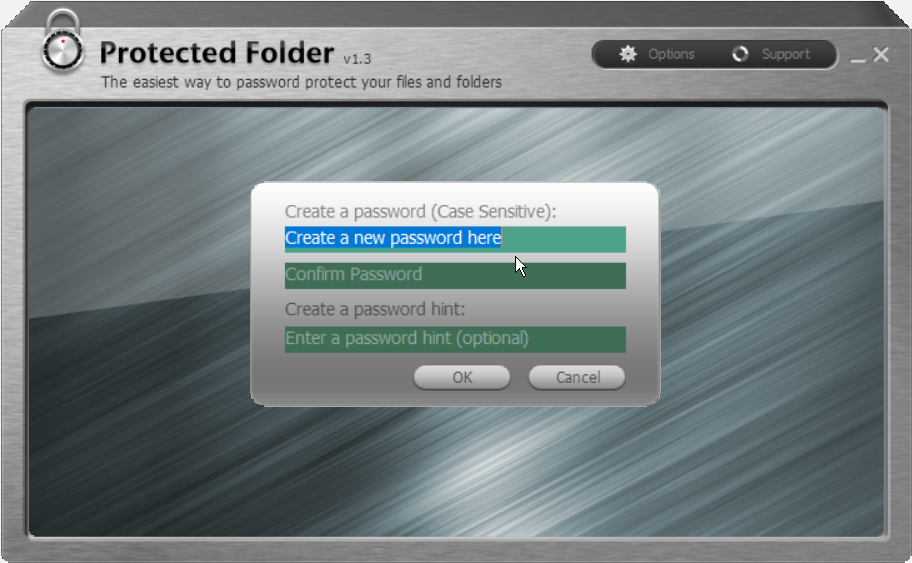
- Open the program and create a password.
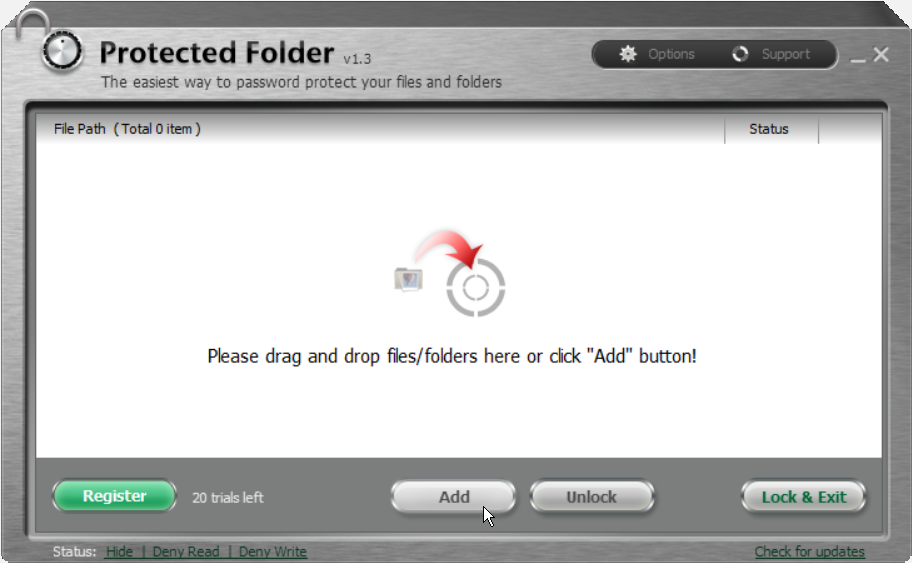
Drag and drop your files into IObit Protected Folder’s interface. Alternatively, you can add your files by simply clicking the Add button on the program.
When you finish adding files to the program, select Lock & Exit to secure those files.
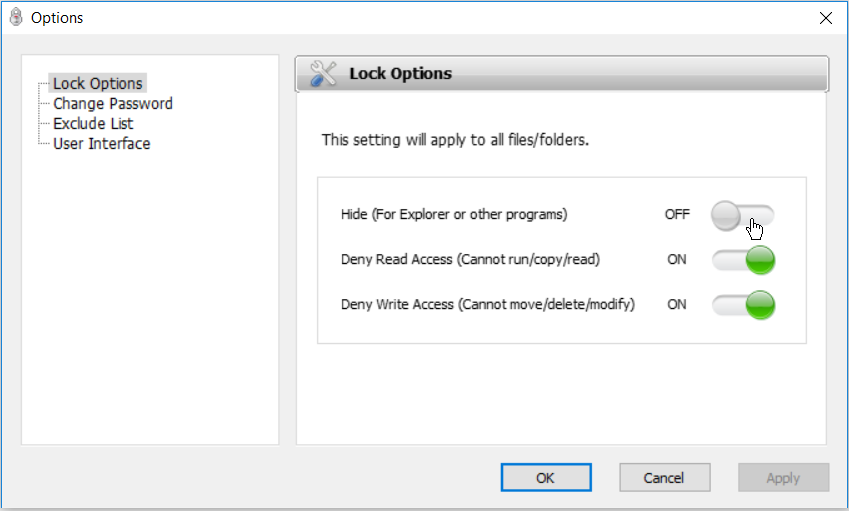
As an additional security measure, your protected files or folders will disappear from the Windows 10 File Explorer. If you want to secure the files but still want them to appear in File Explorer, here’s what you need to do.
- Select Status options on the bottom-left of IObit Protected Folder’s interface.
- Switch off the Hide (For Explorer or other programs) button.
- Press Apply, then select OK to save these changes.
If you want to unlock your file or folder, you can select the specific file or folder and then press the Unlock button.
IObit Protected Folder gives you free 20 uses of the tool. In case the program suits your needs, you can upgrade to a premium version for $20.
Secure Your Files and Folders the Easy Way
By applying any of the methods we’ve highlighted, you can easily protect your files and folders in Windows 10. In addition to this, there are other methods you can apply to password-protect your files and folders.

