
Luminar AI can help your photos stand out with its array of easy-to-use tools. We will explore some of its best features, all of which can be used to enhance photos of people, as well as just about anything else that you photograph.
If you’re interested in seeing what the world’s first 100 percent AI photo software can do for you, then you’ve come to the right place.
Luminar AI is easy to understand and use. In fact, if you’re used to editing pictures on your smartphone, then you’ll be very comfortable with Luminar AI.
Getting Started

If you’re familiar with Luminar AI already, then you’ll know that the general workflow is to choose a Template and then move onto the Edit tab for all the detailed editing. If you’d like to review some of the basics of Luminar AI, feel free to do so before proceeding.
For all of our examples today, we will skip Templates altogether and work only with the Edit tools. We will not be covering all the basic steps of using Luminar AI as a plugin or a standalone program. We will simply explore the tools themselves to give you a deeper understanding of what they do and how to apply them.
Let’s get started!
1. Face AI: Brightening Your Subject's Facial Features
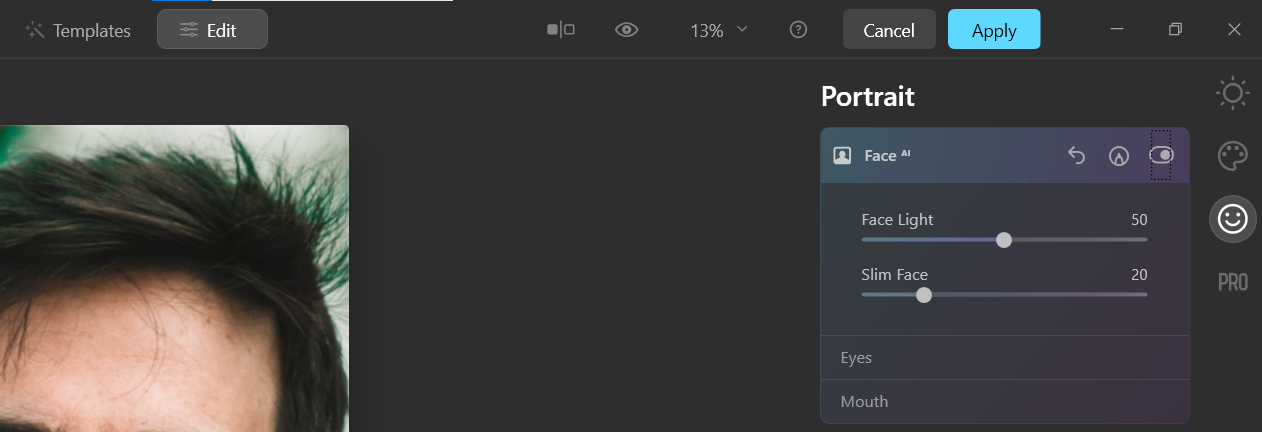
Located in the Portrait menu (on the far right), the Face AI panel is made up of three sets of sliders for the Face, Eyes, and Mouth. Each of these sliders can be used to drastically alter the appearance of your subject, especially their eyes.
Some of these sliders, like Slim Face, may come across as controversial because they can drastically alter the appearance of a person. However, these sliders should also be considered photo-corrective. That is to say, they can be used to improve poor editing and lighting situations, as well as lens distortion.
For this particular photo, the light is flat in appearance, which wasn’t particularly addressed in the original editing. We will make use of just about all of the sliders in Face AI to enhance the overall appearance of our subject.
You can download this image from Unsplash to follow along.
-
In the Face AI panel, make the following adjustments: Face Light: 50 and Slim Face: 20.
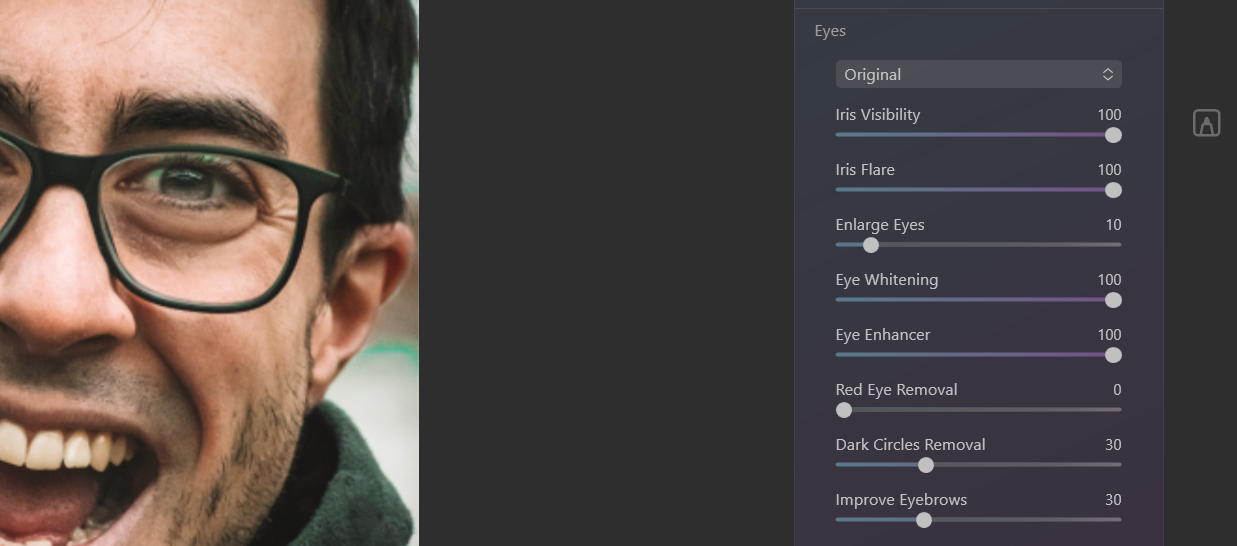
- In the Eyes tab, navigate to the Original dropdown menu.
-
From there, make the following adjustments: Iris Visibility: 100, Iris Flare: 100, Enlarge Eyes: 10, Eye Whitening: 100, Eye Enhancer: 100, Red Eye Removal: 0, Dark Circles Removal: 30, and Improve Eyebrows: 30.
-
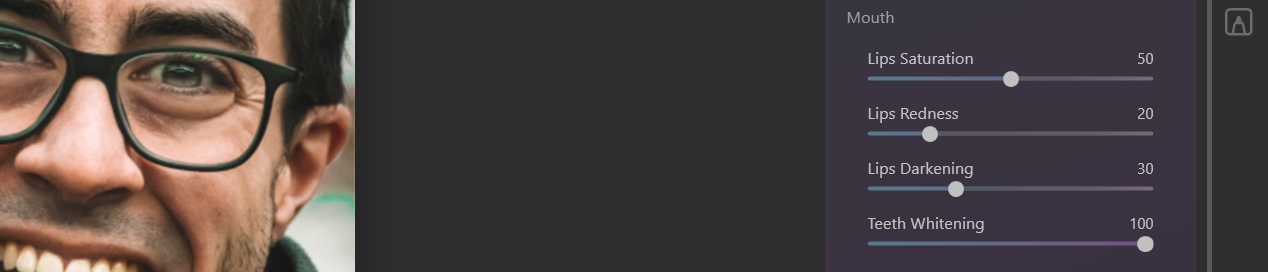
In the Mouth tab, make these adjustments: Lips Saturation: 50, Lips Redness: 20, Lips Darkening: 30, and Teeth Whitening: 100.


Before Face AI:

After Face AI:

If you're interested in more advanced retouching tools you may want to try enhancing portraits using the Portrait Pro plugin as well.
2. Skin AI: Subtly Enhance Your Subject's Skin
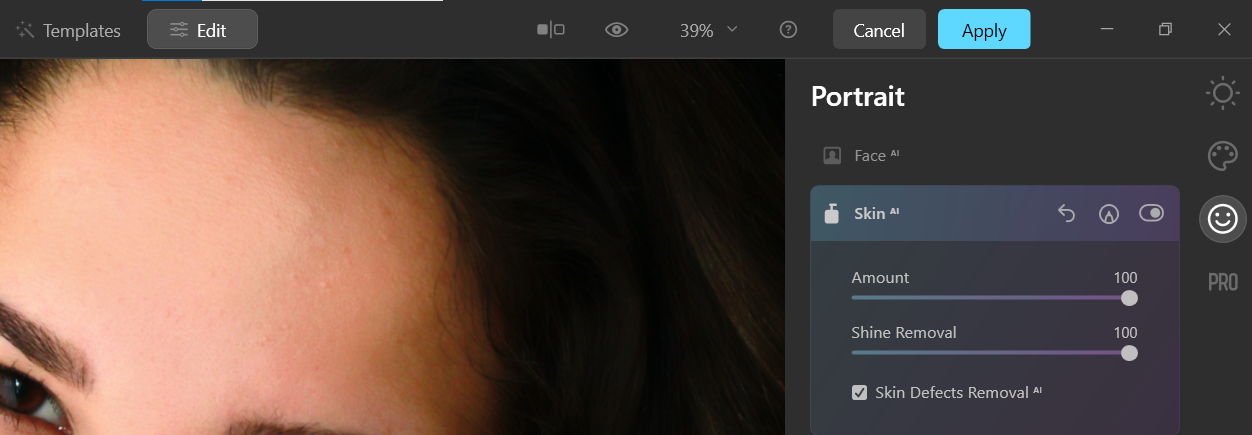
Located in the Portrait menu (on the far right), the Skin AI menu has just two sliders: Amount and Shine Removal. It also contains a Skin Defects Removal AI box that you can check off to enable.
Arguably, the best thing about using Skin AI is that it prevents you from overediting your subject's skin. Instead of making your subject's skin fake or plastic-like, checking the Skin Defects Removal AI box leaves some of your subject’s original skin blemishes intact.
Instead of erasing blemishes altogether, it merely fades them. Overall, it makes for a more realistic approach to basic skin editing.
For this particular photo, we will push the sliders to the maximum. You’ll notice that even with everything maxed out, the changes aren’t too drastic.
You can download this image from Unsplash to follow along.
- In the Skin AI panel, set Amount to 100 and Shine Removal to 100.
-
Check off the box next to Skin Defects Removal AI.

Before Skin AI:

After Skin AI:

You can reset all the sliders by selecting the three dots at the bottom right corner of the screen and choosing Reset Adjustments.
3. Body AI: Change the Shape of Your Subject
Located in the Portrait menu (on the far right), Body AI is another panel with just two sliders: Shape and Abdomen. It is designed to either slim down your subject or to make them larger.
The most effective slider is Shape, the primary shaping tool. The Abdomen slider, if the AI detects one in the image, will also increase or decrease its size.
It’s easy to see how such a powerful tool can be deemed controversial, but it doesn’t have to be. If these tools are used responsibly and respectfully, they can be put to good use for consenting subjects.
For the purpose of demonstration only, we will show you how powerful the Shape slider can be in both slimming and enlarging. We will first show you the steps to slim down our subject, and we’ll also show you what happens if you max the sliders out in the other direction.
You can download this image from Unsplash to follow along. Head to the Body AI panel, set Shape to 100, and then set Abdomen to 100.

Let's have a look at what our photo looks like before any modifications, and what it looks like after maxing out the sliders at 100.
Before Body AI:

After Body AI (both sliders maxed out at 100):

To get the opposite result, set Shape to -100 and Abdomen to 0. Let's see what that looks like.
After Body AI (maxed out in the opposite direction):

4. Enhance AI: Beautify Landscapes
Located in the Essentials menu (on the far right), Enhance AI is a great tool for bringing out the exposure details in a variety of images, especially for landscapes. It comes with two sliders: Accent AI and Sky Enhancer AI.
The most useful tool of the two is Accent AI, which can be applied to any image. On the other hand, Sky Enhancer AI can only be applied to detected skies.
For this tutorial, we will take an underexposed photo of a waterfall, brighten it up, and enhance the color and contrast details. Since there is a detectable sky for AI to detect, we will also boost the Sky Enhancer AI slider.
You can download this image from Unsplash to follow along.
- Go to the Enhance AI menu.
- Set Accent AI to 100 and set Sky Enhancer AI to 100.

Before Enhance AI:

After Enhance AI:

Make sure to explore the Local Masking tool (the Pen icon in the far right menu) for even more options to enhance details after using these sliders.
5. Structure AI: Enhance the Details
Located in the Essentials menu (on the far right), Structure AI is another simple tool to use. Made up of two sliders: Amount and Boost, this feature adds structure intelligently to the details of your image.
The Amount slider is the overall strength that is applied. Boost, as its name suggests, adds even more detail based on the Amount slider.
What makes Structure AI different from other structure tools, like the ones found in Photoshop and Lightroom, is that structure is never added to places where it shouldn’t be, like in skies or skin.
In the following tutorial, we will see how Structure AI is applied to the surfaces of a sports car. We will zoom in on one corner of the car to examine the before and after results up close.
You can download this image from Unsplash to follow along.
- Navigate to the Structure AI menu.
- From there, set Amount to 100 and set Boost to 100.

Before AI Structure:

After AI Structure:

Keep in mind that the Pro tab in the far right menu contains advanced features for finishing off your photo.
Luminar AI: A Versatile Photo Editor for Just About Any Image
There isn’t much that can’t be done with Luminar AI as a starting or finishing point in your photo editing workflow. Discovering the best way to use it for your photos is half the fun. But regardless of how you use Luminar AI, there’s little doubt that artificial intelligence in photo editing is here to stay for the foreseeable future.
Image Credit: Harley-Davidson/Unsplash