There are a lot of commercial VPN providers available, but in many cases, setting up your own VPN is the best option.
When you use a third-party VPN, your data is routed through their servers, meaning that we have no knowledge of what happens to our data on the back end. If you want to maintain your privacy, you should consider setting up your own VPN server using WireGuard.
But why should you use WireGuard to set up a VPN? What actually is WireGuard? And how can you use it to create your own secure network?
What Is WireGuard?
WireGuard is a cutting-edge, open-source VPN that outperforms established VPN protocols such as IPsec and OpenVPN.
In layman's terms, it is a Virtual Private Network (VPN) protocol used to encrypt the connection between your device (say, a smartphone or a desktop) and a VPN server.
Thankfully, it is completely free to use and encrypts the network layer by providing a much more powerful secure network tunnel.
What Do You Need Before Using WireGuard?
Before proceeding to the installation steps, make sure that you've got the following prerequisites:
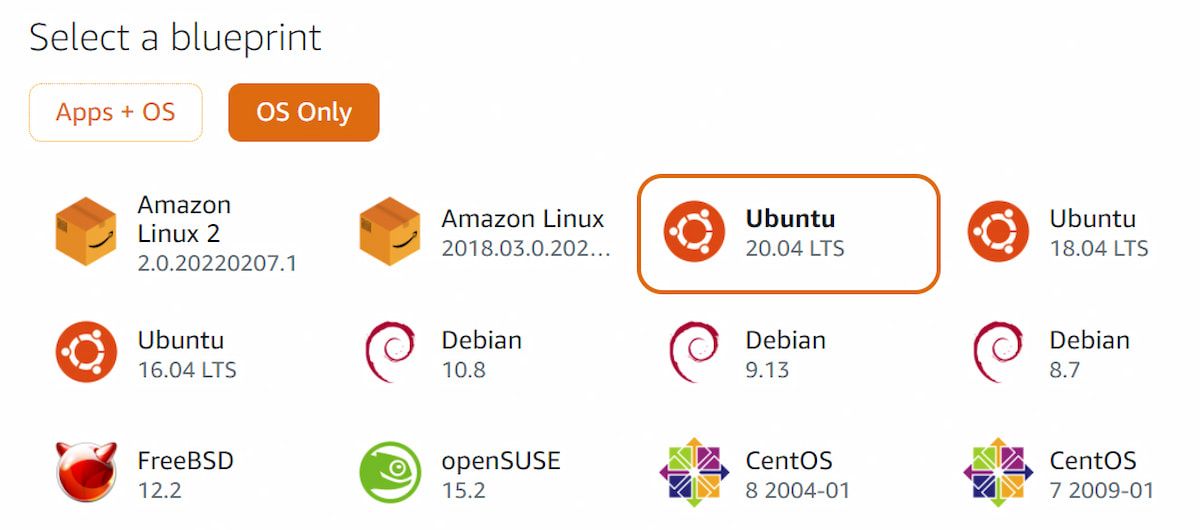
- A Linux-based operating system: This guide uses an Amazon Lightsail server running Ubuntu 20.04 LTS.
- A local computer: We're using a Windows 10 64-bit client for this guide (you can use a remote system as well).
- WireGuard installed on your local computer.
Download: WireGuard (Free)
While we've used the Ubuntu-based server, it should work with other distributions without change, but some tweaks may be necessary. Moreover, if you're connecting to a remote server, ensure that you have the authorization to connect from your local system.
How to Set Up a New Cloud Server
To begin installing WireGuard, you will need a cloud server. Due to the variety of cloud server providers and configuration options, setting up a new server can be complex.
However, for simplicity's sake, we can walk you through certain basics. No matter which cloud server you use, you can start and stop an instance or droplet right from the server provider's dashboard.
Then, select a location (ideally one near you), configure your server with a decent configuration, and launch your server. If you use shared hosting, you will not get a higher level of performance than if you use a managed server.
Note: The most recent free version of WireGuard is significantly more resource-efficient, requiring no more than 512MB of RAM and one virtual CPU. However, if you wish to connect more than three devices, we strongly recommend that you switch to a paid plan.
Installing WireGuard on Your Server
For the terminal, we're using Putty for connecting to our server's SSH. If you've never used Putty before, you can check out some alternatives for using SSH in Windows.
Following the launch of your cloud server, follow the steps below to install WireGuard on it.
1. Log into the server and run the following command to ensure the system is up-to-date:
sudo apt-get update && sudo apt-get upgrade -y
Once this is completed, you can proceed to install and configure WireGuard on the server.
2. Now, we can install WireGuard by running the following command, which is based on a GitHub script by Angristan:
curl -O https://raw.githubusercontent.com/angristan/wireguard-install/master/wireguard-install.sh

            chmod +x wireguard-install.sh
3. Further, run the script using the following command:
sudo ./wireguard-install.sh
4. Immediately after pressing the enter key, the terminal will display a series of questions. You have to respond sequentially to the questions, or you can use the default answers too.
5. Press Enter at each step to continue until WireGuard is successfully installed. Now, you can exit the configuration of WireGuard on your server by pressing any key.
You've got to repeat these steps for each client that you want to connect to the WireGuard server.
Fortunately, WireGuard offers software for the majority of operating systems, which simplifies the process of connecting your Windows, Linux, macOS, Android, or iOS devices.
After installing WireGuard, continue with the steps below to configure some additional server-side features.
How to Configure the Client for WireGuard
Finally, you'll need to configure a client to connect to and test your WireGuard VPN server. It makes no difference whether your client runs on Windows, macOS, Linux, or BSD. A WireGuard client is a computer or other device that uses its own unique public key to connect to the VPN server. To configure a WireGuard client, follow these steps:
- Now, in the terminal, type a basic client name and press the Enter key.
- Additionally, the terminal will display IPv4 and IPv6 addresses; press Enter twice more.
- At this point, it will automatically build a configuration file for you. Note the file path or copy it.
Note: You must maintain the private key's secrecy. Anyone who has access to your private key can establish a VPN connection and can even misuse it.
Additionally, WireGuard produces a QR code that can be scanned using any Android or iOS device. This eliminates the need for manual configuration file copying, for example, from your server to your smartphone.
How to Configure Firewall and IP Forwarding
In addition to setting up the WireGuard server, you should configure your local networking and firewall. This gives you greater control over who can connect to your server.
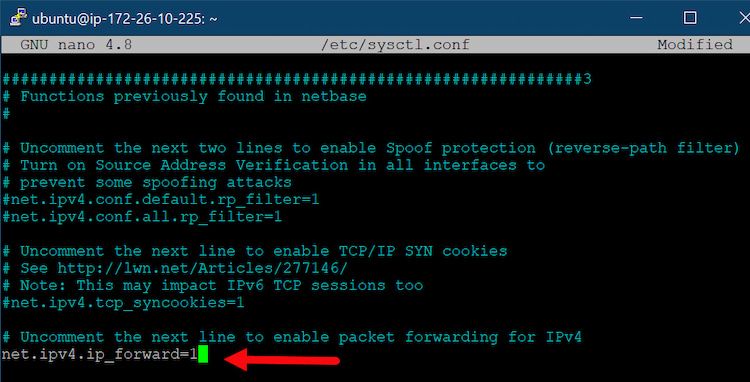
1. Using the following command, open the system configuration file:
sudo nano /etc/sysctl.conf
2. Next, locate and delete the "#" symbol from the following line: #net.ipv4.ip forward=1. This enables IPv4 address forwarding on your server.
3. Finally, save the changes and run the below command to make the changes permanent:
sudo sysctl -p
Your WireGuard server will now deliver traffic to the rest of the world from the clients of your WireGuard peers.
If you are more tech-savvy, you can also set up a firewall to protect your server from malicious attacks. To accomplish this, you can either install a software firewall on your cloud server or enable the "Firewall" function in your server provider's instance settings.
How to Connect to Your VPN Using WireGuard
Now that you've obtained your client's credentials and installed WireGuard on your server, it's time to connect to your VPN.
Connecting WireGuard VPN on Windows
1. Type the below command in the terminal to see the folders or files in the current directory:
ls
2. Now, copy the configuration file's filename. In our case, the file is called "wg0-client-windows.conf", although the file name will vary by user.
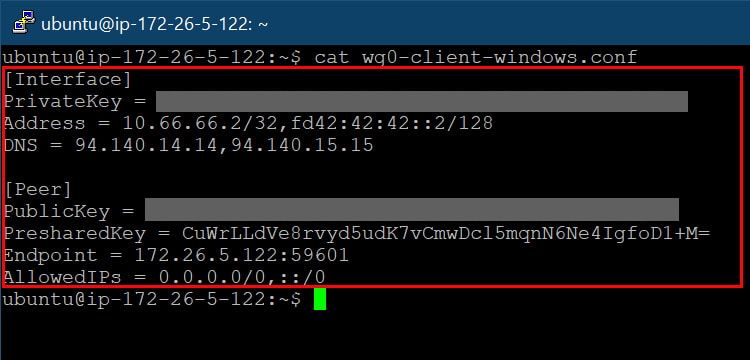
3. Once done, use the below command to read the file's content in the terminal.
cat wg0-client-windows.conf
Remember to replace "wg0-client-ubuntu.conf" with the name of your configuration file.
4. At this step, you'll receive information about your WireGuard configuration. Finally, copy everything from "[Interface]" to the end.
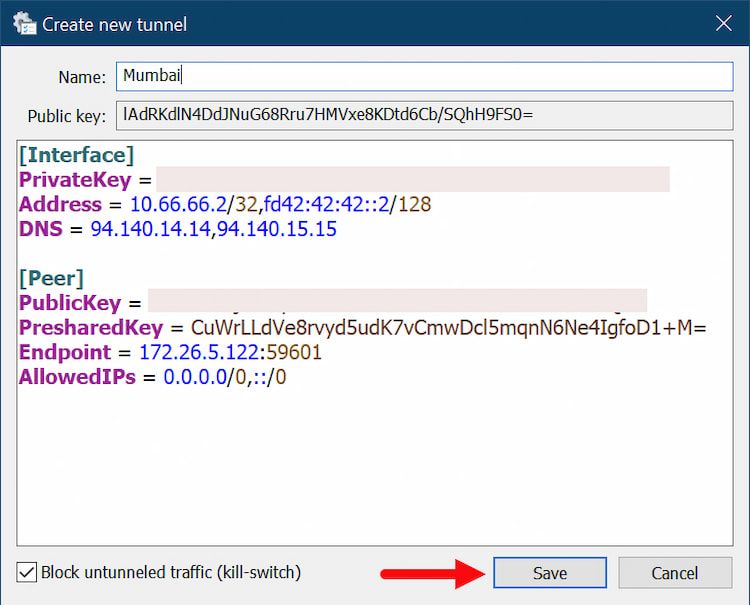
5. Now, on Windows, open WireGuard and navigate to Add Tunnel > Add empty tunnel.
6. Give the tunnel a name and paste the copied text into the editor box. Once completed, click the Save button.
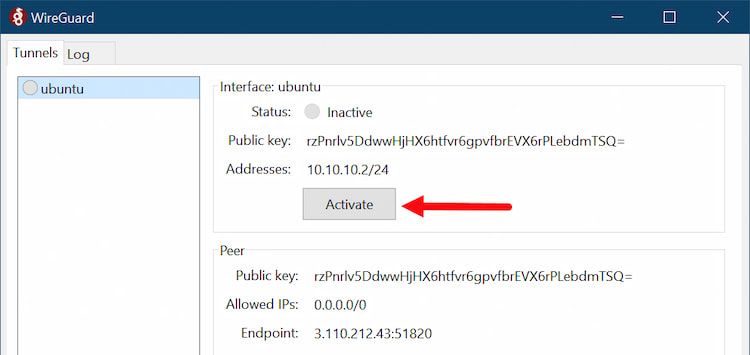
7. On the next screen, click Activate to connect to your VPN.
Connecting WireGuard VPN on Android
WireGuard is compatible with almost all Android phones, regardless of the Android version. Apart from that, the steps for connecting your VPN for iOS devices are identical to those for Android devices.
To configure your VPN on any Android phone using WireGuard, follow these steps:
- Download and install the WireGuard app.
- Open the app and tap the floating icon on the bottom right of your phone.
- Tap the SCAN FROM QR CODE option.
- Allow the required permissions and scan the QR code.
- Once done, enter a new tunnel name and tap on Create Tunnel.
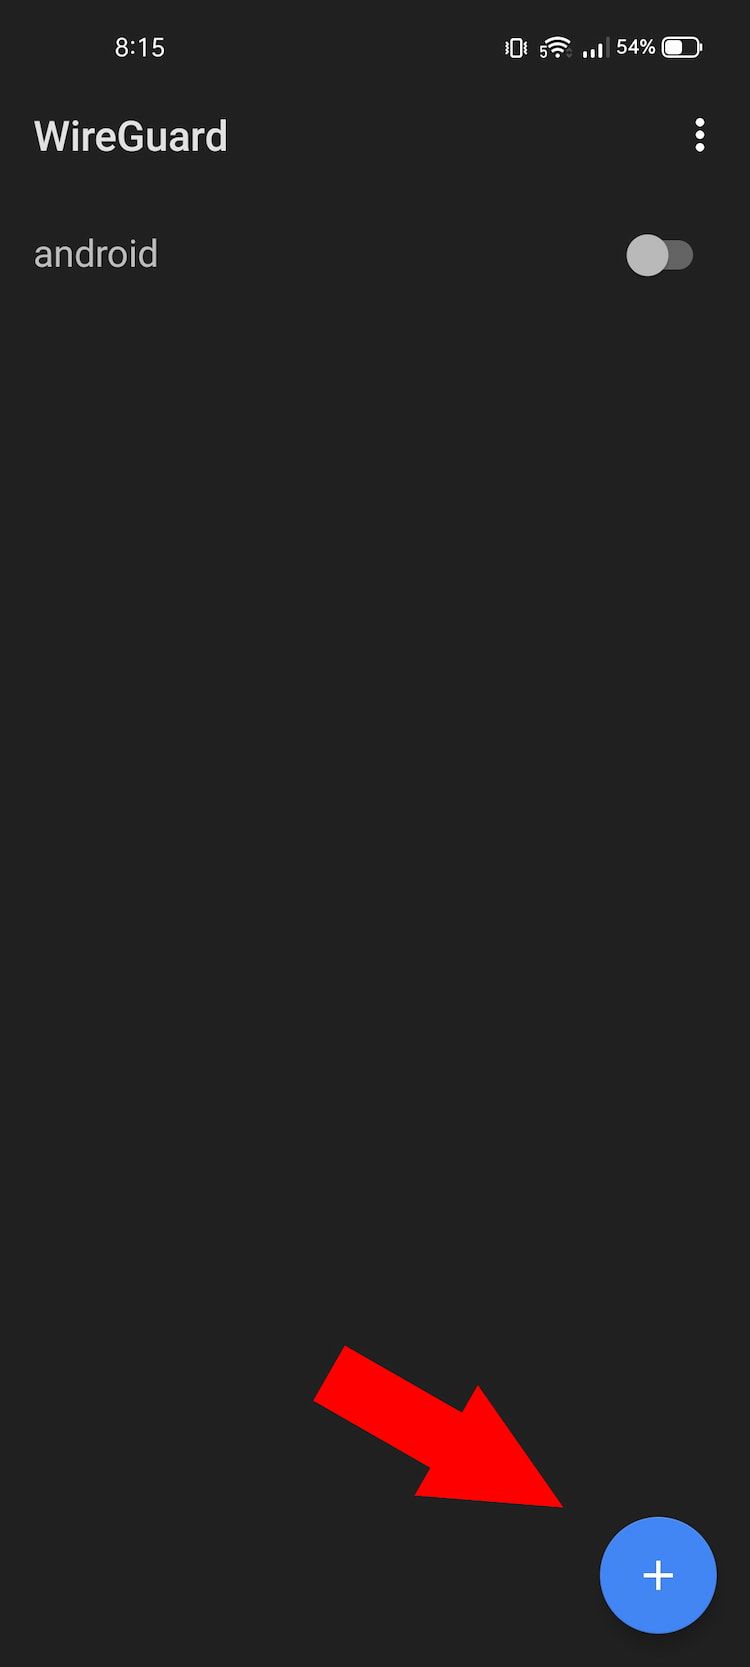
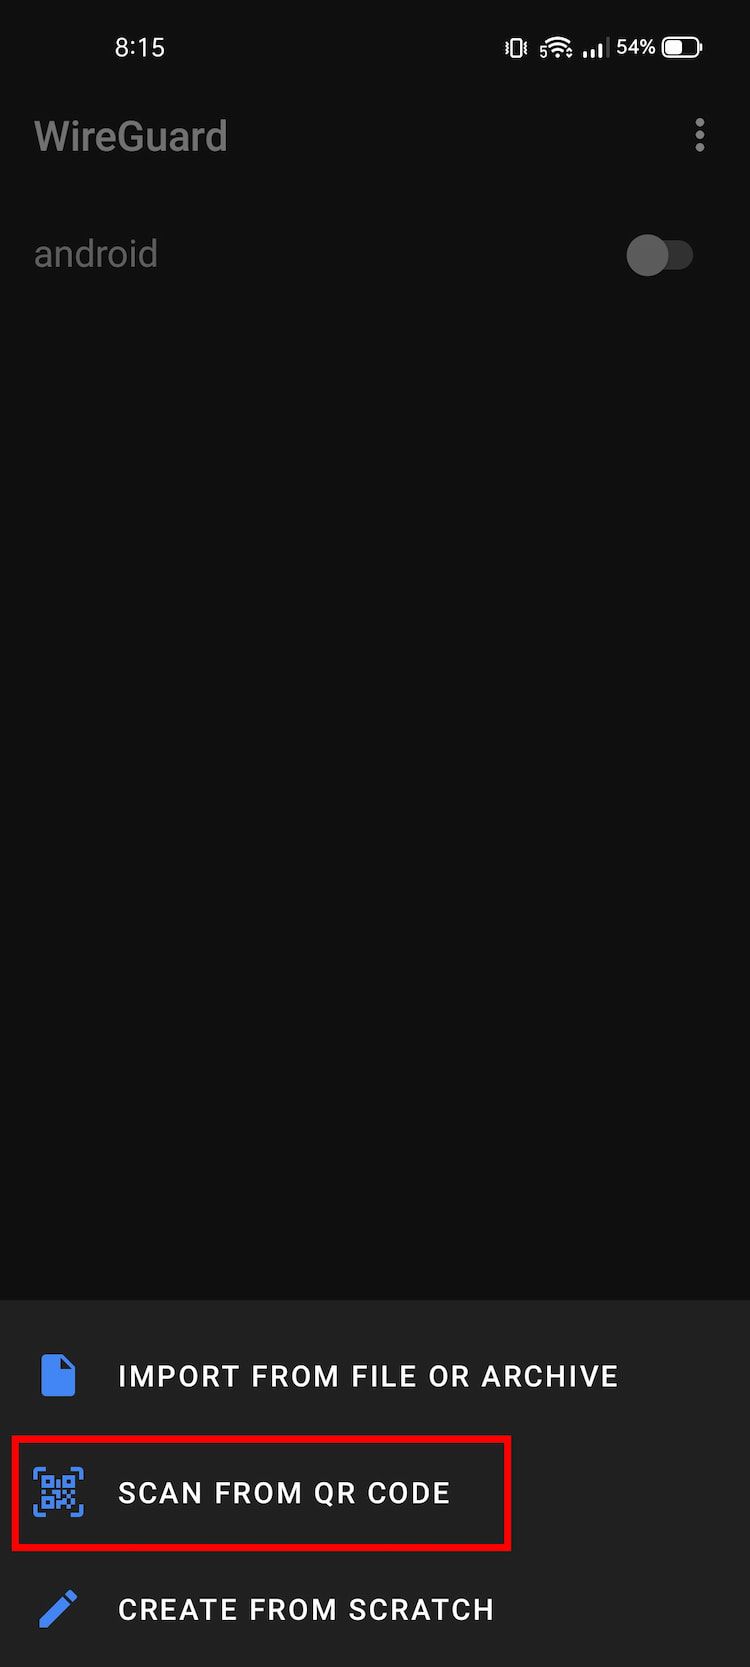
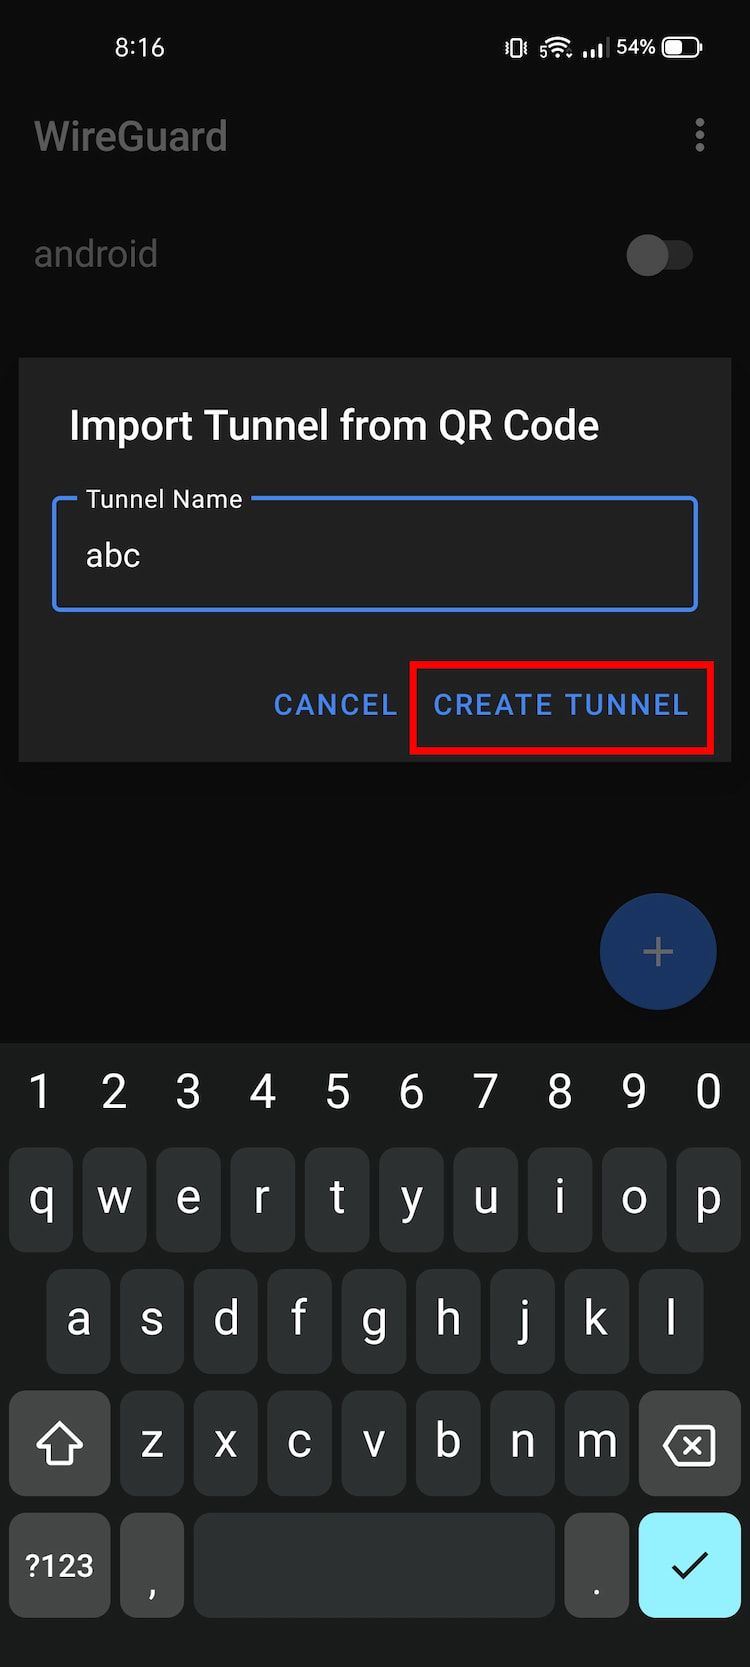
Finally, toggle the switch to connect to your own VPN.
Now, you can quickly set up any number of WireGuard servers and clients to make an encrypted private network that isn't controlled by anyone other than you.
Given that the majority of VPN providers also utilize the WireGuard protocol, there is no reason to pay them a premium price and provide them access to your data when you can handle everything effectively yourself by following the above steps.
Increase Privacy With a Private VPN
You can now configure your own VPN quickly and easily using WireGuard. If, on the other hand, you're not interested in investing your time, the simplest approach is to pay for a VPN subscription.
If you want more control and privacy, though, you should try installing a VPN on your router or even hosting your own VPN server.
A notable advantage of WireGuard is that there are no restrictions on connected clients, meaning you can connect to as many clients as you want. However, keep in mind that the more clients on a low-spec server, the slower it will be.


