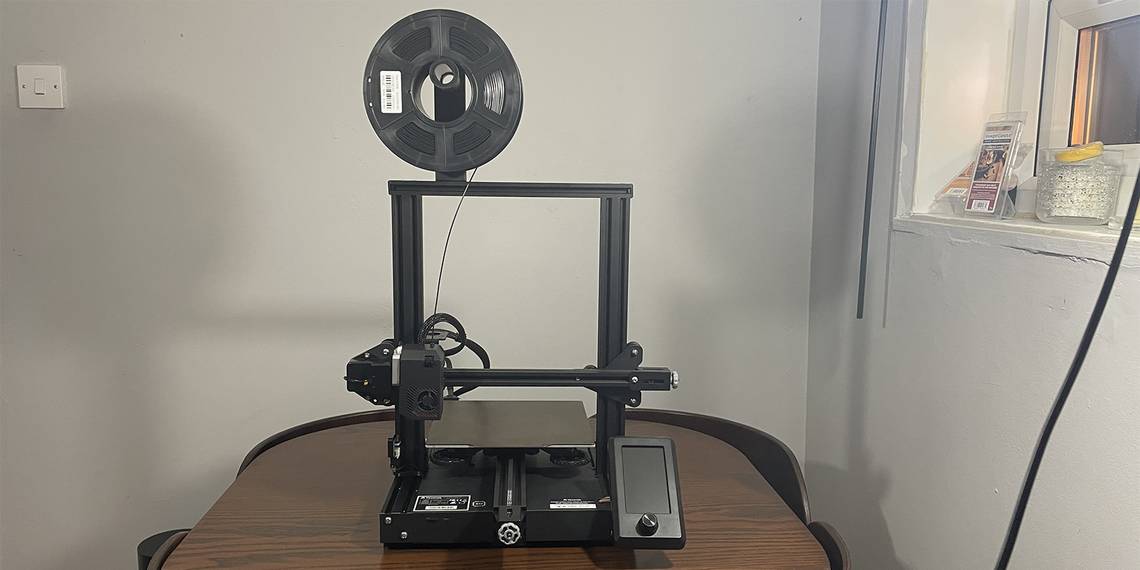
Voxelab Aquila S2


The Aquila S2 from Voxelab is probably one of the best printers available in this price range. It can handle almost any filament that you care to throw at it, and the reversible heated build plate gives you the best of both worlds when it comes to textured and untextured printing surfaces.
- High temperature hot point
- Direct-drive extruder
- Magnetic heated build plate with textured and smooth sides
- Brand: Voxelab
- Build Volume: 8.66 x 8.66 x 9.45 inches (220 x 220 x 240mm)
- Printing Accuracy: ± 0.2mm
- Connectivity: Micro SD, USB
- Heated Build Plate: Yes
- Feed Type: Direct-Drive
- Dimensions: 18.2 x 18.6 x 18.7 inches
- Weight: 8kg
- Dual-Color Printing: No
- Deals with a huge variety of different filaments with ease
- Easy to put together
- Very user-friendly operation
- Firmware can be slightly clunky
- No auto-levelling system
3D printing is an exciting prospect to many. The idea that you can produce almost anything in your own home with a single machine feels like something taken straight out of Star Trek, even if the reality isn’t quite as grandiose. The Aquila S2 from Voxelab is a filament-based 3D printer that supports incredibly high temperatures both in the hot-end and on the textured heated build plate. With these features, is the Aquila S2 the best 3D printer in this price range? Let's take a closer look at the Voxelab Aquila S2 FDM 3D printer.
Building the Aquila S2
This is a self-assembly 3D printer kit that comes with a handful of extras, such as a spare hot-end, and some tools like the scraper and needle for clearing away used filament after a print. It also comes with an SD card and reader. The SD card has a few test prints that you can run once the device is together if you want to get a good idea of the sort of thing that this printer is capable of, but the SD card reader is a bit naff. After a few uses, it stopped working and it hasn't been right since, but fortunately, you can just use any SD card reader you happen to have lying around.
You’ll receive some very simple instructions to build the device, as well as very carefully labeled parts that correspond to the instructions, making the construction process relatively painless. It takes just over an hour to put this thing together, so as long as you’ve got some experience playing with Meccano or K’Nex in your past, then you’ll probably get it done without too much concern. Once it’s put together, it’s simply a case of inserting the SD card with your patterns on, and it’s ready to print outside of inserting your filament with the built-in auto-load function.
The Voxelab Aquila S2 FDM 3D Printer: A High Temp Powerhouse

Some of the key features that make the Aquila S2 so appealing include its ability to work at insanely high temperatures (up to 300C), the direct-drive extrusion, and an easy-to-use magnetic removable build plate that features both a rough and a smooth side. The smooth side is there if you’d prefer your prints to have a smooth base, while the textured side provides better adhesion if you’re printing something that is going to struggle to stay attached to the bed. This works mostly well, assuming that you keep external forces from interfering with your print.
The included filament isn’t named, but we can assume that it’s a translucent bit of red PLA since using those settings on the device worked straight out of the box. Although there were test prints on offer, our first port of call was to print a tiny Charmander because we could. This was literally our first print, both with this machine in particular, and with 3D printing in general, and the results are pretty decent. We also printed off this test pattern that was included with the machine and applied some test finishing to it with good results all around.
One of the most exciting things about this printer is its ability to handle a wide variety of different materials. The hot-end goes up to really high temperatures, around 300 Celsius, so you can use anything from a carbon-fiber PLA to smoother materials like a silk PLA or Nylon, and the nozzle and bed will handle these with great ease. The only minor point that you should watch out for is that the bed can take a little while to heat up. If you’re living in the US or somewhere else using 120V it’s going to take a lot longer to warm up both the bed and the hot end.
On Power and Software

On the note of power, you can at least be sure that you’ll be able to use this printer no matter where you happen to be based. The power supply has variable voltage thanks to this switch on the back of the printer, so if you’re living in the US you can switch to the lower voltage and not have to worry that the machine is going to explode or anything like that. You will however have to get a screwdriver or other thin implement in there to change the voltage switch. This is almost certainly a safety feature to prevent accidental volt-switching, but you should be mindful of it or risk breaking your machine.
Before we dive deeper into the actual printing, it’s essential to look at the printer's software. The firmware has been updated since the end of last year, and you can see that on the device. When you’re loading new filament, the older version of the firmware showed a Bowden-style extruder setup, but now it shows the appropriate image of a direct-drive extruder which is much better. Other than that, the firmware mainly functions relatively well, even if it is slightly clunky to navigate through the menus at times.
The only major downside to the firmware is that while it does have presets for PLA and ABS, the only way to use filaments other than this is to set the pre-heating temperatures for yourself manually. There’s not even a way of adding new presents, although you can edit the PLA and ABS presets to a different bed and hot point temperatures. Hopefully, with future updates, they’ll make it possible to completely edit pre-heating profiles and add your own in case you want to regularly use something like a flexible filament.
The Heated and Textured Bed Makes Printing Tough Materials a Cinch

Moving onto the actual printing outside of the first few test prints. The textured bed has mostly been really helpful when dealing with basic PLA, and it also came in really handy when we were using our Silk PLA which can struggle to adhere appropriately. If you have a preference for using an adhesive, you can always swap to the smooth side of the bed and use hair spray or glue to keep your prints appropriately attached, but for the most part, the textured bed alone does a decent job.
We’ve printed several figures, models, and especially a fair amount of functional prints. For example, we managed to produce several stands for some relatively chunky gaming systems, and these have mostly worked quite well. The only issue we ever encountered was when using rafts they would sometimes be hard to remove altogether, but that could potentially be fixed by changing some settings. Having said that, rafts really aren’t that necessary with this machine. The bed is heated and textured, so you don’t really need to use them, brims will work just as well, and they don’t get badly stuck to your prints when they’re finished.

As you can see, we managed to get a decent level of detail in a lot of these prints. Our Usagi figurine has a lot of fine details, and they’ve mostly come out quite well despite the heavy use of supports. On some prints, we did have a bit of stringing, for instance on the GameBoy Advance SP logo on one of our stands some letters are connected where they’re not supposed to be, but that’s easily fixable with a file or sandpaper. Some of the best results we had were actually from the black Silk PLA, which resulted in a very glossy finish on our trinket dish, and a slightly less glossy finish on our GameBoy color stand.
Is the Voxelab Aquila S2 FDM 3D Printer Worth Your Money?

We also did try some stranger filaments, such as a wood PLA. This was less successful, but that’s almost certainly to do with this filament having pretty narrow requirements when it comes to printing with it. We tried to produce a wooden egg, and unfortunately, it was very stringy and mostly fell apart. Again, this is probably nothing to do with the printer itself and more to do with this being a particularly finicky material to work with in the first place.
We’ve covered a relatively broad number of features and different print and material types, however, there are a couple of minor negative points that we probably want to cover here. Firstly, the build volume is aggressively average. It comes in at 220 x 220 x 240mm, which is plenty of room for a lot of prints, but it is still slightly under similar devices like the Creality Ender 3. The other negative point is that it doesn't come with an automatic leveling system. That’s not much of a shock for this sort of price range, but it can be a bit tough if this is going to be your first machine, and you’re not confident in leveling yourself. You can upgrade the device with a leveling system, but it’s still an essential factor for you to be aware of.
The all-important question is whether the Aquila S2 is worth investing your money in. This machine will cost you around $280, which is pretty cheap for a device that has this sort of feature set. While there are other printers that come in more affordable, they almost certainly won’t perform as well as this one right here does. With the reversible build plate, the ability to handle an overwhelming variety of different filaments, and how easy it is to get this thing up and running, there’s almost no other printer on the market that will serve you as well as the Aquila S2, assuming that you don’t want to try and print something larger than your head.