
VirtualBox released version 7.0 in October 2022. It is the first hypervisor to support the emulation of TPM chips along with all the other system components. VirtualBox also offers a Secure Boot feature in EFI mode for virtual machines. The main reason behind these two features was Microsoft's list of elaborate system requirements for Windows 11.
Without emulation of the TPM 2.0 chip, users couldn't install Windows 11 on a virtual machine. But with VirtualBox 7.0 it is possible to enable Secure Boot and TPM for any Windows virtual machine. This post will elaborate on the methods to enable or disable TPM and Secure Boot for any VirtualBox virtual machine.
Why Does Windows 11 Need TPM and Secure Boot?
Windows 11 needs both a TPM chip and Secure Boot to offer robust protection against threats and not allow any malware to run when the system boots up. Secure Boot only allows signed drivers to load and the TPM chip helps in BitLocker drive data protection. So, both these features are pretty important from a security standpoint. Check out our guide on what Secure Boot is and how it works for more information.
While Windows 11 can work without Secure Boot and a TPM 2.0 chip, it won't be able to offer that extra layer of system protection it would do otherwise. Many features like Core-isolation, Data Encryption won't work. If you want to enable or disable these features for Windows 10 or 11 virtual machines, you can do so in VirtualBox 7.0.
How to Enable or Disable Secure Boot and TPM Support in VirtualBox 7.0
Repeat the following steps to enable TPM 2.0 and Secure Boot in VirtualBox.
- Press the Win key and search VirtualBox. Click on the first relevant search result to launch the app.
- Click on a Windows virtual machine and then click on the Settings icon.
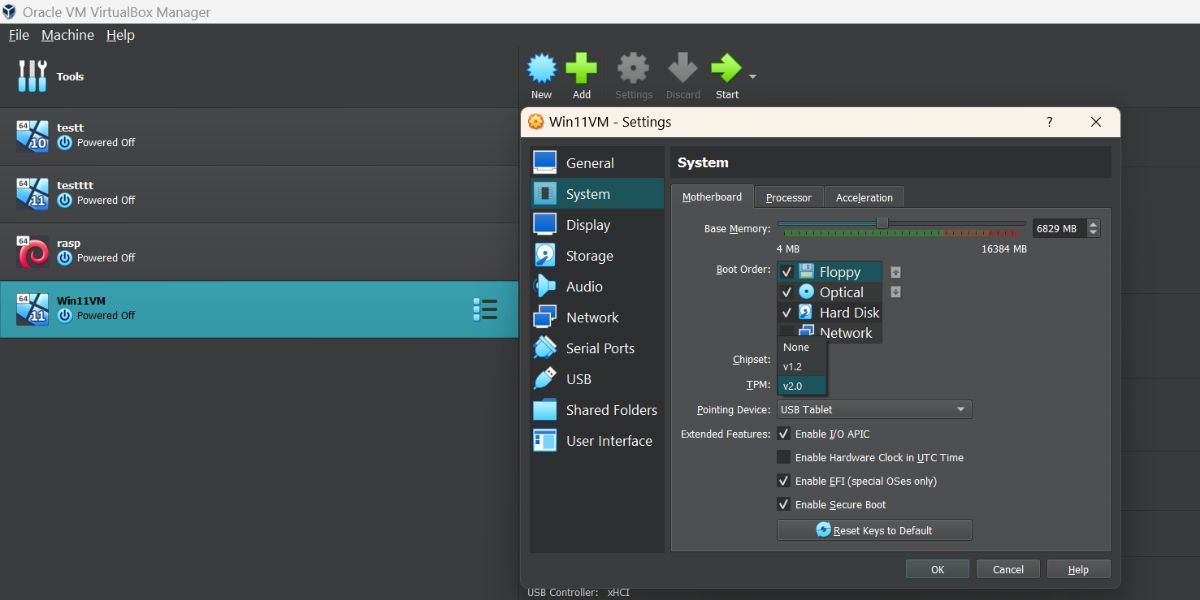
- Navigate to the System settings option.
- Find the TPM option. If it is set to none, click on the arrow icon to open the drop-down menu.
- Select the TPM v2.0 option from the list. Windows 11 won't work with anything lower but if you are using Windows 10 then you can pick v1.2 from the list.
- Scroll down and locate the Extended Features section. Click on the Enable EFI (special OSes only) option check box.
-
Then click on the Enable Secure Boot option check box.
- Now, click on the OK button. The settings window will close automatically.
- Go to the top area and click on the Start button to power on the Windows virtual machine.
- Now, press the Win key and search Security. Open the Windows security app.
- Navigate to the left-hand side menu and click on the Device Security option. Here, all Windows security features will be active.
- To disable TPM and Secure Boot, reopen the virtual machine settings and set the TPM version to None. Uncheck the Enable EFI (special OSes only) option check box. Click on OK to save the changes.

An Alternative Method to Check if TPM Is Active in the Windows Virtual Machine
Here's how to check TPM on Windows 11 virtual machine:
-
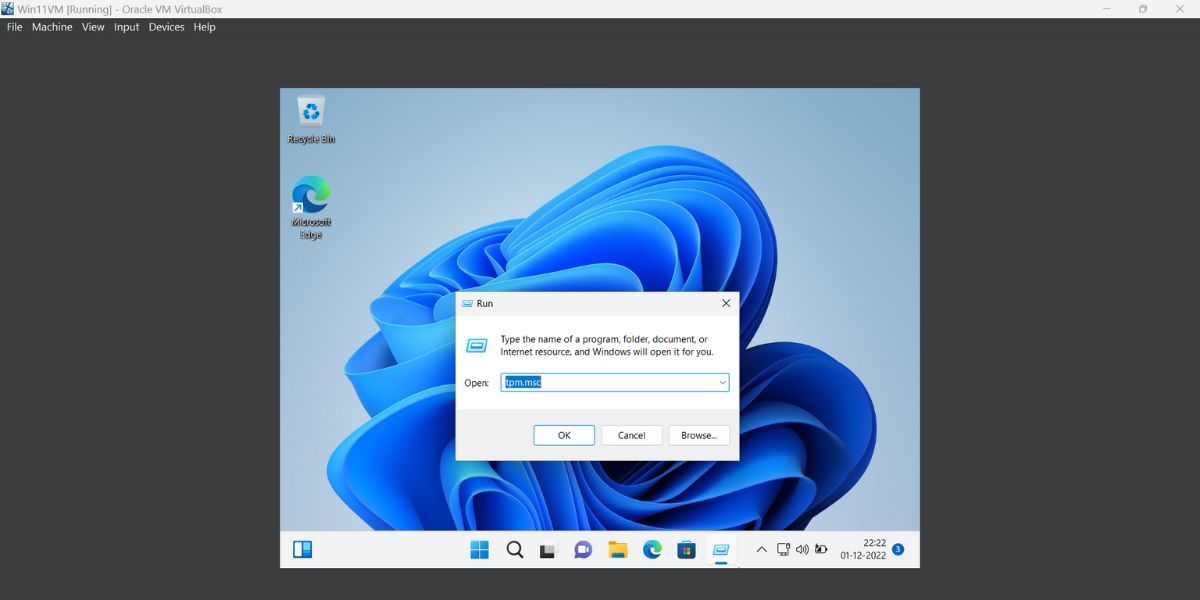
Press the Win + R key to launch the Run command box (see how to open Windows Run for more ways). Type TPM.msc and press the Enter key.
-
TPM utility will launch. Navigate to the Manufacturer Information section.
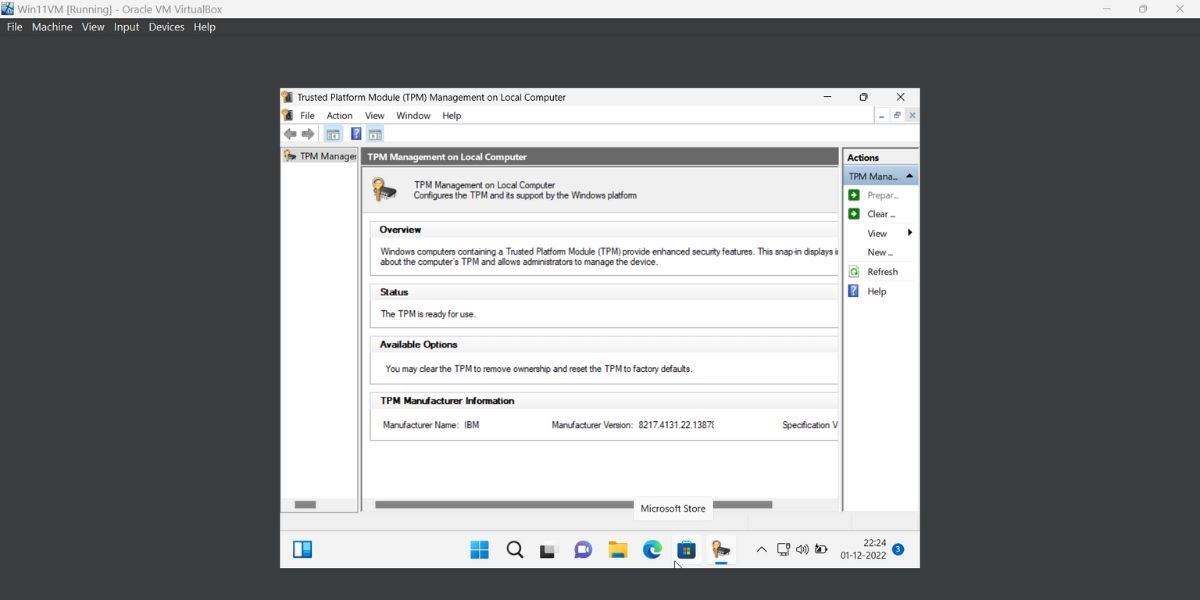
- If the Specification version entry showcases 2.0, it means that TPM chip emulation is successful.


Manage TPM and Secure Boot Features in VirtualBox With Ease
You can choose to keep both features active or not. After installing Windows 11 as a virtual machine, you can turn TPM and Secure Boot off and not face any issues with the operating system. However, remember that these are important from a security perspective.