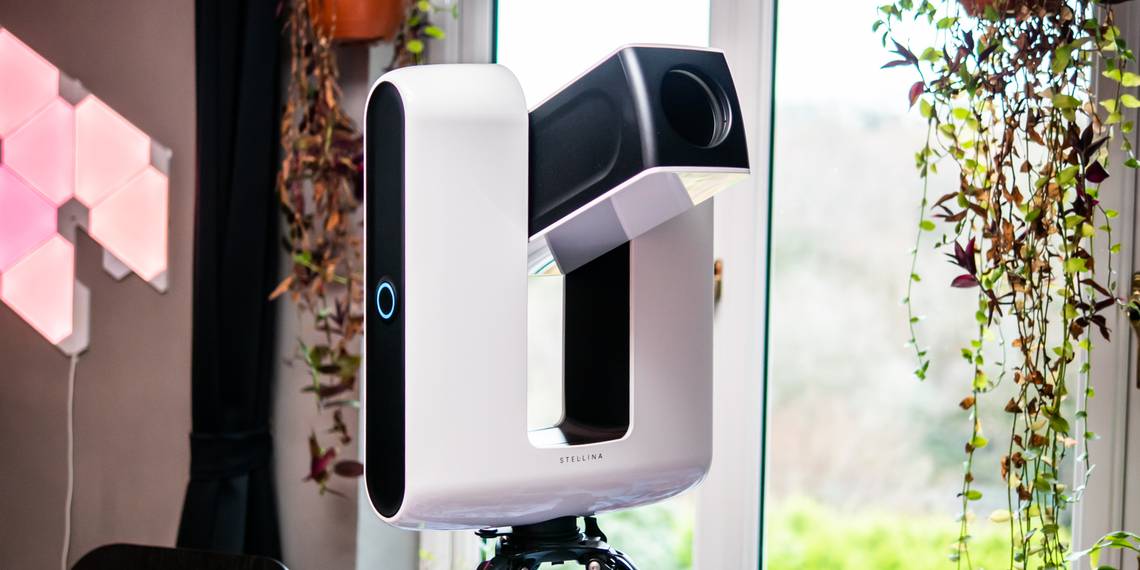
Vaonis Stellina


The Vaonis Stellina makes astrophotography easy and accessible to anyone, and shared viewing capabilities make it perfect for groups. The app is educational, easy to use, and guides you through the viewing experience. But are the images worth the time and cost investment, or would you be better off just Googling it?
- Brand: Vaonis
- Sensor Size: 1/1.8-inch
- Photo Resolution: 3096 x 2080 (6.4MP)
- Battery: 10,000mAh external battery
- Connection: Adhoc Wi-Fi network
- Size: 19 x 15 x 4.7 inches (49 x 39 x 13 cm)
- Weight: 11.2kg / 24.7lbs
- Lens: f/5.0 400mm focal length, doublet apochromatic refractor
- Stupidly easy to use
- Well designed app guides you through what's currently visible
- Timeline view shows you the image improving with each additional exposure
- Each observation takes 30-120 minutes
- Can't view planets
I'm in the enviable position of living just on the edge of Bodmin Moor in rural southwest England, in a designated dark-sky zone. That means it's one of the best places in England for star watching. So I was very excited when Vaonis offered to lend me one of its Stellina telescopes, an automated star-finding app-controlled astrophotography device. Thankfully, it requires zero knowledge of astrophotography and can be used by absolute beginners.
What Is Stellina?
The Stellina is a massive all-in-one astrophotography system that automatically locates, tracks, and photographs star clusters and nebulae. It's entirely portable, includes a 10,000mAh battery (enough for five hours of continuous use), and broadcasts its own Wi-Fi network. Using the accompanying Singularity app, you'll be guided through astronomical targets that are currently visible—nebulae, clusters, constellations etc—from which you can initiate an observation. For the advanced users who wish to track those distant undiscovered alien colonies, you can also target a specific set of coordinates, though most users will want to stick with the known list of targets.

The Stellina will then tilt and rotate on its own accord, autofocus, and begin tracking the target as it moves across the night sky, stacking a series of short exposure images to create the final photograph. Observations can take from 15 minutes to 2 hours(!), depending on the target and how many exposures will be needed. As the images roll in, you're presented with a timeline view, so you can see the photograph getting better in real-time.
Stellina Specifications
Internally, the Stellina telescope uses a 400mm focal length custom f/5 lens with an 80mm aperture and doublet apochromatic refractor—which as far as I can tell means there should be no chromatic aberrations nor will the colors of the stars be changed. It even has a built-in heater to avoid issues with dew and misting up, but one thing to note is that its operating temperature bottoms out at 0C (32F), so those higher up north might not be able to use this to its fullest. That all feeds into a 6.4MP Sony IMX178 sensor, which supposedly has a city light suppression filter on it, so in theory, even in built-up areas you should still get good images. As mentioned, I'm located in a dark-sky zone, so I didn't test out the effect of city lighting.
The lens zooms 50 times in a 1 x 0.7-degree field of view and has an automatic mechanical field derotator to capture the optimal field of view. For an idea of what that means, the full field of view is about the size of a full moon:

The Stellina is mounted in an altazimuth configuration (which means that it spins and rotates in one axis). Everything is powered by the included 10,000mAh over USB-C—though the battery is both removable and generic, so it's easy to replace or carry spares. The battery fits into an internal cavity, but there's plenty of room to fit something larger. I must applaud that design choice, as it manages to keep the cabling neat and tidy, means the Stellina is portable, but won't be hampered by the failure of an internal battery in five to ten years.
The battery cavity also features two standard USB-A ports, into which you can fit a storage device if you'd like to manually process the RAW files from the camera. This is optional though; it's far easier to just save the JPG of the final processed image to your smartphone or tablet device.

A third-party tripod is also included in the package—a Gitzo Series 3 Systematic carbon fiber and aluminum tripod. It's incredibly stable and easy to affix to the base of the Stellina, and includes a small bubble level with adjustable feet, so it's simple to level things out.

The only thing missing is a bag to carry it all in. Although the box the Stellina is packaged in has a sturdy handle, it's not really a carry case, and nor does the tripod fit in there. I wish a little more thought had gone into an integrated carrying solution, perhaps a hard plastic case for the whole thing. As it is, it's a bit awkward to carry around and very heavy anyway, so I wouldn't plan on trekking up a mountain with it, but putting the Stellina in the back of your car to the campsite is certainly an option.
Using the Stellina
I should be absolutely clear here in that I don't have the slightest clue about astrophotography: that's how easy this is to use.
Once you’ve plugged the battery in (physically removing and inserting the USB-C plug is the only way to actually kill the power), there’s a single startup button on the front. Then then you connect to the internal ad-hoc Wi-Fi network, and open up the Singularity app. Stellina goes through a series of initialization steps: it locates itself with GPS, measures the ambient temperature to ensure the lens is warmed up enough and there’s no misting going on, and it autofocuses on the sky. As long as it's not cloudy and your location is accurate, there should be no issues. If you can see stars, Stellina will be able to as well. If you can't, it certainly can't either and you'll get an inititialization error.


After that, you can browse the list of objects in the night sky that are currently available to observe, each with a blurry thumbnail of what you might expect to see. You'll find a handful of recommended objects, but you can also delve into full listings for each type of object, and filter out those not visible or sort by how much time is needed. Each object has a recommended observation time for the best image, so all you need to do is hit the Observe button, and that’s pretty much it.


Assuming it can get a lock on the object and doesn't get obscured by clouds you’ll soon begin to see images rolling in, though bear in mind that the initial views will be a little disappointing. Every minute or so, the picture will improve slightly; some will begin to build up colors. The live view shows the latest combined stack, but during observation you can also playback all the current exposures to see how the image has developed over time, export the photo, or stop the observation at any point and pick another target.

If conditions worsen the Stellina will detect that and actually reject the images so as not to stack up unwanted pixels. If too many images in a row are rejected it’ll let you know you so you can either abort or just keep waiting if you think the clouds will move along.

The whole system is incredibly clever, and you can get some lovely images out of it. The battery life is more than enough for an evening of stargazing, though you can always swap it out if you need to. That said, my iPad died well before the battery on the Stellina did.

Interestingly you can also connect more than one smart device to view the output, while only the first device remains in control and the rest just observe the output. This makes it perfect for stargazing groups or schools.

The Vaonis Stellina genuinely makes astrophotography stupidly simple for anyone. It's plug and play as long as you have good conditions; all you need to do is choose what to look at, guided by the app in terms of what you can currently see and what has good visibility at the moment, then let do its magic. It's the ultimate astrophotography cheat mode.
But Is It Too Easy?
The Stellina isn't perfect, and to my eyes at least, it has some glaring limitations.
The first (and I apologize if this is obvious to those of you who are more versed in astrophotography than I am) is that you can't observe planets, so if you had dreams of taking high-quality zoomed-in photos of Saturn's rings, that isn't happening. It's just not that kind of lens: it's designed to observe nebulae and clusters mainly. You can certainly point at planets, but the results are disappointedly small. As mentioned, the field of view is roughly the size of a full moon. Planets are much smaller than that. This is Saturn:

Secondly, the images you get are impressive—but are they $4000 impressive? Please don't misunderstand me here—I realize that developing a coherent image of something located hundreds of billions of miles away clearly isn't a simple task—but nor are you breaking new ground. To sit there with a telescope, locate a star, and look through the eyepiece is one thing; or even to align your camera perfectly, track a star, take a stack of images and post-process them all yourself, must feel like quite an accomplishment.
But with the Stellina, something feels lost in translation. It's almost ... too easy. If you're going to cheat anyway—selecting a target to observe from your smartphone then sitting back while the device does all the hard work—why not just cheat better and use Google instead? You can find much better photographs of your observation target in a fraction of the time it takes for Stellina to stack images. At the selling price of around $4000, you could buy a DSLR, massive lens, tripod, and star finder, and you'd have a more adaptable bit of kit than this.

If you want to just get outside and do some star watching with friends or family, then staring at a smartphone or tablet screen is the last thing you want to do. It’ll wreck your night vision. If I'm having a star-watching night then I'll make an exception for one person to use an AR app like Star Walk to point out constellations, but sitting there staring at a screen to see images develop is just not my idea of fun. The best way to use Stellina that I found was to set it up, let it do its thing, cover up my iPad, and leave it alone for an hour. Check what it's come up with when you're done for the evening.
Finally, I'll mention that while I was blown away by how ridiculously easy to use the Stellina is, the opportunities I had to really use it were very infrequent. You can't use it when it's raining; you can't use it when it's cloudy; and you can't use it when the moon is around. So that was about one night in thirty that I was actually able to test this. That's a failing of our wonderful British weather rather than the Stellina, but you may find yourself getting less use of your investment than you hoped for.
Is Vaonis Stellina for You?
There's a lot to love about the Stellina. It's wireless so you can take it anywhere—especially useful if you're heading up out of the city for a weekend away. The battery is easy to replace, and the app is a joy to use. It's the ultimate astrophotography cheat mode and the images you get are great, because of the way it automatically tracks the stars. It stacks a series of less noisy quicker exposures, so you get a much better overall quality than one massively long exposure. The ability to connect multiple devices makes it perfect for stargazing groups and educational settings.