You want to log in to your Windows device, but then you realize that some user accounts are missing. What’s causing this issue, and how do you resolve it?
In most cases, this problem occurs if you’ve unknowingly configured the wrong settings on your device. But in some instances, this might be something that stems from a system bug. So, let’s explore some of the best solutions that could help you fix your missing user accounts on the Windows login screen.
1. Enable the User Accounts With the "Local Users and Groups" Tool
The easiest way to tackle this issue is to enable your missing accounts on the “Local Users and Groups” tool. So, let’s explore the steps you need to follow:
- Press Win + R to open the Run command dialog box.
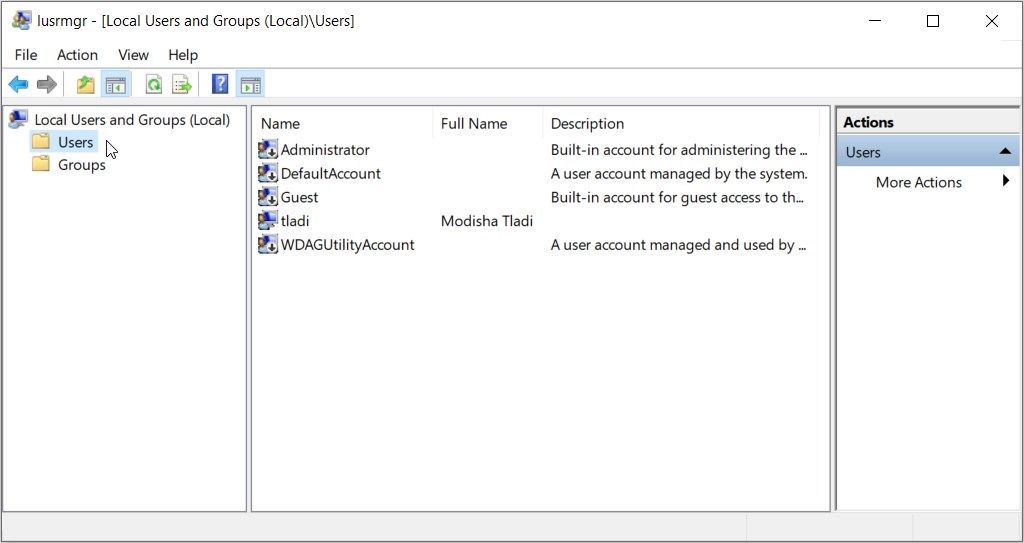
- Type lusrmgr.msc and press Enter to open the “Local Users and Groups” tool.
- Click the Users folder on the left-hand side. This will display a list of the user accounts on your PC.
All the user accounts that have a "downward-pointing" arrow are disabled. To enable them, follow these steps:
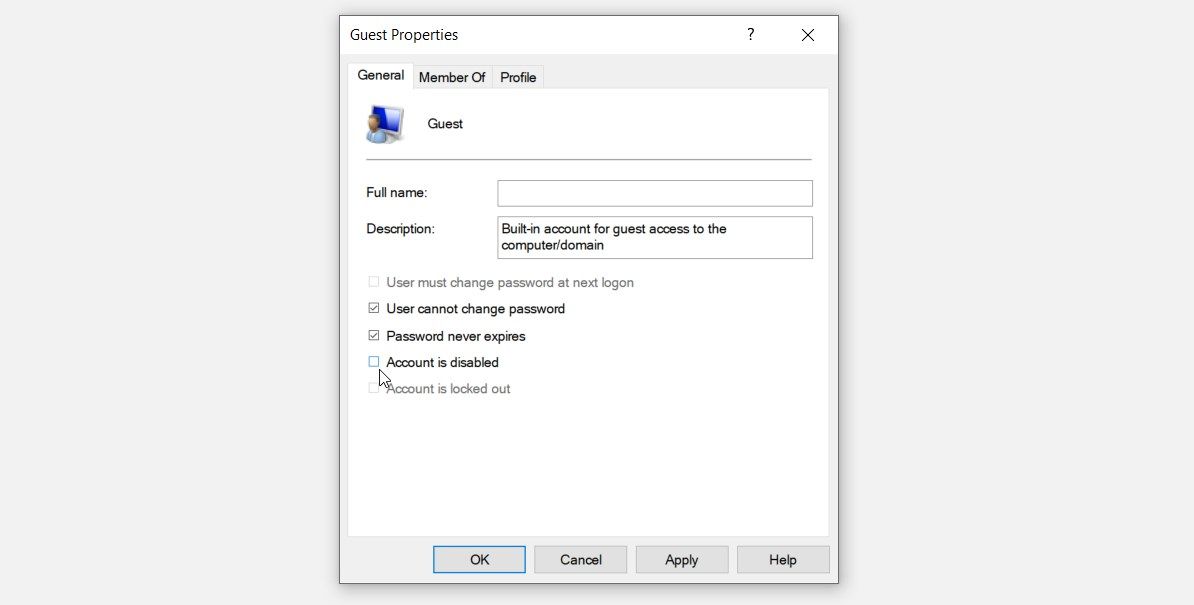
- Right-click on one of the problematic user accounts and select Properties.
- Uncheck the Account is disabled box. From there, click Apply and then click OK.
Repeat the steps and enable all the user accounts that you’d like to display on the login screen. Finally, restart your PC and check if this resolves the issue.
2. Find Missing User Accounts With the "Local Users and Groups" Tool
Now, what if you still don’t see your other user accounts when applying the previous solution? This means a system bug might have removed some of your accounts from the list.
To tackle this issue, search for your other accounts on the “Local Users and Groups” tool through these steps:
- Press Win + R to open the Run command dialog box.
- Type lusrmgr.msc and press Enter to open the “Local Users and Groups” tool.
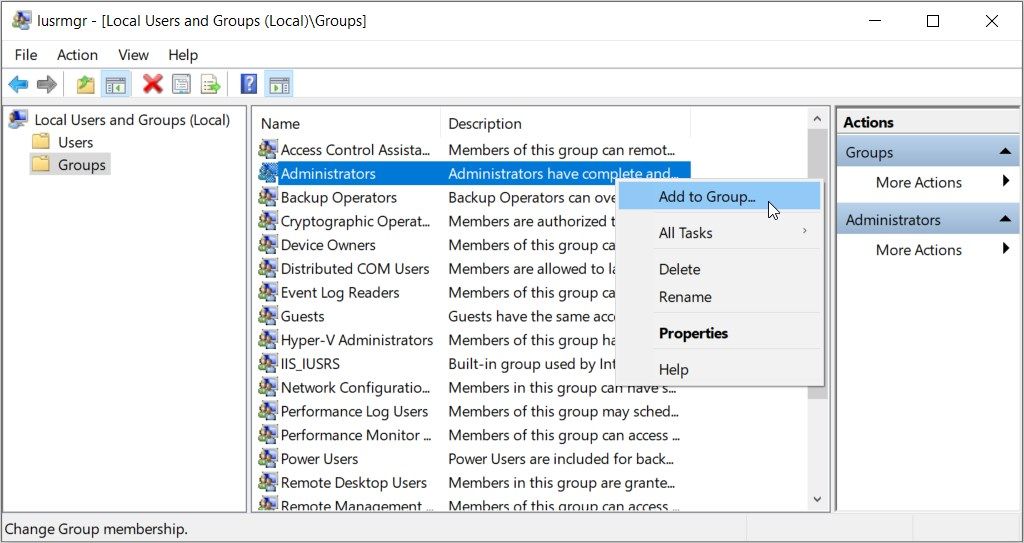
- Click the Groups folder on the left-hand side.
- Right-click on the Administrators option in the middle pane.
- Select the Add to Group option.
From there, follow these steps:
- Click the Add button in the bottom-left corner of the screen.
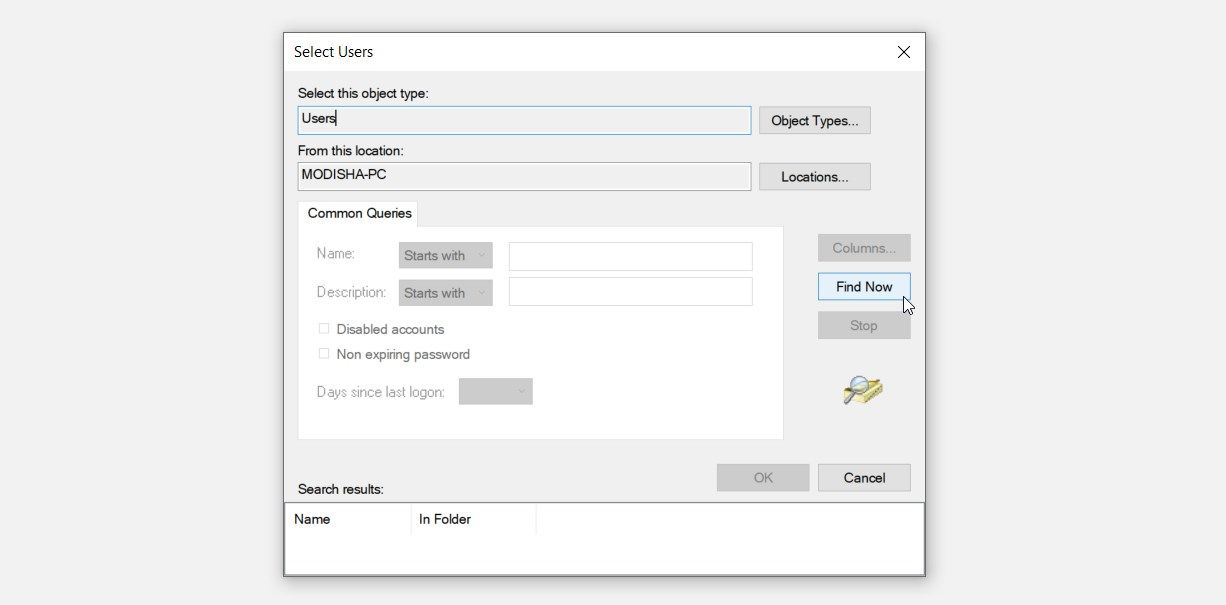
- Press the Object Types button on the "Select Users" screen.
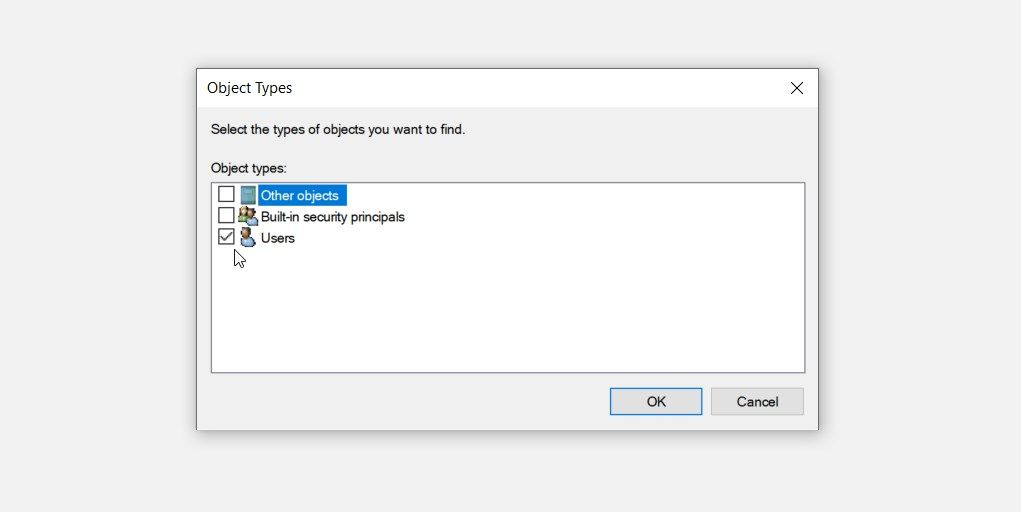
- Check the Users box and uncheck all the other boxes on the pop-up screen.
- Press OK to save these changes. This should take you back to the "Select Users" screen.
Click the Advanced button and then click the Find Now button on the right-hand side of the screen.
On the search results, select the username that isn’t appearing on the login screen and click OK. From there, restart your device to save these changes.
3. Configure the Right Settings in the Local Group Policy Editor
The Local Group Policy Editor (LGPE) is a tool used for configuring system settings and troubleshooting PC issues. It's usually not available on Windows Home editions; fortunately, there is a way to enable the Local Group Policy Editor on Windows Home.
Now, let’s explore how the LGPE can help if your PC won’t show other accounts on the login screen:
- Press Win + R to open the Run command dialog box.
- Type gpedit.msc and press Enter to open the LGPE.
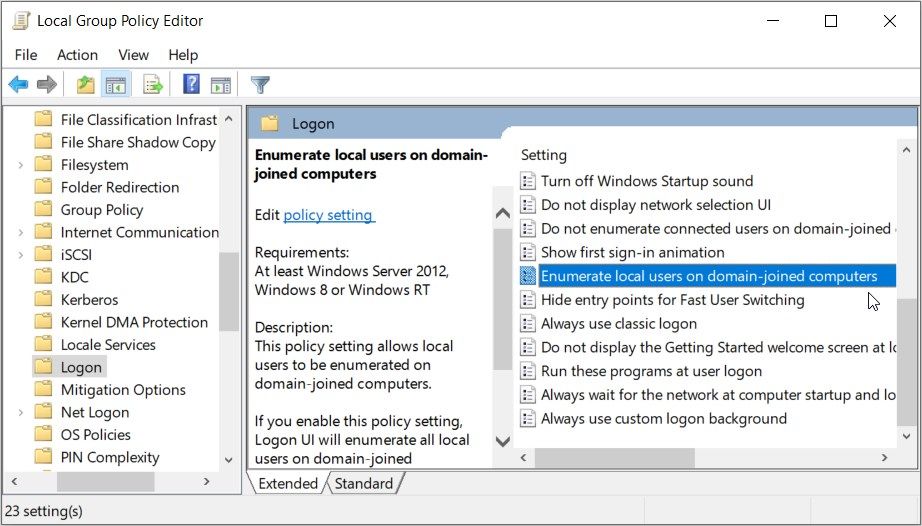
- Navigate to Computer Configuration > Administrative Templates > System > Logon.
- Double-click the Enumerate local users on domain-joined computers option on the right-hand side.
Select Enabled on the next screen. Next, click Apply and then click OK.
From there, follow these steps:
- Access the Logon folder in the LGPE as per the previous steps.
- Double-click on the Hide entry points for Fast User Switching option.
- Select Disabled or Not Configured. This should disable the "Hide entry points for Fast User Switching" option.
- Click Apply and then click OK to save these changes.
While you’re still in the “Logon” folder, disable the Block user from showing account details on sign-in and the Do not enumerate connected users on domain-joined computers options as per the previous steps.
When you finish, close the LGPE and restart your device to save these changes.
4. Edit the Windows Security Options
Configuring the Security options in the Local Security Policy could also help. So, let’s check out the steps you need to follow:
- Type Local Security Policy in the Start menu search bar.
- Right-click on the Best match result and select Run as administrator.
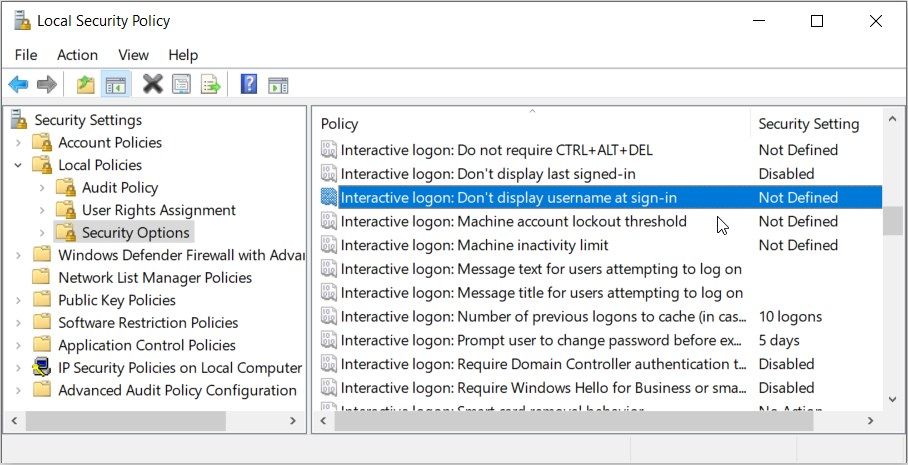
- Navigate to Security Settings > Local Policies > Security Options.
- Double-click the Interactive Logon: Don’t Display username at sign-in option on the right-hand side.
Select the Disabled option on the next screen. From there, click Apply and then click OK.
Apply the same changes to the Logon: Don’t Display Last Signed-in option, and then restart your PC to save these changes.
5. Tweak the Right Registry Keys
Editing some Registry keys could also help you tackle the issue at hand. But if you edit the wrong keys, the Registry Editor might end up causing harm to your device. To be on the safe side, consider backing up the Registry before you proceed.
Now, here’s how to restore missing user accounts using the Registry Editor:
- Press Win + R to open the Run command dialog box.
- Type regedit and press Enter to open the Registry Editor.
- Copy-paste the following command into the address bar:
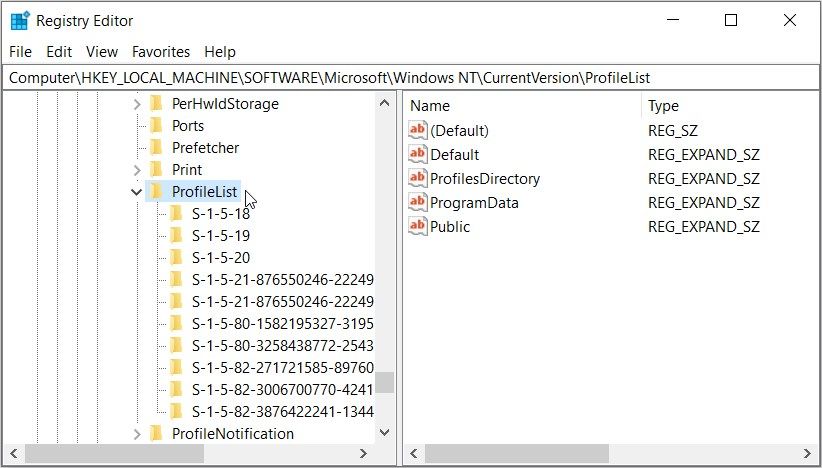
Computer\HKEY_LOCAL_MACHINE\SOFTWARE\Microsoft\Windows NT\CurrentVersion\ProfileList
Below the "ProfileList" folder, you should see a couple of subfolders that represent each of the user's accounts on your PC.
Now, follow these steps to enable all the user accounts:
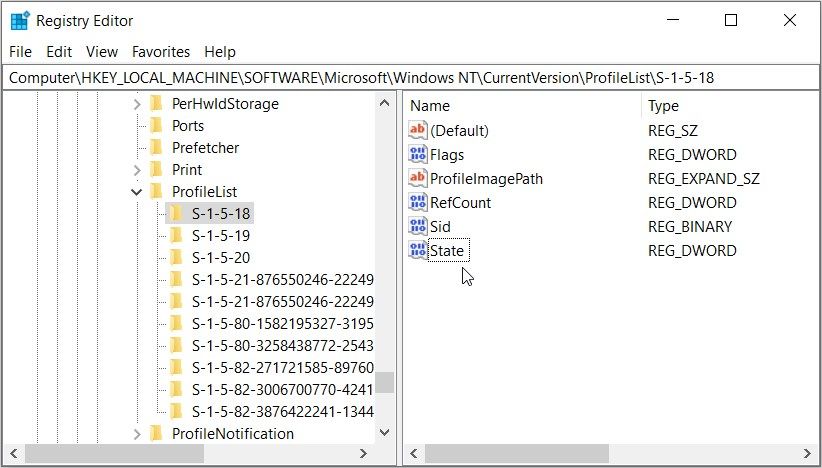
- Click the first user account profile (subfolder) below the "ProfileList" folder. In this case, we’ll pick the S-1-5-18 profile.
- Double-click the State value on the right-hand side.
Set the Value data to 1 and press OK to enable the user account. Apply the same changes to the other user accounts (subfolders) below the "ProfileList" folder.
Finally, close the Registry Editor and restart your PC to save these changes.
6. Update or Reset Your Windows Device
Still can’t resolve the issue? If so, then updating your Windows device could help. When you update Windows, the system gets rid of the system bugs that cause your device to malfunction. In this case, an update could help restore your missing user accounts.
And if the issue persists, you might consider resetting your PC. But since this process is quite risky, it’s best to use it as a last resort.
You've Successfully Restored All Your User Accounts
It’s quite strange when the Windows login screen doesn’t show some of your user accounts. But fortunately, you can easily restore those accounts using any of the solutions we’ve covered.

