
When you accidentally delete a file, that awful feeling sweeps over you. The cold feeling, the unease at the thought of lost work, lost hours, or a lost memory.
You'll be glad to hear that all is not lost immediately. There is a chance you can recover the deleted file if you act swiftly. Using the Windows File Recovery, you can attempt to restore the file to its original location.
Here's how you use Windows File Recovery to recover lost data.
What Is Windows File Recovery?
Windows File Recovery is a command-line app you can use to attempt to recover files deleted from your computer. Microsoft released the file recovery tool in 2020, and you can use it to try and restore data on your hard drive, external drives, and USB flash drives. It will not work with cloud storage devices and network file shares.
The Windows File Recovery tool is free to use and available to Windows 10 version 2004 (Build 19041 and onwards). Unsure which Windows version you have? Here's how to check which version of Windows you're using.
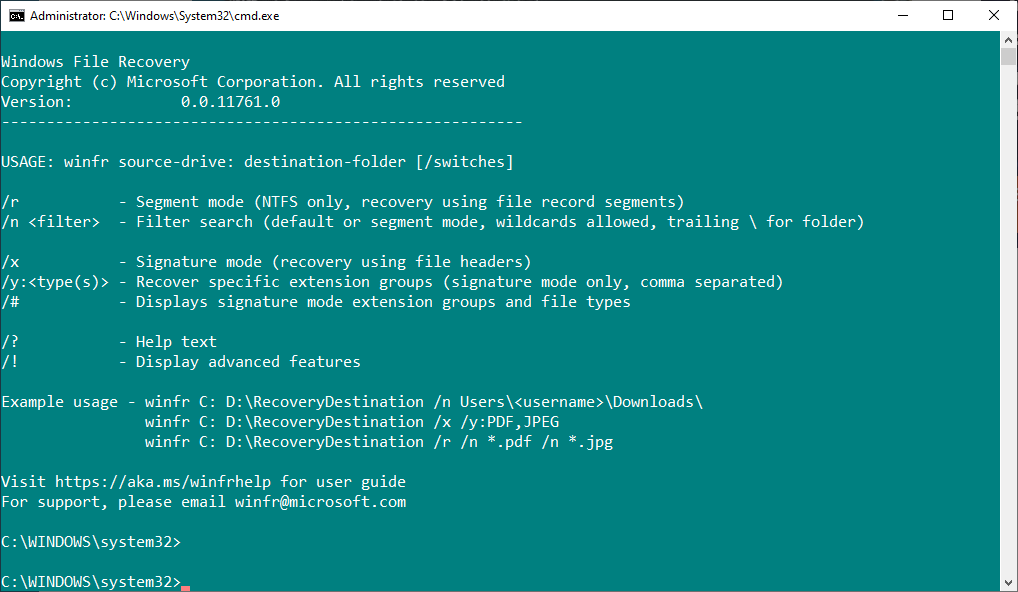
You should note that the Windows File Recovery tool is a command-line tool. It doesn't have a graphical user interface (GUI) with buttons to click. You must input commands to recover your data. While that sounds a little tricky, the commands are easy to learn.
Continue reading for a tutorial on how to restore your data using the Windows File Recovery tool and its commands.
Windows File Recovery Modes
The Windows File Recovery tool has three operating modes:
- Default: Uses the Master File Table to locate lost files.
- Segment: Uses file summaries to search for lost files.
- Signature: Searches for specific file types.
The Master File Table is like a huge table of contents for your hard drive, detailing the location of every file. When you delete a file, the MFT updates, marking the disk space available for new data.
However, data doesn't immediately gush into the new space. Although the space is marked available, the existing data isn't overwritten until your computer specifically writes data to that space. This is the reason data recovery is possible.
That said, solid-state drives (SSDs) play by a different set of rules regarding deleting data.
Because of how SSDs manage data deletion, you might struggle to recover data from the drive or only find snippets of data instead of whole files.
How to Recover Lost Data with the Windows File Recovery Tool
Windows File Recovery tool is a great free file recovery option, but it requires a bit of learning. The following tutorial guides you through the basic file recovery process using the tool, with some explanations as to the commands you input.
1. Download and Install Windows File Recovery
The first thing to do is to download and install the Windows File Recovery tool. Head to the Microsoft Store page using the link below, then select Get. The app will download and install automatically.
Download: Windows File Recovery for Windows 10 (Free)
After the installation completes, Launch the tool. Alternatively, input windows file recovery in your Start Menu search bar and select the Best match.
2. Recover a Single File with Windows File Recovery
Let's look at the basic file recovery. Windows File Recovery requires you to recover data to a separate drive. It cannot recover data from and to the same drive simultaneously.
The following command allows me to attempt to restore a specific file from my C: drive for recovery to a folder on my D: drive:
winfr C: D: /n \Users\Gavin\Documents\Reports\importantreport.docx
The Windows File Recovery tool will scan for the file. When (and if) found, it will restore the file to a folder on the other drive. Microsoft creates a recovery folder automatically, with the name Recovery_[date and time].
3. Recover Specific File Types from a Single Folder
You can use Windows File Recovery to restore data for specific file types. If you want to recover a specific file type or multiple file types from a folder, use the following command:
winfr C: D: /n \Users\Gavin\Pictures\*.JPEG \Users\Gavin\Pictures\*.PNG
The above command will scan the folder for JPEGs and PNGs and recover any data to the recovery folder.
4. Recover a Folder with Windows File Recovery
If you want to recover an entire folder, use the following command:
winfr C: D: /n \Users\Gavin\Documents\Reports\
Just make sure that the output folder is large enough for any recovered data.
5. Recover Any File Including a Specific Term
Windows File Recovery tool can scan for filename terms rather than a filetype. You can use the filename search with the segment mode to find old files, of which only small snippets remain.
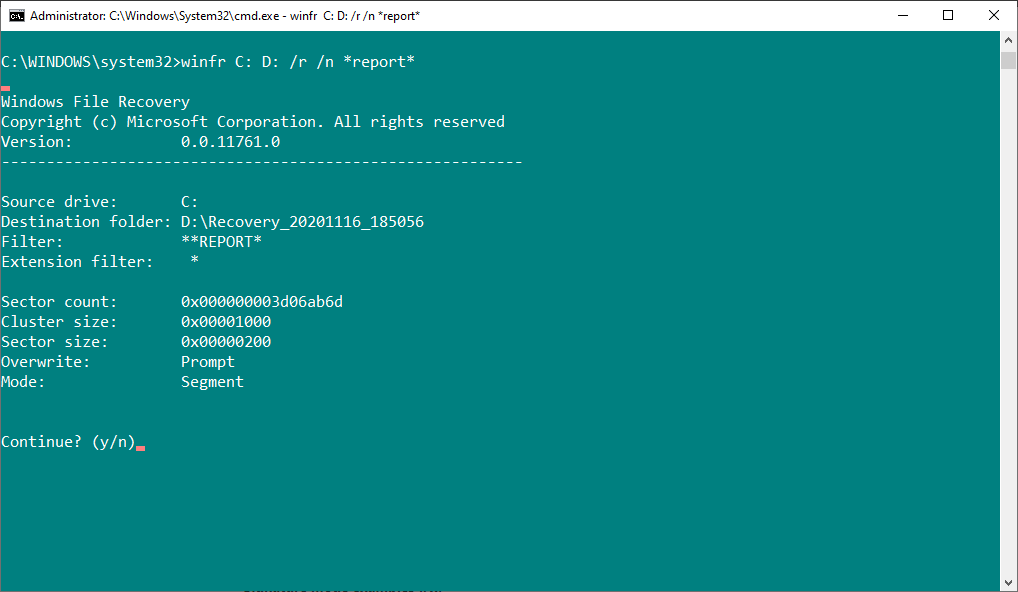
For example, the following command will attempt to recover any files with the string "report" using wildcard characters:
winfr C: D: /r /n *report*
Please be aware that scanning and attempting to recover from an entire drive can take a long time.
6. Recover Specific File Signatures
Windows File Recovery can attempt to recover lost data using specific file signatures. That means, for example, instead of searching for "JPEG" and only that file type, Windows File Recovery can attempt to recover similar file types, such as JPG, JPE, JIF, and so on.
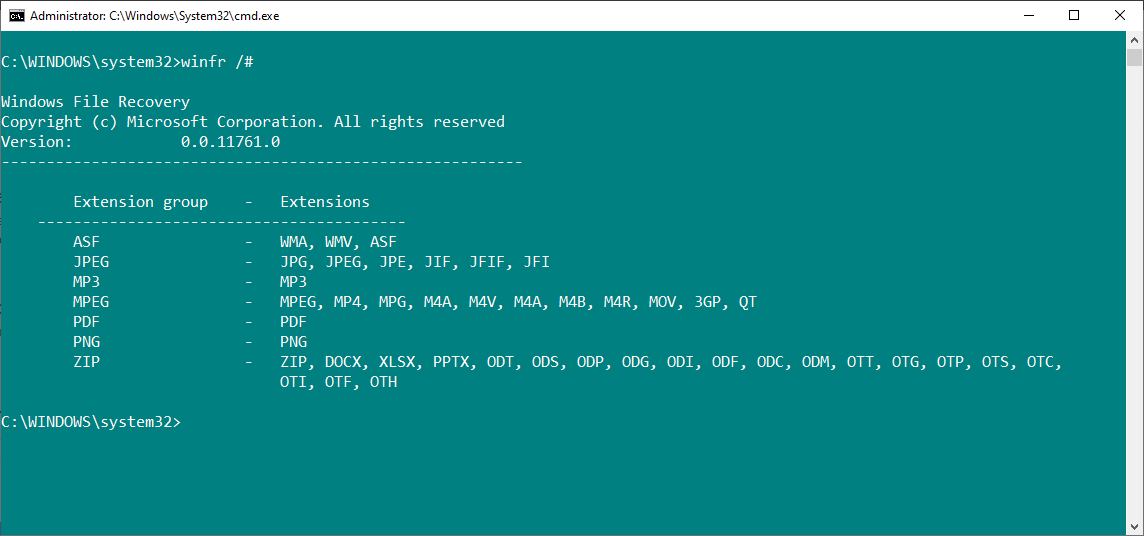
The signature scan mode is limited to the file signature types in the above image. Still, it provides decent coverage for many common file types, especially common document types in the ZIP extension group.
If you want to check the signature file extensions group list yourself, use the following command:
winfr /#
You can use the following command to attempt to recover JPEG file extensions and PNG file extensions:
winfr C: D: /x /y:JPEG,PNG
Please note that there are no spaces between "/y:JPEG,PNG" as this is the correct syntax for the command.
7. Windows File Recovery Advanced Commands and Syntax
The Windows File Recovery tool includes a list of advanced commands and syntax. You can access the advanced command line syntax using the following command:
winfr /!
The advanced commands provide extra control over the file recovery process or provide additional options for creating script files.
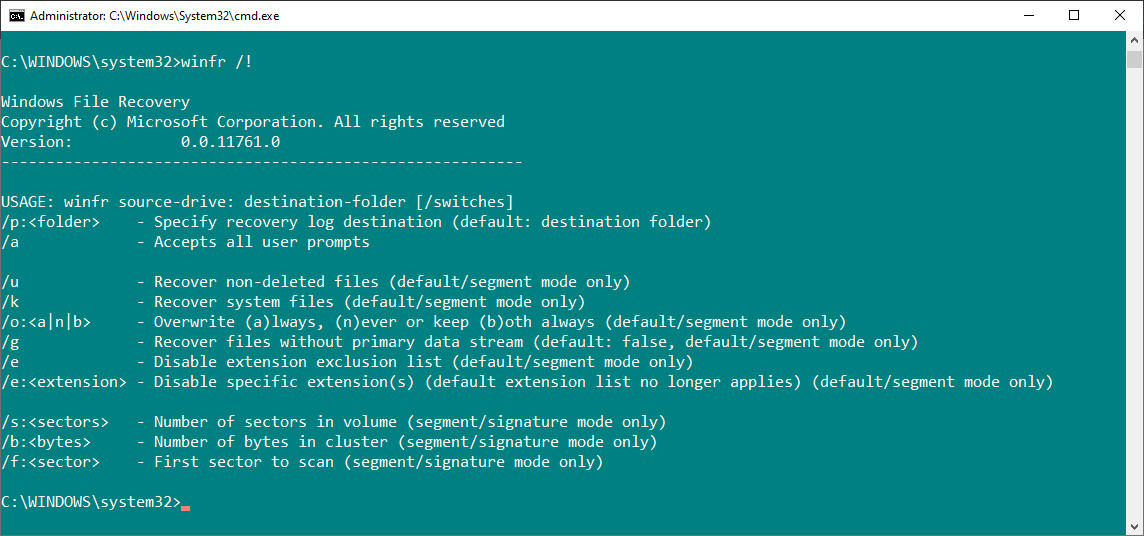
One of the most interesting advanced command-line options is "/e", the file filter toggle. The Windows File Recovery tool filters out heaps of file types automatically. This helps reduce the recovery time for file types you do want and make your file recovery results easier to understand.
Does the Windows File Recovery Tool Work?
Yes, the Windows File Recovery tool works just fine. The success of the tool (and any consumer file recovery tool) depends on the length of time between deletion and running the file recovery process. The bigger the gap, the lower the chances of recovery.