Quick Links
Key Takeaways
- Split View in macOS allows you to view two windows on your Mac simultaneously, making multitasking easier.
- You can enter Split View on a Mac using the Enter Full Screen button or Mission Control.
- While in Split View, you can adjust the window size, swap positions, and replace a tiled window to make the most of it.
Tired of switching back and forth between two app windows on your Mac? The Split View feature in macOS makes multitasking a lot easier. Read on to learn how to split the screen on your Mac and use two apps simultaneously.
What Is Split View in macOS?
Split View is one of the useful macOS features that makes your life easier. It allows you to view two windows on your Mac at the same time without them getting overlapped or jumbled with other opened windows.
If you don't have an extra monitor, Split View is a great option when you need to use two apps side-by-side on your Mac. For example, with Split View, you can scroll through a document on one side of your Mac's screen and type information into Numbers on the other side.
This feature is a lifesaver for people who often multitask on their computers. There's one minor downside to it, though—you can't use more than two apps in Split View at once.
How to Split the Screen on a Mac
You can split the screen on your Mac using the Enter Full Screen button or Mission Control. We'll teach you both methods below.
Enter Split View on a Mac Using the Enter Full Screen Button
Most app windows on macOS have an Enter Full Screen button that lets you put them in full-screen view or tile them to the left or right half of the screen. You can use that to put an app in Split View with these steps:
- Open the two apps you want to use side by side.
-
Hover the cursor over the green button in the top-left corner of either app's window.
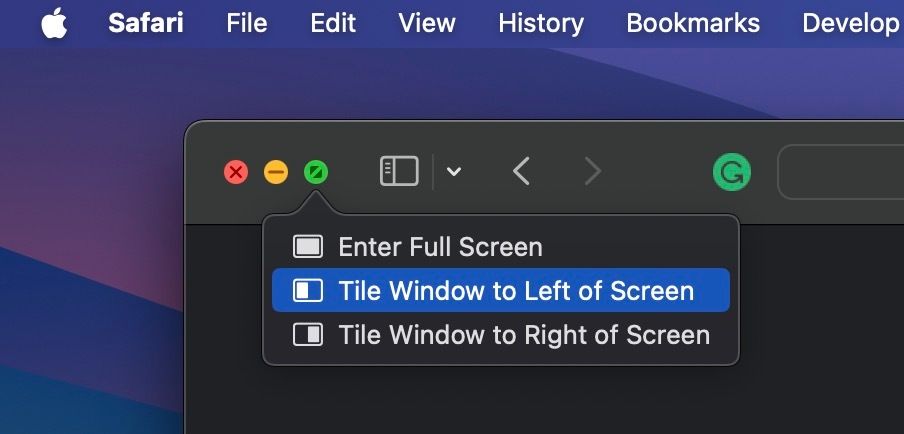
- Click the second or third option from the context menu according to your preference on snapping to the Left or Right.
-
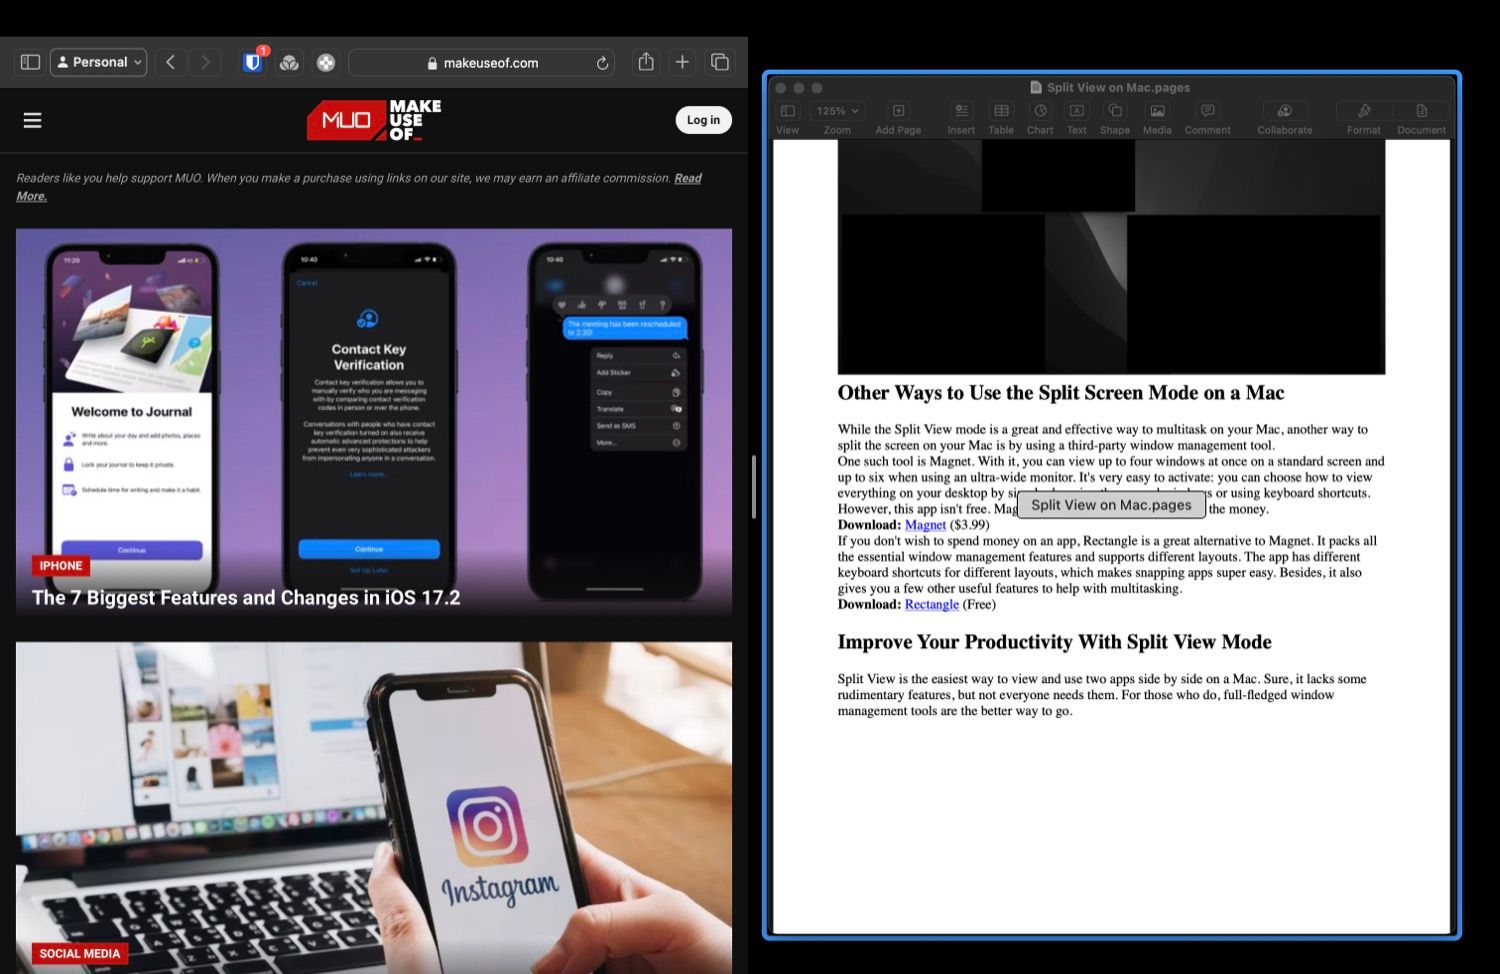
Once the app is tiled, click the second app window, which appears on the other half of the screen, to tile it.


Enter Split View on a Mac Using Mission Control
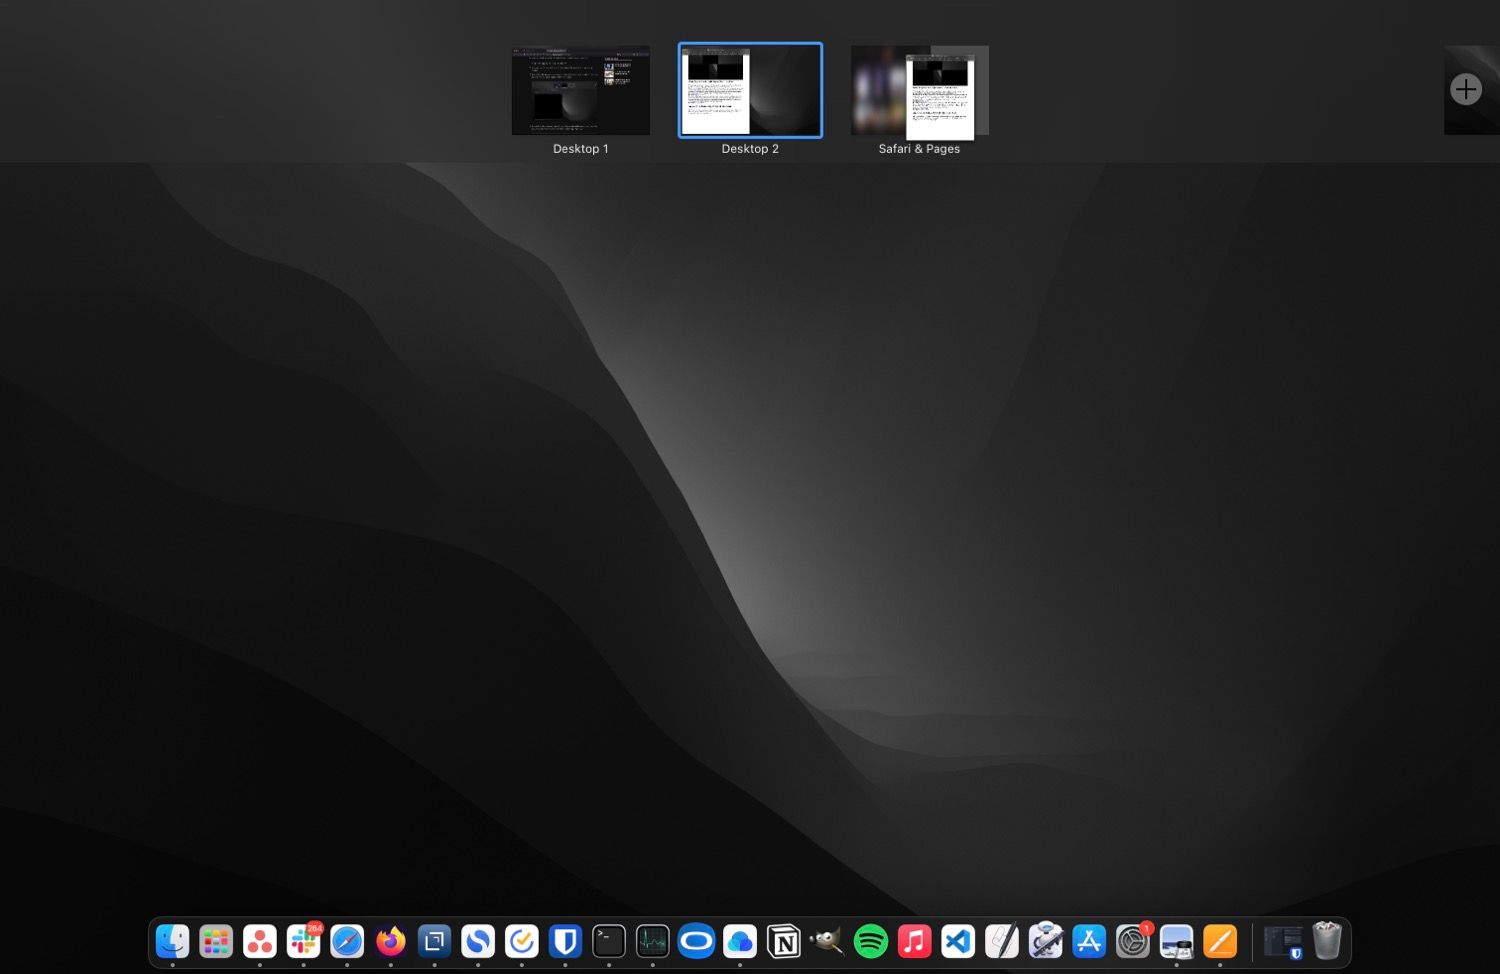
Mission Control is a macOS feature that shows you all open apps and spaces on your desktop to make them easily accessible. Here's how to use it to put two apps side by side:
- Open the two apps you want to use in Split View.
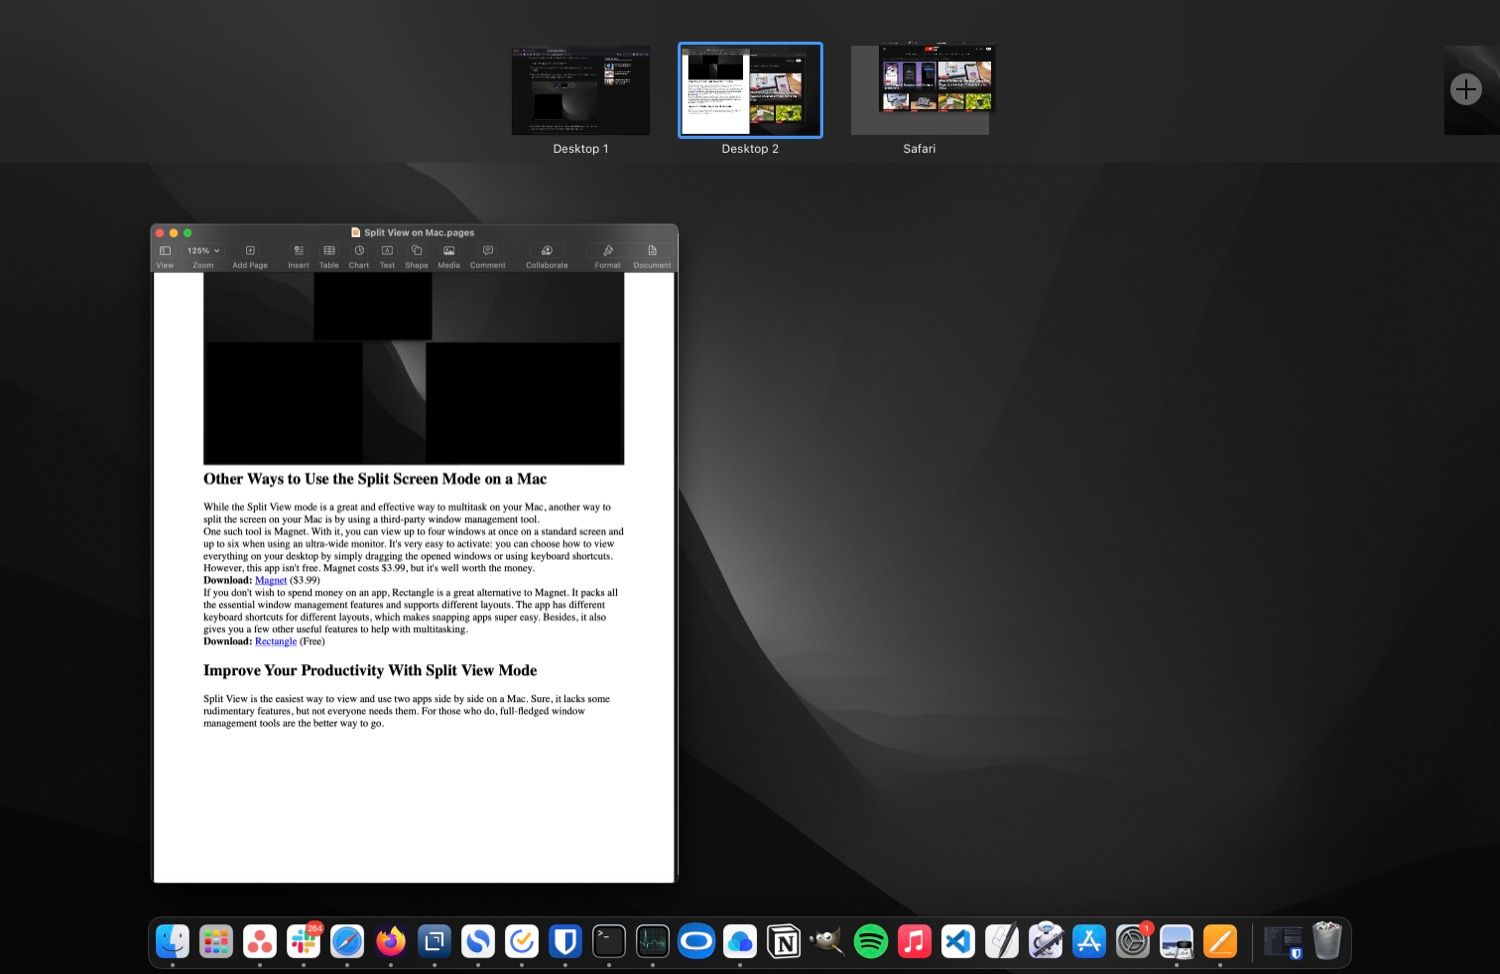
- Bring up Missing Control. You can do this by hitting the Mission Control (F3) key on your keyboard. Alternatively, you can swipe up with three fingers on your trackpad or double-tap the Magic Mouse with two fingers.
-
Click on an app window and hover it over the left or right of the active space at the top of the screen. When you see a window with a plus (+) button, drop the app window on top of it.
-
Now, click and drag the second app window over the new space and drop it there to put it next to the other app in Split View.


How to Adjust the Windows in Split View
Once you've put two apps in Split View on your Mac, here are a few actions that can help you multitask more effectively.
Adjust the Split Screen Area
If you want the window on either side of the screen to be larger, click and drag the vertical separator between the two windows to the left or right, according to your liking. Remember that there's a limit to how much you can adjust the size of the windows in Split View.

Switch Window Positions
For times when you feel it'd be more convenient to view one of the apps on the left side of the screen rather than on the right (or vice versa), you can easily switch the window's position without exiting Split View.
To do this, move the cursor to the very top of the screen. This will expose the window's title bar. Click the title bar of the app you want to move and drag it to the other side of your Mac's screen.

Also, don't fret if you can't see your Mac's Dock—it's temporarily hidden when you're in Split View. If you want the Dock to show up, simply move your cursor to the bottom of the screen.
Replace a Tiled Window in Split View
Lastly, if you want to use a different app than the two currently open in Split View, you can replace a tiled app window with another.
For this, go back to the desktop space where you have the two apps open side by side. Hover your cursor over the green button on the app window you want to replace and select Replace Tiled Window.

When macOS shows you all the open apps on your desktop, click on the one you want to use, and it'll be stacked next to the existing one in split-screen mode.

How to Exit Split View in macOS
There are four ways to exit the Split View mode on a Mac. The fastest way is to press the esc key. This will take the app (on which you press the key) out of Split View and put the other app in full-screen mode. However, this method doesn't work on apps that use the esc key for some other action.
Alternatively, you can exit Split View using the green button. With this method, you can choose what happens to the app windows when you exit Split View by hovering over the green button and selecting either Move Window to Desktop or Make Window Full Screen. If you can't see the green button, move your cursor to the top edge of the screen.

If you're done working with one of the apps from the Split View screen, click the X button at the top-left corner of its window to close it. When you do this, the other app will open in full-screen mode.
Finally, you can also exit Split View using Mission Control. To do this, press the Mission Control (F3) key on your keyboard or swipe up with three fingers on the trackpad. Then, hover the cursor over the desktop space showing the windows in Split View and click the inwards-facing arrows to separate them.

Other Ways to Split the Screen on a Mac
While Split View is a great and effective way to multitask on your Mac, another way to split the screen on your Mac is by using a third-party window management tool for macOS.
One such tool is Magnet. With it, you can view up to four windows simultaneously on a standard screen and up to six when using an ultrawide monitor. It's effortless to activate; you choose how to view everything on your desktop by simply dragging the opened windows or using keyboard shortcuts. Magnet isn't free, but it's well worth the few dollars.
Download: Magnet ($4.99)

If you don't wish to spend money on a third-party app, consider using Rectangle instead. Its free offering packs all the essential window management features and supports different layouts. The app has different keyboard shortcuts for different layouts, which makes snapping apps super easy. Besides, it also gives you a few other useful features to help you multitask efficiently.
Download: Rectangle (Free, premium version available)
Split View is the easiest way to view and use two apps side by side on a Mac. Sure, it lacks some features, but not everyone needs more than the basics. For those who do, full-fledged window management tools are the better way to go.