
NTFS drive format may be standard for the Windows operating system, but macOS refuses to write to it. If you ever need to use an external disk with both a Mac and a Windows PC, you could encounter compatibility issues if you haven’t configured the drive correctly.
While your Mac can read NTFS drives—you can view contents and copy files—it stops short of being able to write. Therefore, you’ll need to use a workaround if you want your external disk to play well with both operating systems. Let’s discuss how you can read and write to an NTFS drive in macOS.
1. Format an NTFS Drive to FAT32 or ExFAT on Mac
If your NTFS drive doesn’t contain any important data, formatting to FAT32 or ExFAT is the simplest solution for sharing files between macOS and Windows. Once you’ve switched to a cross-compatible format, you’ll be able to read and write to your external disk in both operating systems. While either FAT format will work, FAT32 has several limitations, including a 4GB file size limit. Therefore, in most cases, ExFAT is the superior choice.
Formatting your drive will erase all the data on it.
Here’s how to format a hard drive to FAT32 or ExFAT in macOS:
- Launch Disk Utility.
- Select your NTFS volume in the sidebar and click Erase.
- Switch the format to FAT32 or ExFAT, rename if necessary, and click Erase.

Once you complete the process, your external disk will be in a friendly format that’s fully compatible with both macOS and Windows. If, however, your NTFS drive contains important data that you don’t want to delete, you’ll need to consider an alternative solution.
2. Use a Third-Party App to Write to NTFS on Mac
When you need a quick NTFS write solution for macOS, a good third-party app will get the job done. Most quality software designed for this task requires you to make a purchase, but free trials are available as well. Paragon NTFS for Mac is one of the slickest solutions on the market, so we’ll focus on that app here. You are, however, welcome to explore other options.
Here’s how to write to an NTFS disk using the Paragon software:
- Download and install Paragon NTFS for Mac.
- Launch the app and follow the setup prompts (restart required).
-
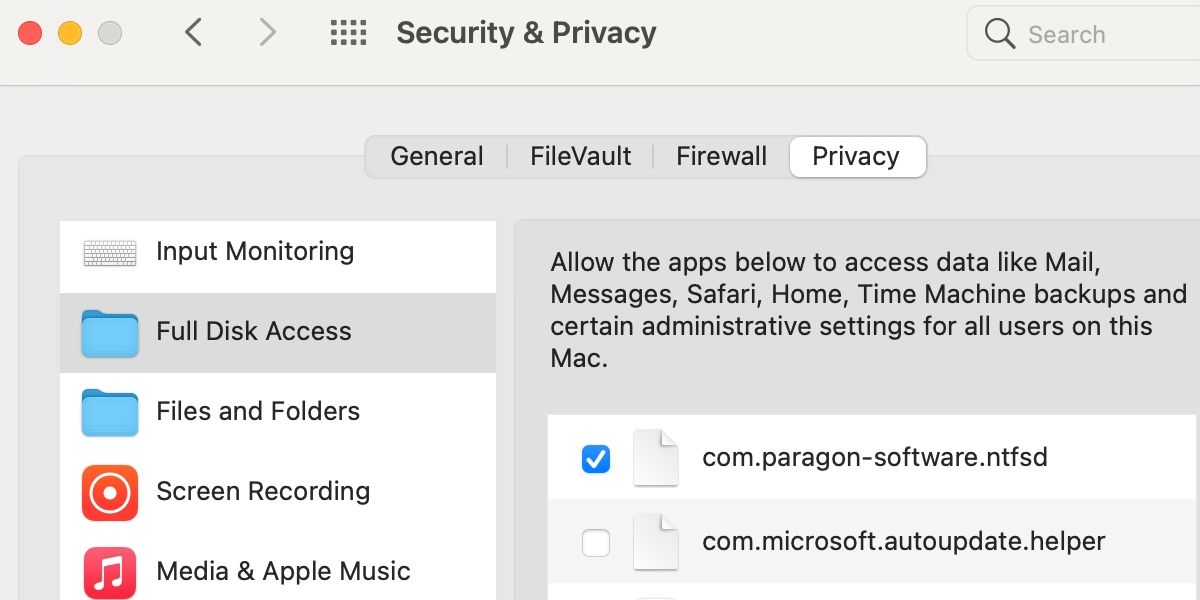
Grant Paragon Full Disk Access when prompted by going to System Preferences > Security & Privacy > Privacy. If needed, click the padlock at the bottom of the screen and enter your password to make changes.
-
Mount your NTFS drive if necessary.
- Open the disk in Finder and enjoy full read and write access.


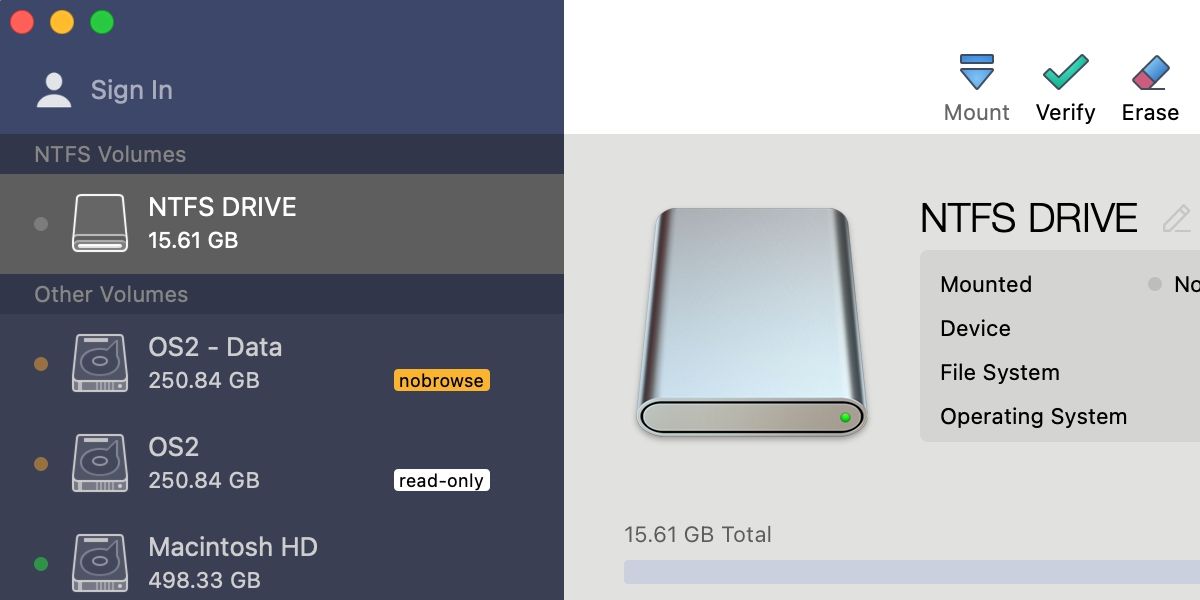
If you’ve already mounted your external drive, and it shows read-only in Paragon, you’ll need to unmount the disk and remount to gain full access. When you install the software, Paragon adds launch daemons to the root library folder, which means the appropriate processes will open in the background automatically when you start your Mac.
Paragon offers a 10-day free trial and a reasonable purchase price. On top of that, the software receives regular updates and is compatible with the latest versions of macOS and new Apple silicon hardware. If you frequently need to write to NTFS disks on your Mac, investing in a reliable application may be worth the spend.
Some totally free applications do exist, but quality and functionality are questionable in many cases. However, if you fancy yourself to be a bit of a technological pioneer, testing some unpaid options could lead to a welcome discovery.
3. Enable NTFS Write in macOS
Interestingly, macOS does have the ability to write to NTFS, but Apple disables the feature by default. To enable the tool, you’ll need to use Terminal, and you do so at your own risk. The feature is somewhat experimental—or, at the very least, unsupported by Apple—so the results can be unpredictable.
Whenever you make any significant changes to your system, you should always back up important information first. In this case, enabling a setting that affects disk write capabilities has the potential to corrupt hard drives and cause data loss. Therefore, you should proceed with caution.
If you understand the risks and wish to enable NTFS write mode in macOS, you can do so by following these steps:
- Launch Terminal with the NTFS drive connected to your Mac.
-
Enter the following command and press Return:
sudo nano /etc/fstab
- Type your admin password and press Return when prompted.
-
Enter the following command, replacing NAME with your external volume title:
LABEL=NAME none ntfs rw,auto,nobrowse
- Press Control + O to save, followed by Return.
- Press Control + X to exit nano.
- Eject your NTFS drive and reconnect it.
If your drive name contains spaces, you’ll need to represent them with \040, for example if your drive is called NTFS DRIVE you need to enter:
LABEL=NTFS\040DRIVE none ntfs rw,auto,nobrowse

When you complete the process, your external disk will be available in Volumes. Here’s a quick way to access your write-ready NTFS drive in macOS:
- Launch Finder.
- Click the Go menu and select Go to Folder.
- Type /Volumes and press Return.
From here, you can access your NTFS drive and should have full read and write access. If the Terminal method hasn’t worked, you should check that you entered all commands correctly. One out-of-place character is enough to derail the entire process.
4. Use Virtualization Software to Write to NTFS on Mac
Using virtualization software—such as Parallels—that allows you to run Windows on your Mac is another way to write to an NTFS drive. However, installing an entirely new operating system on your device to complete a simple task may not be worth the effort.
But if having access to Windows on your Mac will benefit you in other ways, exploring virtualization software may be worthwhile. If you’re using an Intel device, you could also consider Apple’s Boot Camp solution, but, at this stage, Apple silicon Mac users don’t have that option.
We’re not going to discuss the intricacies of virtualization or Boot Camp here, but knowing that other solutions exist will help you make an informed decision.
NTFS Is Somewhat Compatible With macOS
While NTFS drives won’t work on your Mac without additional tinkering, you can force compatibility when necessary. Using third-party software is perhaps the simplest solution when reformatting isn’t an option, and enabling NTFS writing through Terminal is viable if you’re comfortable with command lines and understand the risks.
But if you want to work between Windows and macOS the easy way, having a drive that’s formatted in either FAT32 or ExFAT will save you a lot of time and effort. The key is to configure the external disk before you fill it with important information.