Editing landscape photography can be one of the most challenging tasks to tackle as a beginner. Fortunately, Luminar AI is bridging the gap for users who are comfortable with smartphone editing but may feel out of their depths when it comes to professional photo editing software like Photoshop.
In this tutorial, we will cover two common types of landscape images, and show you how to improve them dramatically using Luminar AI.
Why Is Luminar AI Great for Beginners?
Have you ever taken a photo of a beautiful landscape, only to discover that your smartphone editing tools weren’t enough to do it justice? Then you get home, open up Photoshop, and realize it's way too complicated.
This is probably the number one reason why beginners should take a look at what Luminar AI can do, especially when it comes to landscape photography. It’s by far one of the easiest software suites to use, and can deliver both creative and dramatic results nearly every time.
Editing for Detail Enhancement and Adding a New Sky
A very common problem for landscape photos is the question of where to begin. Oftentimes, the image looks great when you originally take the picture, but it turns out to be not so impactful after a more thoughtful review.
In this example, we will offer a way forward for images that lack punch and could possibly be in need of a new sky to make the image more dramatic.
We will begin by choosing an appropriate template and effect. Then, we'll edit the fine details that will ultimately transform the image into a stunning landscape.
Feel free to download the same image from Unsplash and follow along.
Let’s get started!
-
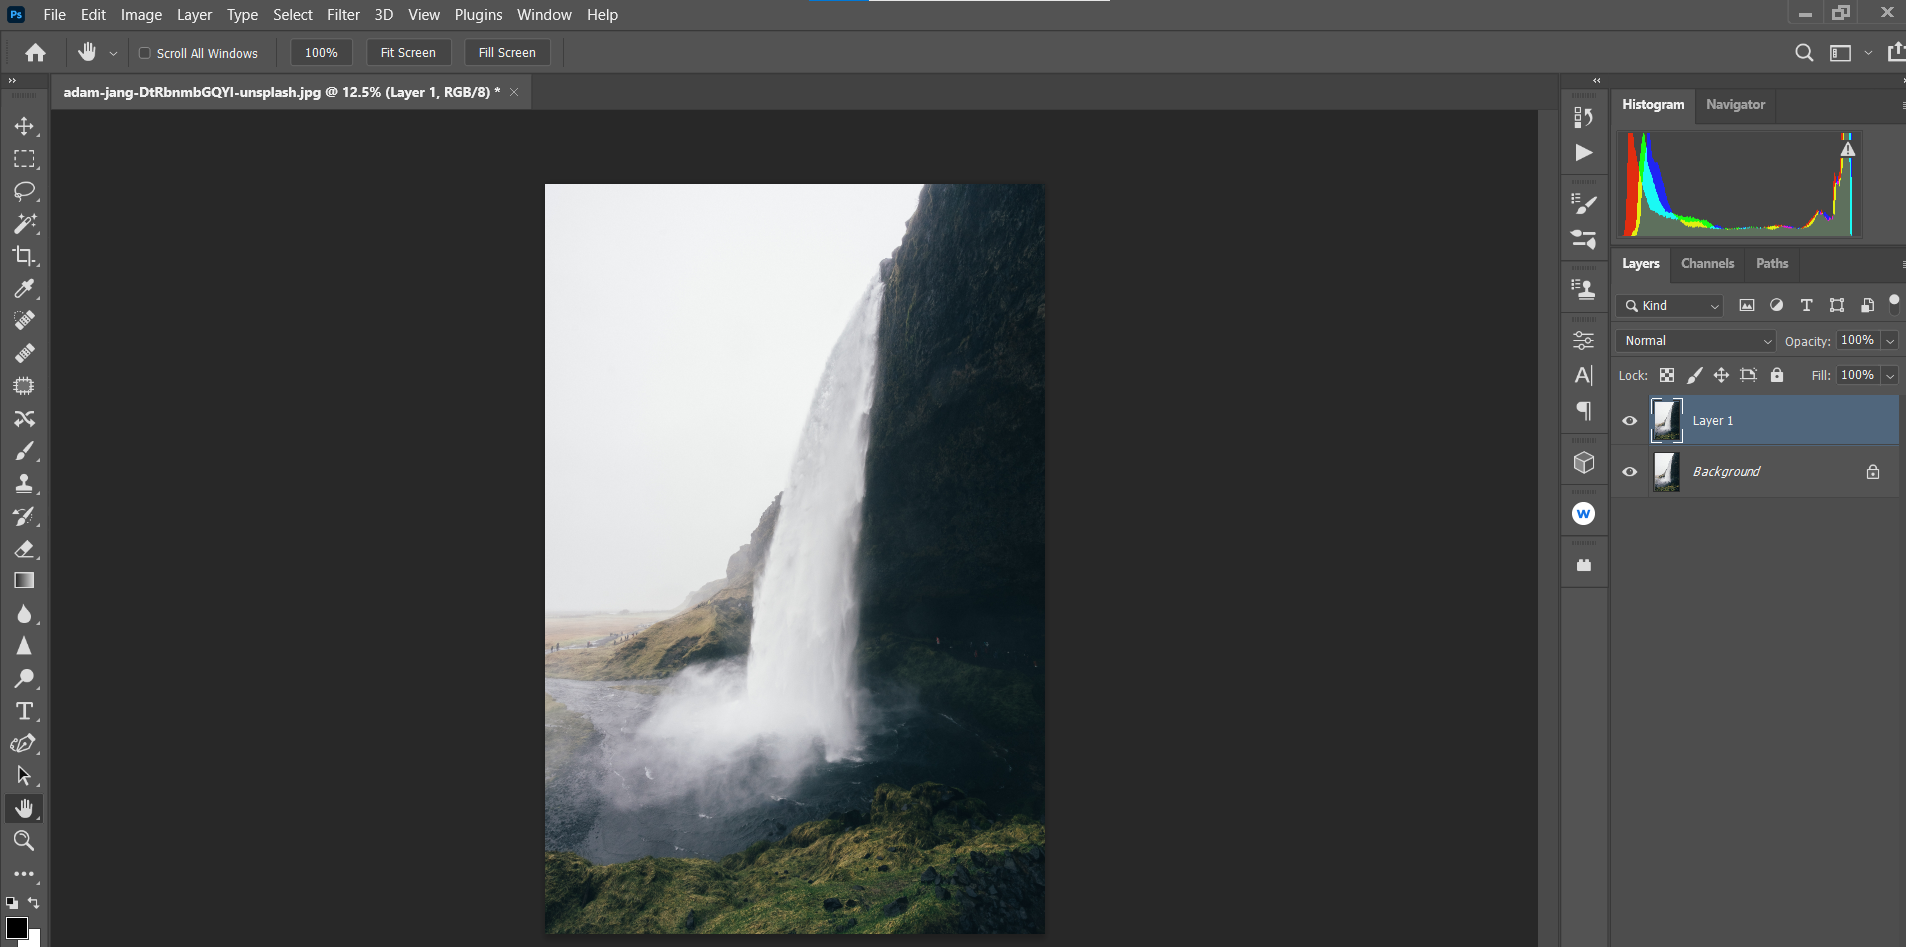
In Photoshop, create a duplicate layer by clicking Ctrl + J. If you don’t use Photoshop, skip the first three steps and simply load the image into Luminar AI. You can continue along with us on step four.
-
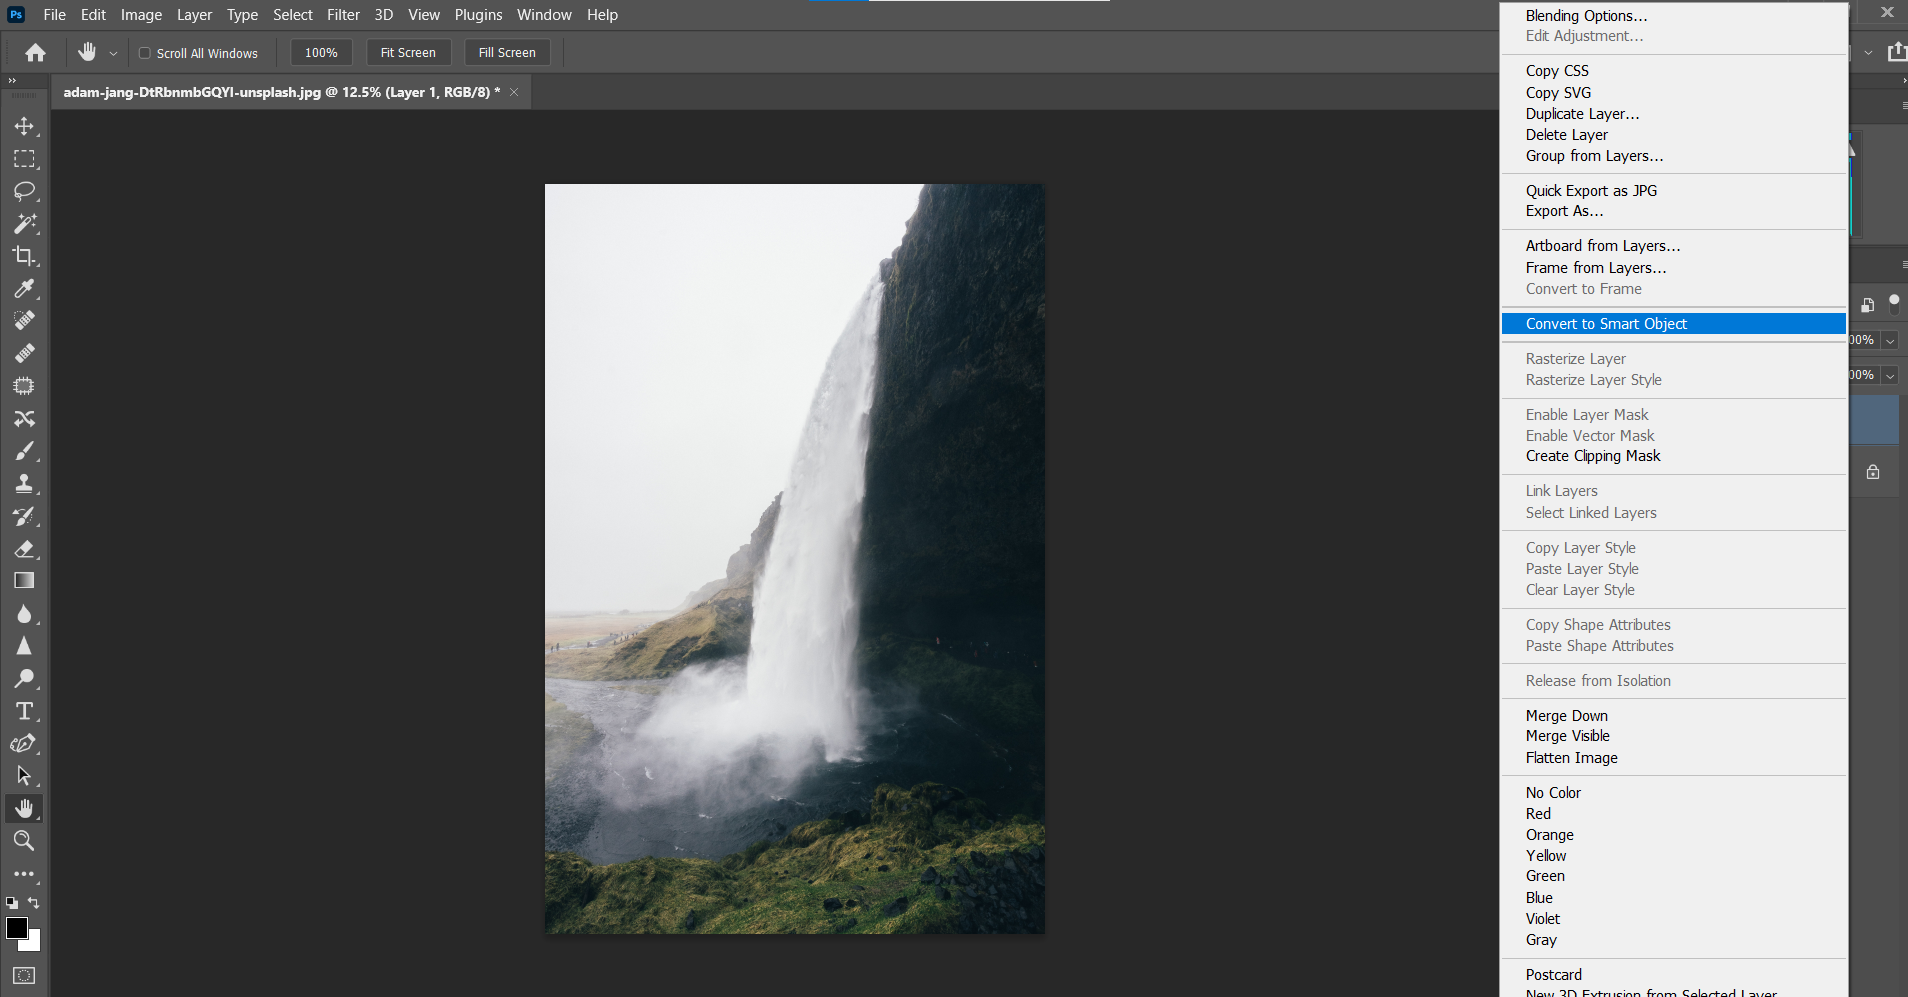
Convert the layer to a Smart Object by right-clicking on the Layer 1 copy. Then, select Convert to Smart Object.
-
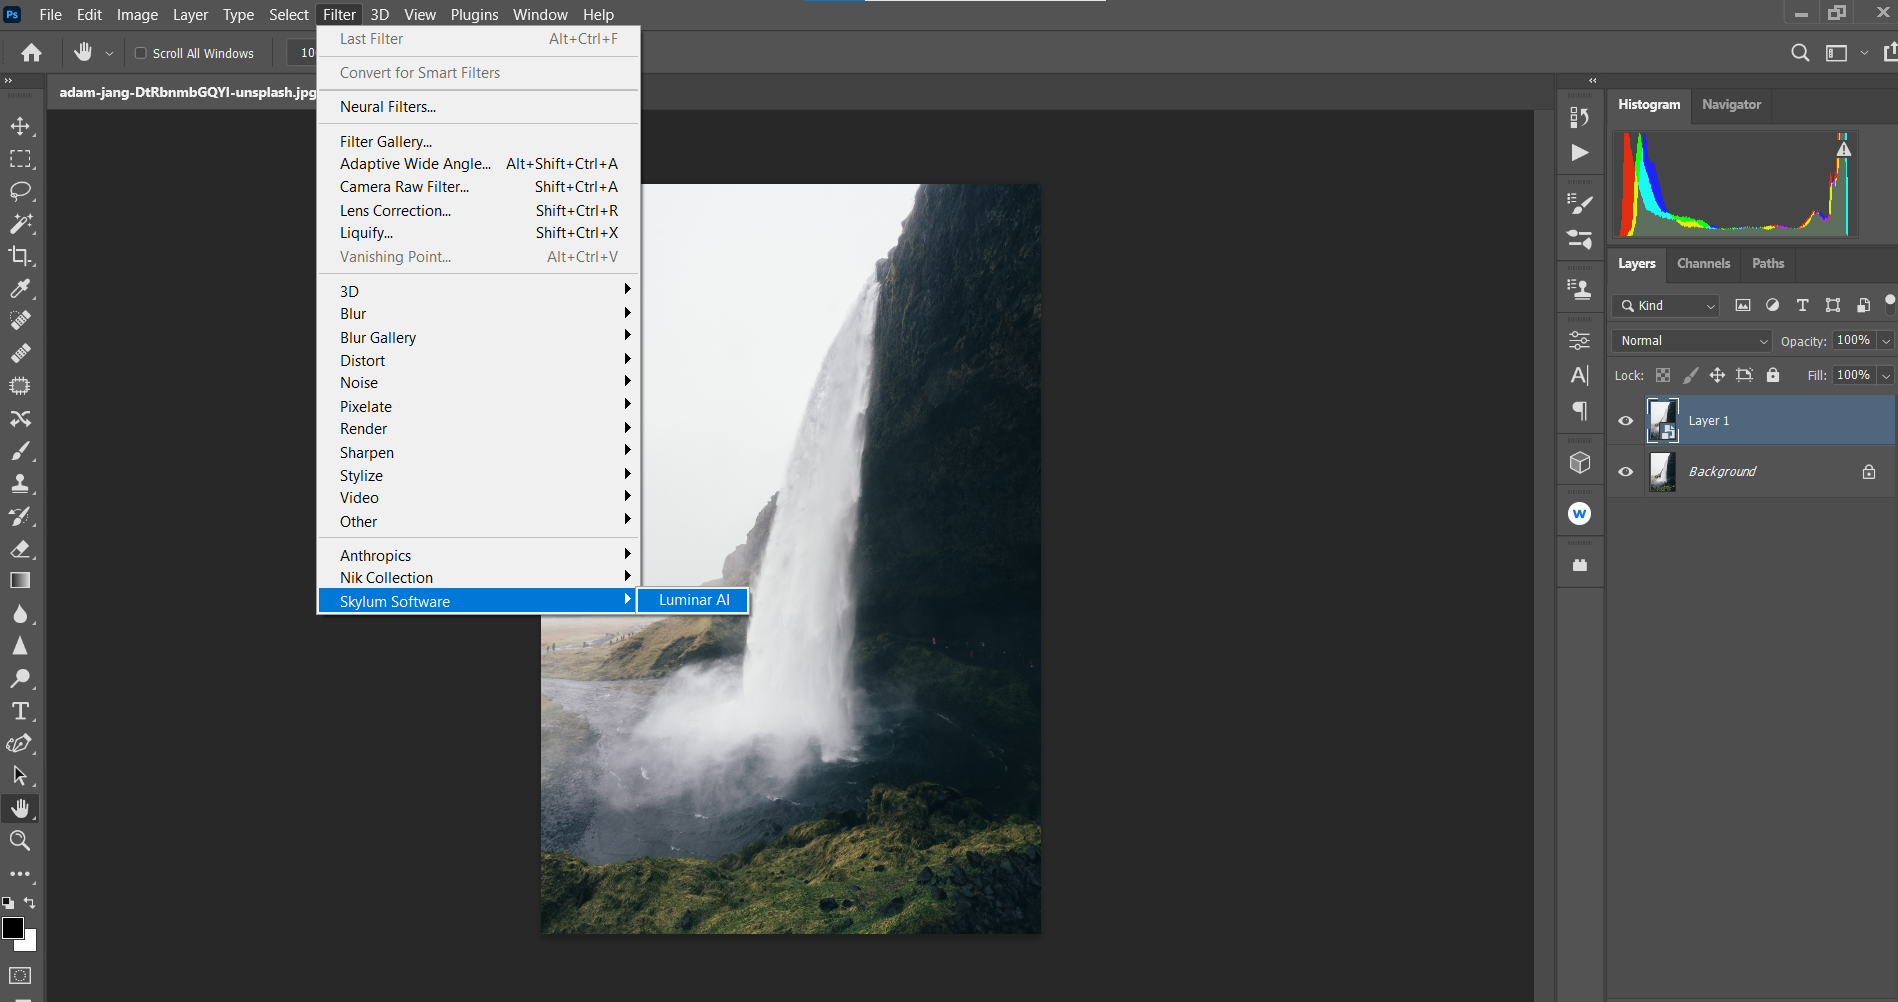
Go to Filter > Skylum Software > Luminar AI.
-
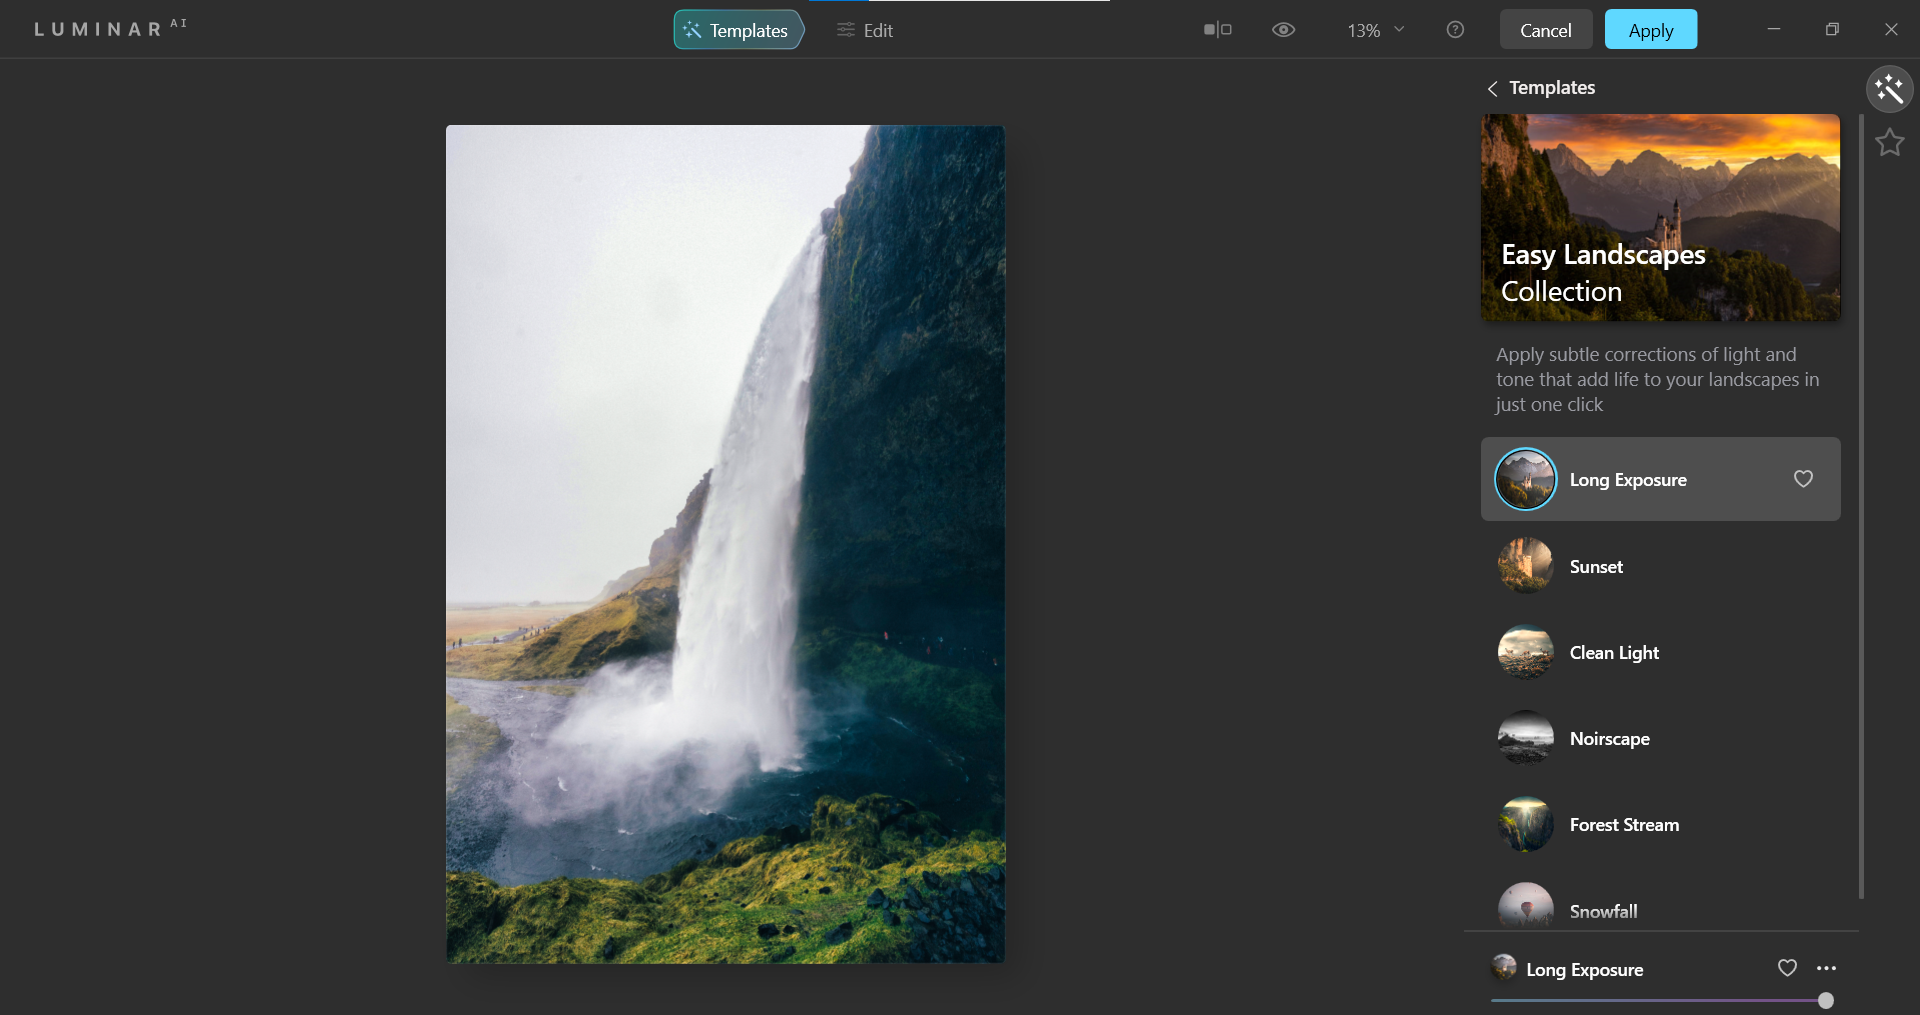
In the Templates menu, select Easy Landscape Collection. Then, select Long Exposure from the menu options.
-
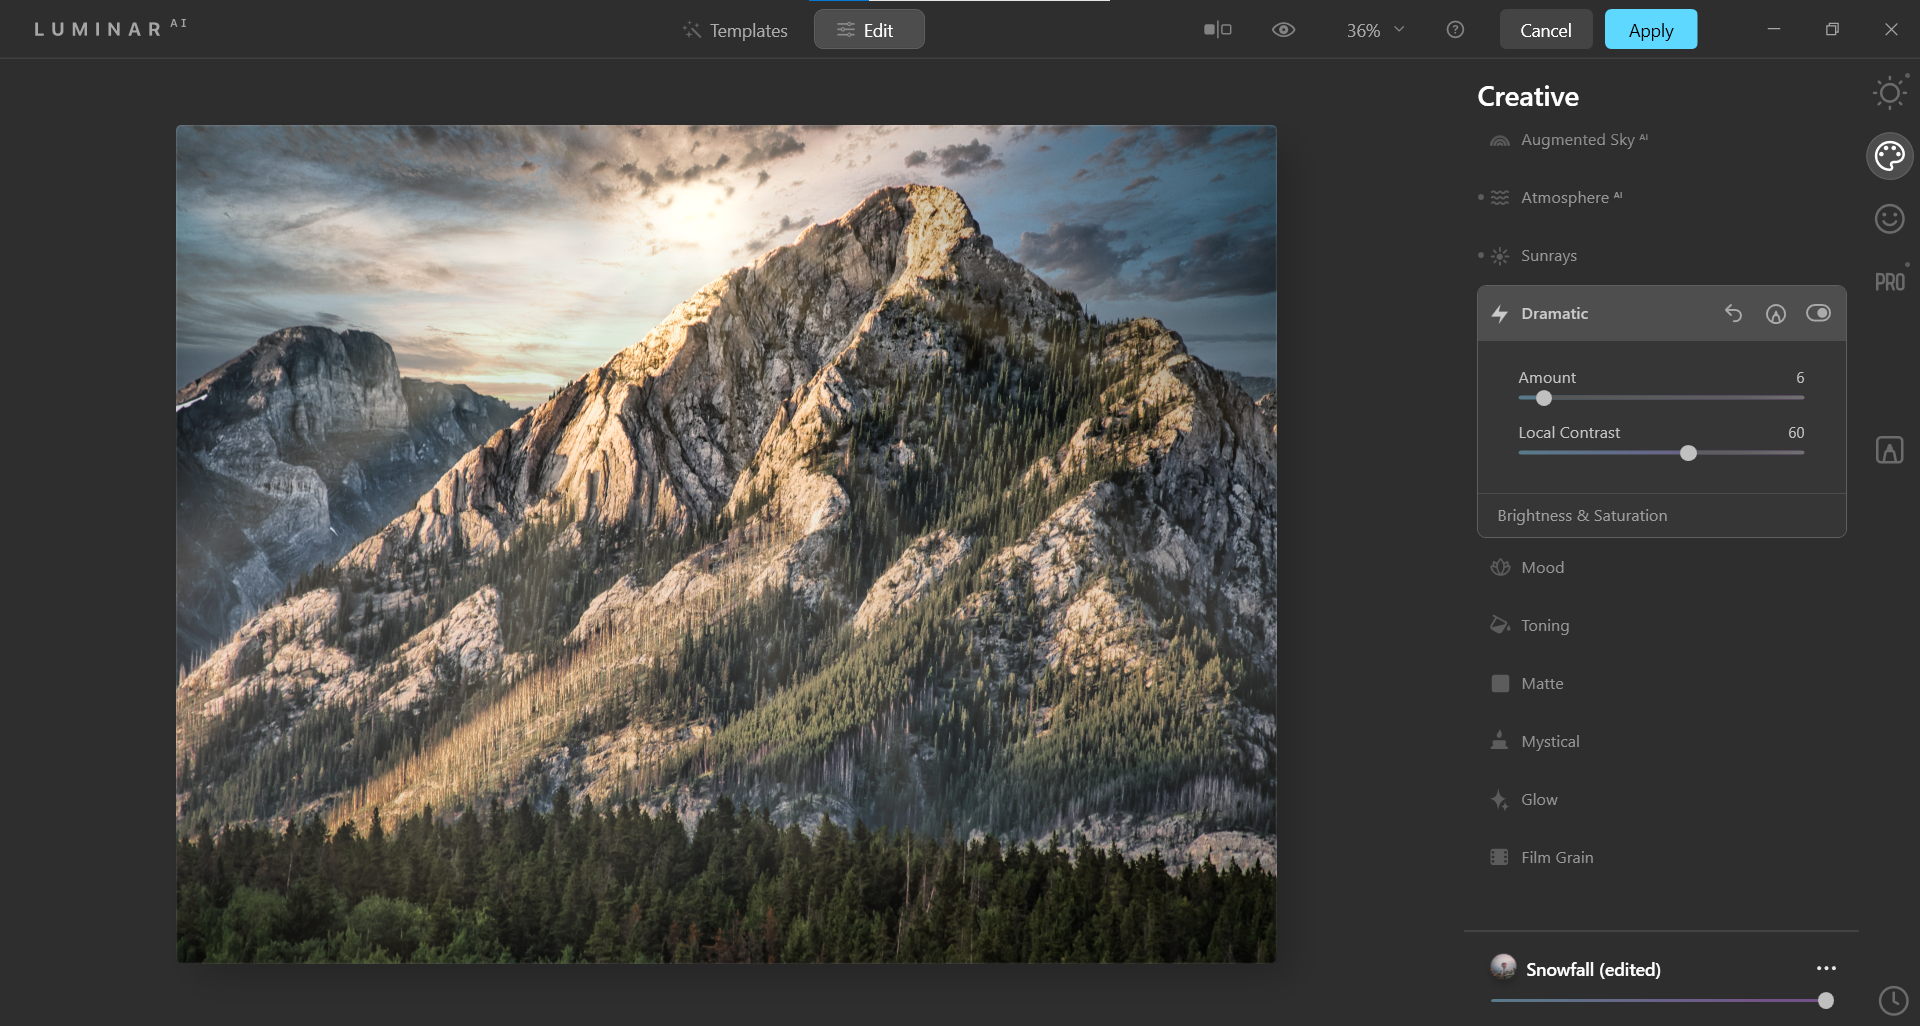
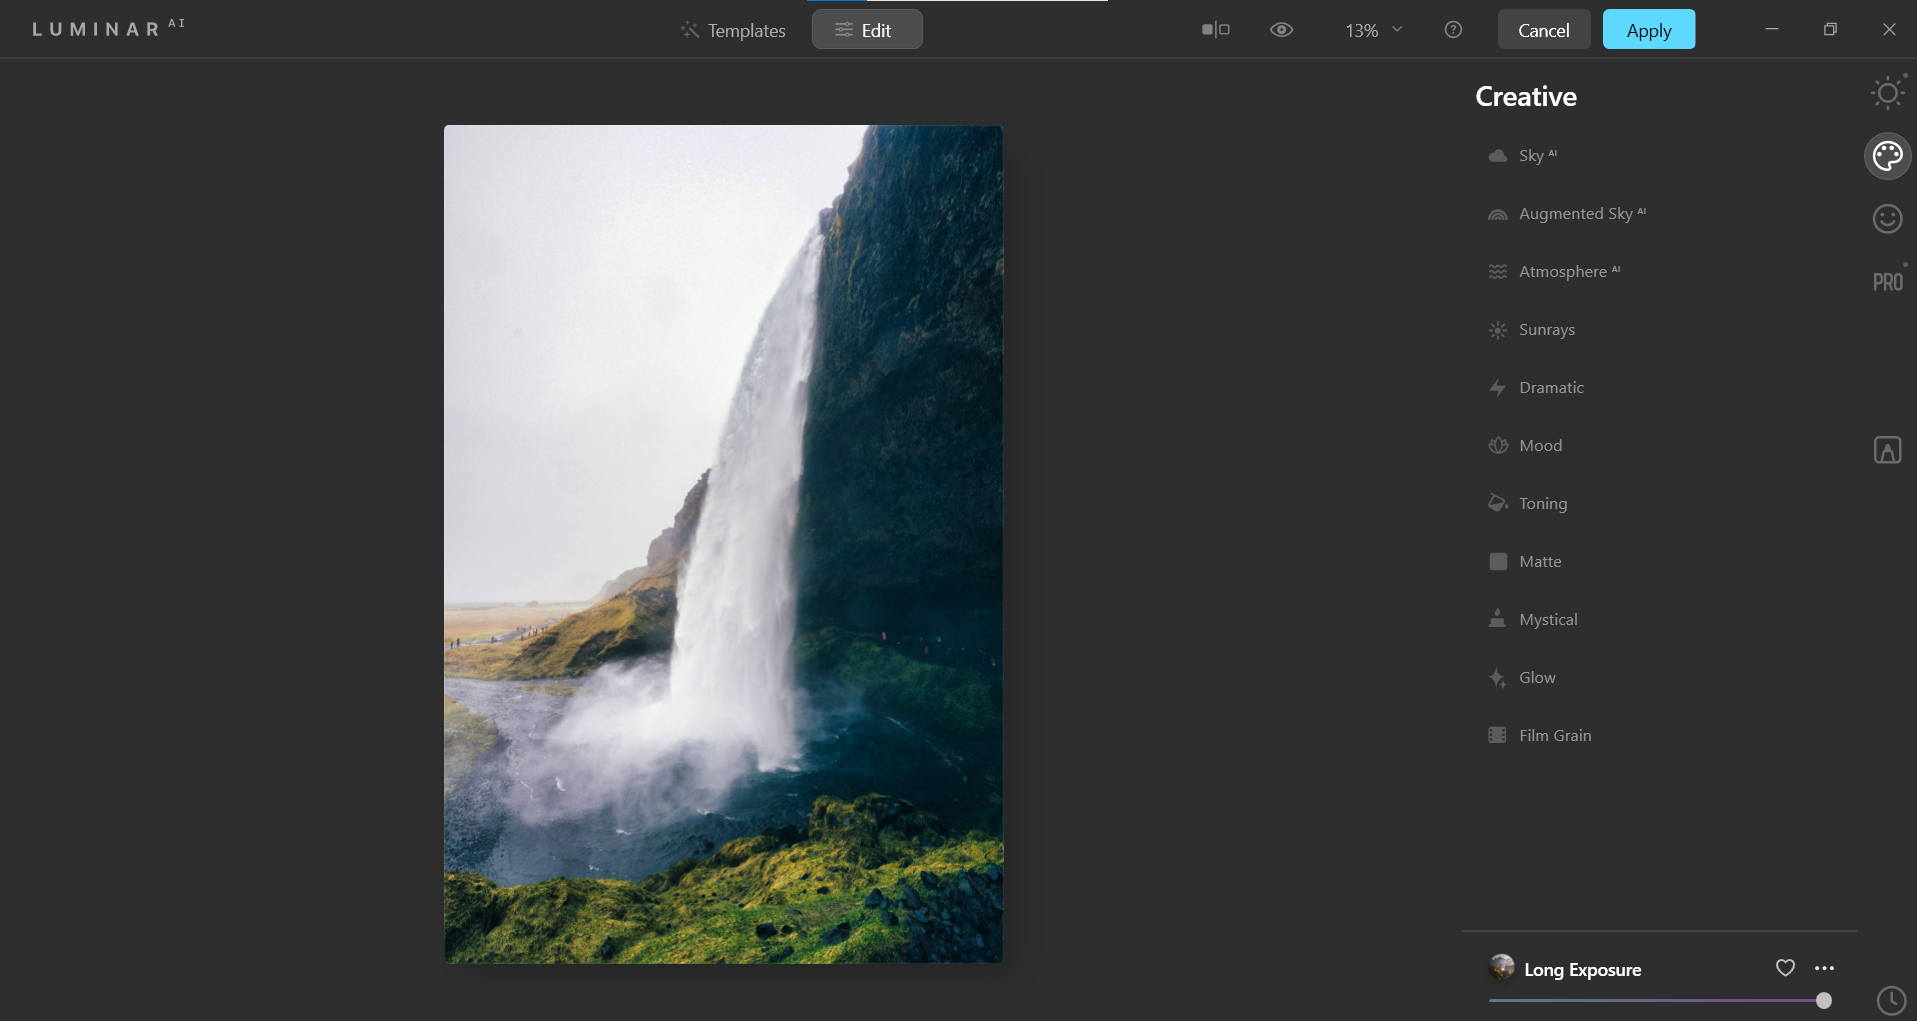
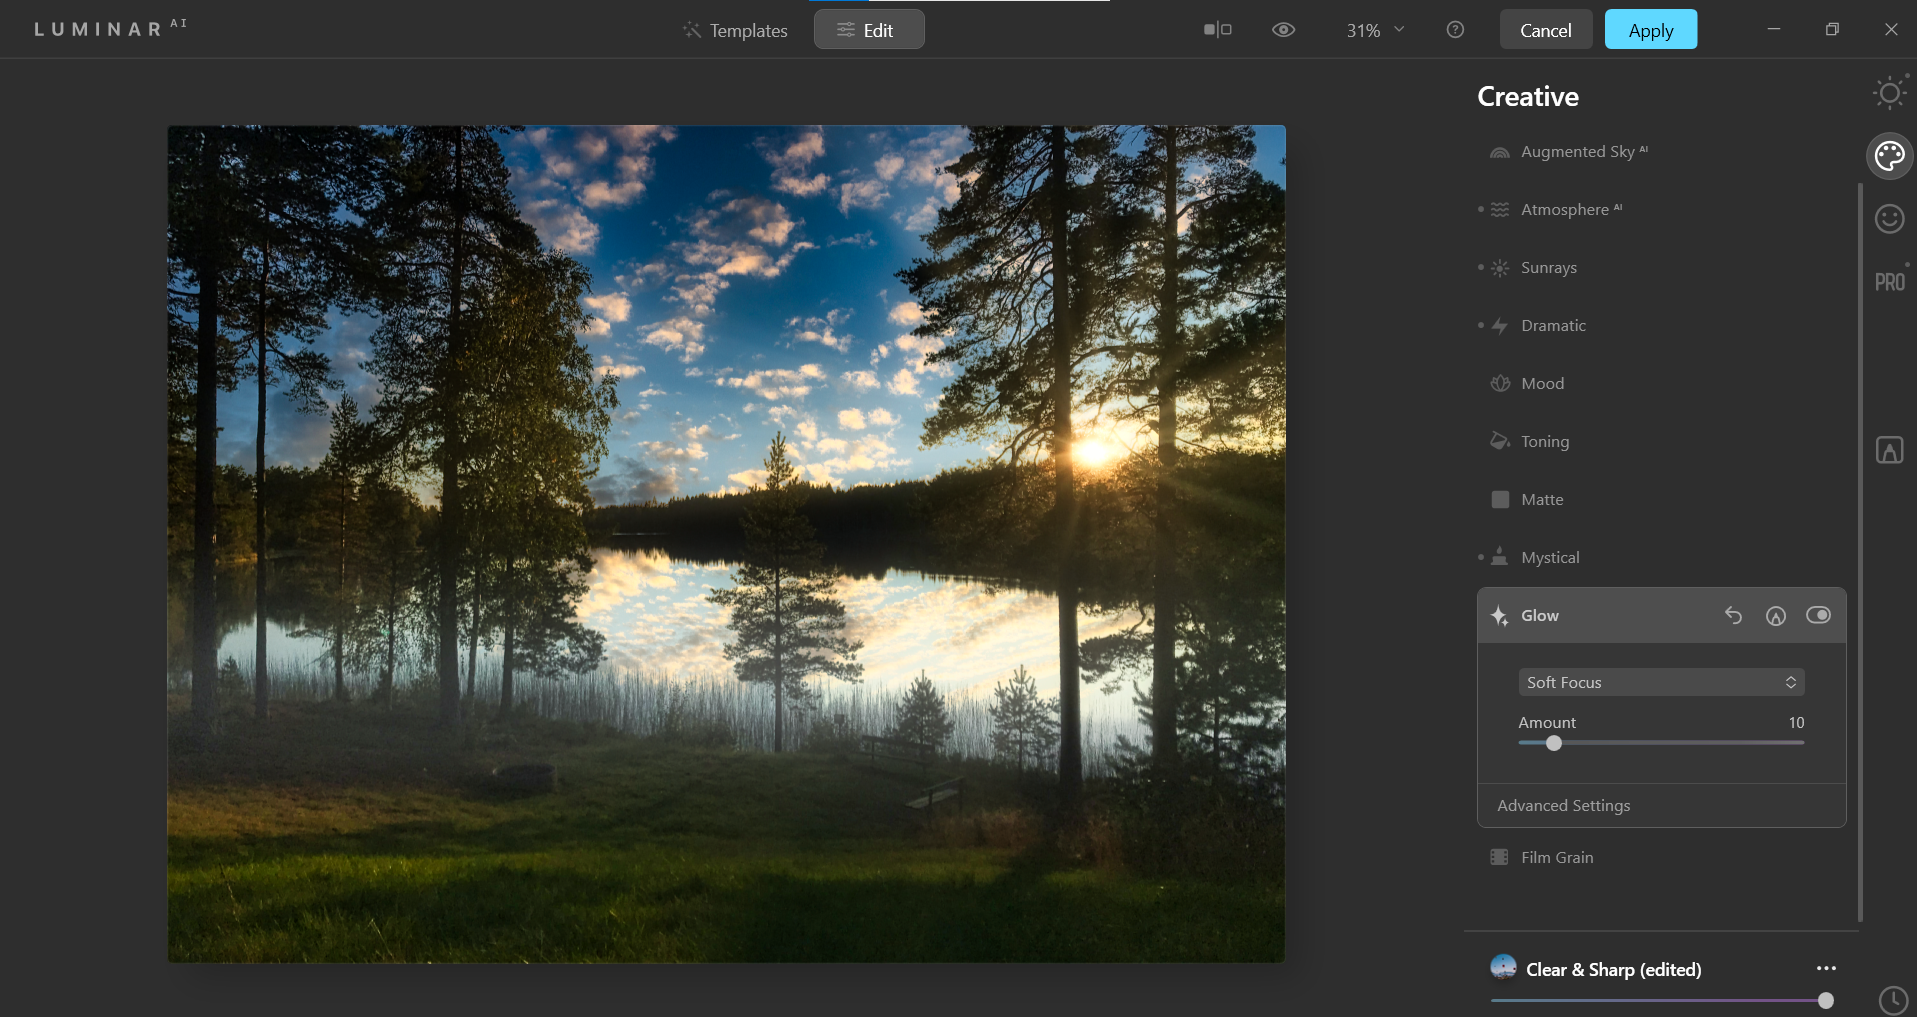
Select Edit (next to Templates) at the top. Then, select Creative from the right menu, which is represented by the painter palette icon.
-
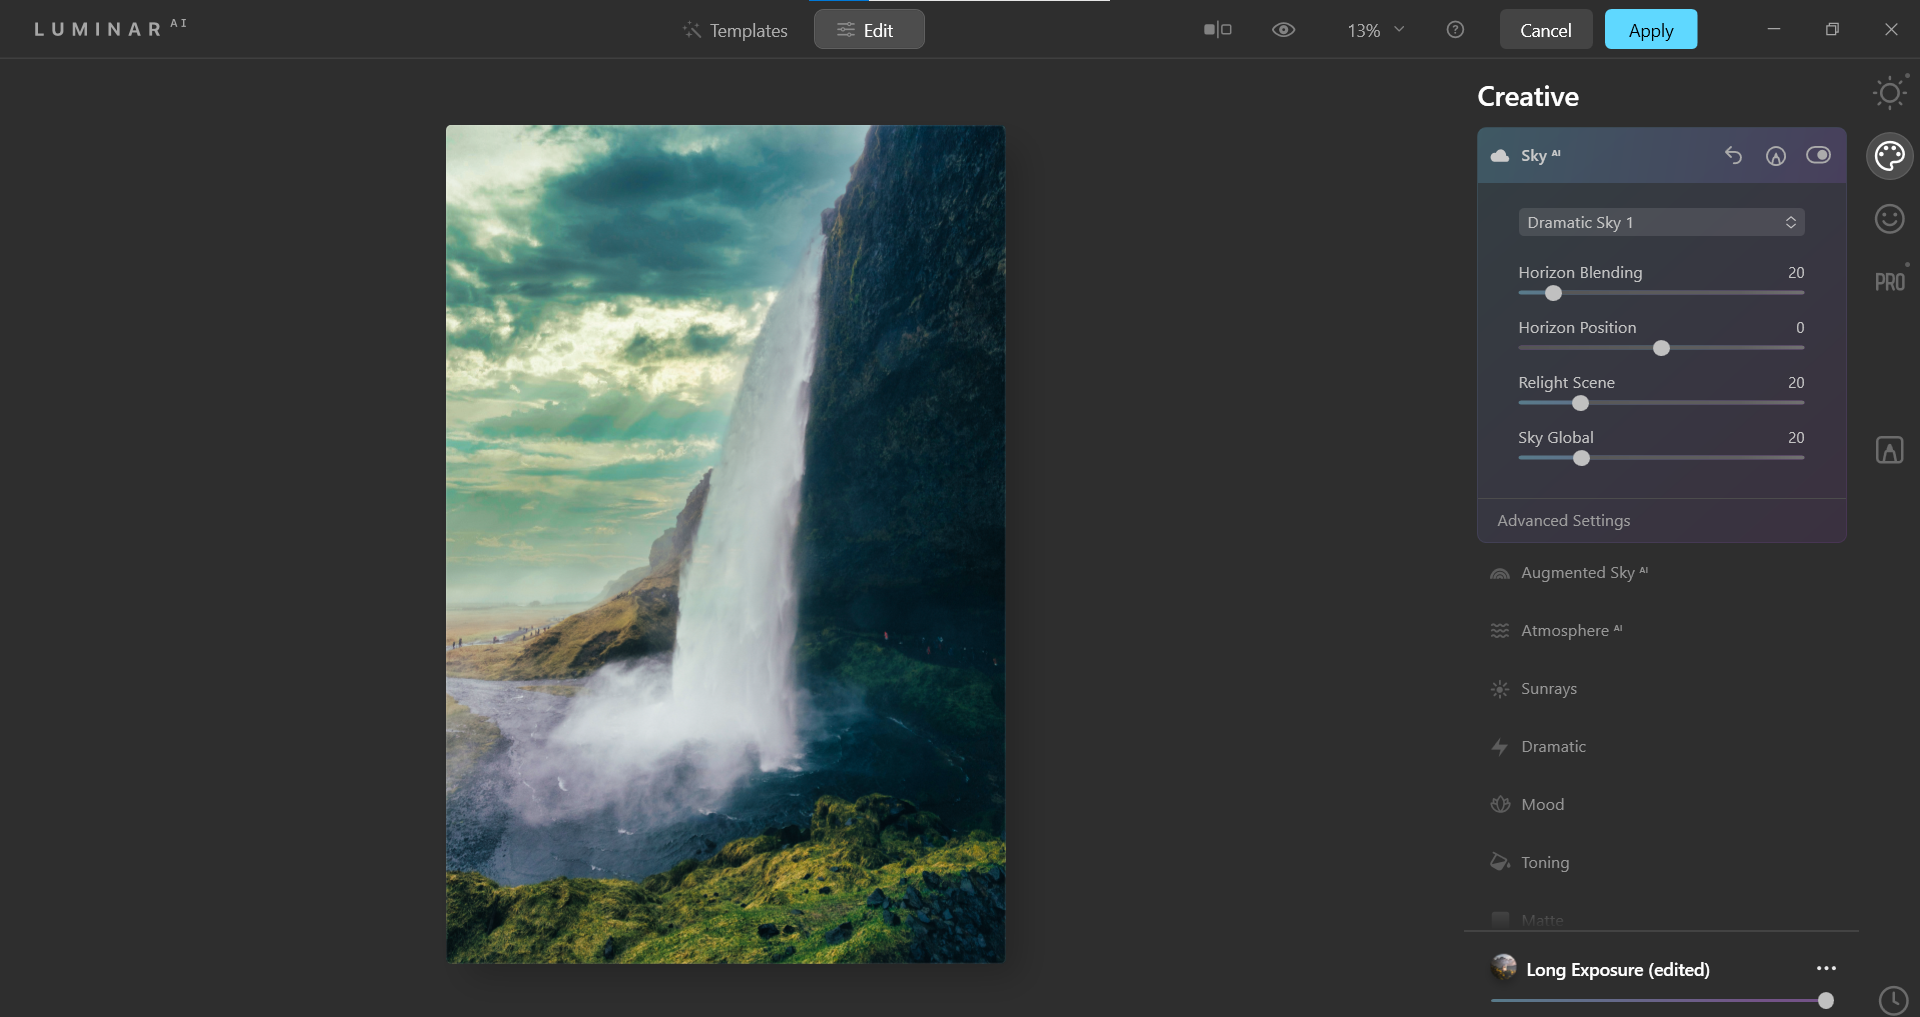
Select Sky AI. In the dropdown menu, choose Dramatic Sky 1. Then, enter these values for the sliders: Horizon Blending: 20, Horizon Position: 0, Relight Scene: 20, Sky Global: 20. Keep in mind that a few sliders will already be set for default values as determined by the Long Exposure effect.
-
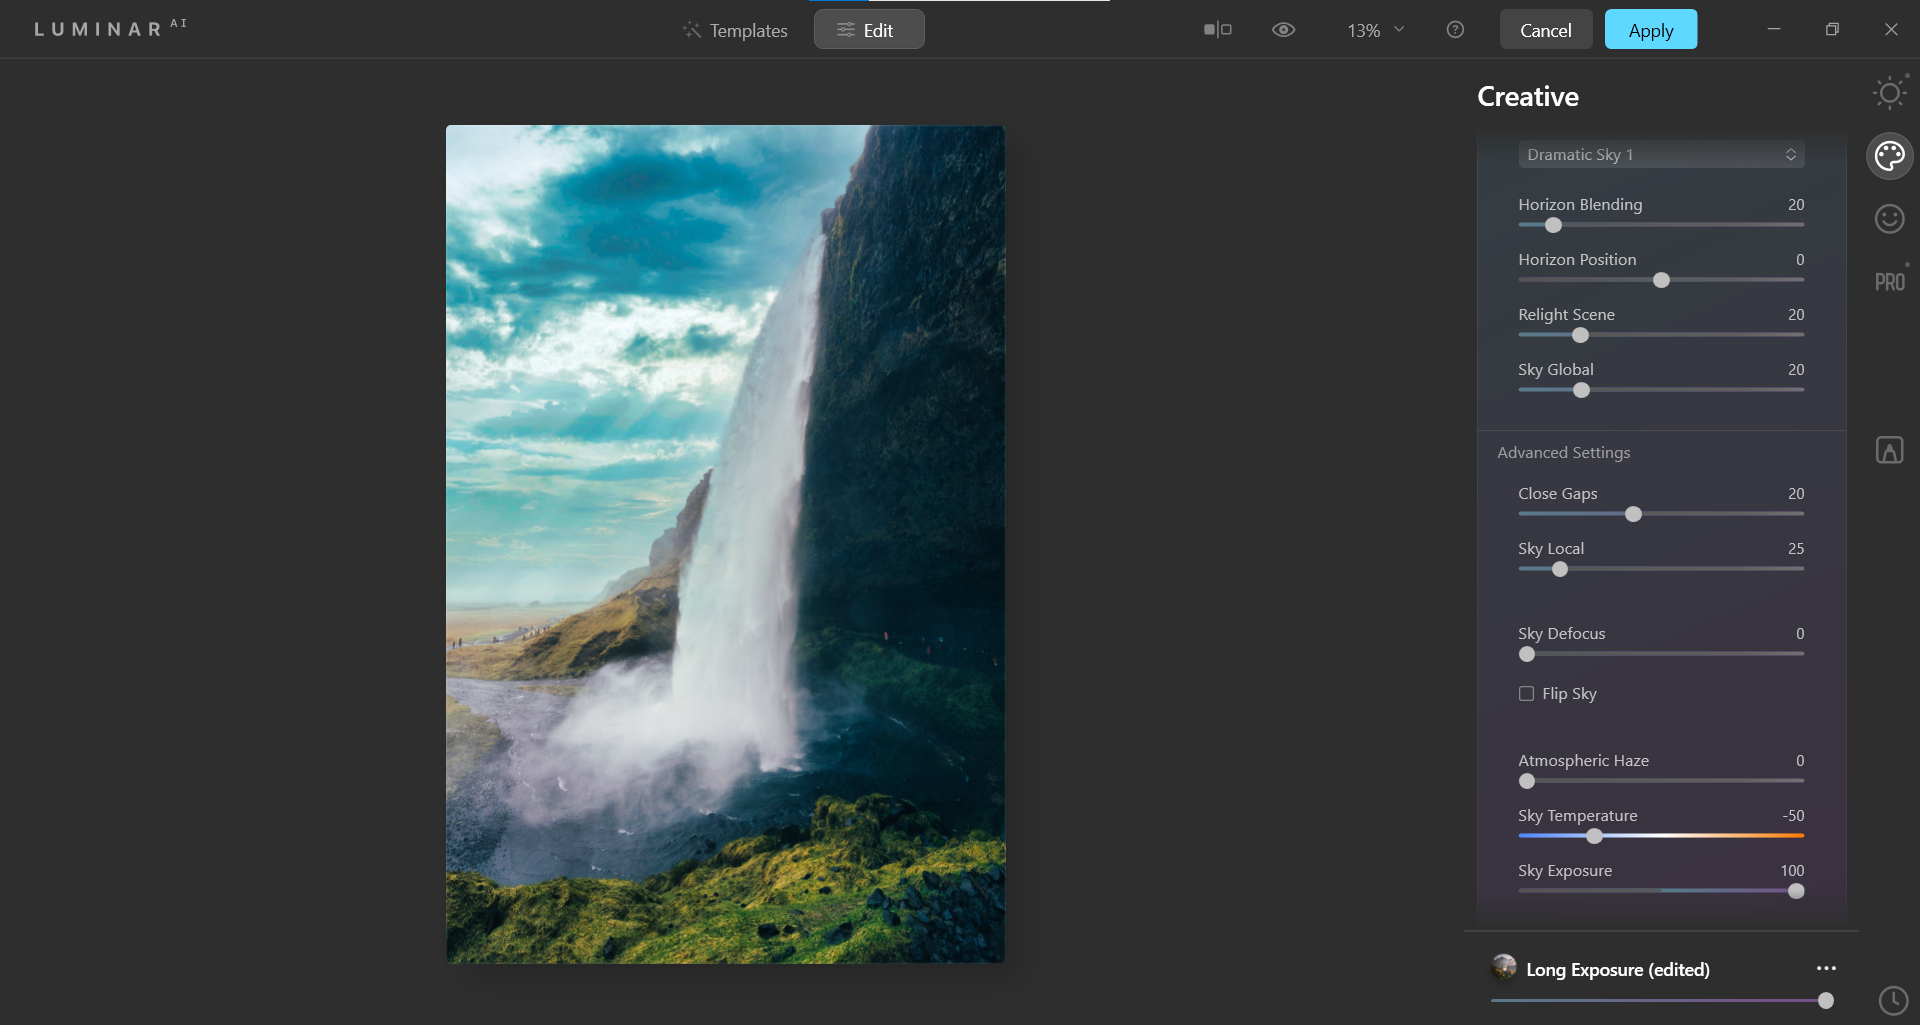
Next, open the Advanced Settings tab under Sky AI. Enter these values for the sliders: Close Gaps: 20, Sky Local: 25. Then, skip down to Sky Temperature: -50, Sky Exposure: 100.
-
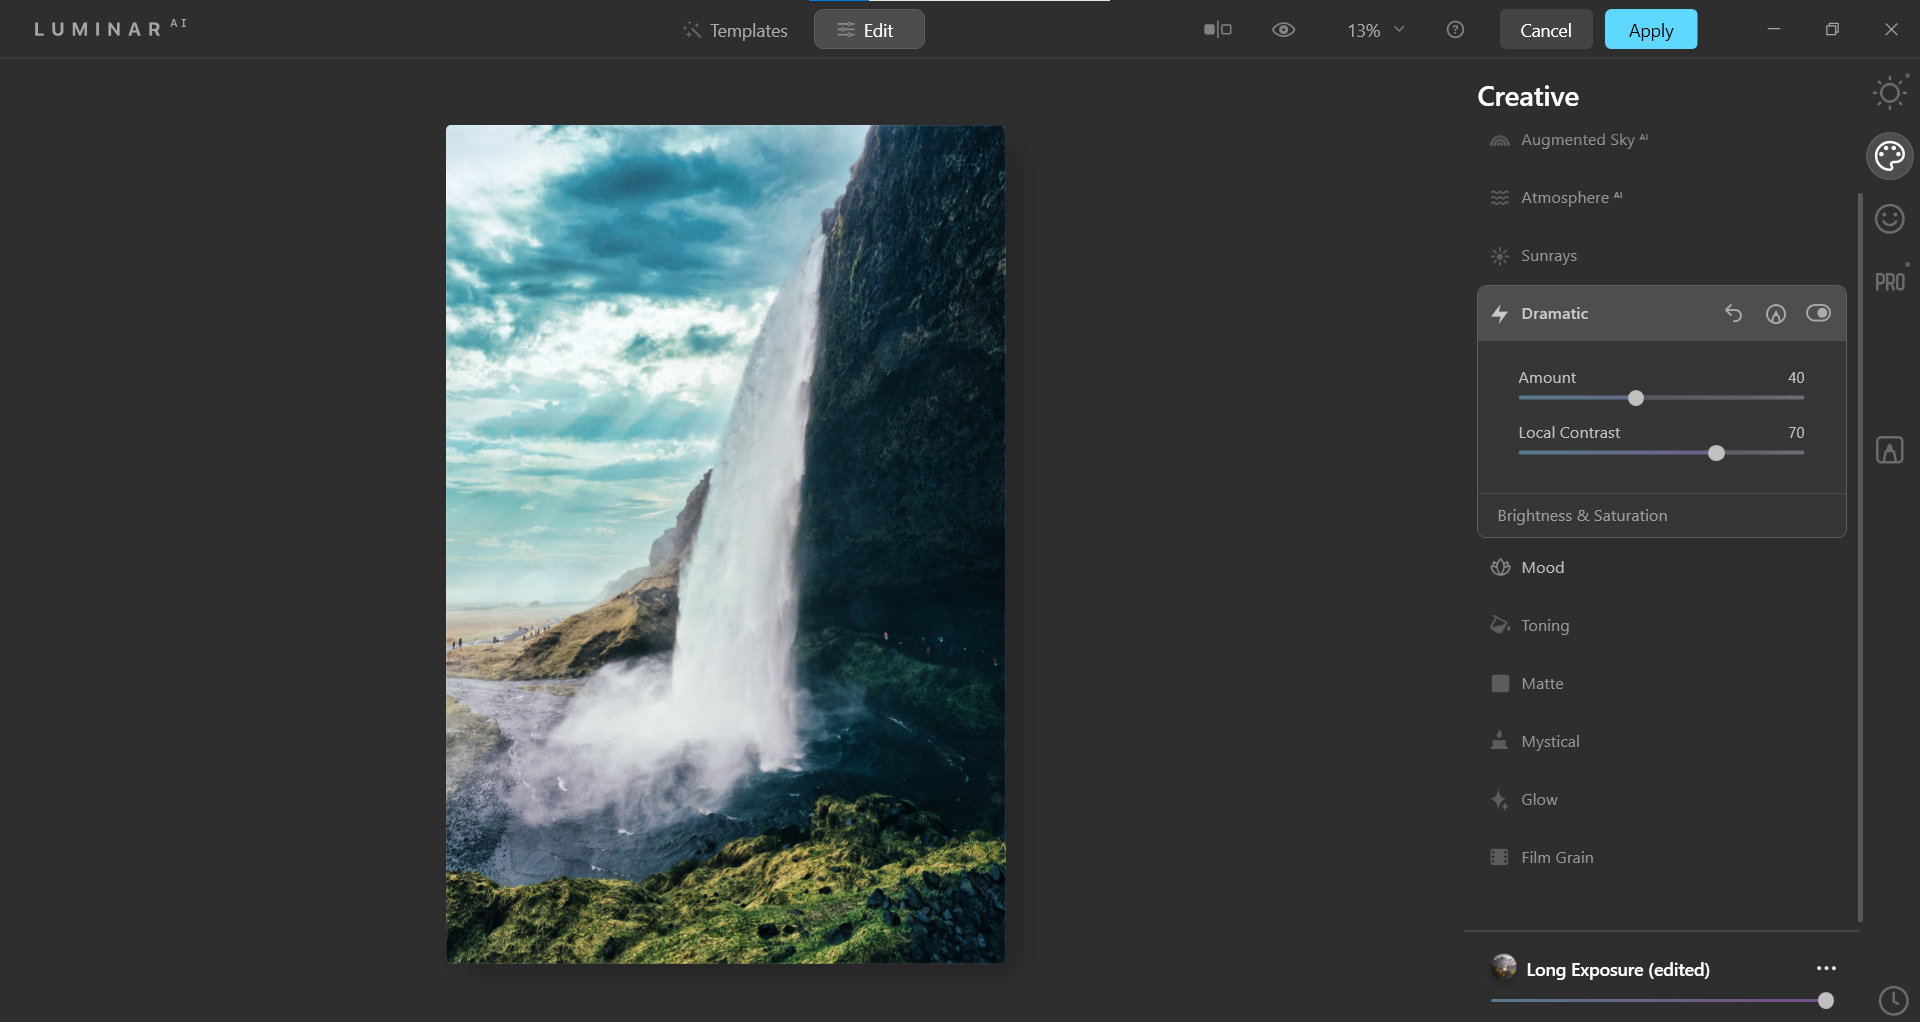
Choose Dramatic, which is further down in the Creative menu. Enter these values for the sliders: Amount: 40, Local Contrast: 70.
-
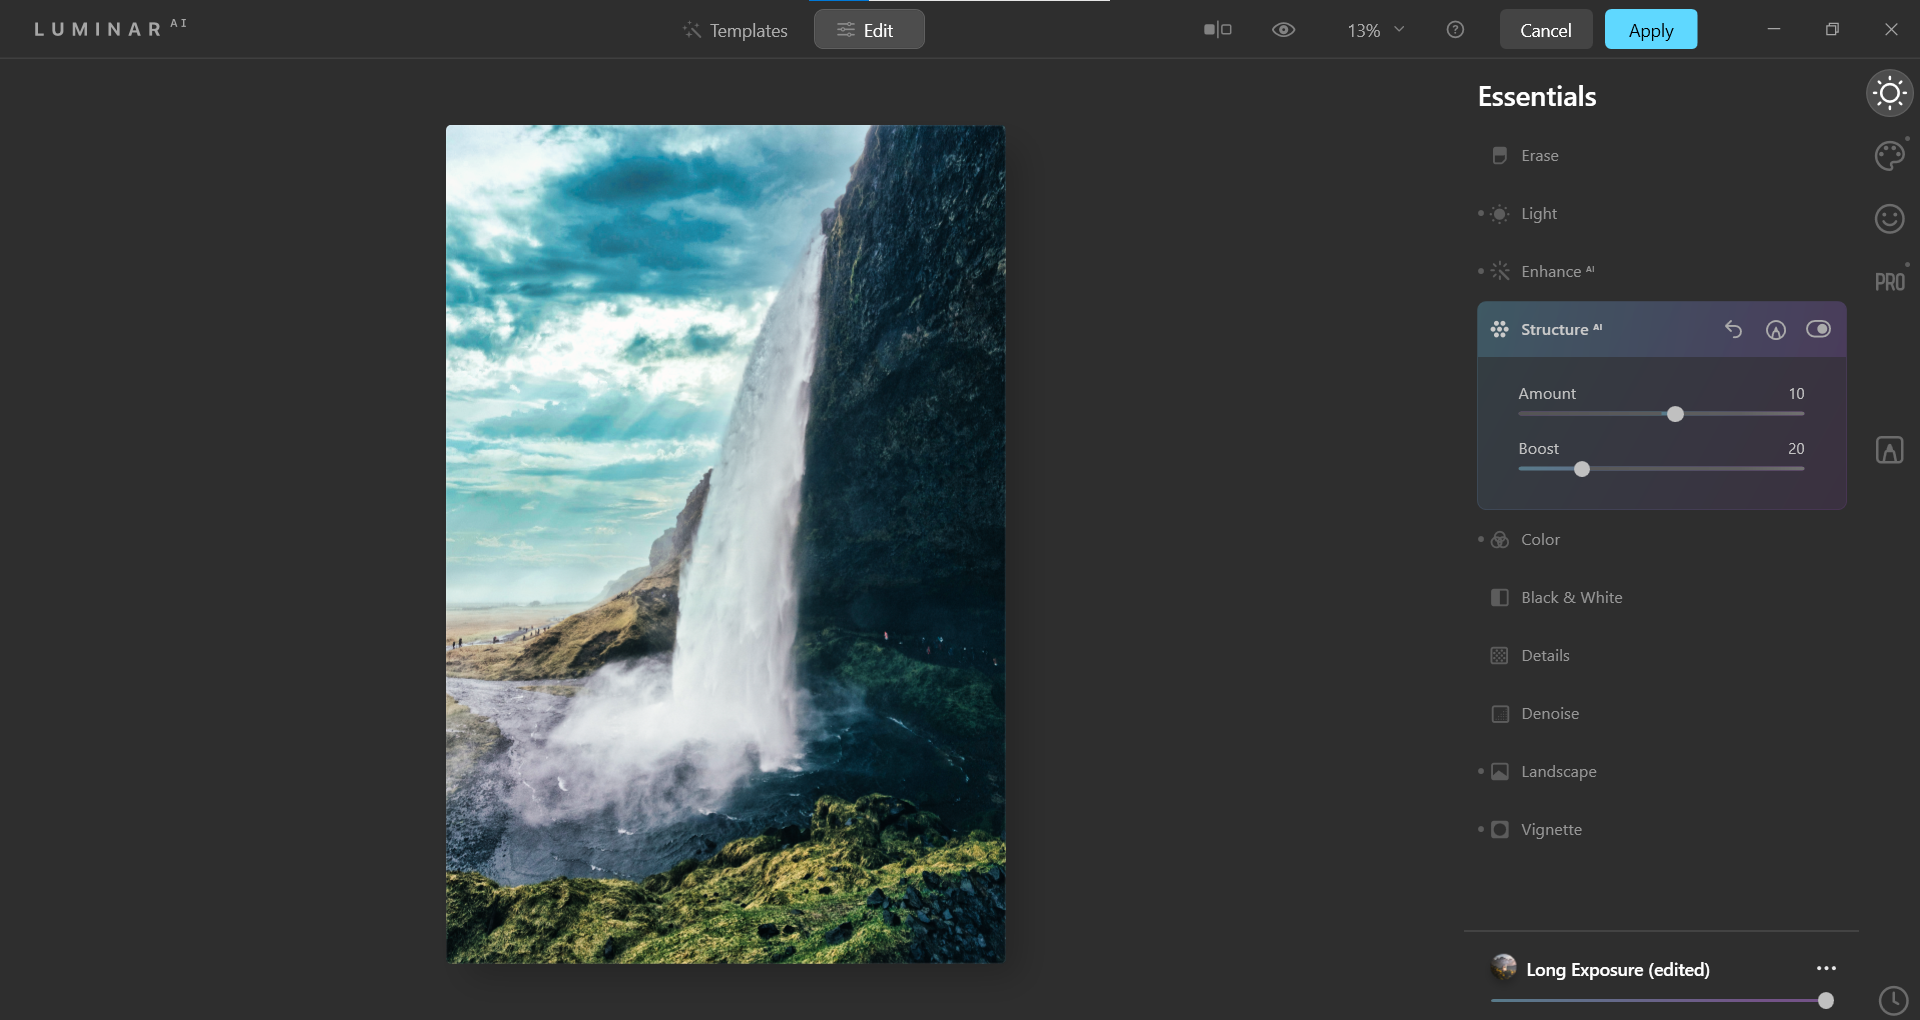
Next, choose Essentials from the menu. Go to the Structure AI tab. Enter these slider values: Amount: 10, Boost: 20.
-
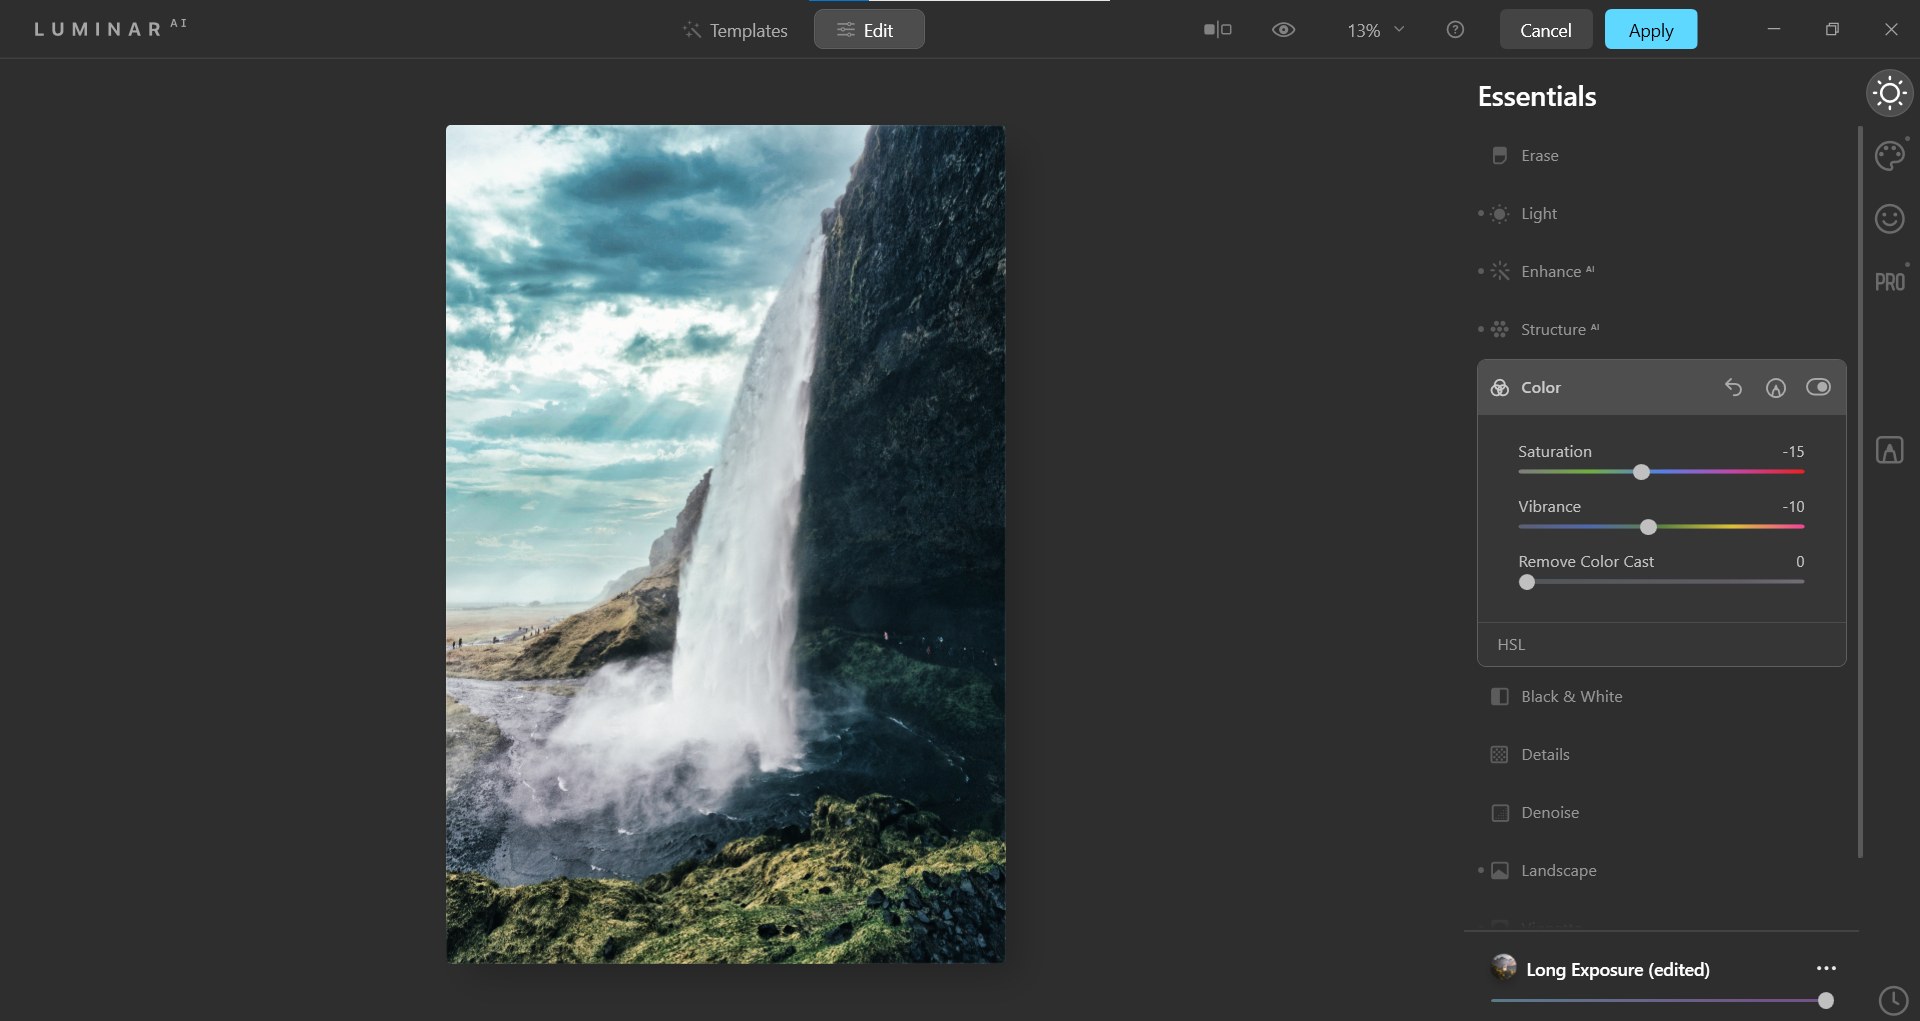
Choose Color from the Essentials menu. Enter these values for the sliders: Saturation: -15, Vibrance: -10.
-
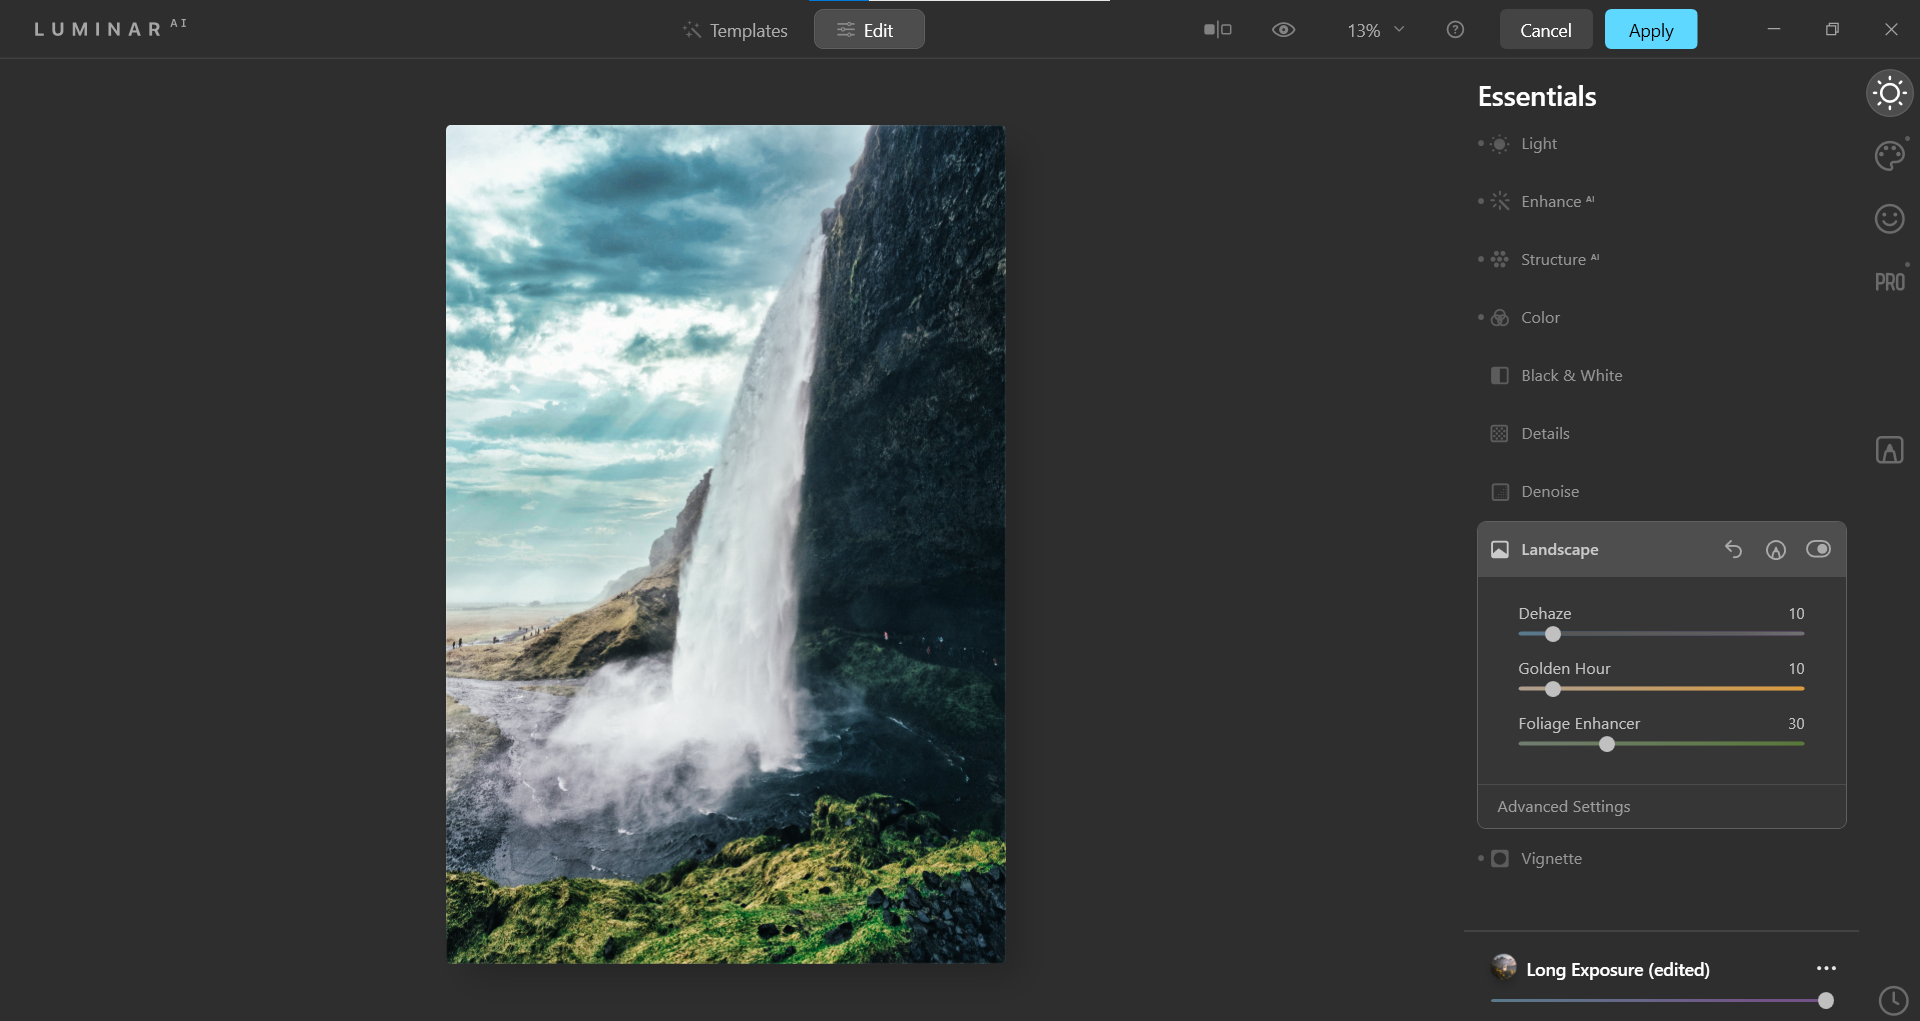
Choose Landscape from the Essentials menu. Enter these values for the sliders: Dehaze: 10, Golden Hour: 10, Foliage Enhancer: 30.
-
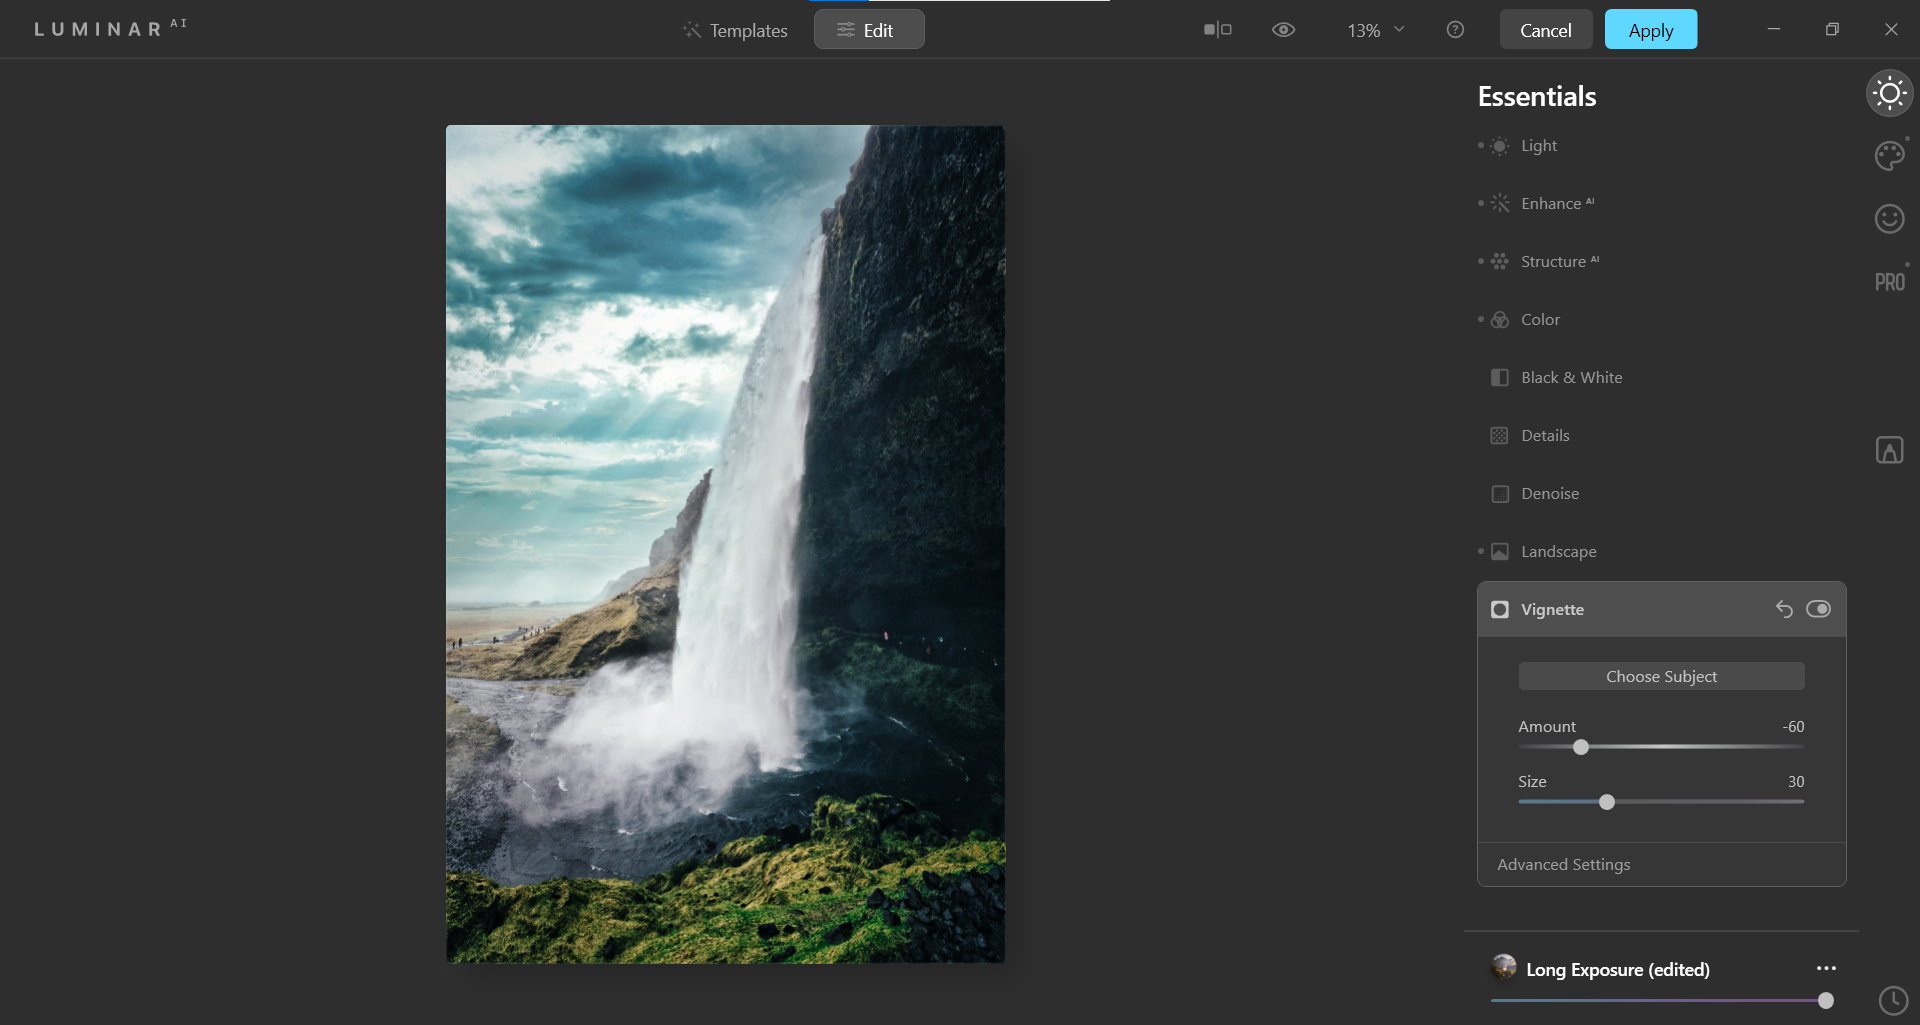
Choose Vignette from the Essentials menu. Enter these values for the sliders: Amount: -60, Size: 30.
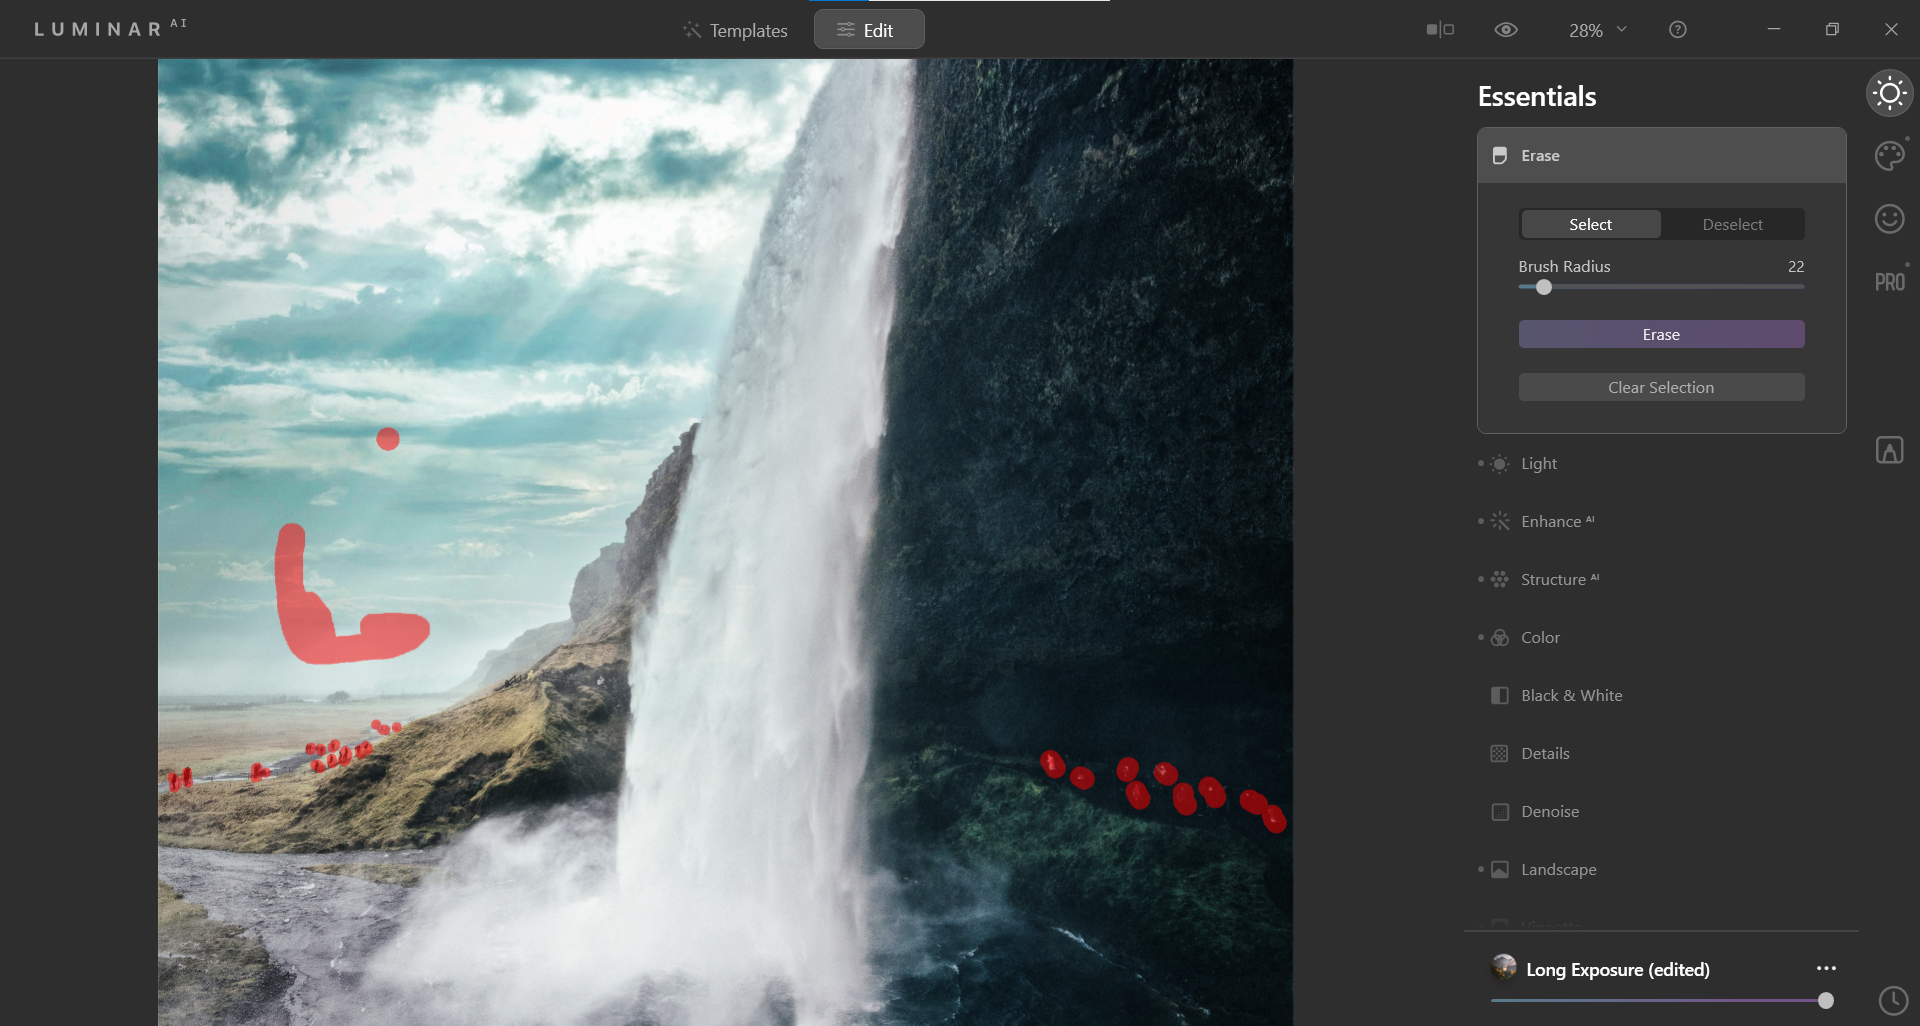
- Lastly, we will remove the people and some of the water splash that has become distorted. Choose Erase from the Essentials menu. Use the scroll wheel on your mouse to zoom in on the image. With your mouse, highlight all the people and any water splash distortions.
-
When you’re finished, click Erase. If you miss anything or the effect isn’t smooth, you can repeat the process until the image is clean.
-
Click Apply to export the image back into Photoshop. If you’re using Luminar AI as a standalone program, there will be options for exporting your image.
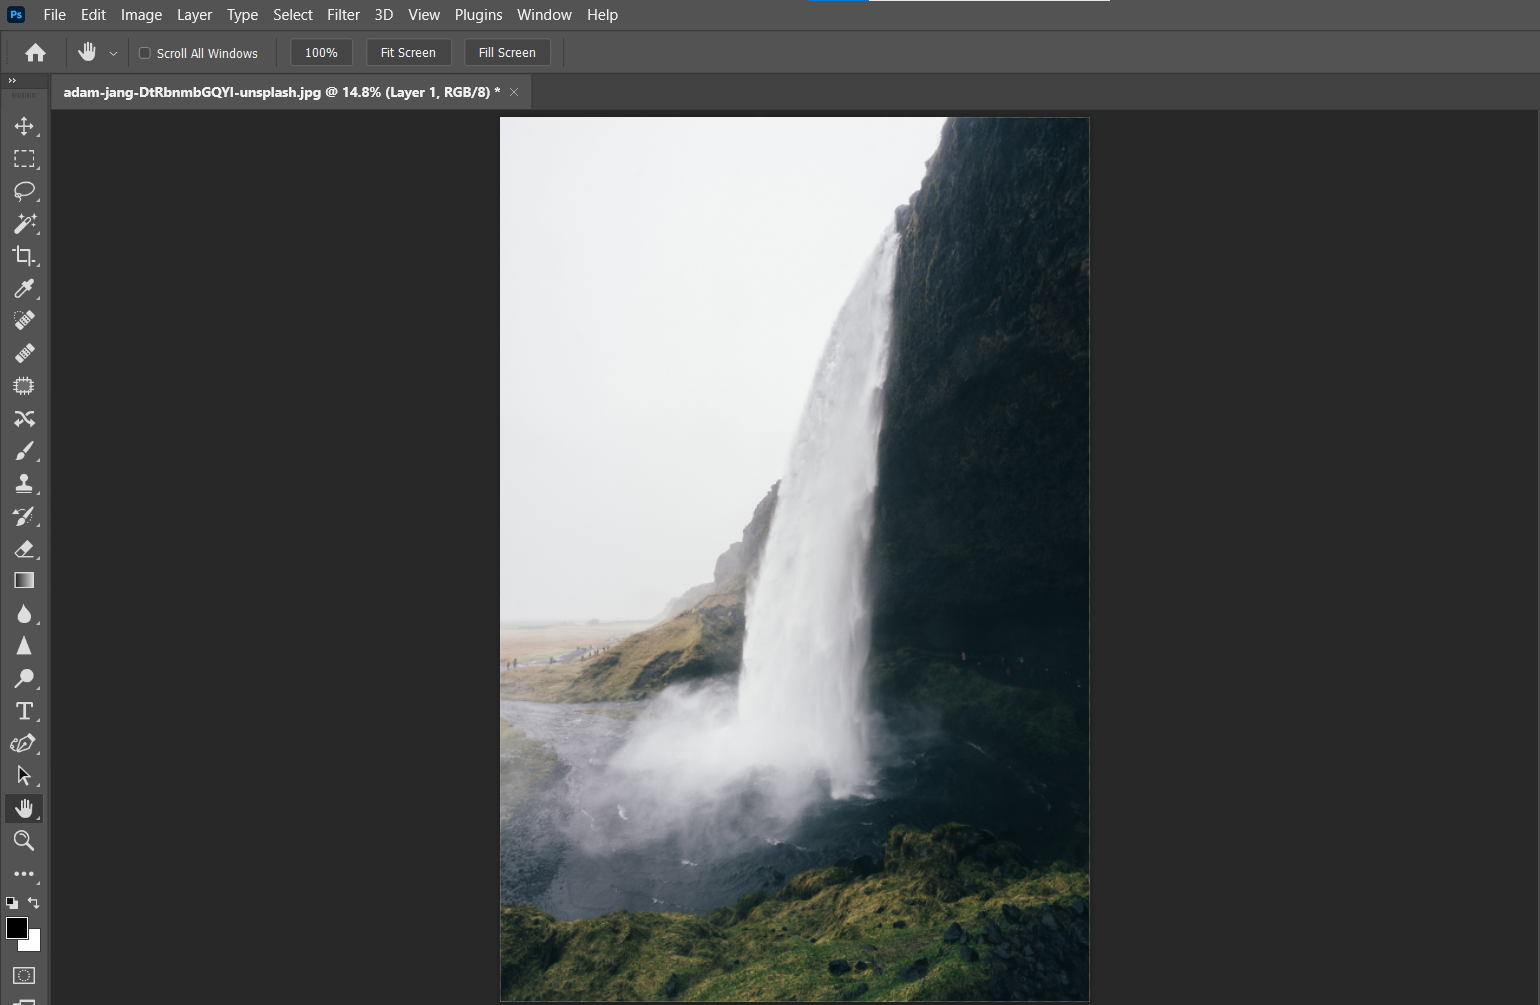
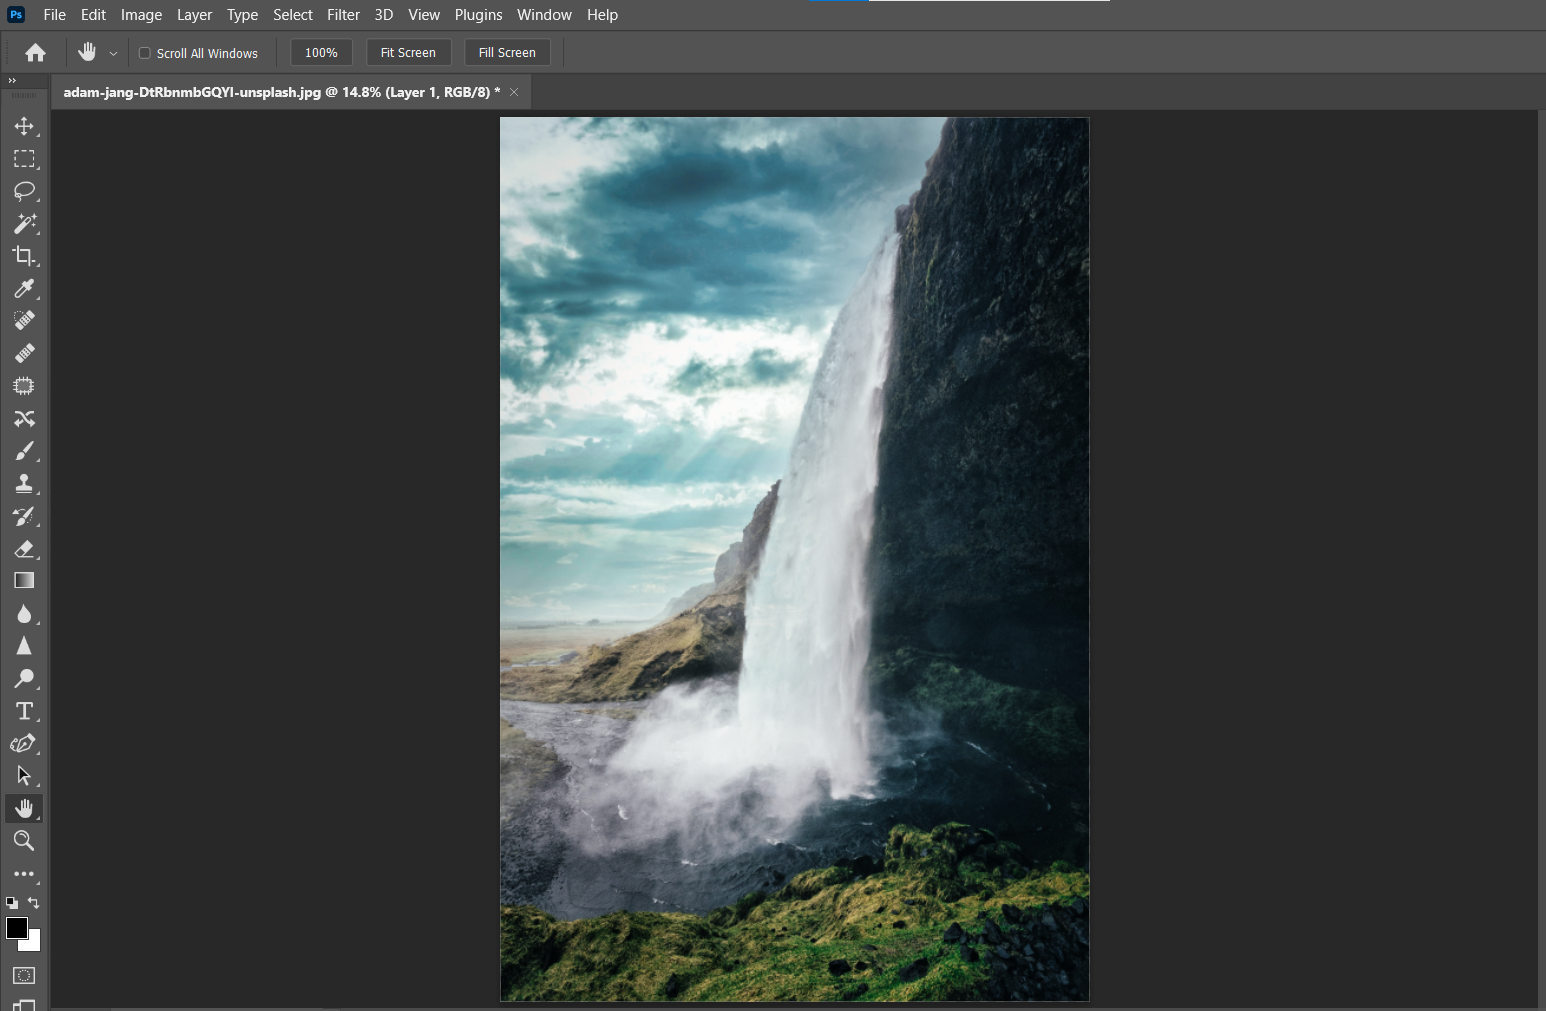
Below is a look at how our image has changed over the course of the editing process.
Before:
After:
Editing a Forest Scene
Forests are also commonly captured in landscape photography. These pictures are often taken from within a forest in low-light situations.
We used a simple approach to this type of photo. First, we determined where a new source of light could be added, in this case, a sun. Secondly, we decided to illuminate much of the foreground elements that were immersed in shadows.
Naturally, there are numerous ways to approach editing any image. But it does help to approach the process with a predetermined idea of what changes you’d like to make. Luminar AI makes it easy.
Feel free to download the same image from Unsplash and follow along.
- Repeat steps one through three as shown above.
-
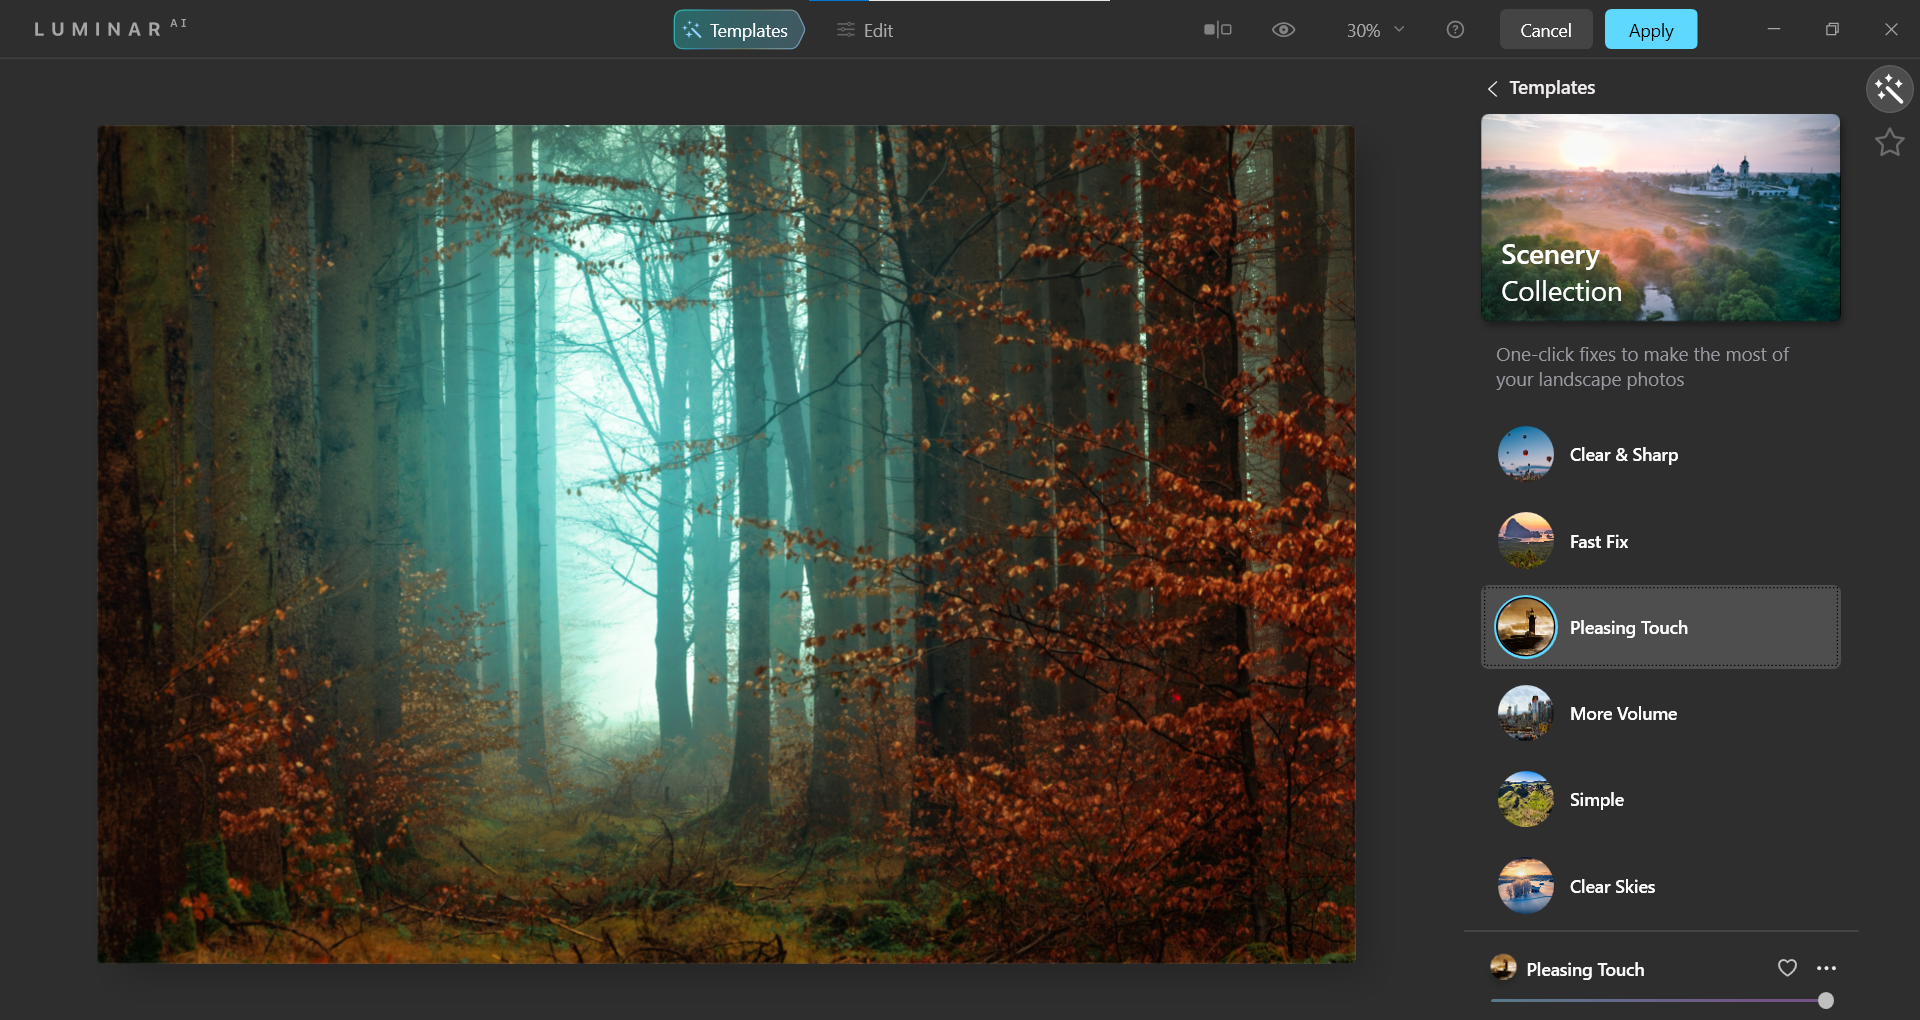
In the Templates menu, select Scenery Collection. Then, select Pleasing Touch from the menu options.
-
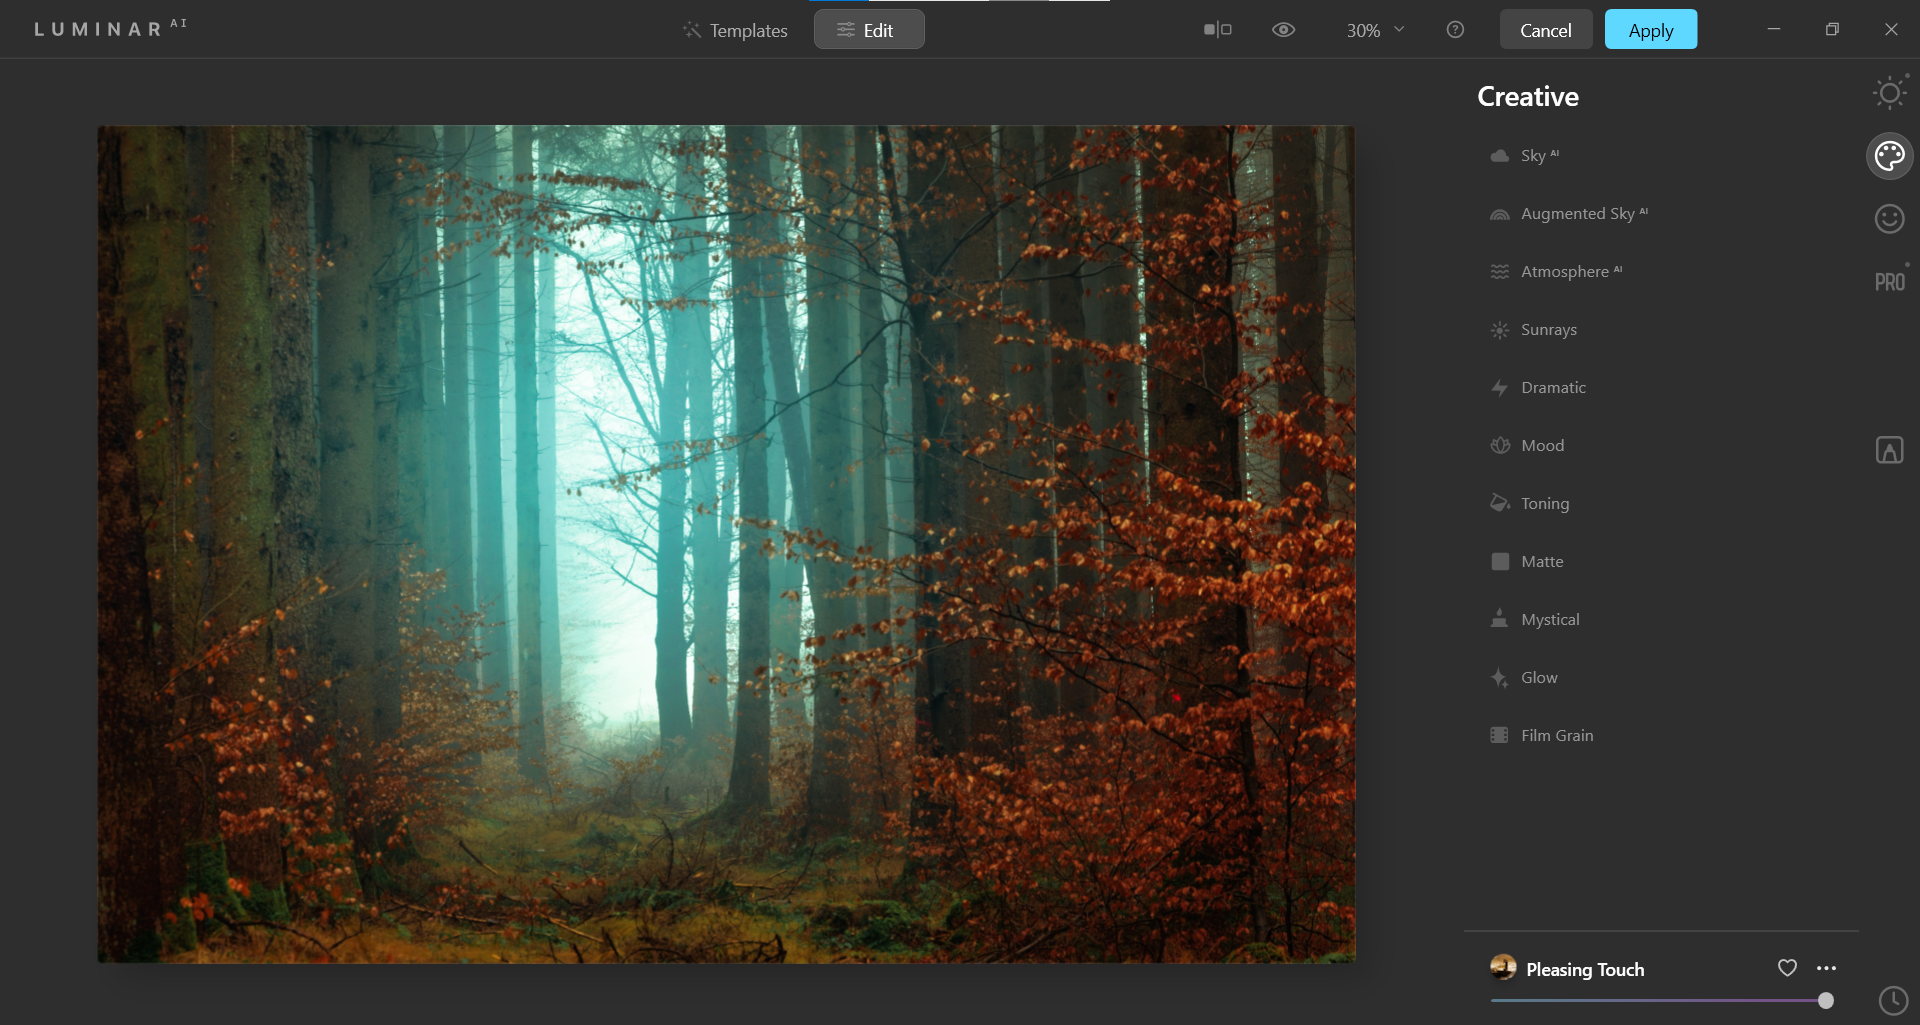
Select Edit (next to Templates) at the top. Then, select Creative from the right menu, which is represented by the painter palette icon.
-
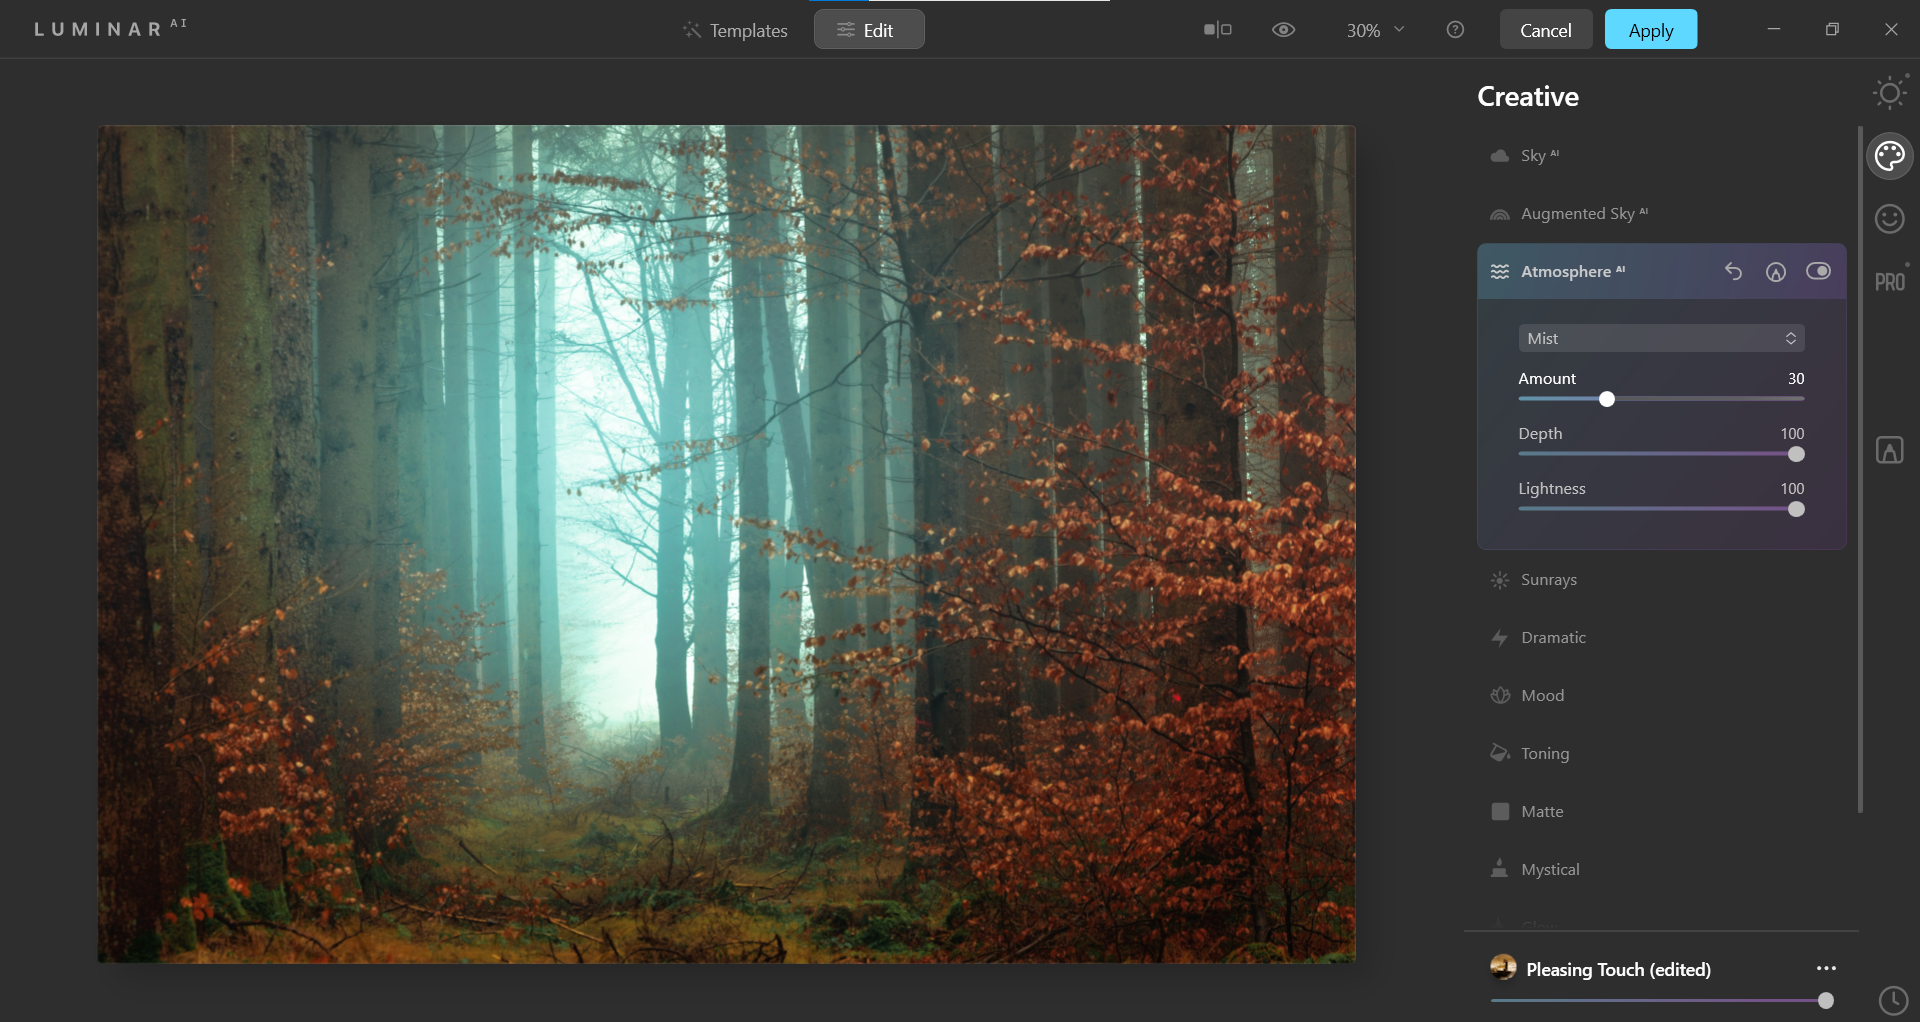
Choose Atmosphere AI. Select Mist from the dropdown menu. Enter these values for the sliders: Amount: 30, Depth: 100, Lightness: 100.
-
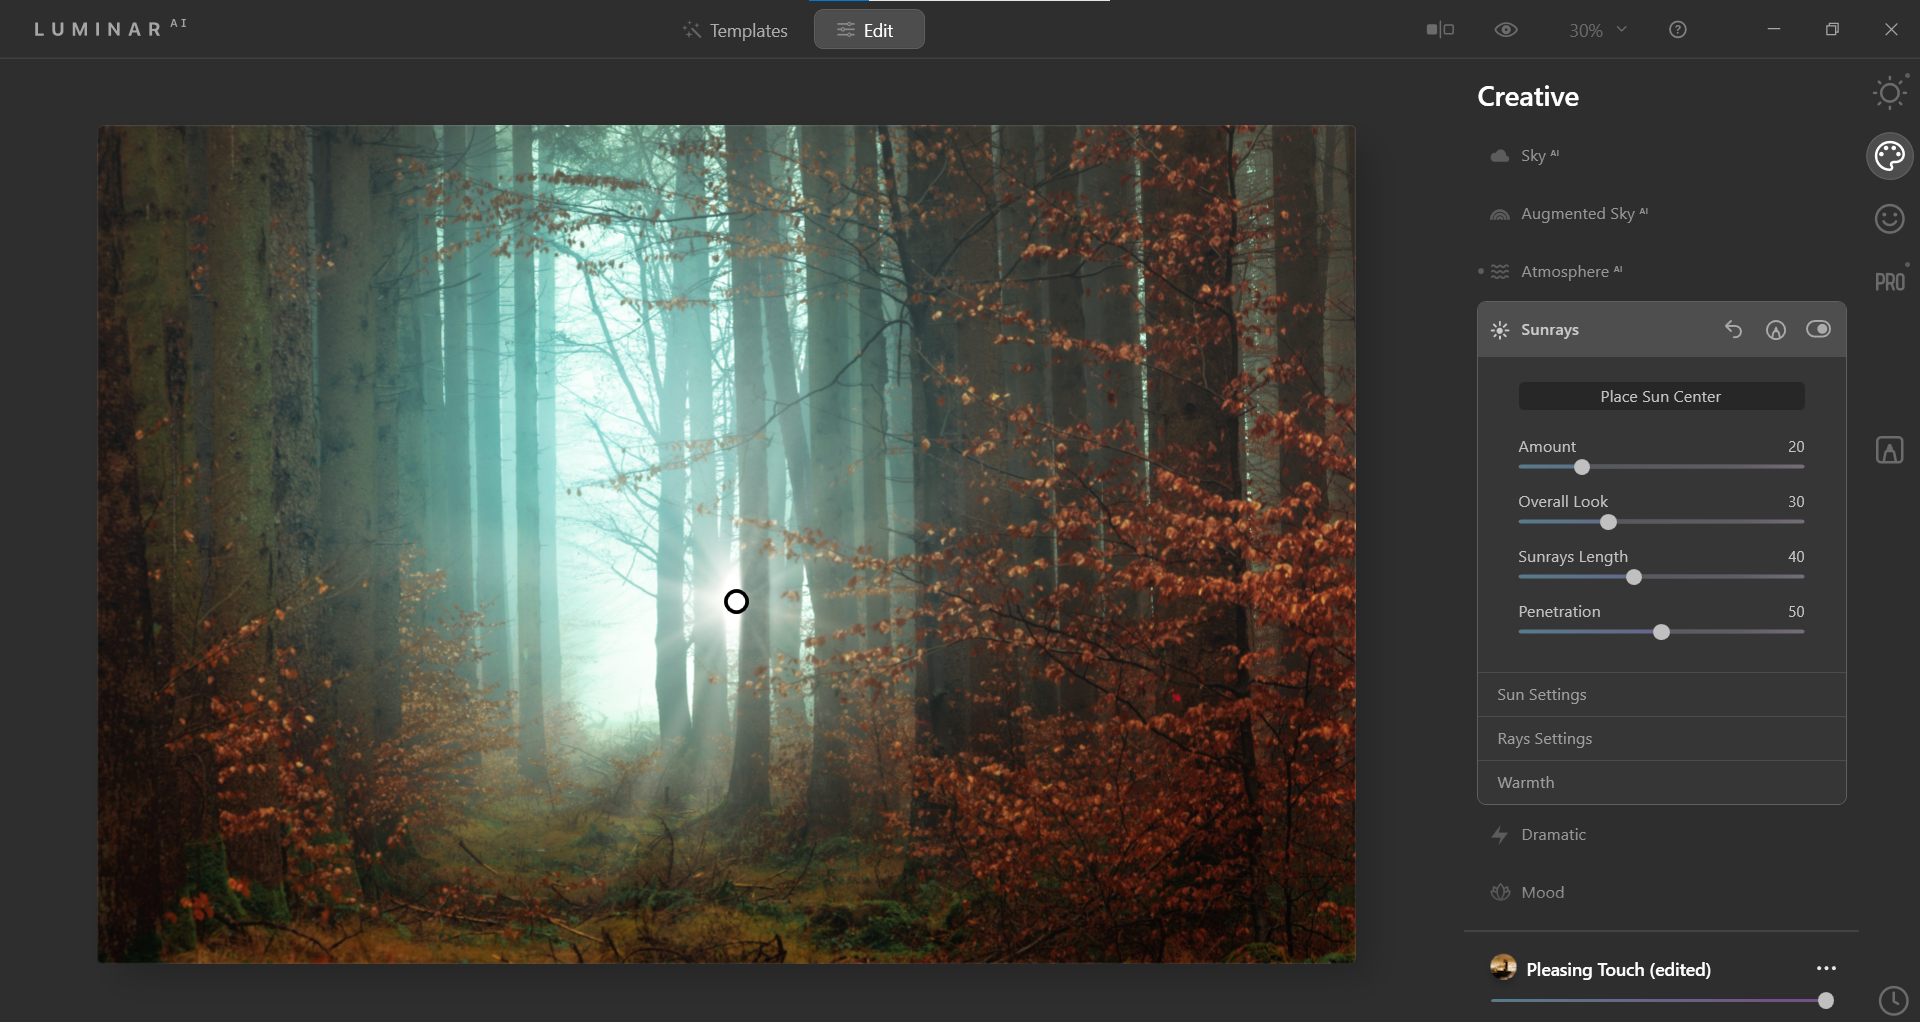
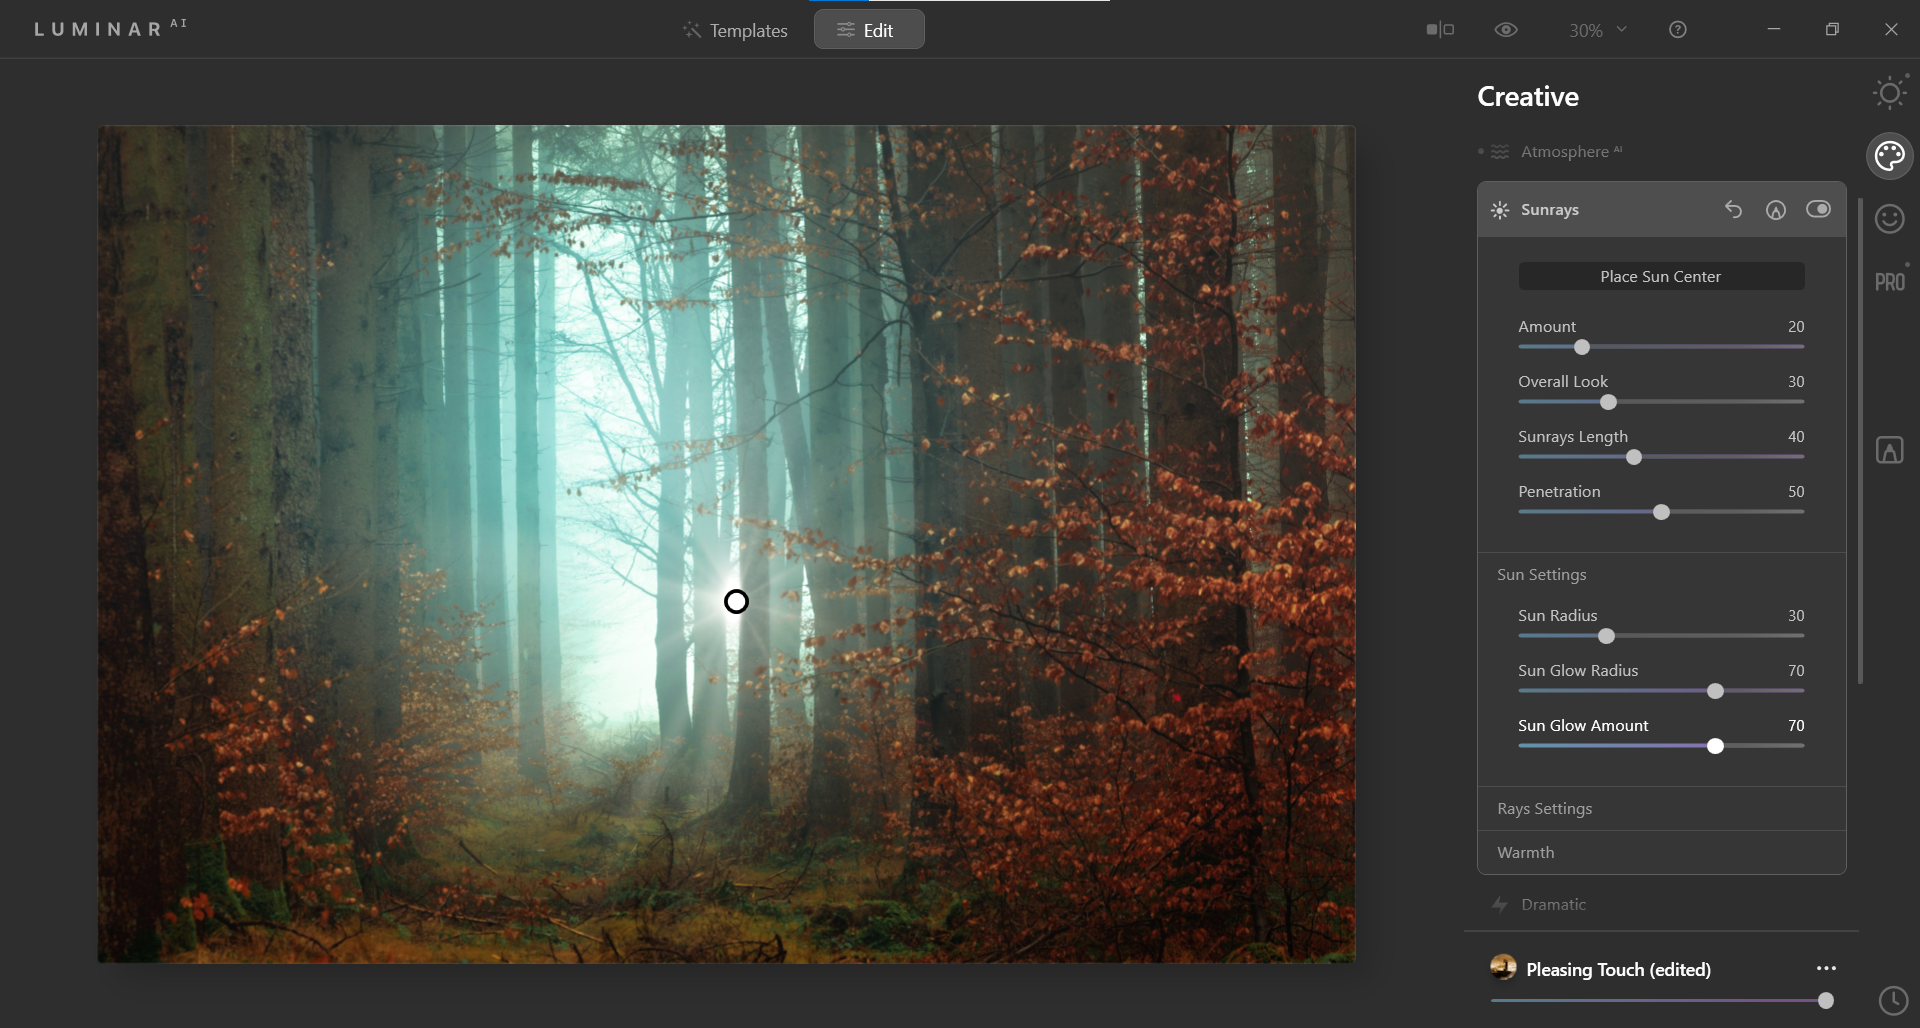
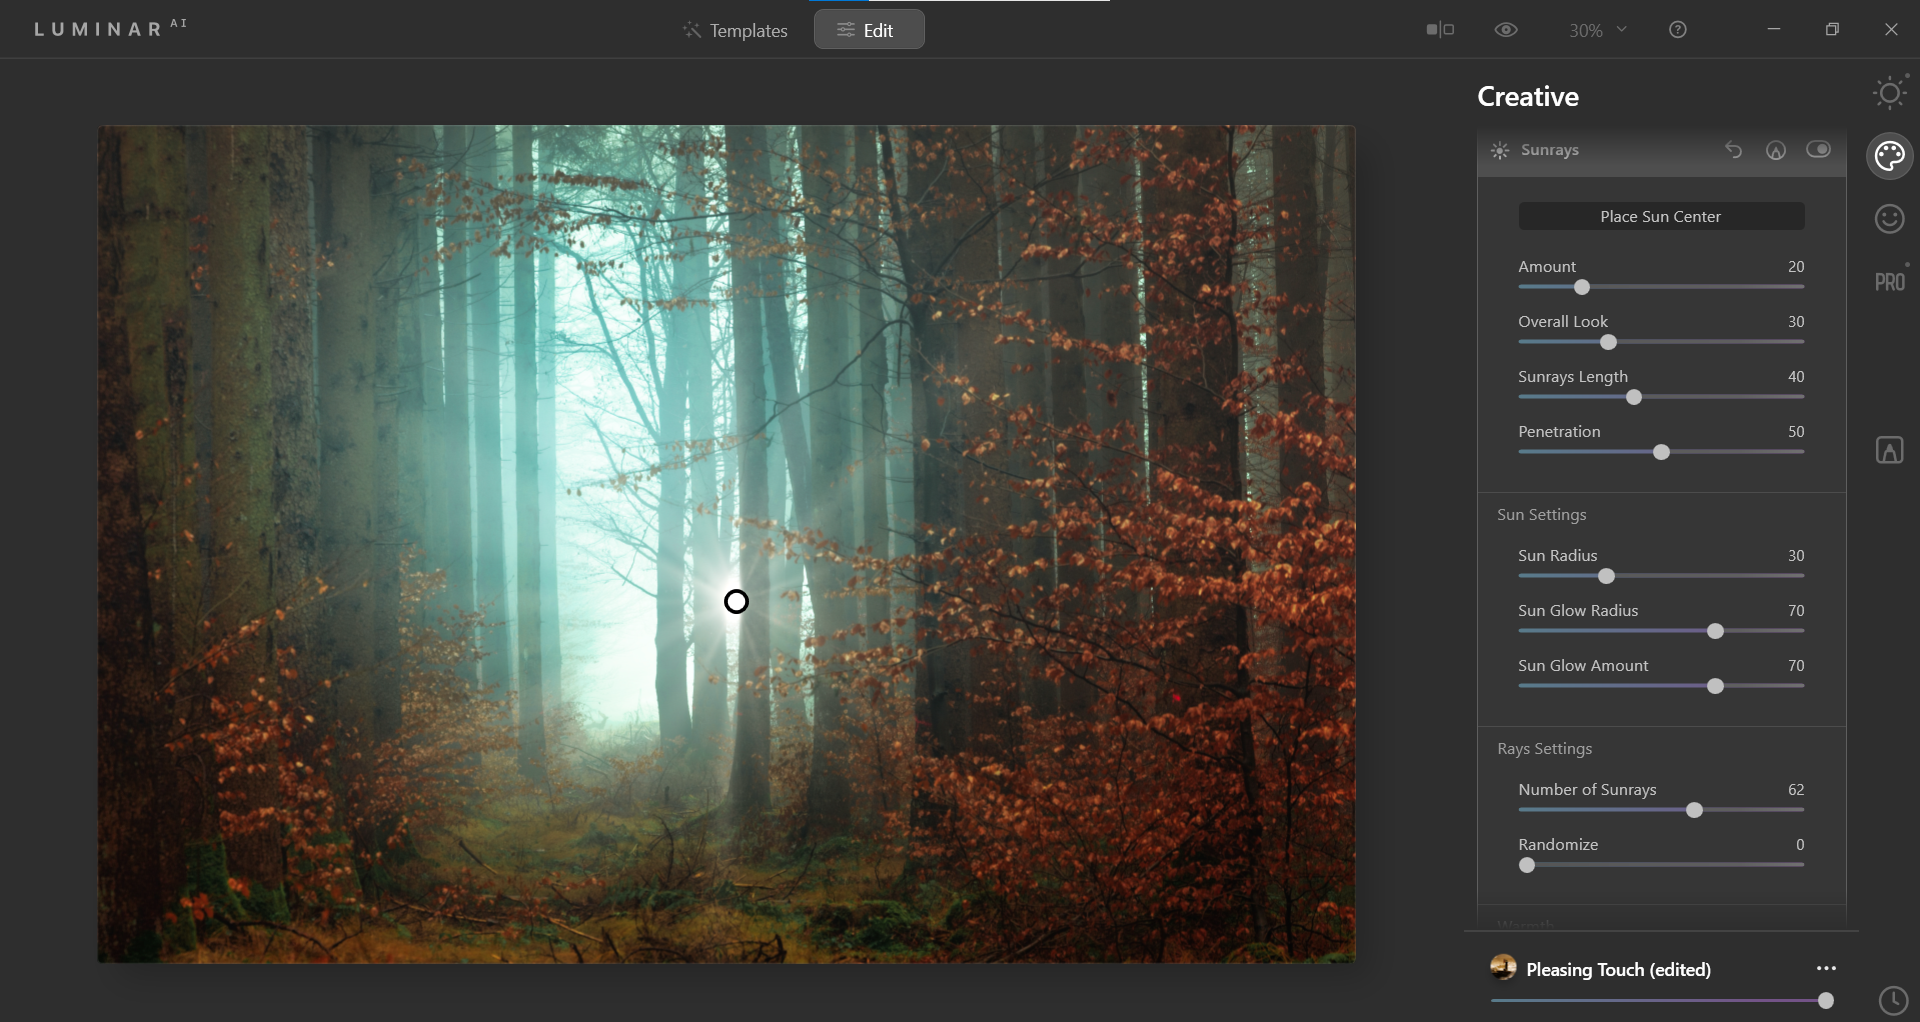
Choose Sunrays from the Creative menu. Click Place Sun Center, and move the sun to the center of the image using your mouse. Enter these values for the sliders: Amount: 20, Overall Look: 30, Sunrays Length: 40, Penetration: 50.
-
Choose Sun Settings from the Creative menu. Enter these values for the sliders: Sun Radius: 30, Sun Glow Radius: 70, Sun Glow Amount: 70.
-
Choose Ray Settings from the Creative menu. Enter 62 for the Number of Sunrays slider.
-
Choose Warmth from the Creative menu. Enter these values for the sliders: Sun Warmth: 45, Sunrays Warmth: 50.
-
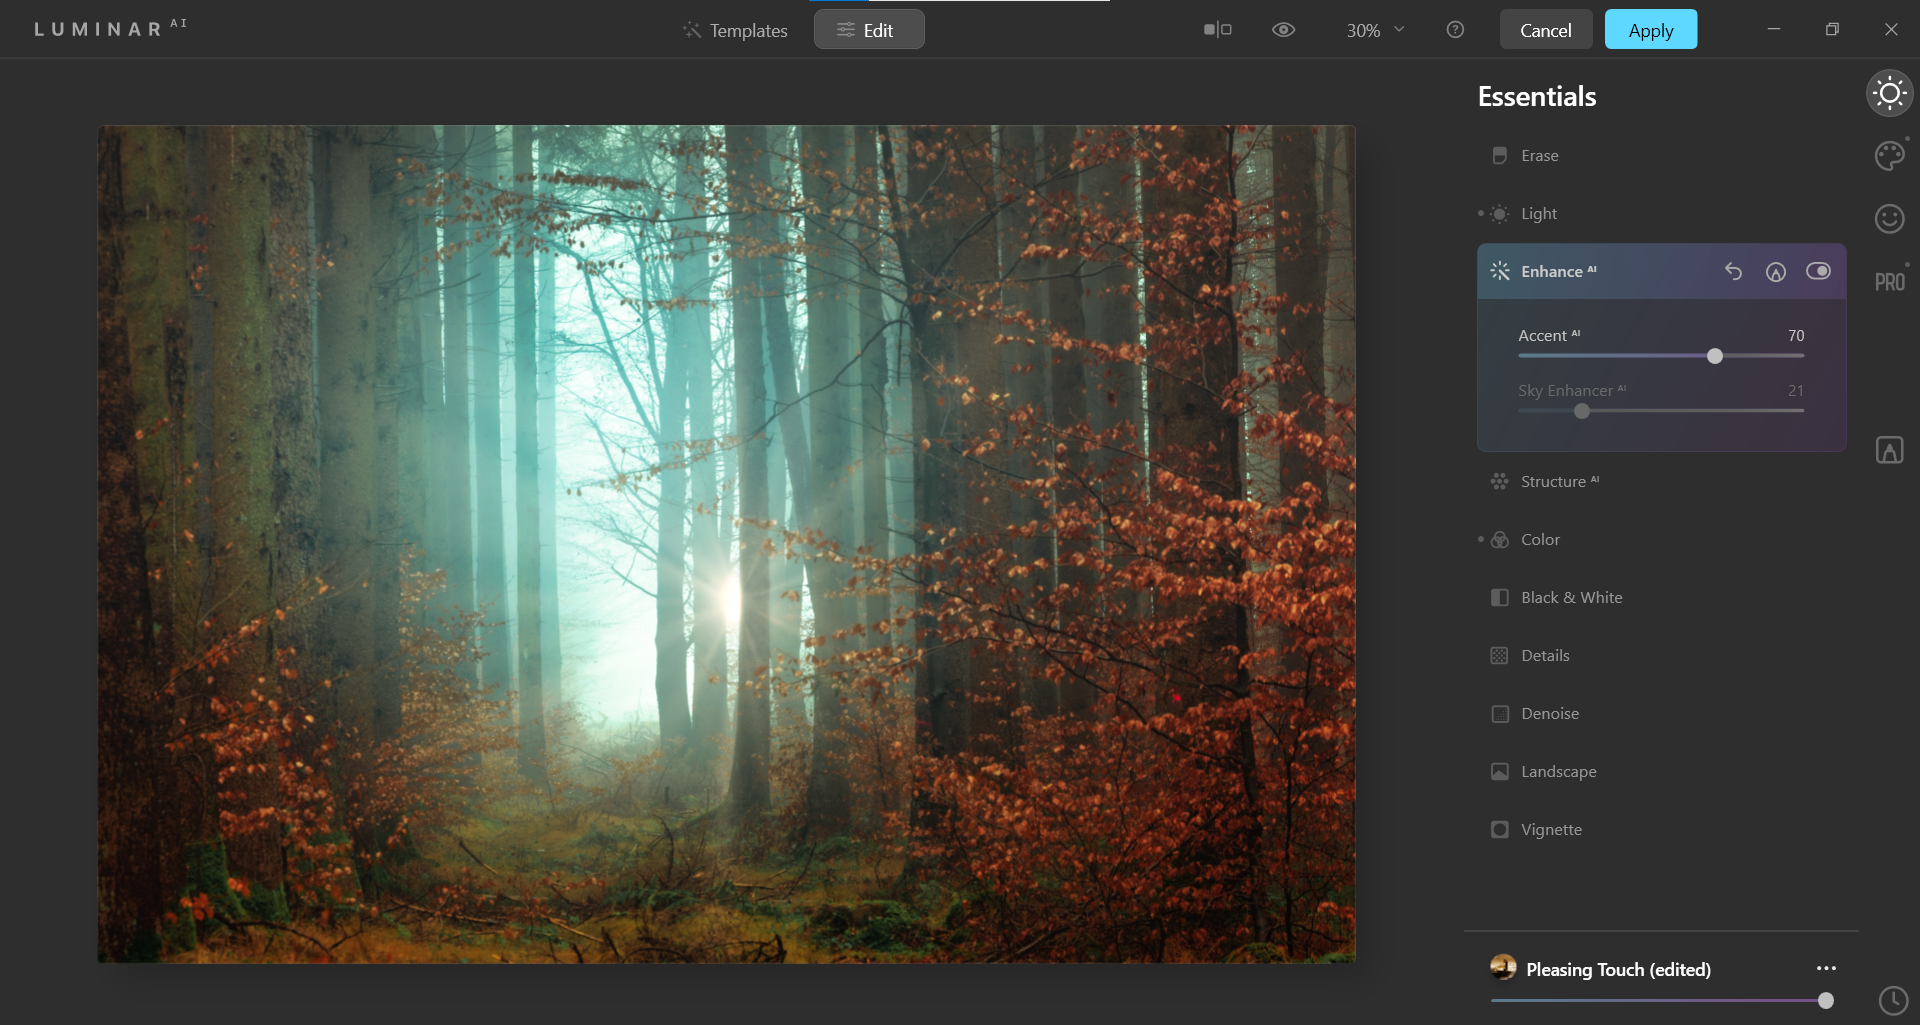
Next, choose Essentials from the menu. Choose Enhance AI, and enter 70 for the Accent slider.
-
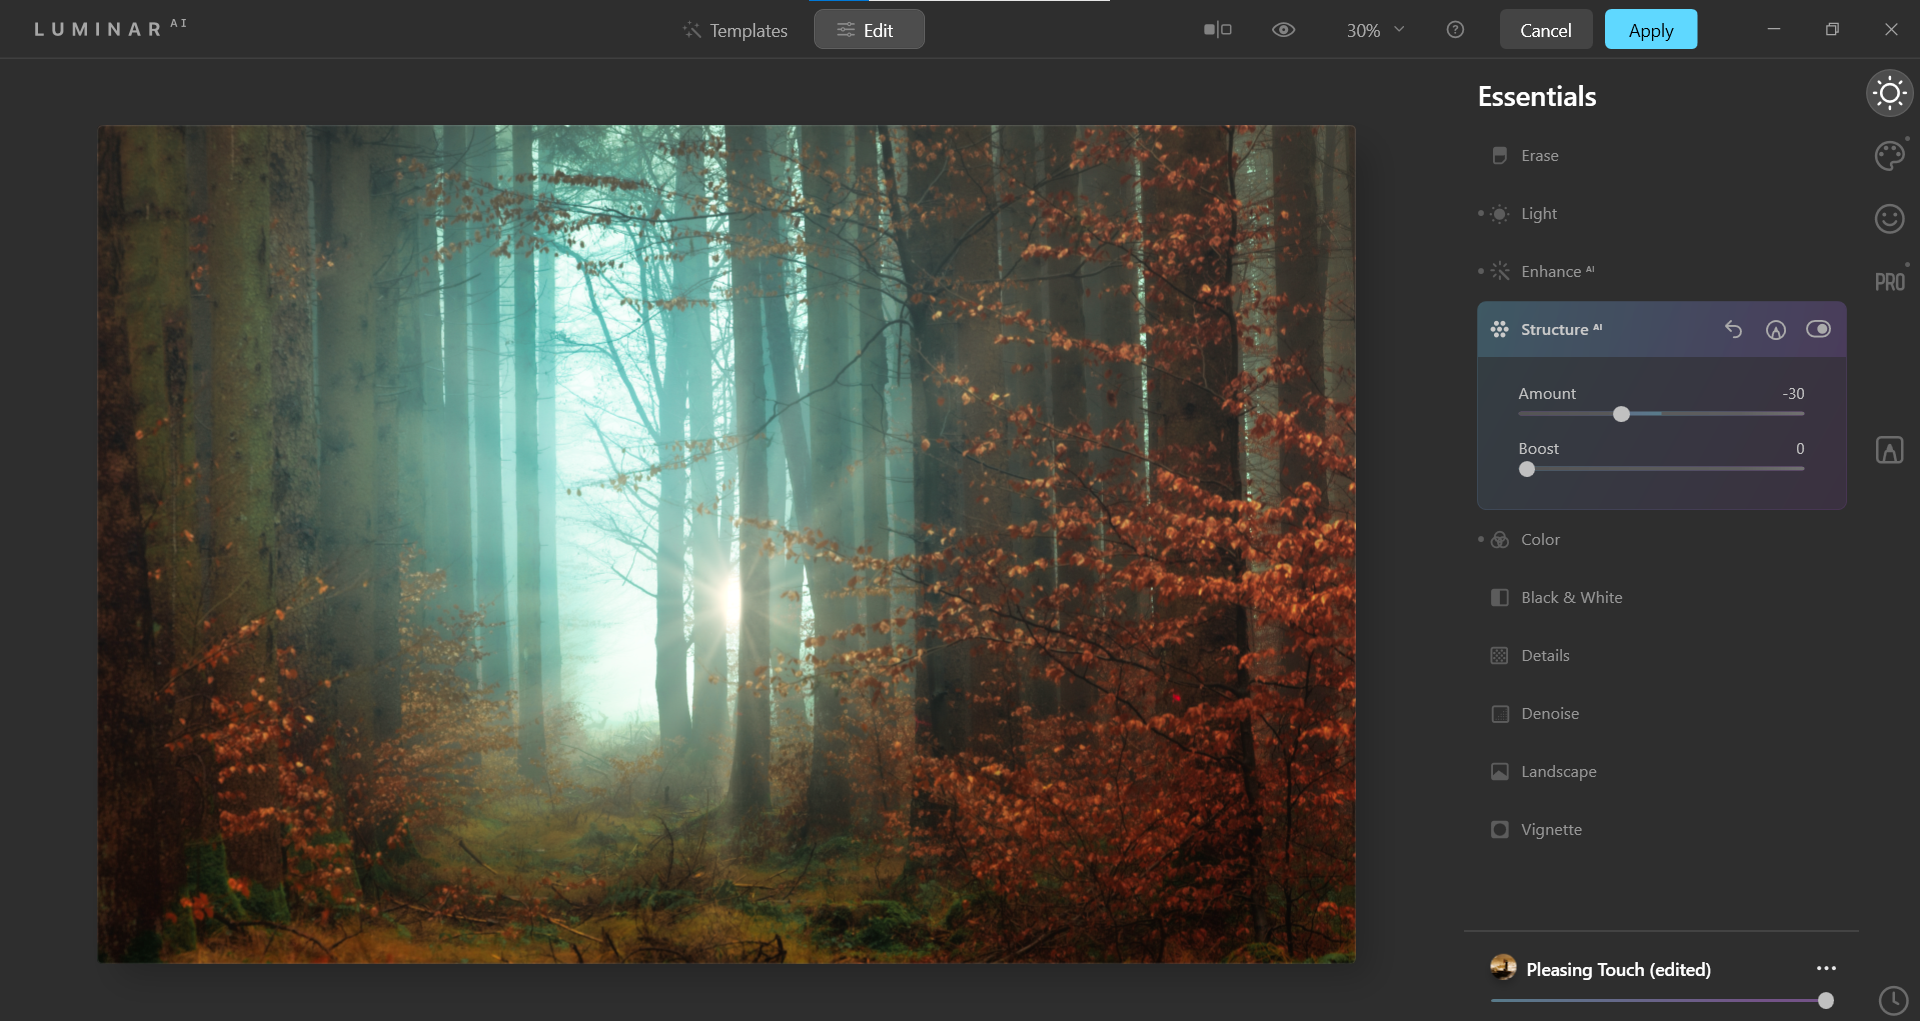
Choose Structure AI from the Essentials menu. Enter -30 for the Amount slider.
-
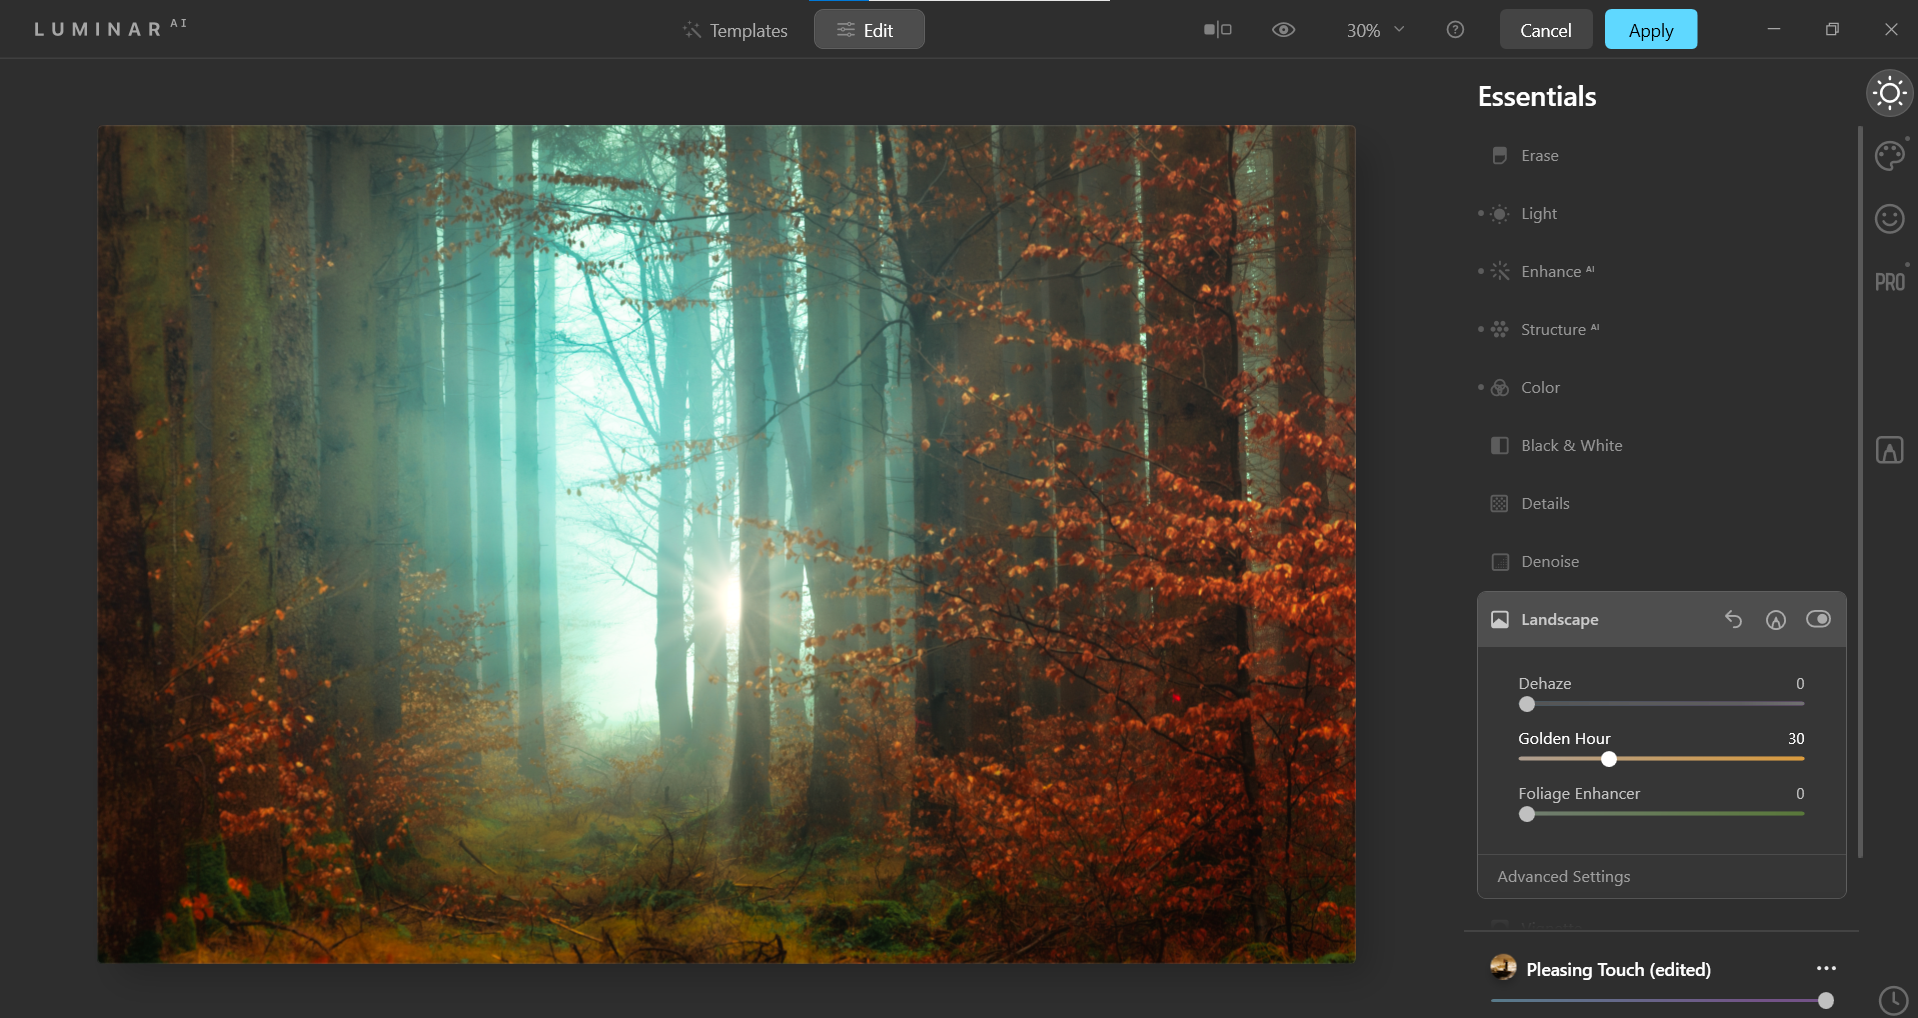
Choose Landscape from the Essentials menu. Enter 30 for the Golden Hour slider.
-
Click Apply to export the image back into Photoshop. If you’re using Luminar AI as a standalone program, there will be options for exporting your image.
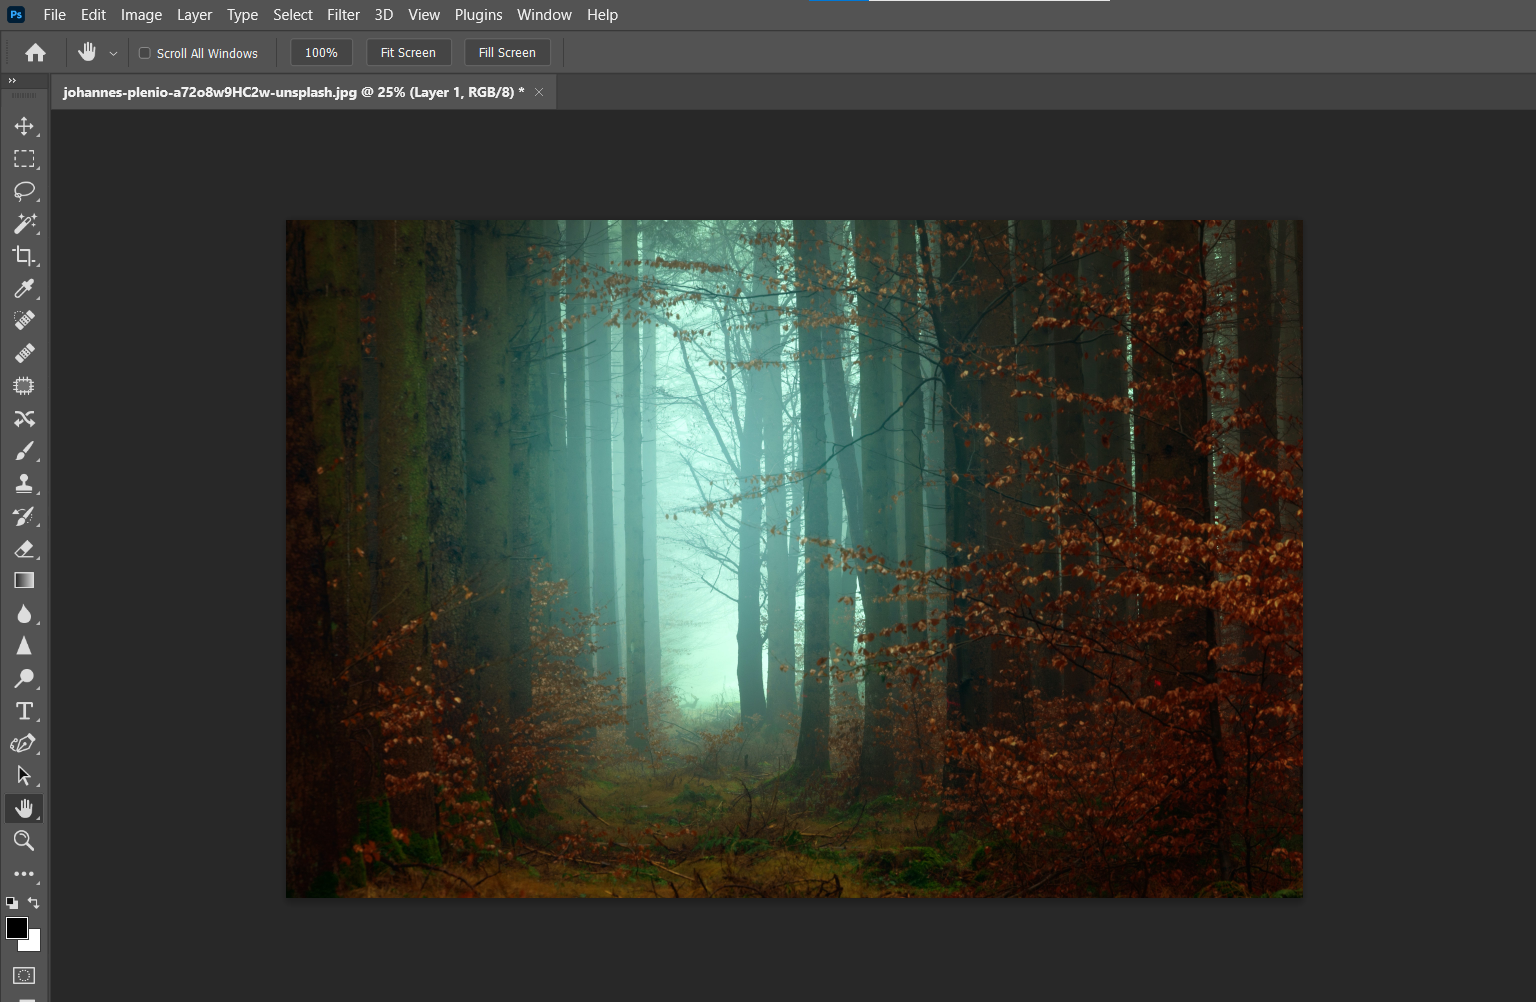
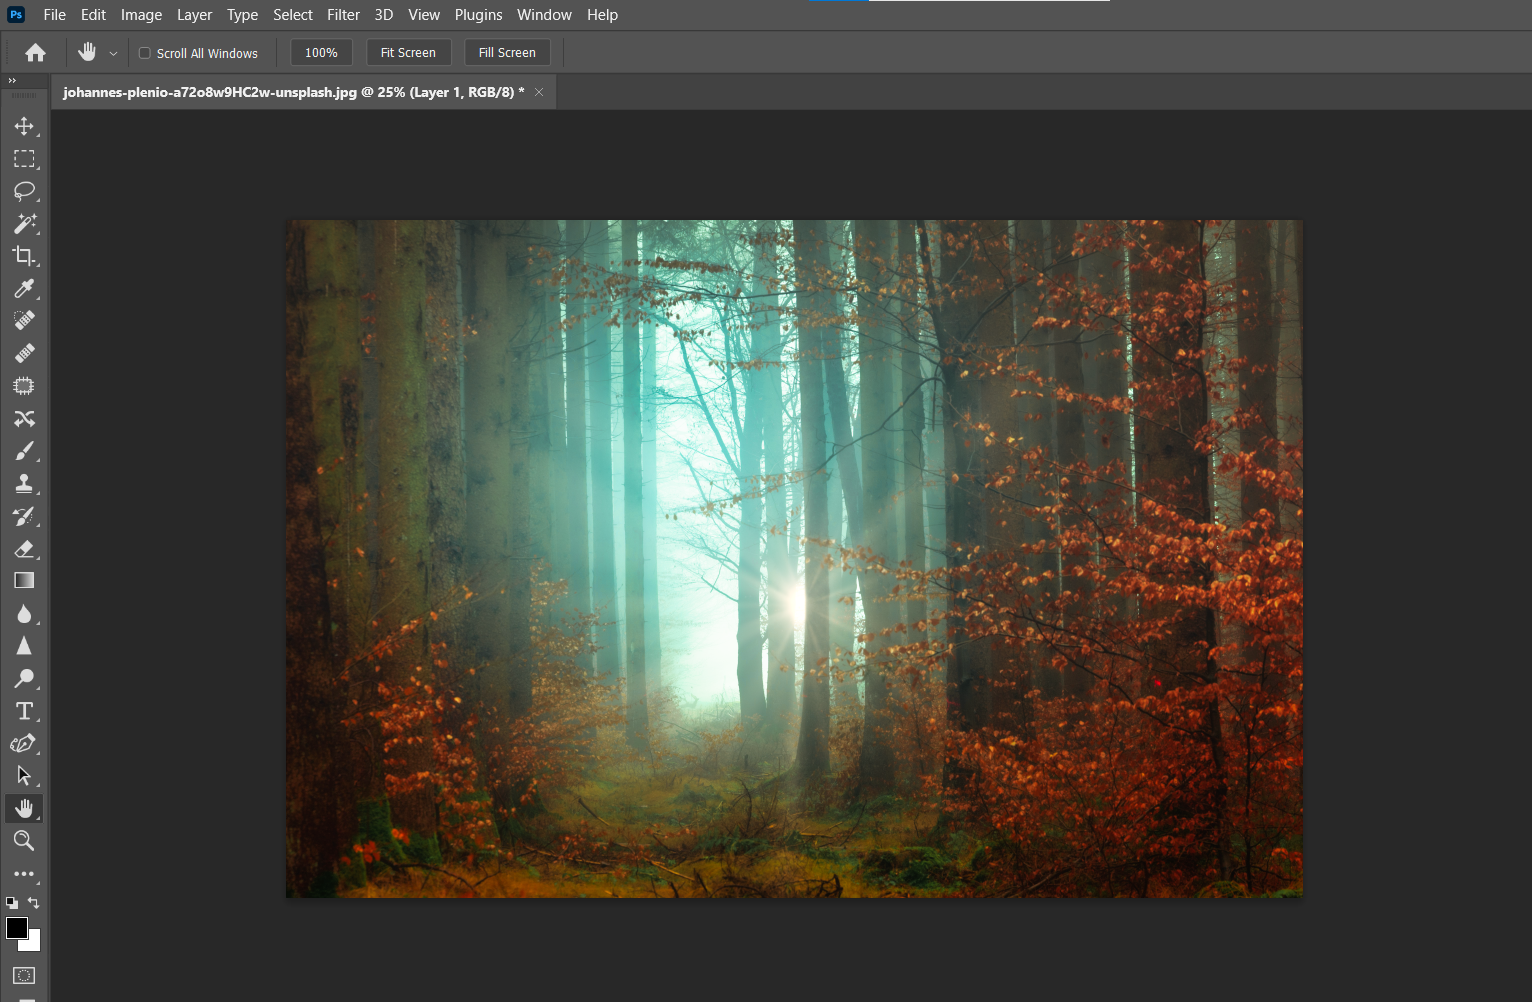
Below is a comparison of the original image versus our edited image.
Before:
After:
Don't forget that you can also use hue/saturation adjustments in Photoshop to enhance the colors in your landscape photos.
Artificial Intelligence Is a Stepping Stone to Improving Your Photo Editing
Luminar AI makes it entirely possible for someone to transition over to more powerful editing tools without having to master photo editing. It also provides more creative and dramatic results in a very short amount of time. This makes Luminar AI perfect for any budding photographer.
Image Credit: Kalen Emsley/Unsplash

