Excel has an arsenal of built-in functions. This arsenal includes hundreds of useful functions in diverse categories. Although Excel's built-in functions cover most areas, it cannot possibly have an exclusive function for every calculation.
But Excel has one more trick to offer. The LAMBDA function allows you to create custom functions in Excel. With this, you can turn your lengthy formulas into a custom function and simplify your workflow.
What Is the LAMBDA Function in Excel?
The LAMBDA function is a built-in Excel function that lets you create custom functions. More often than not, you need to combine Excel functions together to perform a calculation. If you're capable of writing complex formulas in Excel, then congratulations! You have successfully entered the nightmare zone.
A formula consisting of multiple functions and long calculations is a hassle to manage and reproduce. Suppose that you've created a lengthy formula for a spreadsheet that other people are going to use as well. Even if you're immune to human errors, other users might be unable to make complete sense of your Excel formula and make mistakes.
That's where LAMBDA comes in to save the day. The LAMBDA function in Excel lets you convert a formula into a function. You can then name your custom function, and use only that in your spreadsheets. This drastically simplifies your spreadsheet. Instead of a lengthy formula using multiple functions, there'll be a single function doing everything.
Understanding the LAMBDA Function in Excel
=LAMBDA([parameter1, parameter2, ...], formula)
The LAMBDA function takes two types of arguments: formula parameters, and the formula itself. To use the LAMBDA function in Excel, you need to first define the parameters in your formula. After that, you need to input the formula using those parameters.
LAMBDA will deem the last argument as the formula. Anything you put in before the final comma registers as a parameter. You can input up to 253 parameters for LAMBDA. The parameter names can be anything you want, as long as you stay consistent throughout the formula. It's good practice to keep the names short and concise.
To use the LAMBDA function directly in a spreadsheet, you need to write the function along with the parameters and the formula. Then, you have to input the parameters in another pair of parentheses.
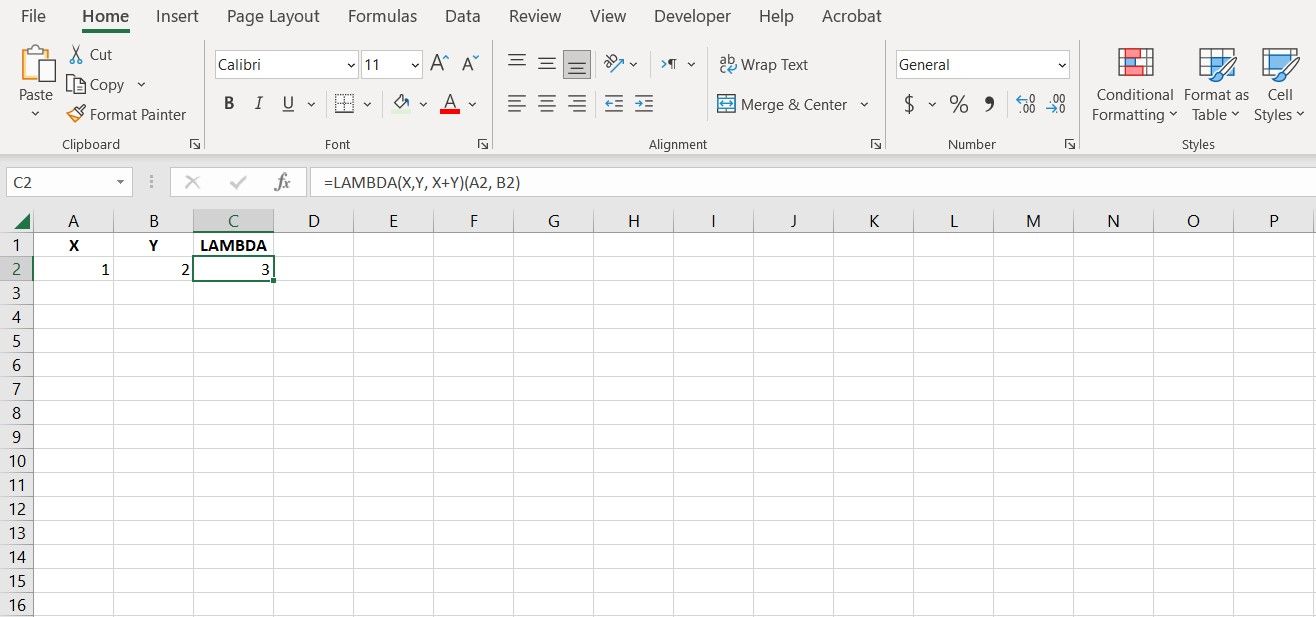
=LAMBDA(X, Y, X+Y)(A1, B1)
For instance, this formula defines X and Y as the formula parameters and then tells LAMBDA to add them together. The second pair of parentheses indicates that A1 and B1 are the X and Y parameters in the formula.
If you input this formula directly into your spreadsheet, you'll get the results. But this formula doesn't make the original formula any simpler to use. In fact, it makes it harder because now you have an extra function in it. That's because you're not supposed to use LAMBDA directly.
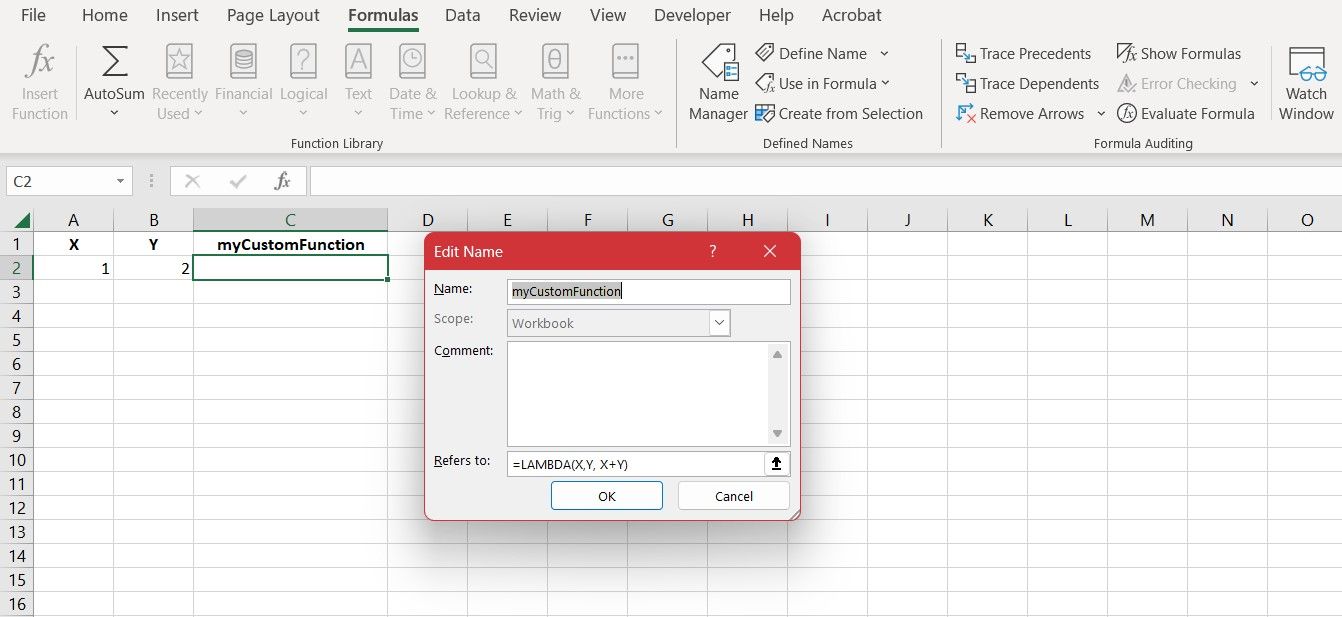
Instead, you should create a new name in Name Manager and refer to your LAMBDA formula in it. This creates a custom name for the LAMBDA formula, turning it into a custom function. From there, you can simply call on that name to use your formula.
How to Use the LAMBDA Function With Name Manager in Excel
The Name Manager lets you set custom names for different elements in your spreadsheet. You can use Name Manager to name specific ranges, single cells, or formulas. Once you give your formula a name, it basically becomes a custom function.
Here's how you can use the LAMBDA function in Name Manager:
- Go to the Formulas tab and select Name Manager.
- In the Name Manager window, click on New.
- Type in the Name of your custom function.
- Set the Scope of your function. Setting this to Workbook will enable the custom function across the entire workbook.
- Type in a description of your function in Comment. This helps you remember what each custom function does.
- Enter the formula in the Refers to text box.
- Click OK.
Now your custom function is ready to use! Go to the formula bar in any cell and type in your custom functions name to see for yourself.
How to Use the LAMBDA Function in Excel
Now that you know how to give your custom function a name, it's time to dive into using LAMBDA. You can use LAMBDA to create all sorts of custom functions. If you see the need to turn your formula—be it simple or complex—into a custom function, then LAMBDA is the way to go.
Creating a Simple Custom Function in Excel With LAMBDA
Let's start with a very simple formula. In this example, we're going to create a custom function that takes in two parameters and sums them together. Although not very practical, this formula is a good starting point.
- Select a cell.
-
In the formula bar, enter the formula below:
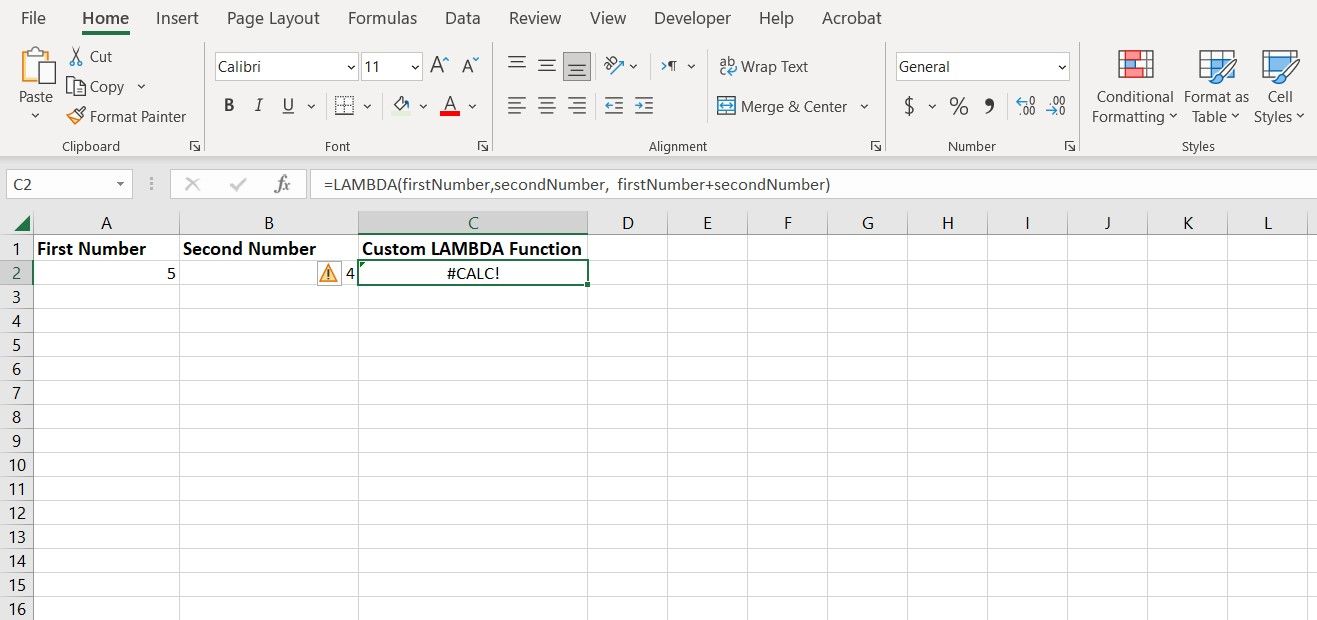
=LAMBDA(firstNumber, secondNumber, firstNumber+secondNumber) - Press Enter.
This formula defines firstNumber and secondNumber as parameters. Then it tells LAMBDA to take the parameters and sum them together.
Once you press Enter, Excel will return an error indicating that the function requires input. No cause for concern; this is because your custom formula doesn't have any input to work with. Add two sample inputs to your formula after the LAMBDA function:
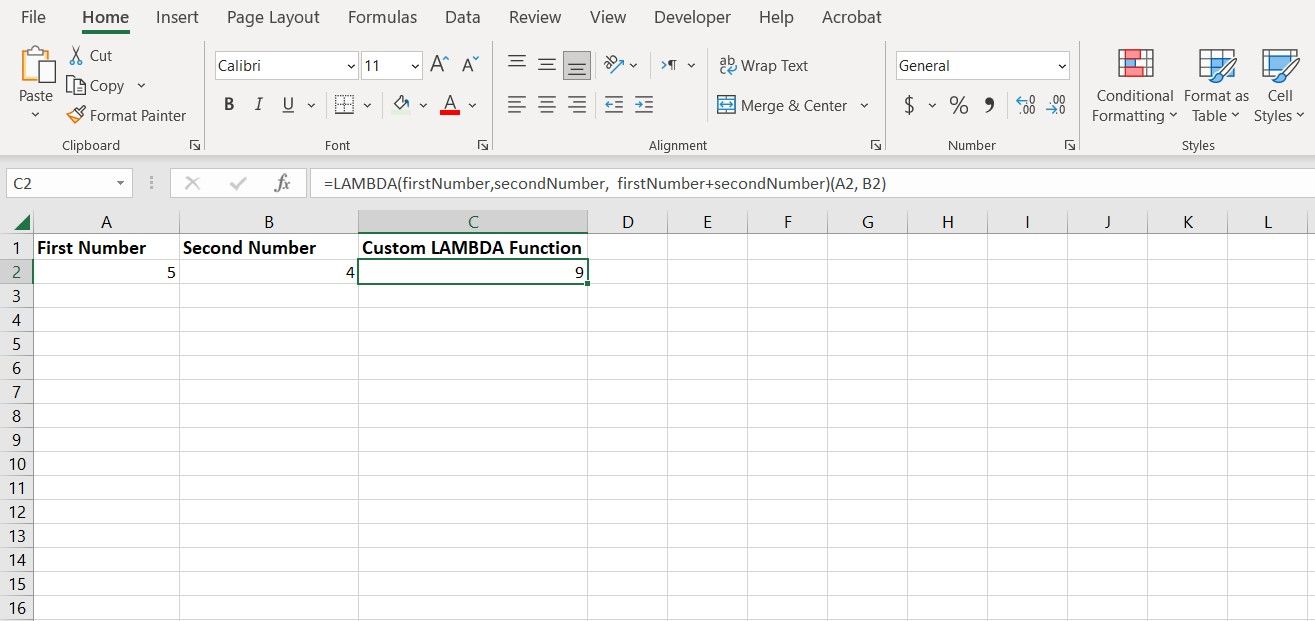
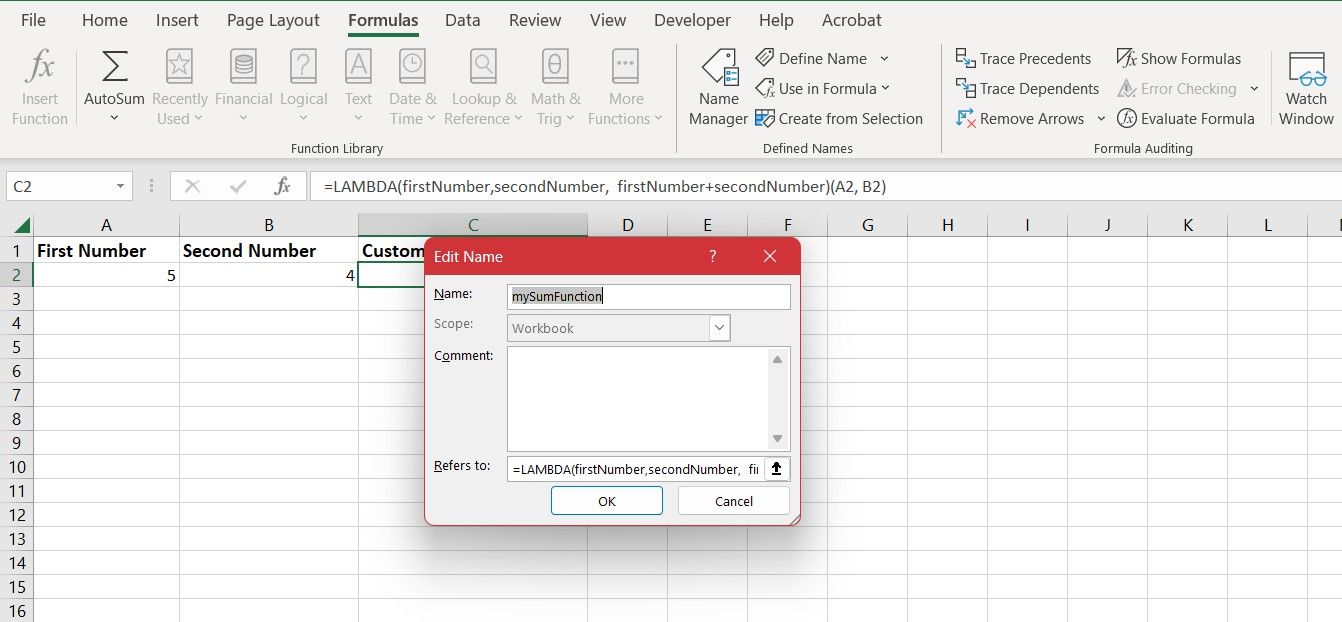
=LAMBDA(firstNumber,secondNumber, firstNumber+secondNumber)(A2, B2)
This formula gives the previous LAMBDA function two inputs to work with. The order is important. A2 and B2 fill firstNumber and secondNumber, respectively.
You should now see your LAMBDA formula working with the values from A2 and B2. Now that you're certain your LAMBDA formula works, it's time to give it a name in Name Manager.
- Copy your LAMBDA formula. Exclude the test inputs from the formula.
- Open Name Manager.
- Create a new Name.
- Give your function a name. We're going to call it mySumFunction in this example.
-
In the Refers to box, input your LAMBDA formula:
=LAMBDA(firstNumber, secondNumber, firstNumber+secondNumber) - Click OK.
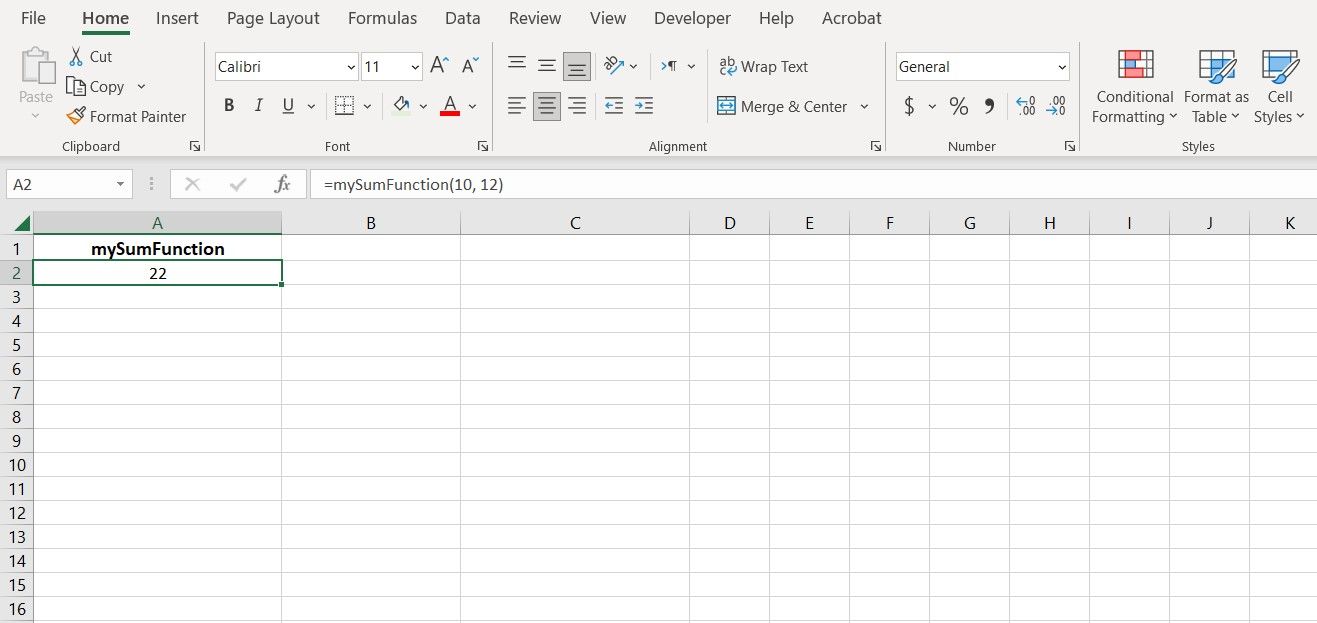
Your custom function is ready to use! Select a cell and enter your custom function's name along with the parameters:
=mySumFunction(10,12)
This custom function will sum the two parameters 10 and 12, and return 22 in the cell. You can also refer to cells and ranges in your custom function. It's just like any other Excel function, but with your own flavor.
Creating a Custom Function to Convert Text Case in Excel
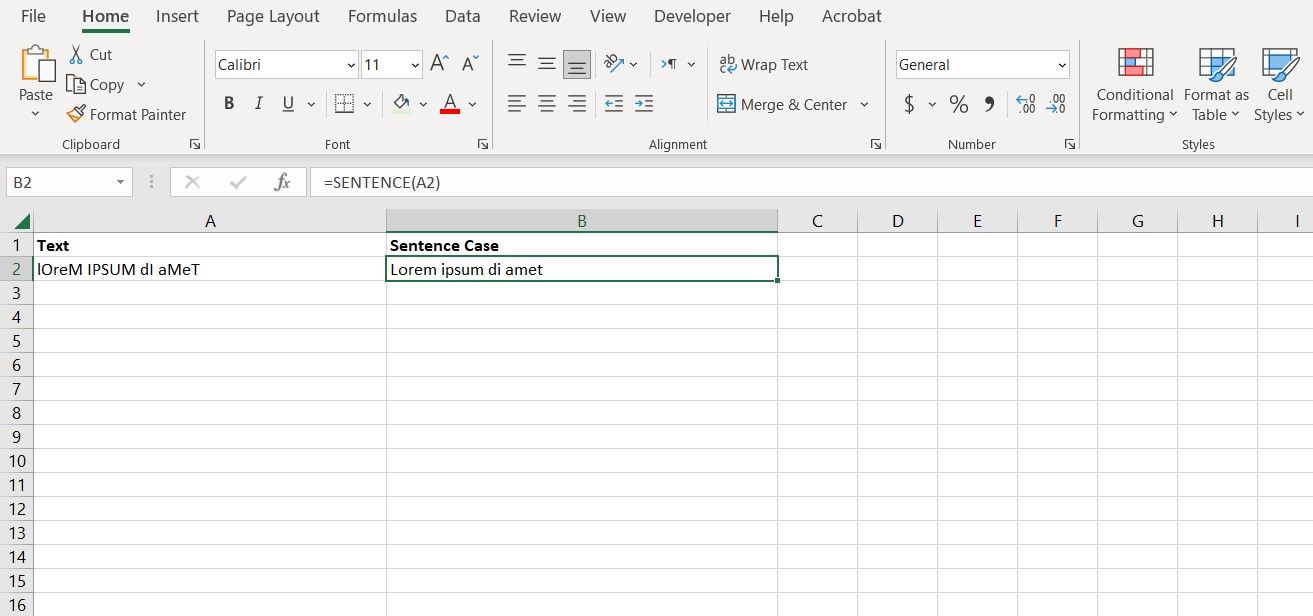
Now let's try something else. The formula below takes the text from A2 and converts it to sentence case:
=UPPER(LEFT(A2,1))&LOWER(RIGHT(A2,LEN(A2)-1))
Excel doesn't have a built-in function for this purpose. Therefore, this formula is very useful. On the other hand, it's hard to type it every time you need to convert something into a sentence case. So why not make it a custom function with LAMBDA?
Just like before, test your formula first to ensure it works. Once you're sure it works, turn it into a custom function:
- Open Name Manager.
- Create a new Name.
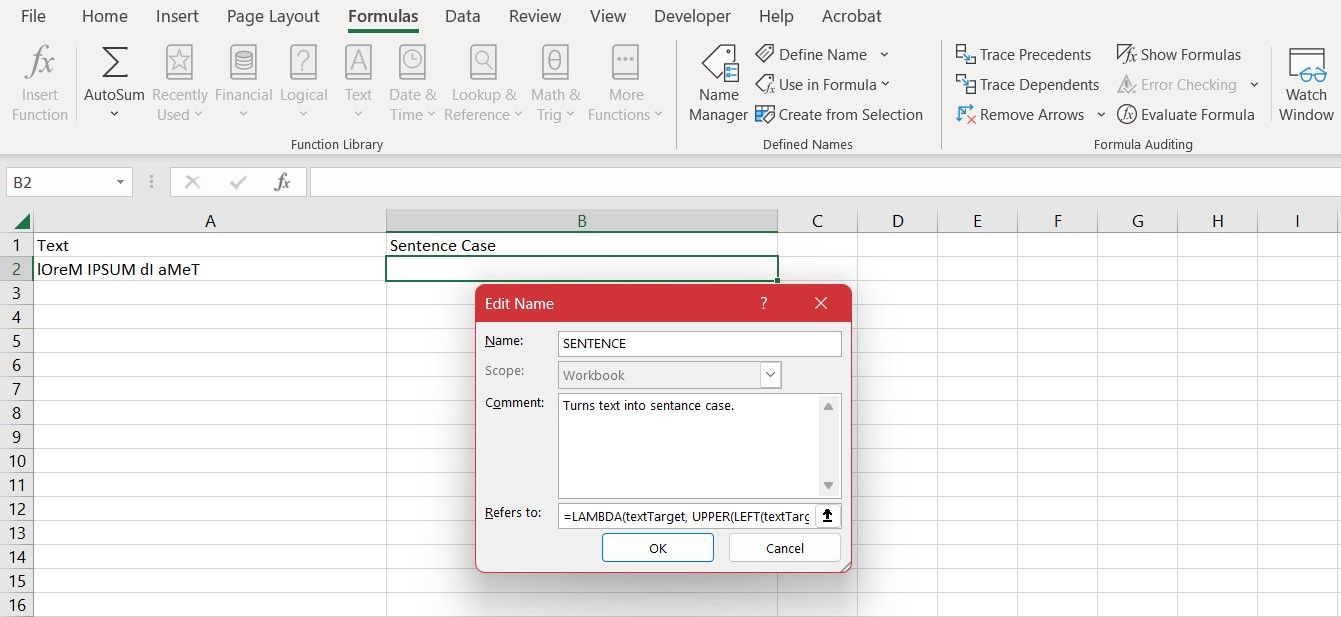
- Type in a name for your function. We're going to call it SENTENCE.
-
Insert the formula below in the Refers to box:
=LAMBDA(textTarget, UPPER(LEFT(textTarget,1))&LOWER(RIGHT(textTarget,LEN(textTarget)-1))) - Click OK.
Your custom function is now ready to serve you. Select a cell, then use the SENTENCE function you just made to convert text to sentence case.
Unleash Excel’s Power With LAMBDA
With its powerful capabilities, LAMBDA is an invaluable tool for any Excel user looking to take their spreadsheet skills to the next level.
By now, you should have a good understanding of how to use LAMBDA and Name Manager to create custom functions in Excel. Now go ahead, give LAMBDA a try, and see what amazing things you can do!


