If you haven’t heard of the Insert from iPhone or iPad feature in Pages, you’re in for a treat. No longer do you need to iMessage, email, or AirDrop images to yourself, so you can place them in your Pages document.
Whether you’re learning about it for the first time or you’re here because you’re feeling a little stuck, this guide will walk you through how to use this somewhat hidden, albeit useful feature in Apple Pages.
How to Send an Image Directly to Pages
Using Insert from iPhone or iPad, you can take photos, scan documents, or draw images into your work.
- Click Insert in the menu bar at the top of your screen
- In the Insert menu, find Insert from iPhone or iPad—it’s near the bottom
- There you’ll find the options Take Photo, Scan Documents, and Add Sketch
You can swiftly crop or edit any image you insert by double-clicking it. If it's upside down, you can Rotate it 180 degrees in the Arrange panel of the sidebar.
Take a Photo Into Pages
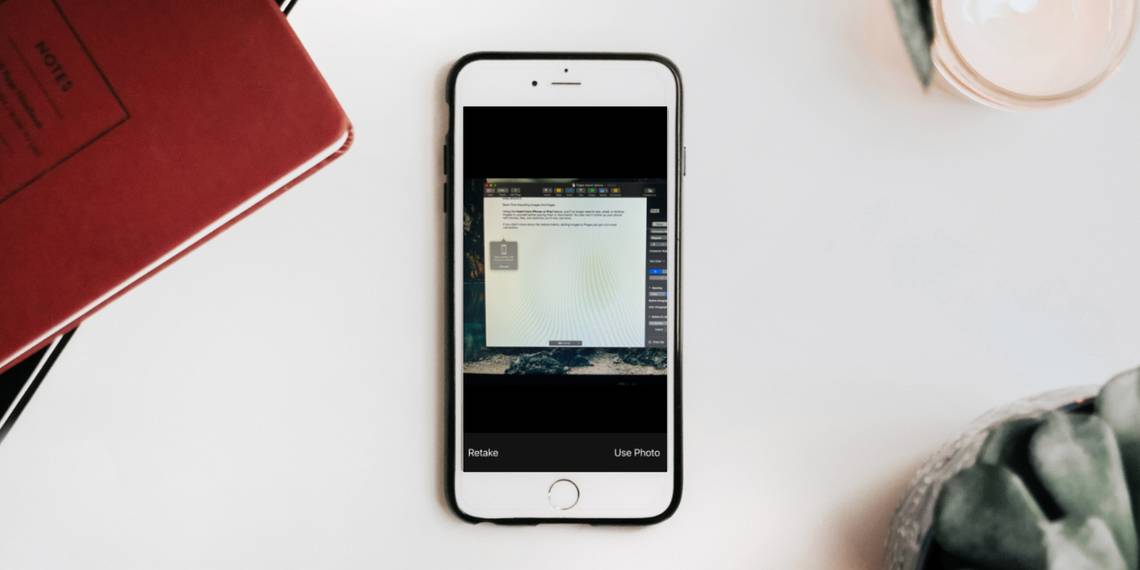
When you select Take Photo, the instructions Take a photo with appear, followed by the device name. In the same pop-up, Pages give you the option to hit Cancel if you change your mind.

Remember, you won't be able to edit your document further until you take either action.
At the same time the pop-up appears, your device’s camera opens. While you won’t see instructions on your iPhone or iPad, your device gives you the option to Retake or Use the image once you take the photo.
Pressing Use places it into the document in the location of your cursor. From there, you can format it however you'd like.
Scan a Document Into Pages
Scan Document works similarly to taking a photo. Once you select the option, the instructions to Scan a document with your device name appear, and your camera opens.
The difference here is that your camera will capture the image automatically once you line it up with the document. The color will also look more washed out, like the effect of an actual scanner.

As your phone works, it presents the image for quick review, allowing you to save it when you’re happy with it. At the same time, it continues to look for other things to scan unless you tap the thumbnail image in the bottom-left corner of your device’s screen.
The automatic scanning feature is handy if you have a multi-page document. It allows you to keep going without going back and forth between devices. However, it’s easy to scan unwanted extras or capture an image too soon.
You can review, retake, or delete scans by tapping the thumbnail image. Additionally, you can take multiple scans until you get one you like and delete any extras in Pages.
Alternatively, if you want to keep a copy of your documents elsewhere, you can import them directly to your desktop by right-clicking anywhere and selecting Import from iPhone.
Sketch Into Pages
The Add Sketch tool will pull up instructions to Add a sketch with your device in Pages. On your phone, it will open a blank document where you can use various tools to draw.

Once you hit Done, your device places the drawing into the document. You’ll notice that there’s no perimeter around it, so you’ll want to adjust your formatting if you don’t want the text to wrap around it.
If you find you have trouble getting creative with layouts, there are plenty of places you can find templates, including those that come with the software.
Save Time Importing Images Into Pages
Using the Insert from iPhone or iPad feature, you’ll no longer need to text, email, or AirDrop images to yourself before placing them in documents. Additionally, you won’t clutter your phone with photos, files, and sketches you’ll only use once. If you didn’t know about this feature before, adding images to Pages just got a lot more convenient.