In Google Docs, the header and footer refer to the uppermost and bottom most parts of a page in a document. You can typically use the header and footer to add information such as the author's name, section title, footnotes, or page numbers to your document.
Inserting and customizing headers and footers in Google Docs is simple, yet there are some tips you should heed to master it. Read on to find out how you can use headers and footers in Google Docs.
How to Add a Header or Footer in Google Docs
Before you get started, it's worth noting that you can't have headers or footers in pageless Google Docs documents—mainly because the pageless documents don't have any pages!
If you've got your document in pages, then adding a header or a footer in Google Docs is quite simple.
- Open your document in Google Docs.
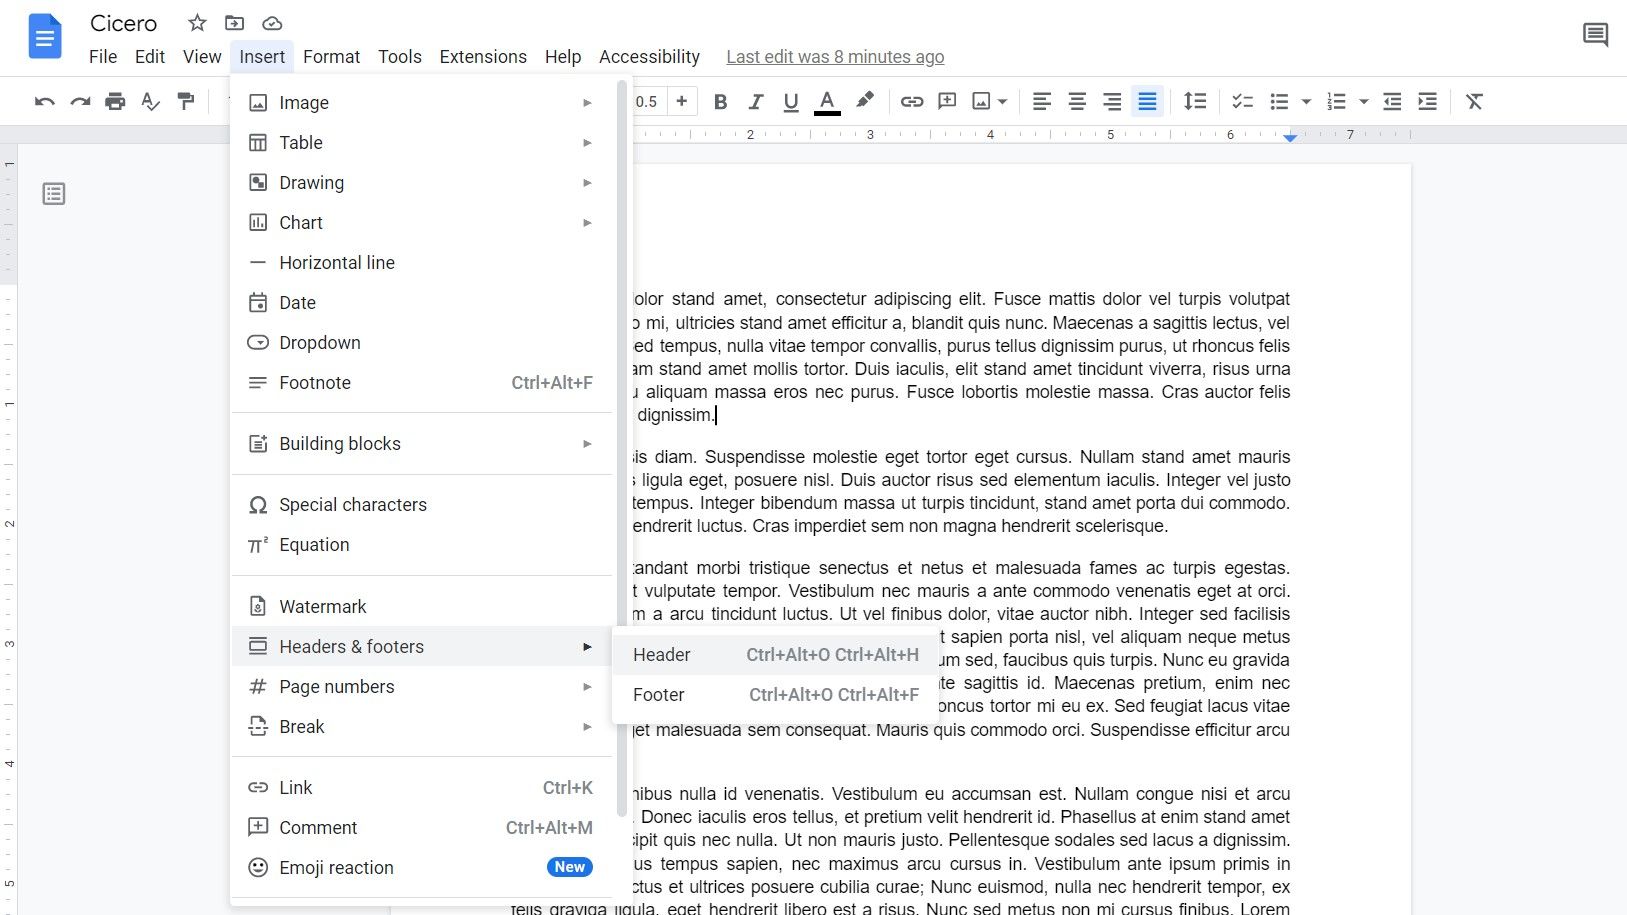
- Go to the Insert menu.
- Select Header or Footer. This will make the header or footer editable.
Once you've access to the header or footer, you can add what you want to it. You can change the styling of the text, or even add images and tables. Once you're done editing the header or footer, click the main body of the document. You can double-click the header or footer to edit it again.
How to Customize Header and Footer in Google Docs
As mentioned before, you can edit the header and footer just as you would edit the ordinary text in Google Docs. Other than the content of the header or footer, there are two main settings you can alter: The margins, and the layout.
The Margins
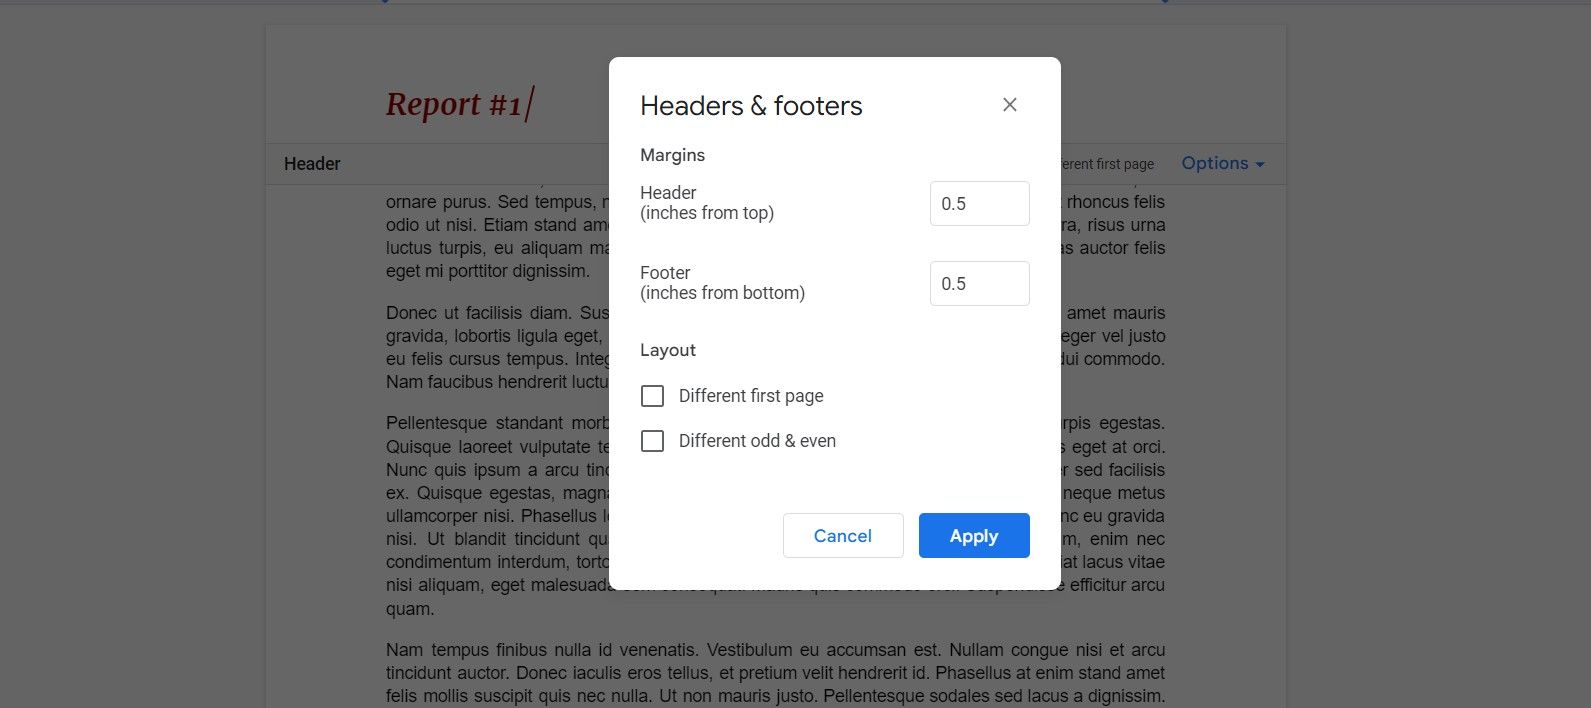
Changing the margins will change how far the header is from the top of the page, and how far the footer is from the bottom of the page.
- Go to the header or footer in your document.
- Click Option.
- Select Header format. This will be Footer format if you're in the footer.
- In the window that opens, change the margins to your ideal. Note that increasing the header margin will put more space between the header and the top of the page. Increasing the footer margin will put more space between the footer and the bottom of the page.
- Click Apply.
The Layout
It's common practice in many document types to put different sorts of information in the first header. For instance, in a lab report, you'd add the date, the patient's name, the technician's name, and so forth in the first page's header. But for the rest of the pages, you can just put the patient's name and the lab report's title.
You can achieve this by having a different first page header or footer.
- Go to the header in your document.
- Select Option, then select Header Format.
- Check Different first page.
- Click Apply.
It's best to check this option before you add anything to your header. If you check the Different first page option after you put content in the first page's header, the other pages will still keep the header up to that point. Though, they won't get the new content that you type in.
You can also have different odd & even headers or footers. If you check this option, then the odd pages will have the same header/footer, and the even pages will have the same header/footer.
How to Add Page Numbers in Google Docs
Page numbers are one of the most important functions of headers and footers. With page numbers, you can make your document easier to navigate, and lay the foundations for a table of contents in Google Docs. You can display page numbers in either the header or the footer.
- In Google Docs, go to the Insert menu.
- Select Page numbers. Here you'll see the four possible arrangements. There are two that show the page number in the footer, and two in the header. One of each omits the first page. You can pick one of these four to quickly set up page numbers.
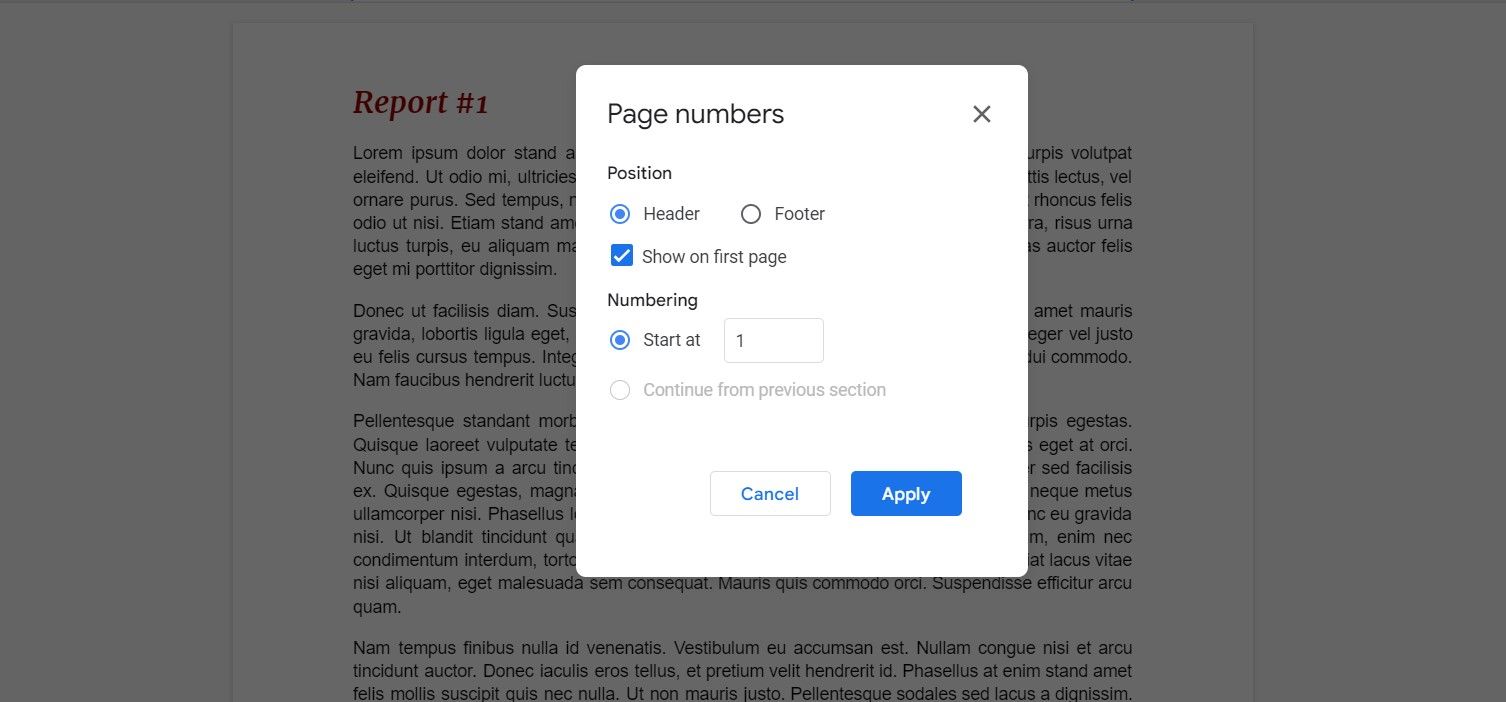
- If you want to manually configure the page numbers, select More options. This will bring up the Page numbers window.
- Select the position where you want the page numbers to show. This can be the footer or the header.
- Check whether you want to show the page numbers on the first page or not. The first page will still be counted, but won't show the page number.
- Finally, input the number that you want to start the page numbering from. This is best left as 1 in most cases.
- Click Apply.
Now the page numbers will appear. You can go to the header or footer and then customize the number's styling. You can change the alignment, font, color, and more. Once you change the styling for one of the page numbers, the others will follow.
Make the Most Out of Your Google Docs
The top and bottom of your page in Google Docs aren't dead space, they're headers and footers, and you can write in them. For instance, you can use the header to give information about the document, and the footer to write footnotes. What's more, the header and footer can house page numbers.
Now that you know how to use headers and footers in Google Docs, it's time to make the most out of every page in Google Docs.


