Effects in Premiere Pro come in a million different varieties. Some are silly. Others are absolutely indispensable. Knowing the basics will help you find exactly what your project needs and to utilize the relevant effects to the fullest extent possible.
What Are Effects in Premiere Pro?
Effects are any of a diverse group of modifiers that you can apply on top of any of the media that you've brought into the project. Even if you're just starting out, you're probably already using them. Any time you change any of the basic parameters of a clip, you're putting effects to work in your project.
One thing that you may not yet realize, however: effects fall into one of two major categories. These two categories are called Fixed effects and Standard effects.
Fixed Effects in Premiere
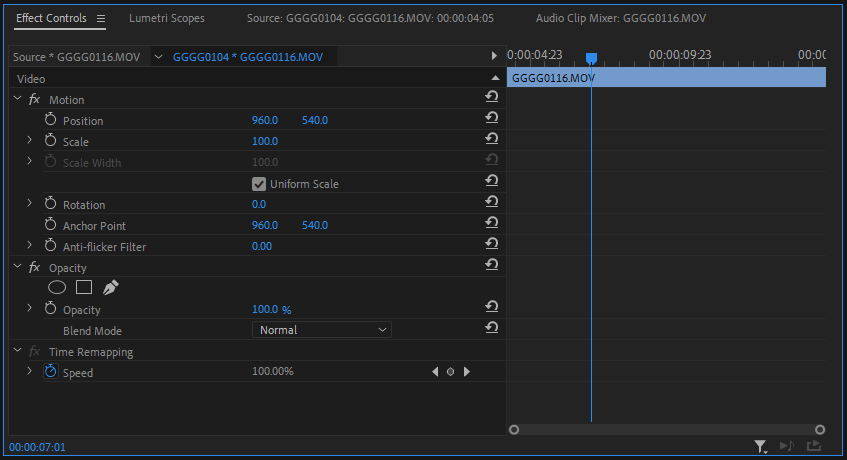
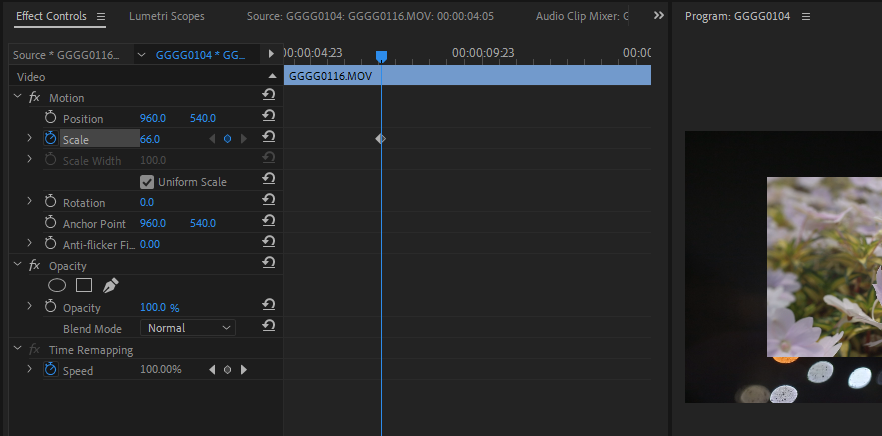
Fixed effects are clip-based and ride along with all of your media in Premiere by default. To access them, double-click on a clip or any other piece of media.
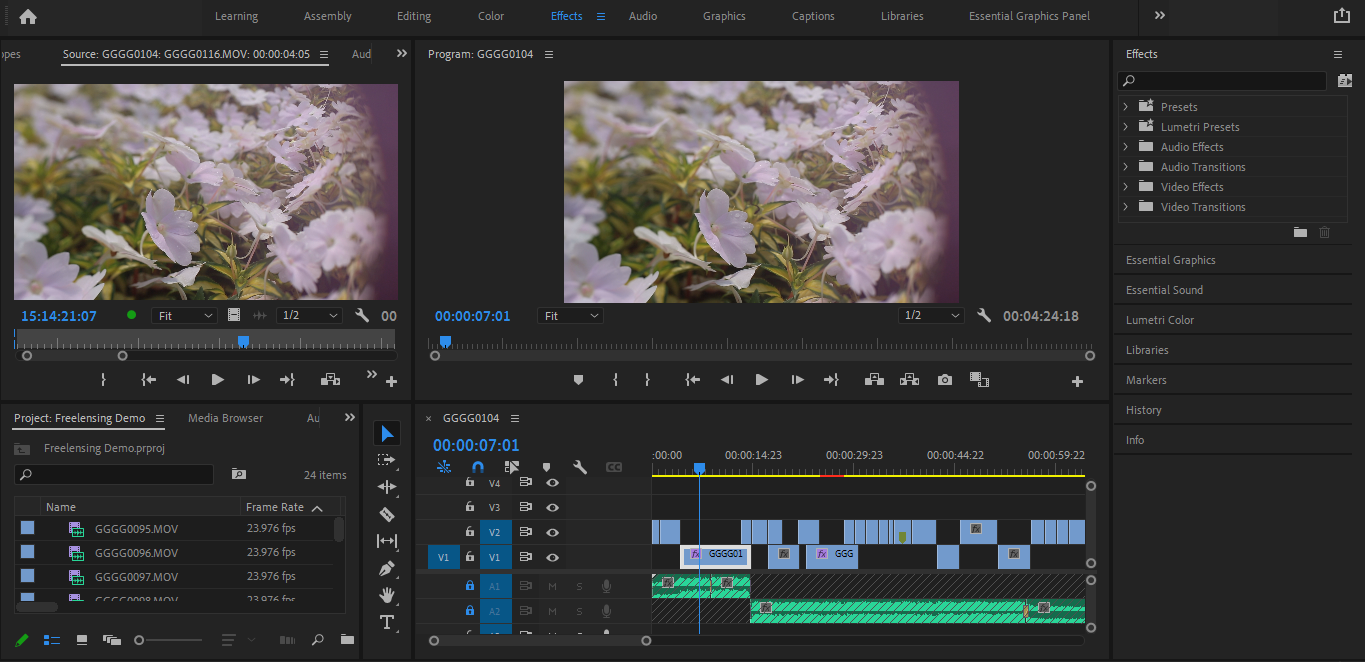
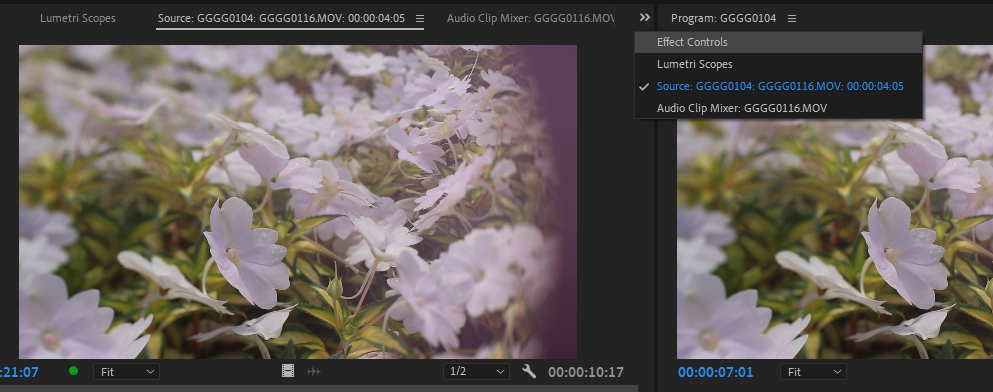
The Effect Controls panel should be grouped in the same window as the Source Monitor. Click into it to check them all out.
This space is reserved for the effects that are applicable to any type of visual media. You'll find things like position, scale, and opacity here—everything can be adjusted and keyframed. You are also able to reset any of these effects back to their default values with each of their respective Reset Parameter buttons.
How to Use Fixed Effects in Premiere
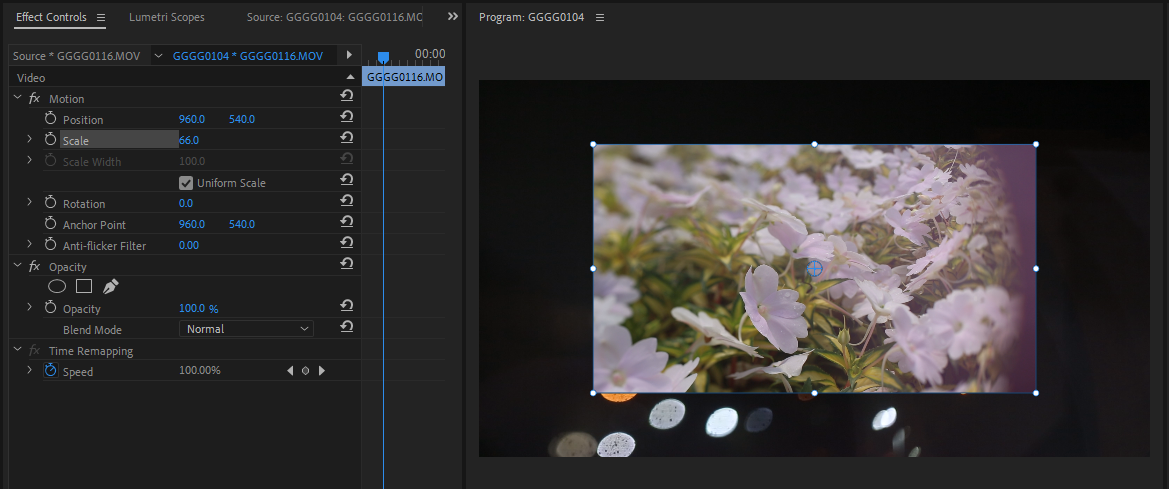
Fixed effects cover most of your generic, everyday needs when editing. If you wanted to adjust the scale of a clip, to name one example, this would be the place to do it.
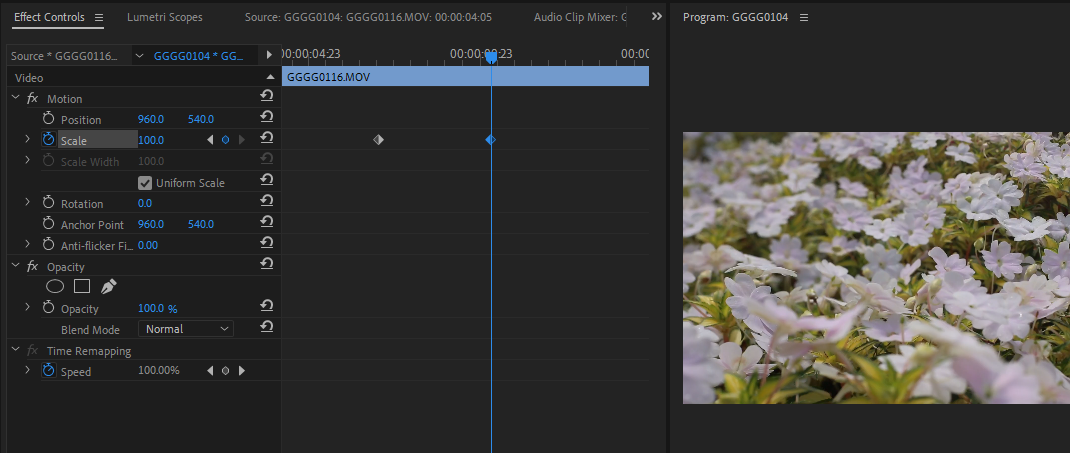
Click and drag the scale parameter until you've found the value that you want. You'll be able to see the difference at play in the Program Monitor panel.
To animate the effect so that it changes over time, hit the clock icon to create your first keyframe.
Now, move the playhead further along and adjust the scale again. This creates your second keyframe automatically. The image will grow or shrink as you move from one keyframe to the other.
You can keyframe any effect in Premiere—Fixed or Standard. The process will be exactly the same. Right-clicking a keyframe brings up a context menu with all of your Bezier curve and Ease-In/Ease-Out options. These allow you to transition between values at rates that may feel gentler or more natural, simulating motion or change more realistically.
Standard Effects in Premiere
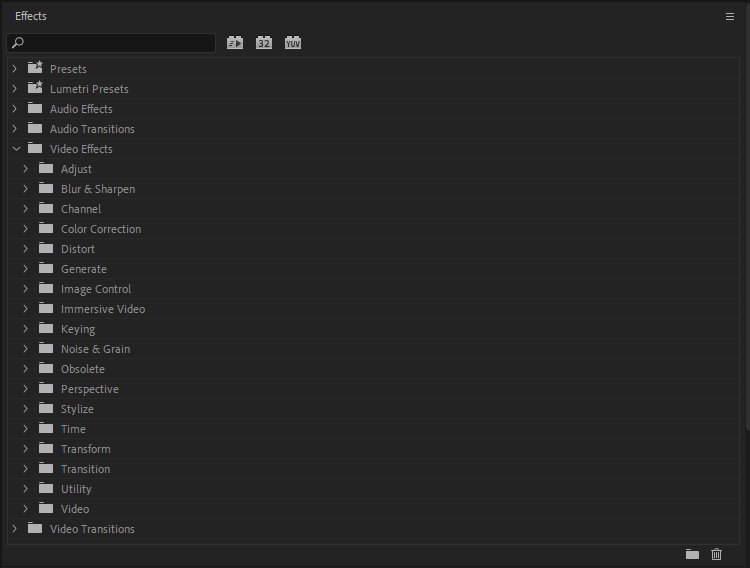
Standard effects address more specific needs; they go beyond generic clip modifiers, like rotation. You will recognize Standard effects as all of the options available under the Effects panel.
There are a plethora of effect categories to sift through. Most of these categories are self-explanatory.
Keying effects, for example, are used when green-screening or carrying out a sky replacement. Adjust effects, Color Correction effects, and Image Control effects offer tools that adjust different aspects of the luminance and chrominance values of the image selectively. Generate effects add elements to the shot, like lens flares or lightning bolts. Some of them transform the entire frame into things like ramp gradients or a grid.
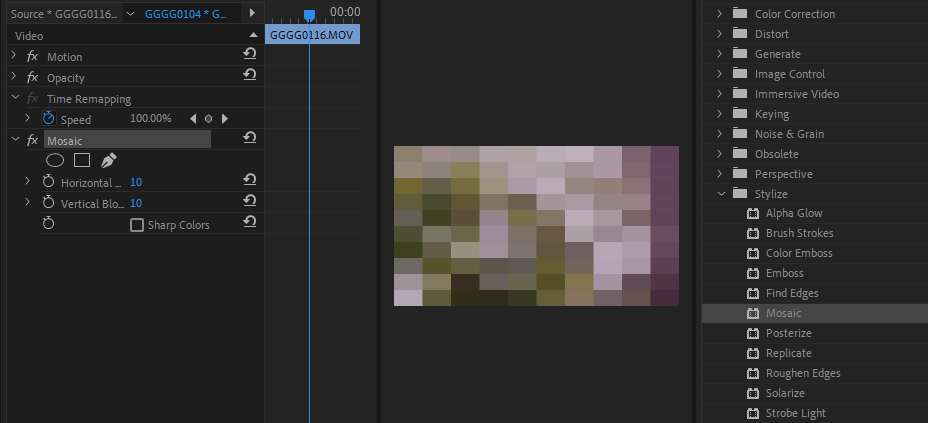
The list goes on. To try one out, select a clip. From the Effects panel, you can either double-click on the one that you want or you can drag it over into the frame or Effect Controls panel directly.
Stylize effects add a unique and global effect to the clip. In this case, we're going to audition the Mosaic effect. It sort of pixelates the image, which could be used to simulate a weird, glitchy vibe. You can tailor the effect to your liking through any of the options that come along with it.
Some effects like this might feel less-than-useful at first. Many can actually be really interesting when customized, keyframed, and used alongside others, however. All that it takes is a little bit of imagination and tinkering.
How to Use Standard Effects Together: Where Things Get Interesting
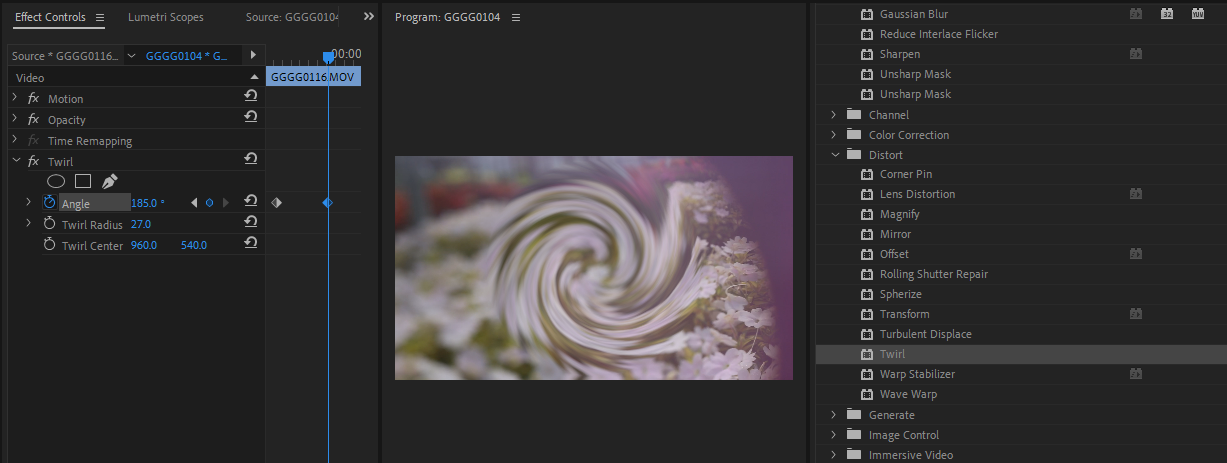
The Distort effect called Twirl, static and on its own, is sort of boring. When keyframed and set into motion, however, you've suddenly got the maw of a cool vortex opening up on-screen.
There is no reason to stop here, but, before continuing, there is one more thing to remember when combining effects in Premiere.
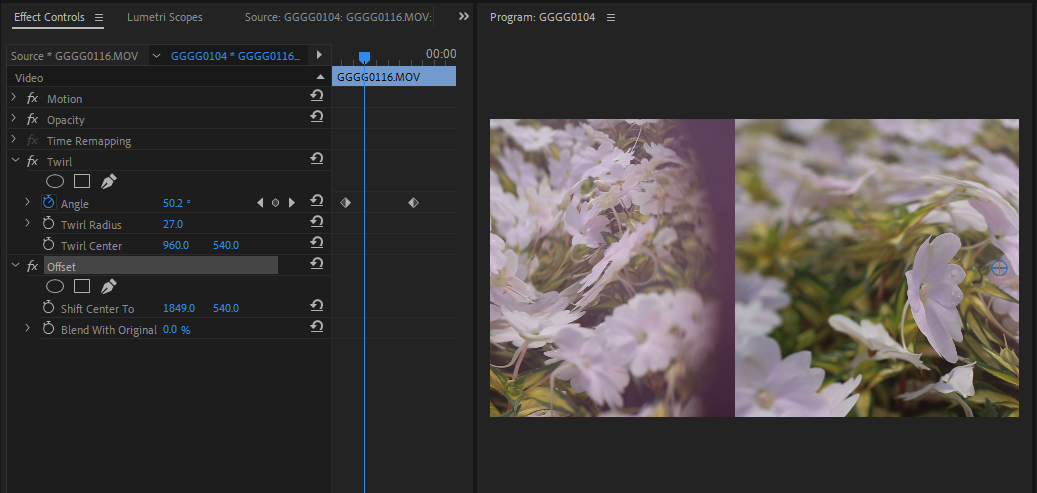
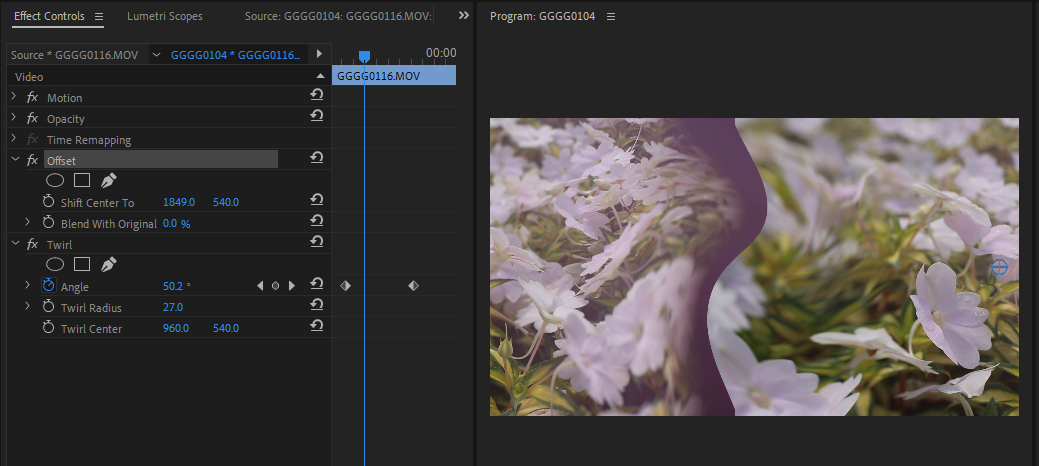
When you've got a couple of effects modifying the same clip, the order of the stack in the Effect Control panel may have some impact on how the effects compound and build off of one another.
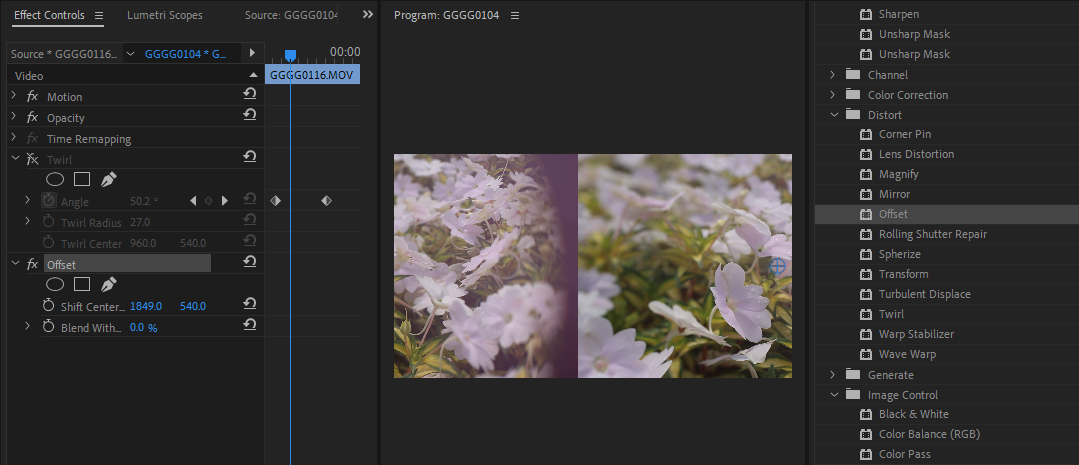
To illustrate the point, we're going to hide the Twirl effect for one minute, just to show what our second effect, the Offset effect, does on its own. You can do the same by hitting the FX toggle right next to it. As you can see, Offset shifts the center of the frame up or down, or to one side or the other.
When applied after Twirl, the Twirl effect will also be Offset, just as though it were part of the original source footage.
When you move Offset up over Twirl, you'll see the opposite happen. Now, the Offset perimeter of the shot is also being Twirled along with the rest of the frame.
Because Twirl is taken into consideration afterward, everything that comes before gets baked into the clip, for all intents and purposes. Keeping this in mind may inspire new ways of combining simple effects to create something new.
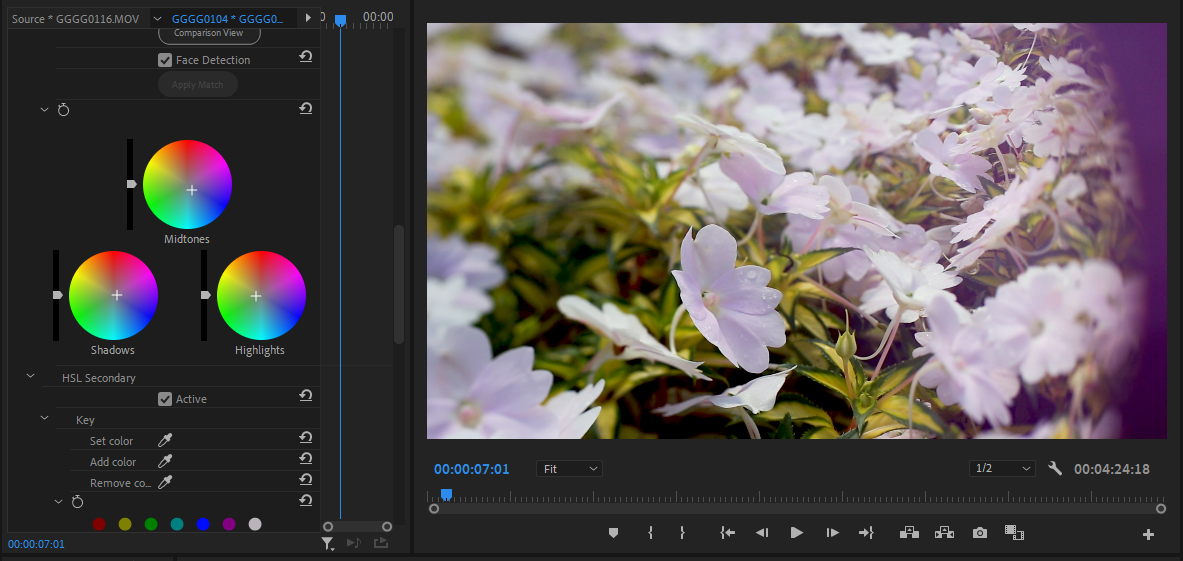
Then, what are the best effects in Premiere that are applicable to pretty much any type of project, even on their own? Warp Stabilizer, Sharpen and Gaussian Blur, Chroma Key and Luma Key, Premiere's Timecode generator, and, of course, Lumetri Color are all worthy contenders. All of them can be applied to your footage through the same Effects workflow described here.
Copying and Pasting Effects in Premiere
It's totally possible to simply navigate into the Effect Controls of a clip and copy the effect that you want for another clip directly. It's faster to grab them from the timeline by simply copying the clip itself. This is one efficient way to work when you would like to apply a Lumetri color grade to many clips without disturbing any of the other effects that they already have going on.
To begin, select the clip with the effect that you want and hit Ctrl + C, plain and simple.
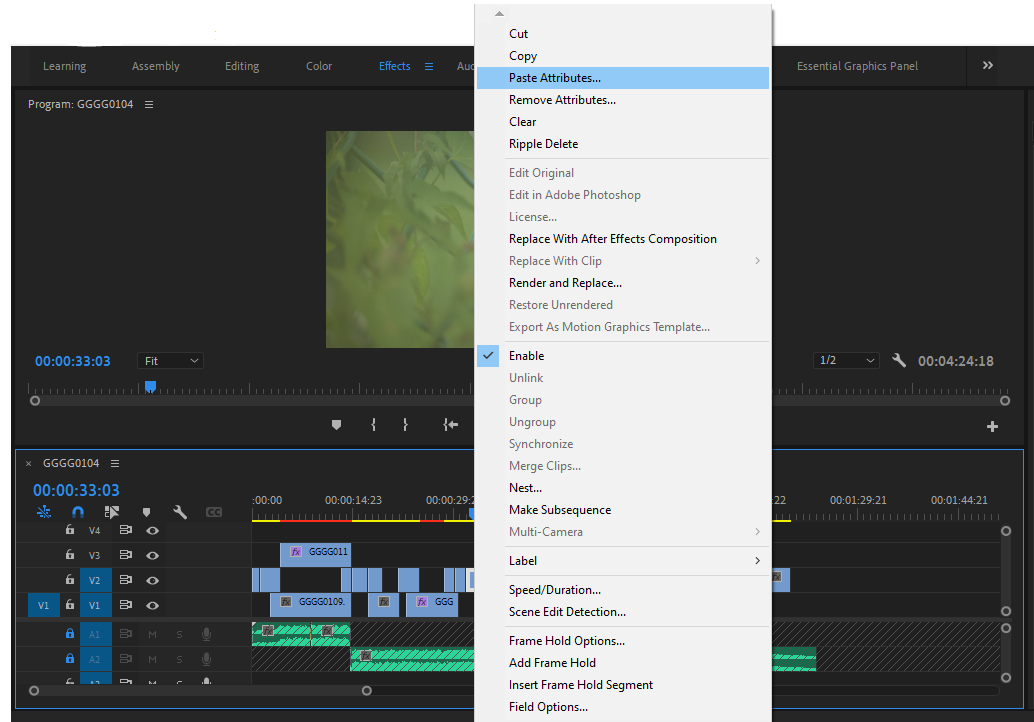
Once you've done so, find the receiving clip or clips. Right-click and select Paste Attributes. The Remove Attributes option just below lets you remove effects in exactly the same way.
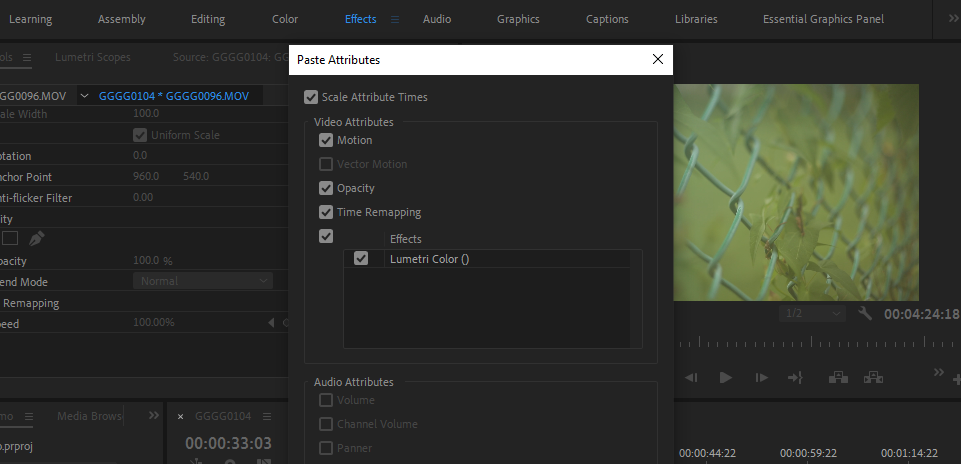
The prompted window that results lets you choose which effects you would like to copy over.
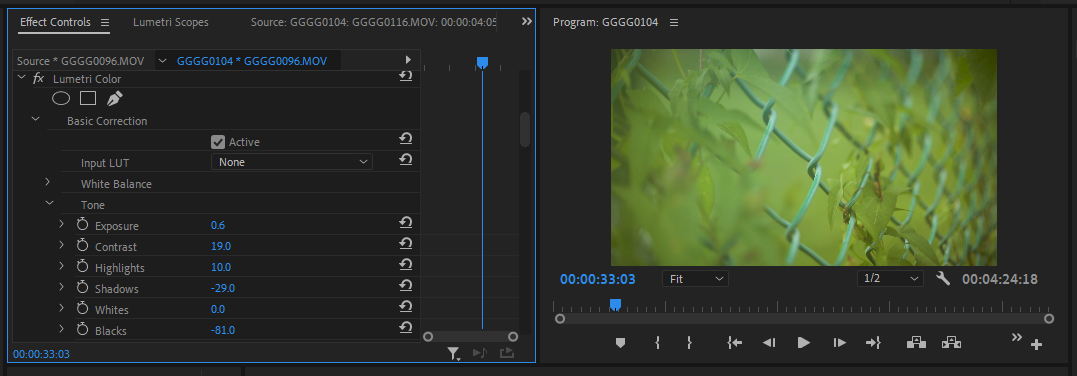
In the receiving clip's Effect Controls, you should find the same effect with the same parameters copied over.
Putting Effects in Premiere to Work, Just Like the Pros
The best effects in Premiere Pro to use? Well, that's going to depend a lot on what you need to get done. Organizing your favorites is as easy as right-clicking in the Effects panel, creating a Custom Bin, and dragging over the ones that you love for easy access later.
Give each one a shot. Once you've seen what they all have to offer, plenty of new ideas will start rolling in.


