
If you use Microsoft Word, chances are that you're familiar with tables. Tables allow you to present information in an easy-to-digest format—in rows and columns. This can be useful when preparing reports, listing features, or displaying data in Word.
Perhaps you know how to add tables in Word using the popular Insert Table function, among others. But have you ever tried to draw your own custom tables?
In this article, you'll learn how to use the draw table feature in Microsoft Word to quickly draw tables, plus how to customize the tables that you draw.
What Is Draw Table in Microsoft Word?
Just as the name implies, the Draw Table feature in Word allows you to draw and design your own tables by hand using your mouse and a pen tool.
Draw Table is one of the five methods of creating tables in Word. Others include Insert Table, Convert Text to Table, Insert Excel Spreadsheet, and Quick Tables.
Draw Table allows you to customize your tables in far more ways. For instance, you can place a table exactly where you want it and manage its proportions quickly if you draw it.
If, on the other hand, you use the Insert Table option, your table will expand to fit the page. You'll then need to start adjusting its proportions using the table formatting tool.
What's more, with Draw Table, you can draw diagonal lines and cells within cells. Below is an example of what's possible with Draw Table.

The Draw Table feature is currently not available in the Microsoft Word mobile app, but here's how to use it in Microsoft Office 365.
How to Use the Draw Table Feature in Microsoft Word
Here's how to draw a simple 10×5 table in Microsoft Word using the Draw Table feature.
- Launch the Microsoft Word desktop app on your PC and open the document in which you want to insert a table.
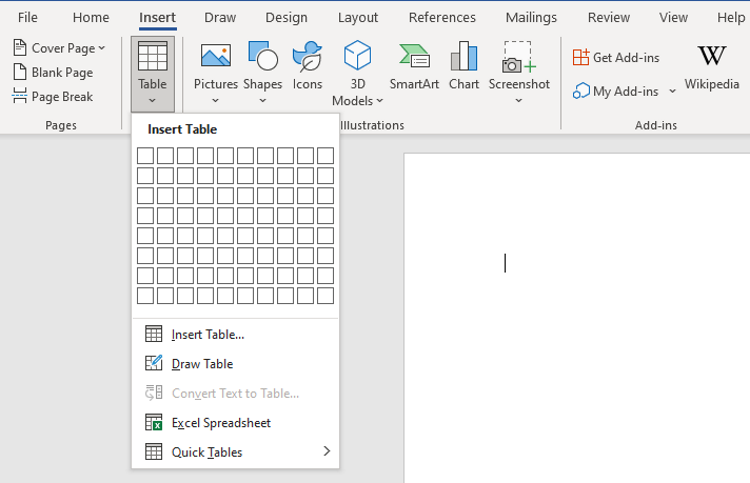
- Click the Insert tab in the ribbon area and select Table from the menu options.
-
Scroll down and click Draw Table. This will activate the pen tool with which you'll draw your table.
- Now, click your mouse and drag across and down one inch to create a single cell outline for your table.
-
Use your pen to draw a vertical line that divides this cell into two equal parts to create a 2×1 table.

-
Click outside the table to deactivate the pen tool. Now, place your mouse pointer at the midpoint and click on the + button. This will add more columns to your right. Do this until you have a 10×1 table.

-
Place your pointer at the upper-left tip of the table to reveal the same + button from earlier. Click on it until you have four additional rows.

- You've now created a 10×5 table using the Draw Table feature. Notice that the cells are of the same proportions.


And just like other tables, you can equally format and customize this table to your liking.
Basic Formatting and Customizations for Drawn Tables
You can format and customize the tables you've drawn with Draw Table in several ways. Here are some of the basics.
1. Insert Rows, Columns, and Cells
If you begin by drawing a 2×1 table, you can expand it to any size of your choice by clicking the + button around the edges or using the Insert function. Simply select the table, right-click inside it, scroll down and select Insert.

By using this method, you can insert columns to the left and right, rows above and below, as well as cells.
2. Distribute Rows and Columns Evenly
If you drew your own table by hand, there's a good chance that some cells will be disproportionate. To fix this, select the table and right-click inside it. Select Distribute Rows Evenly or Distribute Columns Evenly.

This will make all the cells of your table of equal sizes. You can still grab the pen tool if you want to add any odd-shaped cells.
3. Restrict Editing
If you've put in some hard work into creating your tables, you wouldn't want that to go to waste. You can limit other authors from making certain changes to your tables during a review.
To do so, select the table or portion of it for which you want to restrict editing. Now, click on Review, then click Restrict Editing to your right-hand side.

In the Restrict Editing pane, set your preferences and click on Yes, Start Enforcing Protection.
4. Watermark Your Table
Watermarking your table is another way of branding it and preventing unauthorized copying and distribution. If your table contains sensitive information, then you should definitely add a watermark.
Place your cursor at the spot where the watermark should be, then click on Insert > WordArt. Select your preferred style and enter watermark text in the Your text here box.

Drag and drop the box wherever you wish within the table.
5. Color-Code Your Table
You can color-code your table to highlight certain key information. This is great for easy reference when working with large tables containing lots of data.
To color a single cell, place your mouse pointer in the cell and click once the black pointer arrow appears. Click on the Shading tool and pick a color to apply to your selection.

You can also apply a single color to an entire row or column by highlighting the row or column. This also makes your table visually appealing. With Draw Table, the sky is the limit. You can cut, copy, paste, delete, distribute, autofit, direct text, insert caption, and even add comments.
You can also access the Table Properties from where you can make additional changes to the table, rows, columns, cells, and alt text.
Tabulate Your Microsoft Word Documents With More Flexibility
DIY or not, drawing your own tables by hand gives you a certain level of control and input over the way your tables look and feel. You can create just about any kind of table you can imagine in Microsoft Word and customize it accordingly using Draw Table. So, go ahead and be creative.
You can also use Draw Table in combination with other methods of adding tables in Microsoft Word for greater variety and customization. If you use tables a lot in your line of work, this can help you to up your tables game.