You've just purchased a new monitor, perfect for gaming and using apps. But, when you tried to watch your offline media, the quality was a blocky and blurry mess. Shouldn't everything look better on your brand-new monitor?
Welcome to the world of modern high-res displays, where most of our older video files can only cover one-fourth of the screen... at best. To improve the quality of these older videos, you need to use smart filters and upscalers, and madVR is one of the best for Windows.
What Is MadVR?
MadVR is a powerful post-processing filter "enhancer" for many popular media players. It offers a range of sophisticated algorithms to upscale and improves video quality. Unlike apps like the top video editors for YouTube that we've already covered, it works in real-time, "improving" your videos as they play.
With some tweaking, madVR can make lower-resolution videos look better on high-resolution displays, and reduce the effects of compression on highly-compressed files. The more compressed the file, the more striking the improvement.
MadVR is heavily optimized yet relatively lightweight, so you can use it on older PCs without worrying about resources.
Best of all, it is open-source and free to use.
How to Add MadVR to MPC-HC
You can use madVR with many media players. Still, for this tutorial, we'll use the popular Media Player Classic - HomeCinema, better known as "MPC-HC". It's old and has ceased development, but it remains one of the best solutions for playing media when paired with madVR.
-
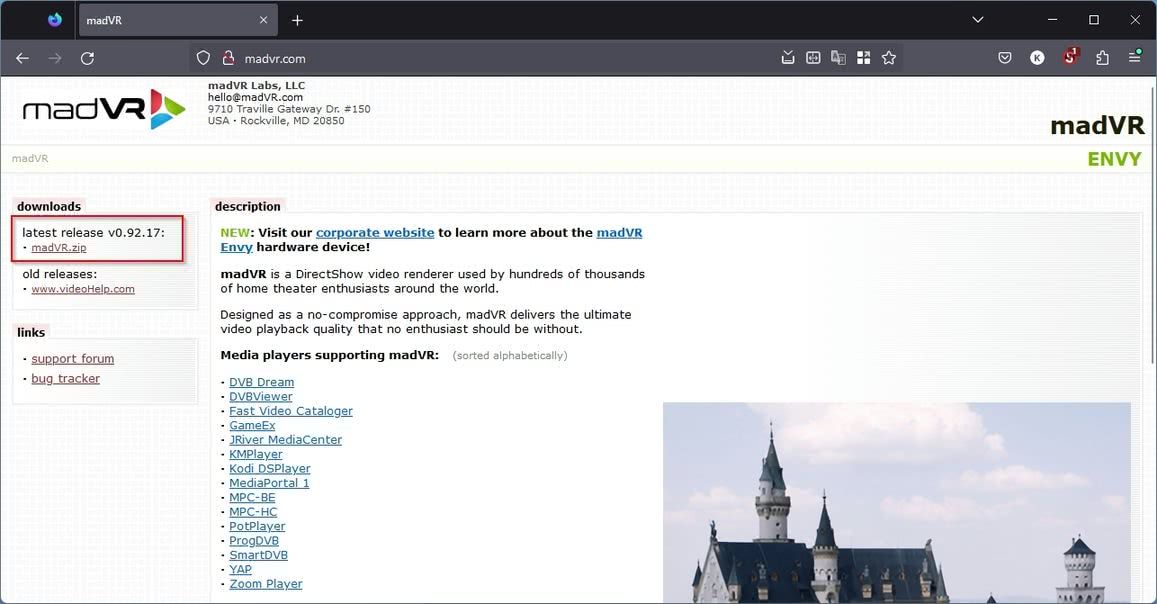
Start by downloading its latest version from madVR's official site. We assume you've downloaded and installed the media player part of the equation from MPC-HC's official site.
- Extract madVR's downloaded archive into any folder of your choice. You can extract it directly in MPC-HC's installation folder, but if you want to use it in more than one player, it's best to extract it in a folder of its own.
-
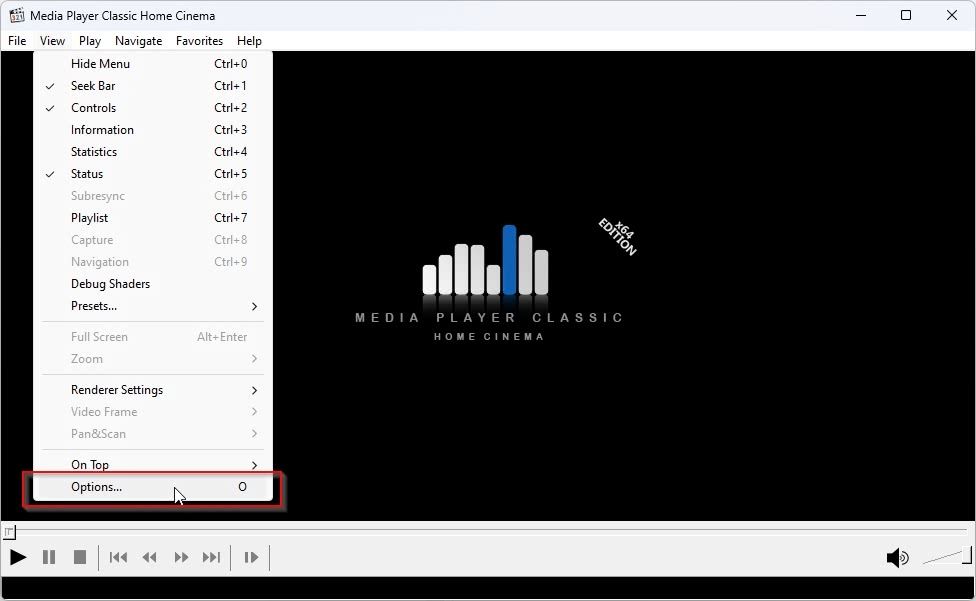
Launch MPC-HC and choose View > Options.
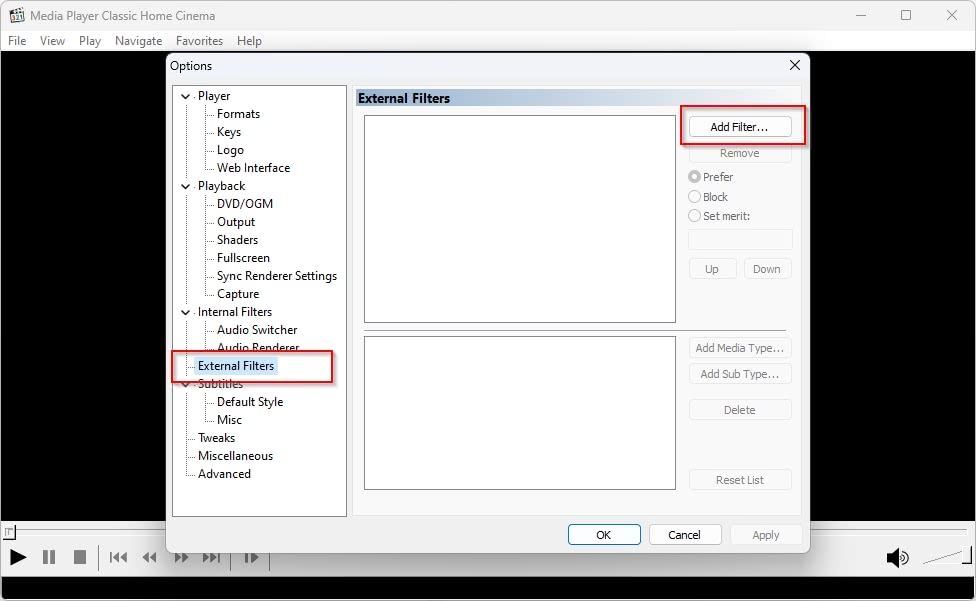
- Look for the External Filters options page on the list on the left and click on it — it's the fourth entry if viewing the list in fully collapsed view.
-
Click on Add Filter at the top right.
-
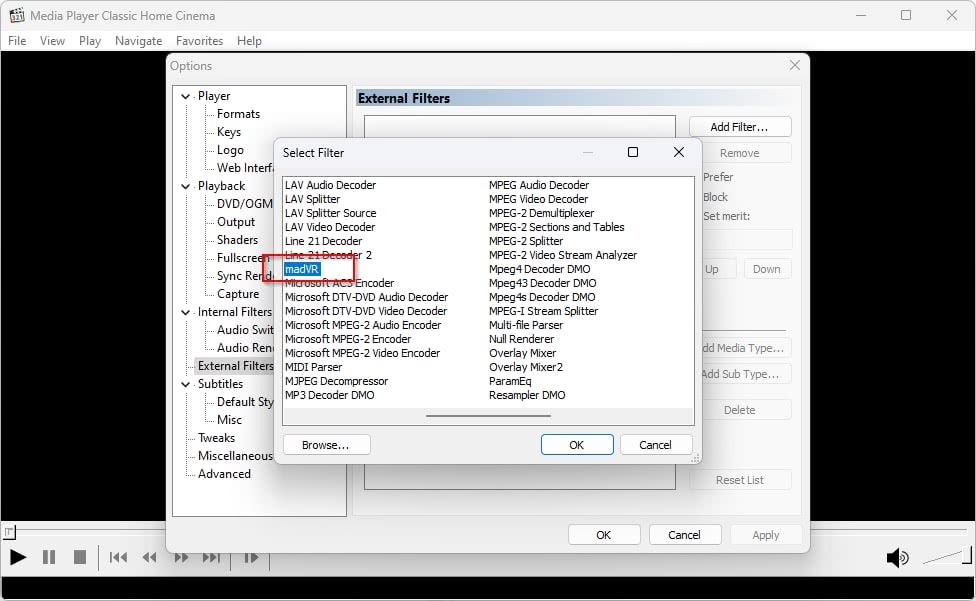
Click on Browse at the bottom left of the new Select Filter window. Point the requester to the folder where you extracted madVR and select the madVR.ax file. Click OK to return to the Select Filter window. Locate madVR among the entries, select it, and click OK.
-
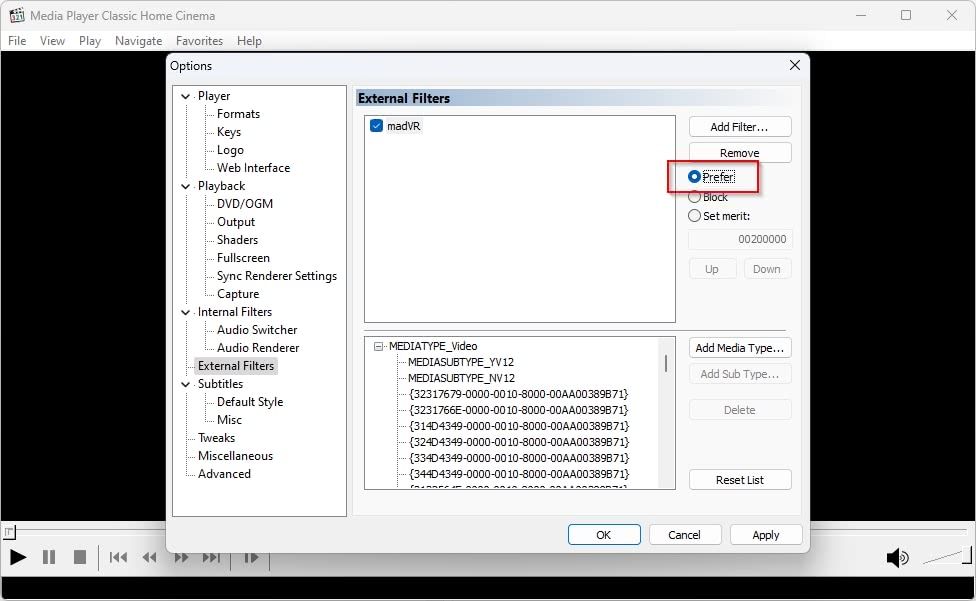
Click on the newly-added madVR entry on the External Filters list. Choose Prefer from the options on the right.
- Expand the Playback entry from the list on the left and choose Output.
- Click on the drop-down menu under DirectShow Video and select madVR.
- Press OK to save the changes. Close and relaunch MPC-HC to ensure it will be using the madVR renderer.


Tweaking the MadVR Settings
After adding and enabling madVR in MPC-HC, if you start playing a video file with it, you'll see a new icon for madVR appear in the Windows tray. Right-click on it and choose Edit madVR Settings to configure the renderer according to your gear and preferences.
1. Setting Up the Basics With MadVR
Expand the devices group from the list on the left, and choose your display device. Change its device type to reflect its type. For most, it will probably be Digital Monitor / TV. Do the same for your other display devices if you use more than one.

Expand the processing group, and choose deinterlacing. If you're a fan of anime, disable only look at pixels in the frame center.

Move to artifact removal, and pause for a second. Now's the time to drag and drop a video, preferably a highly-compressed one, onto MPC-HC's window, and let it play in the background. This way, you'll be able to check how your madVR settings affect how videos look.
Try enabling the options in this section one by one and, if available, progressively increasing their strength. You can click on Apply at any time to check their effect on your video.

When your video starts looking "off", with annoyingly pronounced "edges" around elements, dial your last settings down a notch. If playing a lot of MPEG4/HEVC content (encoded with DivX/XviD/H.264/H.265/NVENC), make sure to try out reduce compression artifacts. Setting its quality to very high and enabling process chroma channels, too come with higher requirements but can also further reduce the annoying "(macro)blocks" on highly-compressed files.

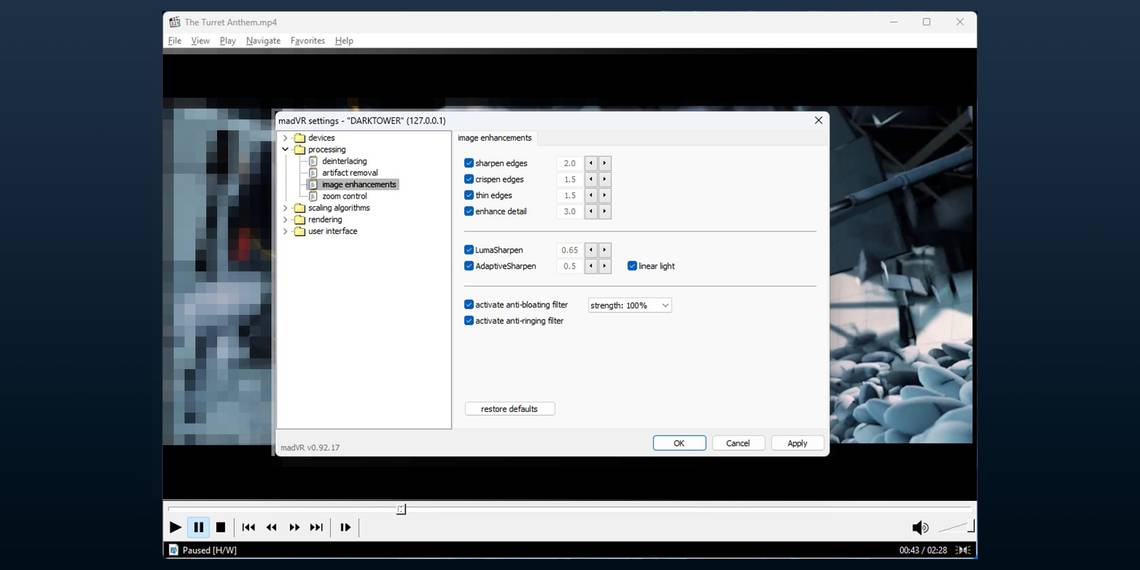
Do the same for the options in the image enhancements section. Since their result depends on both the active video and your perception of what looks best, we'll leave the choice of which you should enable and their values up to you. Remember that you can see their effect in any active video immediately after hitting the Apply button on the window.

2. Performing Upscaling With MadVR
Move to the scaling algorithms and start from chroma upscaling. All options here take advantage of modern GPUs, so you can choose any you want without wasting resources. For each option, madVR will show you how it affects the video on the top right of its window.
Positive results are marked with green bars and negative ones with red bars. The longer the bar, the more noticeable the effect. Also, enable the SuperRes filter and increase its strength to 2 or 3 to take advantage of madVR's scaling chops.

Modern GPUs are pretty good at downscaling. Thus, you can choose DXVA2 from the image downscaling page to have the task entirely performed by your GPU. However, the other options also "run" on the GPU, either on its texture units or as pixel shaders, and may offer even crisper visuals. It's worth trying them all out to see which you prefer.

Move to image upscaling, and notice how the options here are split into two lists: Upscaling and Doubling. Upscaling lists advanced algorithms that analyze each frame and try to create more visual detail from what already exists.
Doubling lists various methods that also "make a video look larger than it is" but with simpler "show-each-pixel-more-than-once" methods (hence "pixel doubling"). This writer's personal preference is Jinc, but fans of Anime will also want to try super-XBR.

As before, we won't suggest specific settings for the options on upscaling refinement. Enable them one by one, play with their values, and click Apply to find what you like. If you see strange artifacts, lines, or elements of your video look "glitchy", change the last option on this page to Refine the image only once after upscaling is complete.

3. Adjusting the Quality With MadVR
If your videos look jerky in motion, expand the Rendering section, and on the Smooth Motion page, place a checkmark on enable smooth motion frame rate conversion. This may lead to the "soap opera effect," which refers to how TV shows look compared to movies (because of their higher framerate).

For the highest quality, you can visit the Trade Quality for Performance page and disable some or all of the default settings. However, these will make less of a difference compared to the other options.

A Final Note About MadVR
Keep in mind that not all videos are equal. Your madVR settings will need tweaking depending on the video you're watching. You can use "mild" defaults for general improvement of all videos on your monitor, but madVR is best when you invest a minute in fine-tuning it for each video.
Still, madVR has its limitations. It can improve how videos look and perform smart upscaling, but it's still a filter, tailored for real-time media reproduction, not a full-blown upscaling app. If you want the best upscaling quality for your videos, you'll have to use a dedicated app and invest some time to do it manually, as we saw on our guide on how to upscale a video to 4K.
However, if you configure madVR with relatively mild settings, it will essentially be a "set it and forget it" affair. After its initial configuration, it will start enhancing every video you play with MPC-HC. Plus, if you enable it in any other media player, you won't have to reconfigure its settings; it will make your videos look just as good there.
Still, you may need to make occasional tweaks here and there to make a video look its best. One video might need less sharpening, while another might look better with a higher "reduce compression artifacts" value.
Getting Optimal Playback With MadVR
And that's how madVR can go beyond being just a video renderer and become a full-blown hobby. Don't be alarmed if you find yourself trying to upgrade every video and constantly adjusting madVR's settings. You'll be joining a club of many.