If you have installed Windows 11 on unsupported hardware, the upgrade process will be a tough task. When you try to look for an update, Windows 11 shows everything as up to date and has no option to install the 22H2 version.
While you can use the ISO-based clean install method, the upgrade process lets you install the latest version without deleting your apps and other data. Here’s how to upgrade to Windows 11 22H2 on unsupported hardware using the Windows 11 setup file.
How to Upgrade to Windows 11 22H2 on Unsupported Hardware
Windows 11 runs a hardware compatibility check during the upgrade process. To perform a successful upgrade, you’ll need to work around this hardware compatibility assessment. To achieve this, we’ll replace the appraiserress.dll file in Windows 11 ISO with the appraiserress.dll from Windows 10 ISO.
If you have Windows 11 22H2 and Windows 10 ISO available, skip to the third step below. If not, follow all the steps to download the necessary ISOs and then perform an upgrade.
While these steps shouldn’t cause any issues, it is better to create a backup of any important Windows 11 data on your system drive just in case something goes wrong and you need to perform a clean install.
1. Download the Windows 11 22H2 ISO

You can legally download the Windows 11 ISO from the Microsoft server directly or using Media Creation Tool. For this guide, we’ll use Media Creation Tool to download the ISO image file.
- Go to the Microsoft Software Download page.
- Click on Download Now under Create Windows 11 Installation Media.
- Run the mediacreationtool.exe file and accept the license terms.
- Review the selected language and edition. To change the language, uncheck Use the recommended options for this PC and select your preferred language.
- Click Next.
- Select the ISO file option in the Choose which media to use dialog.
- Select the download location and click Save. Make sure the selected partition has enough space available.
- Media Creation Tool will start downloading the ISO to your local drive. This process may take some time, depending on your Internet connection. So wait for the download to complete.
- Once the download is complete, click Finish and follow the next step to download Windows 10 ISO.
2. Download a Windows 10 ISO

You’ll need to modify the Windows 11 ISO by replacing the appraiserress.dll with a version available in Windows 10 ISO. This DLL file is responsible for performing a hardware check during an upgrade.
To download Windows 10 ISO:
- Go to Windows 10 download page.
- Click the Download Now button under Create Windows 10 installation media.
- Run the mediacreationtool.exe file to open Windows 10 Setup dialog.
- Click on Accept.
- In the What do you want to do screen, select Create installation media and click Next.
- Check if the language, edition, and architecture preferences are set correctly. If not, click on Use the recommended options for this device and set your preferences.
- Next, select the ISO file option and click Next.
- Select the download location and click Save.
- The downloading process may take several minutes to complete. So wait for the process to complete and click Finish once done.
Once you have both the ISO files saved, follow the next step to extract and modify the Windows 11 ISO.
3. Modify the Windows 11 ISO to Bypass Hardware Check During the Upgrade
The following steps involve extracting the Windows 10 ISO and copying the appraiserress.dll file. Next, move the copied DLL file to the Windows 11 ISO’s sources folder. Here’s how to do it.
-
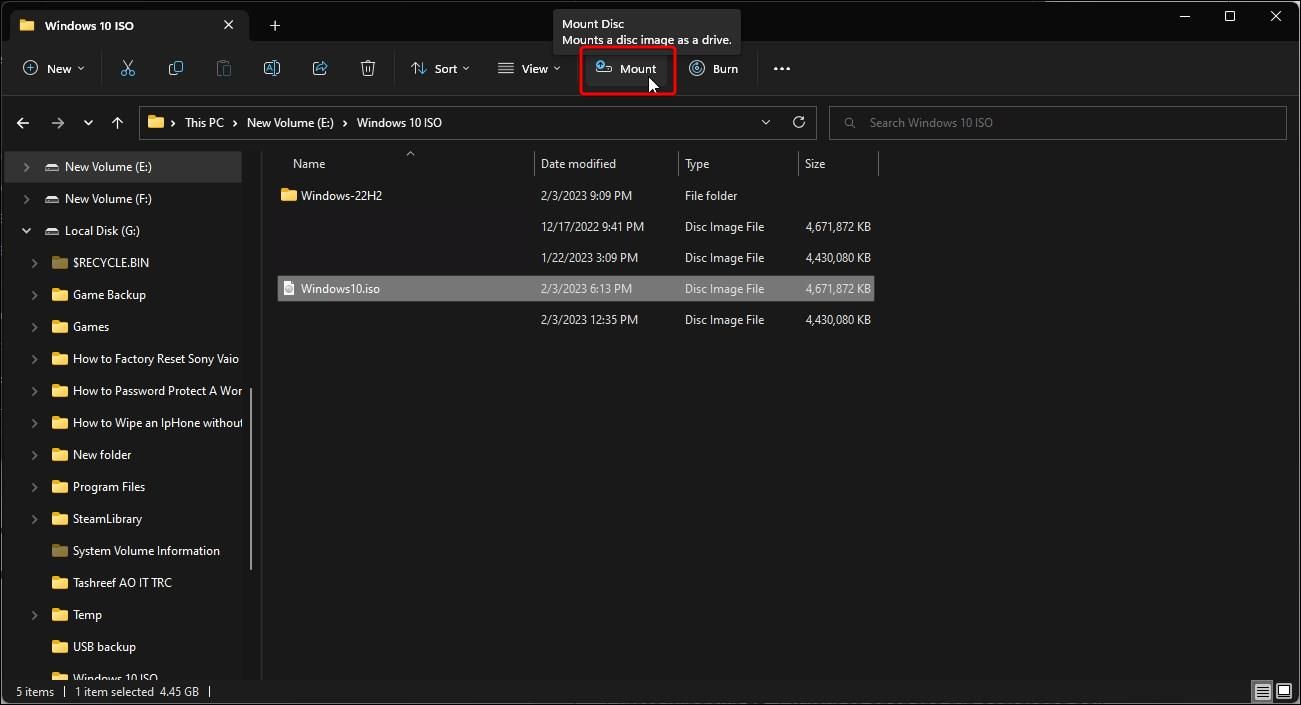
Right-click on the Windows 10 ISO file and select Mount. This will create a new virtual DVD Drive and open the ISO folder.
-
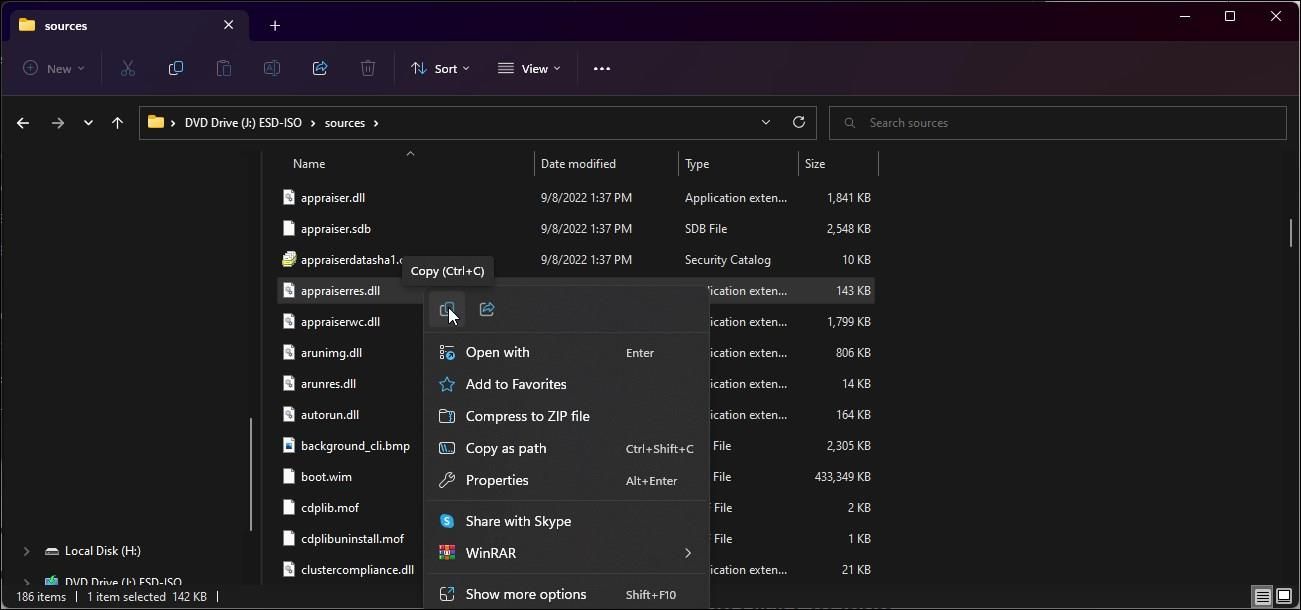
Open the Sources folder and locate the appraiserres.dll file. Copy the DLL file and move it to a different folder.
-
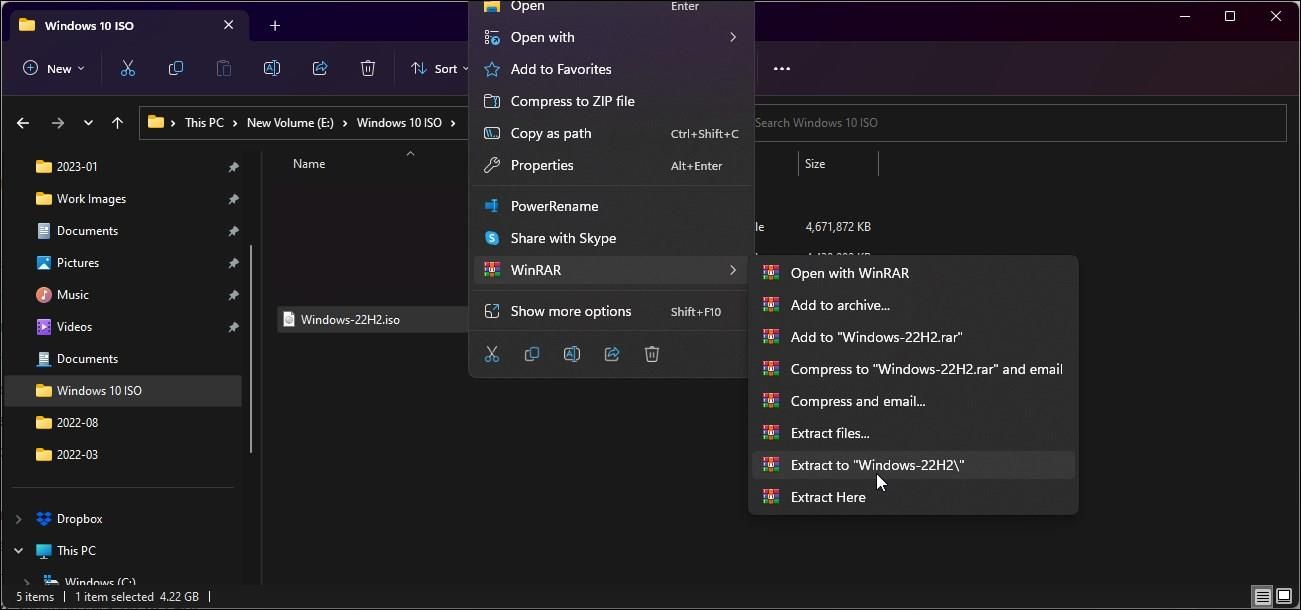
Next, extract the Windows 11 ISO to a different folder. You can use WinRAR to extract the Windows 11 ISO file.
- Open the Windows 11 ISO's extracted folder and then the Source folder.
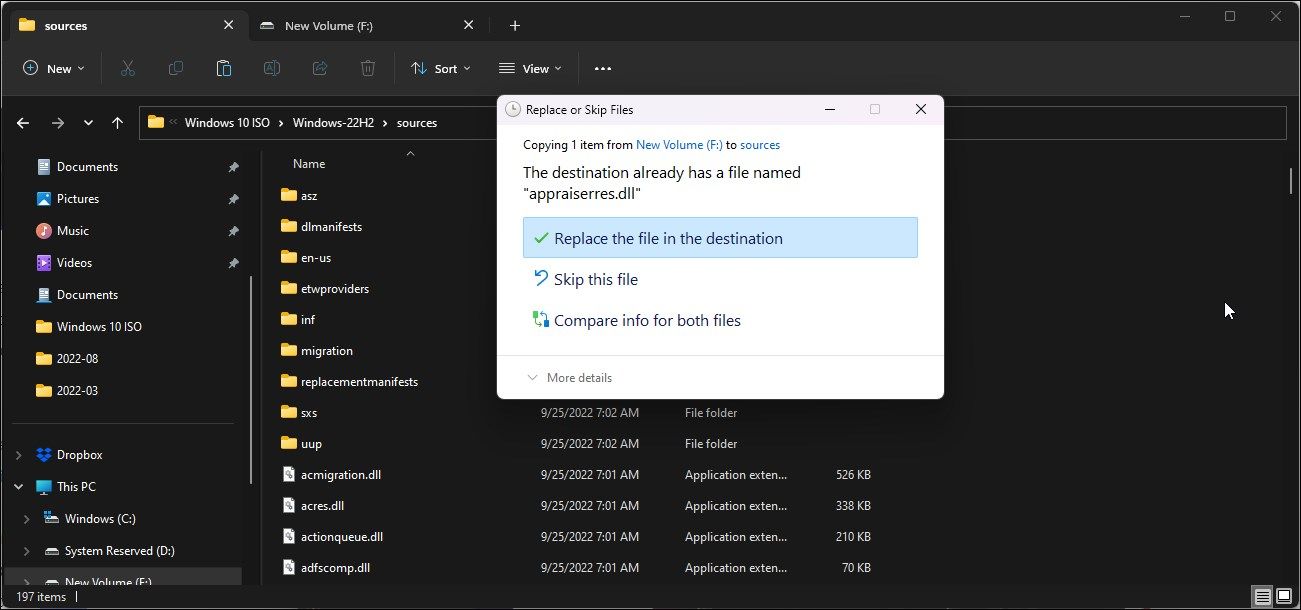
- Next, copy and paste the appraiserres.dll file copied from Windows 10 ISO into Windows 11 ISO's Sources folder.
-
Select Replace the file in the destination to confirm the action.
- Next, disconnect your PC from the Internet. This prevents the setup from downloading updated files during installation and overwriting the modified dll file.
- Once the Internet is disabled, open the extracted Windows 11 ISO folder and double-click on the Setup file. Click Yes if prompted by UAC.
-
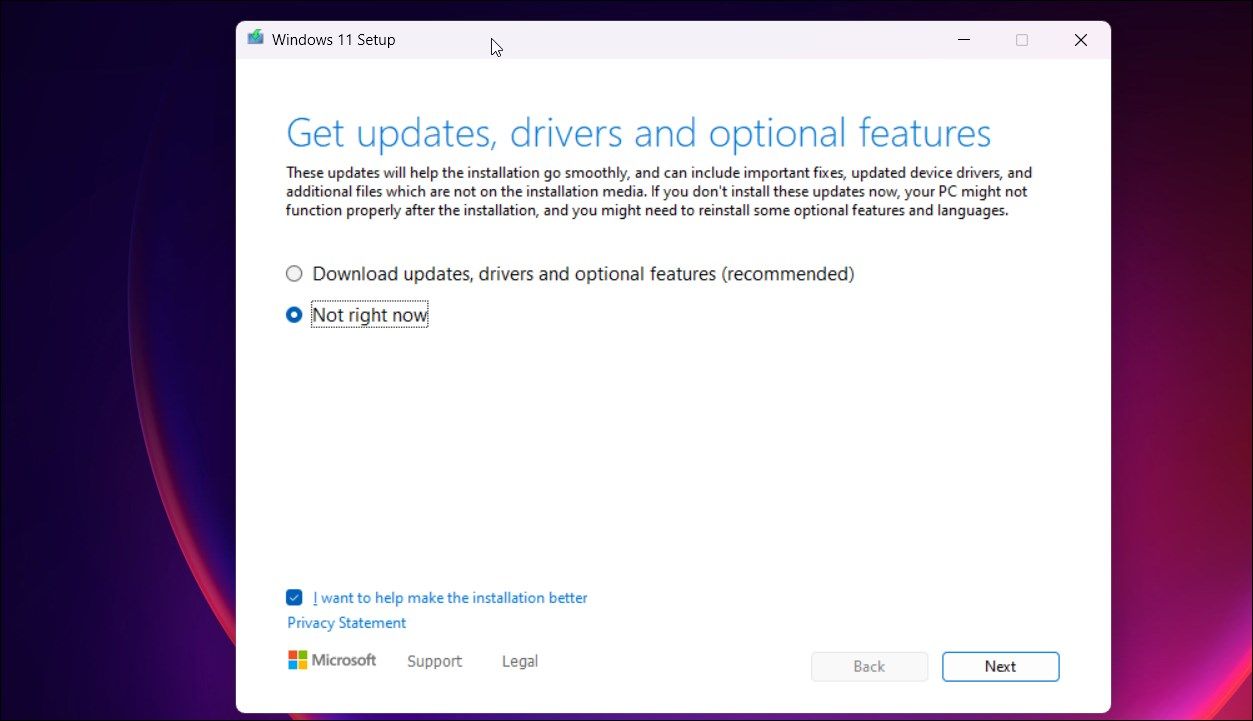
In the Windows 11 Setup dialog, click on Change how Setup downloads updates.
-
Next, select Note right now. This will prevent the Windows setup from finding and installing newer updates causing the upgrade process to fail on unsupported hardware.
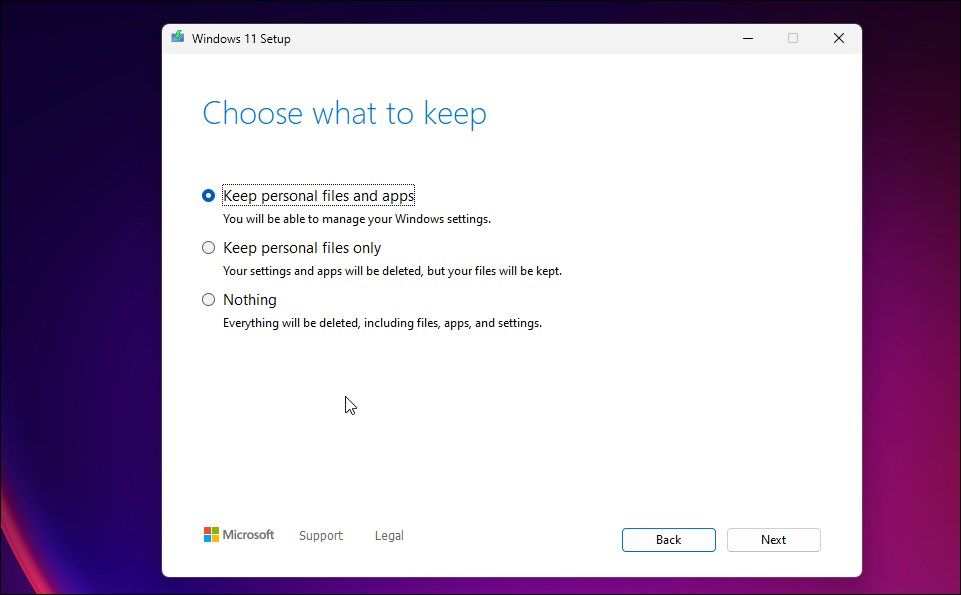
- In the Choose what to keep screen, select Keep personal files and apps.
-
Click Next and then click on Accept.
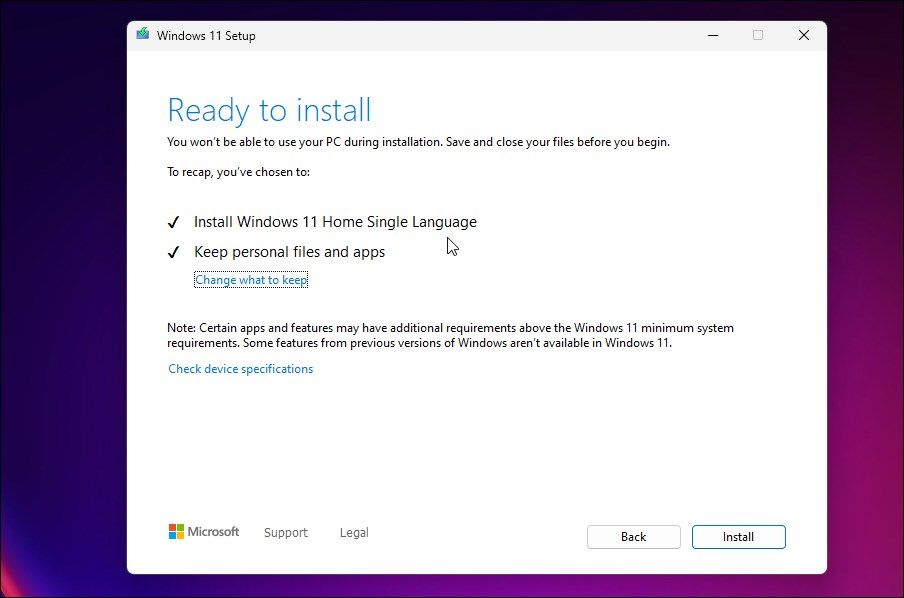
- Next, click on Install to install Windows 11 version 22H2 while keeping your personal files and apps.
- Leave your computer idle until the installation process is complete. After the restart, you’ll have the latest Windows 11 22H2 running on your computer.


To check your Windows specification:

- Press Win + I to open Settings.
- In the System tab, scroll down and click on About.
- Under Windows specifications, you’ll see Version 22H2 if the upgrade was successful.
4. Go Back to the Previous Version

If you run into an issue after the upgrade, you can use the Go back option to undo the update and restore the earlier version of Windows 11. However, the "Go back" option is only available for seven days since the upgrade. After that, the option will be greyed out.
To go back to the previous version:
- Press Win + I to open Settings.
- In the System tab, scroll down and click on Recovery.
- Click on Go back under Recovery options. Then, follow the on-screen instructions to uninstall the Windows 22H2 update.
Installing Windows 11 22H2 on Unsupported Hardware
It is easy to bypass the Windows 11 system hardware requirements when you want to perform a clean install. However, to perform an upgrade, you’ll need to modify the appraiserress.dll file and then run the setup.
While the upgrade is possible for now, the lack of future automatic Windows updates makes maintaining the PC a complicated task. If upgrading to Windows 11 is not a must, you can stick to Windows 10 on older hardware, which will continue to receive support until late 2025.