Google Chrome's Live Captions feature can help solve accessibility challenges for hearing-impaired folks, as well as those who find different accents hard to understand. Captions can also come in handy when you're watching a video in a noisy area, and don't have headphones with you.
All you have to do is play media with audio in Chrome, and the captions will appear automatically. Read on to find out how to enable Live Captions in Chrome.
How to Enable Live Captions in Google Chrome
Google's Live Caption feature is available with Chrome 89 and beyond for Windows, Mac, and Linux.
To try out this feature, ensure that you have Chrome 89 or above. To check this, click the three dots in the top right corner of the screen, and go to Help > About Google Chrome. The version will be listed at the top of the screen.
Ready to turn on Live Captions? Here's how to enable the feature in Chrome on Windows, macOS, or Linux:
- Open Google Chrome. Click the three dots in the top-right corner of the screen, and choose Settings.
- From the Settings page, click Advanced on the left-side navigation pane to reveal additional settings.
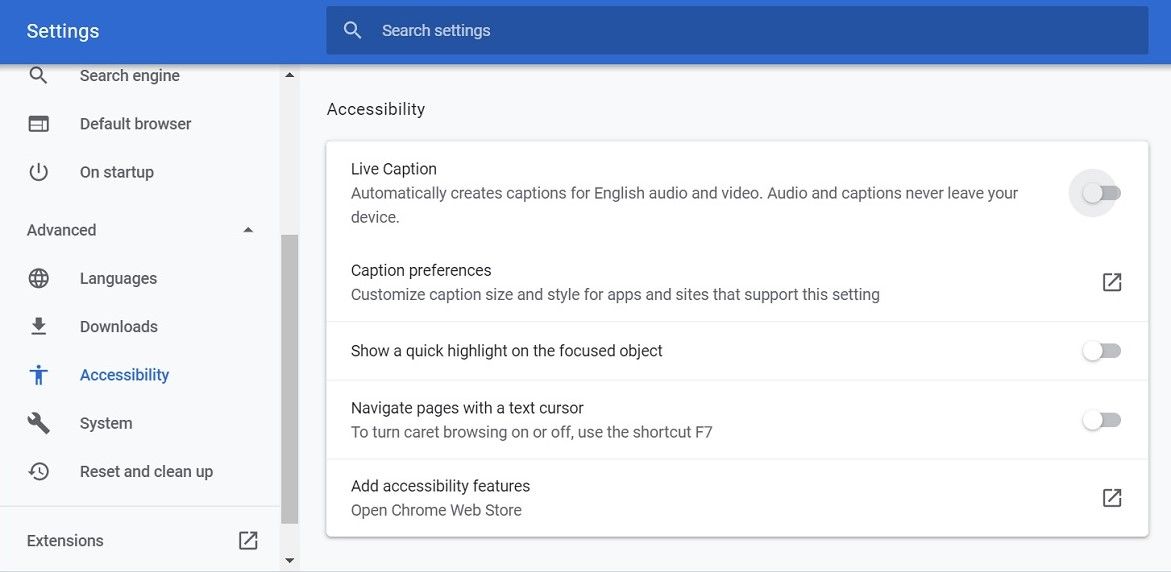
- Click on Accessibility under the Advanced heading.
-
On the left-hand pane, toggle the switch for Live Caption to enable it. Now, Chrome will download the speech recognition files automatically.

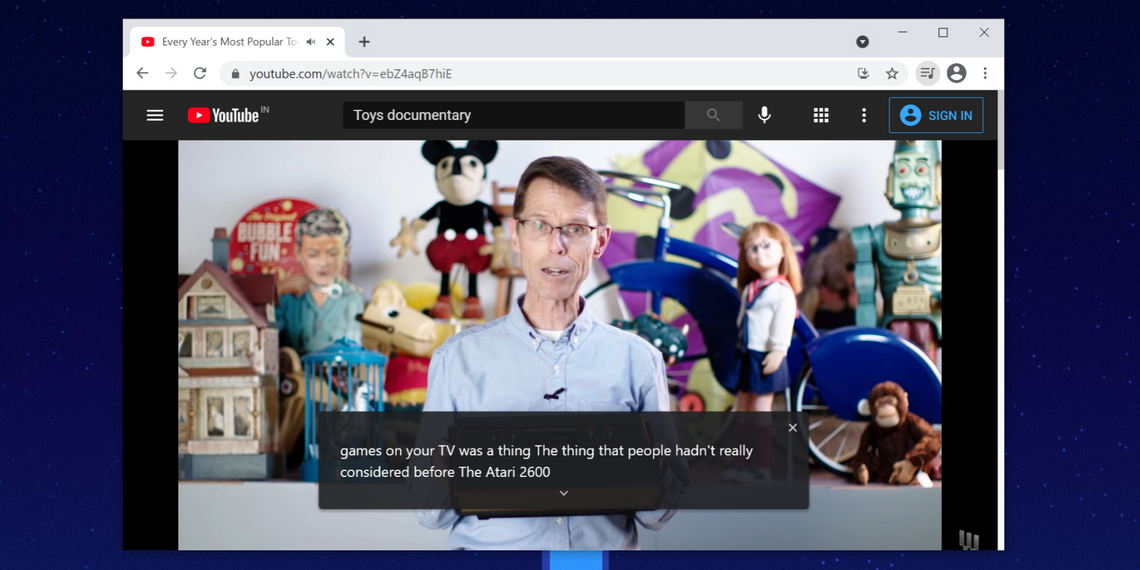
After enabling Live Captions, you can open a video or podcast in Chrome, and captions will appear at the bottom of the screen.
How to Customize the Appearance of Live Captions
If you don't like the look of the dynamically-generated captions or find them hard to read, you can change their appearance.
To start customizing, visit chrome://settings/accessibility to open the Accessibility menu in Chrome. When you click on Caption Preferences to customize the text and effects, the native option to customize captions on your Windows or macOS device will open.
Alternatively, you can customize the captions inside Windows and macOS directly. Once you customize the captions using your device's native settings, the Live Captions in Chrome will use these settings as well.
Customize Captions in Windows
To customize captions in Windows, press the Windows key + I to open Settings, and choose Ease of Access. Click on Captions under the Hearing header on the left pane.
Next, you can pick from four default caption styles. You can also create a new style by customizing options like text color, background color, opacity, fonts, size, effects, etc.

Customize Captions in macOS
If you want to customize captions on macOS, click on the Apple menu at the top-left corner of the screen, and choose System Preferences. Click on Accessibility, scroll down to the Hearing tab and pick Captions. From the right pane, choose one of the four options, or create a new style.

Live Captions Will Get Better
Chrome's Live Caption feature is far from polished. There are some rough edges, and it carries some limitations that you can't overlook:
- Live Captions are available only in the English language.
- While most captions are comprehensible, they're not always accurate—especially when people with distinct accents speak.
- The option to enable or disable Live Captions is nested deep inside Accessibility settings.
To access Live Captions quickly, you can bookmark Chrome's Accessibility settings page.
Live Captions Open Up New Possibilities
Chrome's Live Caption feature generates text automatically on your desktop and works in offline as well as incognito mode. With this feature, you can enjoy audio or video in a noisy environment, or use lower volumes to avoid disturbing others.