Windows 11 and 10 include various troubleshooting tools you can open via Settings and the Control Panel. There are troubleshooters for fixing Bluetooth, internet, Windows Update, audio, hardware, printer, video, and MS Store app-related errors that arise. Those troubleshooters detect issues and either automatically apply or suggest potential fixes to resolve them.
Adding troubleshooter shortcuts to Windows 11/10 will save you from rummaging through Settings or the Control Panel whenever you need to access them. You can create troubleshooter shortcuts on the Windows 11/10 desktop, taskbar, Start menu, and even context menu with the methods below.
How to a Set Up a Desktop Shortcut for Opening the Troubleshooting Applet
Most users probably go through Settings to bring up troubleshooters. However, Control Panel’s Troubleshooting applet includes more troubleshooters than the Settings app. Adding a desktop shortcut for opening the applet will enable you to access all troubleshooters included within it more quickly.
You can create a Troubleshooting shortcut on the Windows desktop in the following steps:
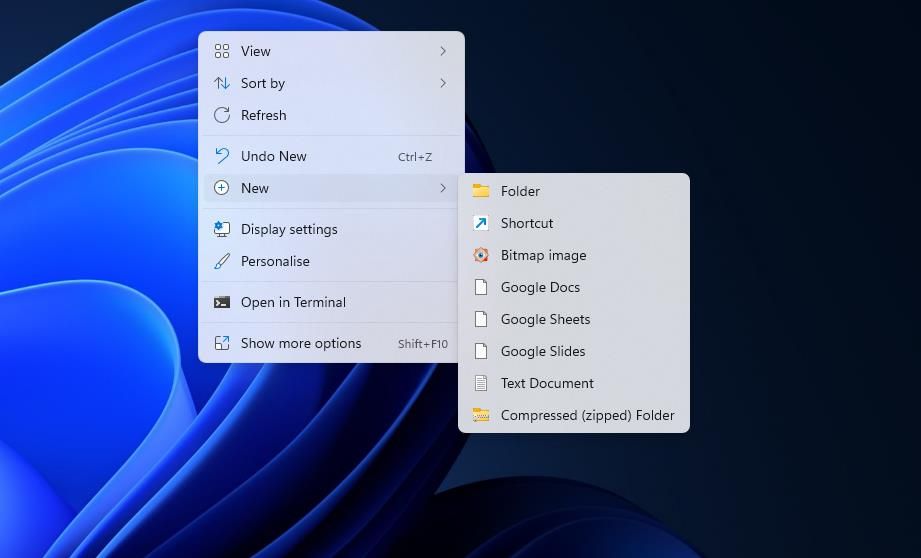
- Right-click any part of the desktop area and select New.
-
Click the Shortcut option on the New submenu.
-
Input explorer shell:::{C58C4893-3BE0-4B45-ABB5-A63E4B8C8651} inside the location box, and select the Create Shortcut wizard’s Next option.

- Erase the default shortcut title, and type Troubleshooting Applet in the text box.
-
Select Finish to add the Troubleshooting Applet desktop shortcut.
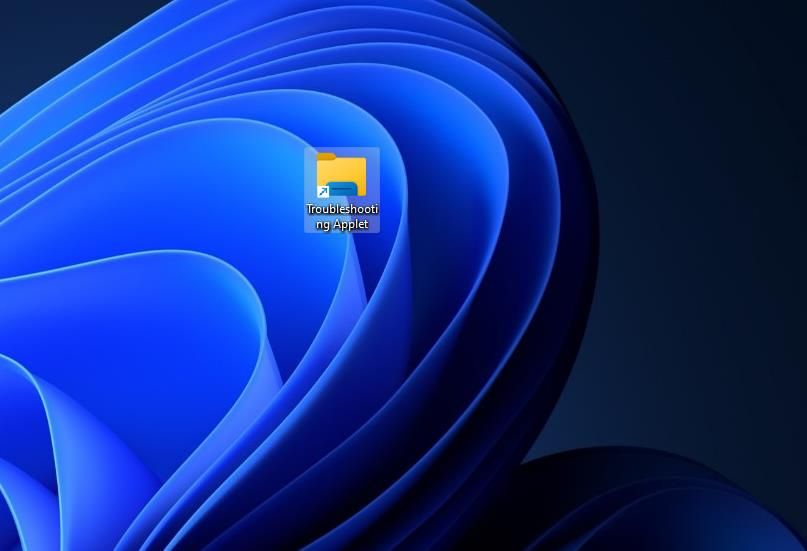


Double-click the new desktop shortcut you just added to open the Troubleshooting applet. There you can click Programs, Hardware and Sound, Network and Internet, or System and Security to view and access different categories of troubleshooters. Alternatively, select View all open to bring up a full list of troubleshooters. You can click any troubleshooter there to open it.

The Troubleshooting shortcut will have the same folder library icon as Explorer’s taskbar button. If you would prefer something else, you can change the icon via the shortcut’s properties window. Check out our guide about how to customize icons on Windows for details.
How to Set Up Taskbar and Start Menu Troubleshooting Shortcuts
You can easily convert the Troubleshooting Applet desktop shortcut into a taskbar or Start menu one. To do so in Windows 11, click the Troubleshooting Applet shortcut with the right mouse button and select Show more options. Select Pin to taskbar on the classic menu to stick the same shortcut on the taskbar. Or click Pin to Start to have one for opening the Troubleshooting applet from the pinned area of the Start menu.

Then you may as well remove the desktop shortcut if a taskbar or Start menu one is preferred. Right-click Troubleshooting Applet to select Delete (the trash bin icon in Windows 11).
How to Set Up a Troubleshooting Hotkey
A Troubleshooting desktop shortcut can also become a convenient hotkey in a few quick steps. All you have to do is set a key combination for activating the desktop shortcut. Then you can open the Troubleshooting applet by pressing a Ctrl + Alt key combo. These are the steps for setting up a hotkey that opens the Troubleshooting applet:
- Create a desktop shortcut for opening the Troubleshooting applet as outlined in the first method.
- Right-click the Troubleshooting shortcut and select Properties.
- Click inside the box labeled Shortcut key.
-
Press T (for troubleshooting) to establish a Ctrl + Alt + T key combination.
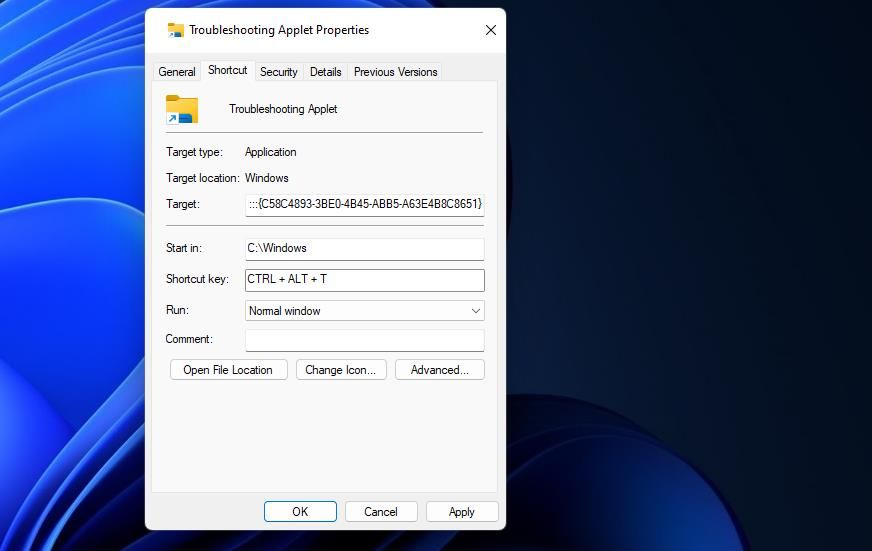
- Select Apply to save your new troubleshooting hotkey.
- Click OK or X to close the Shortcut tab and window.

Now you can access the Troubleshooting applet with a key combo. Press Ctrl + Alt + T to open that applet and access its troubleshooters. That hotkey depends on the desktop shortcut you set it for. So, you’ve got to leave the shortcut on the desktop.
How to Set Up Shortcuts for Opening Specific Troubleshooters
You can also set up shortcuts for opening any specific troubleshooters included within the Troubleshooting Control Panel applet. Each troubleshooter there has a pack ID with which you can set up a desktop shortcut for opening it. You can set up a troubleshooter shortcut in such a way via the Create Shortcut wizard with the following command:
msdt.exe /id <diagnostic_id>
The above command must include an actual diagnostic_id for the troubleshooter. This MSDT page has a list of troubleshooting pack IDs you can include in that command. These are the diagnostic ID commands for some of the more useful troubleshooters:
        msdt.exe /id WindowsUpdateDiagnostic

msdt.exe /id SearchDiagnostic

msdt.exe /id DeviceDiagnostic

msdt.exe /id PrinterDiagnostic

msdt.exe /id NetworkDiagnosticsWeb

msdt.exe /id AudioPlaybackDiagnostic
You can set up a desktop shortcut for a specific troubleshooter much the same as the Troubleshooting applet. Go through the same steps in this guide’s instructions for setting up a desktop shortcut, but input a troubleshooter diagnostic ID command at step three instead. Enter a different name for the shortcut in step four, and select the Finish option.

Double-clicking that desktop shortcut will open whatever troubleshooter you set it to with the diagnostic ID command. Then you can also pin that desktop shortcut to the taskbar or Start menu just the same as the Troubleshooting applet one. Or set up a hotkey for opening the troubleshooting tool as outlined in this guide’s keyboard shortcut instructions.

How to Add a Troubleshooters Submenu to the Context Menu
The right-click context menu is another place you can add Troubleshooting shortcuts in Windows 11/10. You can set up a Troubleshooters submenu on the Windows 11/10 context menu that includes shortcuts for opening different parts of the Troubleshooting applet. To do that, you only need to download and run a premade registry script like this:
- Open the Add Troubleshooters Context Menu Softpedia page.
- Select that registry script’s Download Now option.
- Click the Secure Download (US) option.
-
Go into File Explorer (press Win + E to open), and bring up the directory containing the registry script’s ZIP archive.
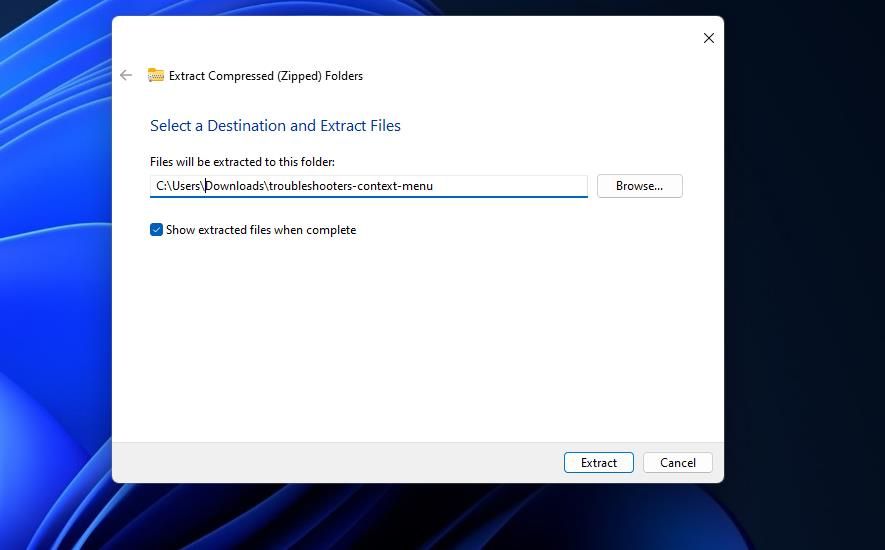
- Select to extract the troubleshooters-context-menu.zip archive. Our guide to unzipping ZIP files on Windows includes instructions for extracting these archives.
- Open the extracted troubleshooters-context-menu folder.
-
Double-click the Add Troubleshooters To Desktop Context Menu.reg file.

- Click Yes on the prompt that asks for user confirmation to apply the script.


You will now see a new Troubleshooters submenu on your desktop’s context menu. Right-click any space within the desktop wallpaper area and select Show more options on Windows 11’s context menu. Move the cursor over the Troubleshooters submenu to view its shortcuts.

There you can select Classic Troubleshooting applet to bring up the Troubleshooting home screen in the Control Panel. Select All Categories to open the full list of troubleshooters. Or click Programs, Hardware and Sound, Network and Internet, and System Security to view category pages for opening troubleshooters.
The troubleshooters-context-menu folder also includes a script for removing the Troubleshooters submenu. Double-click Remove Troubleshooters From Desktop Context Menu.reg in that folder to run that script. Then select Yes to erase the submenu from the context menu.
Make Some Shortcuts for Accessing Troubleshooters in Windows
So, now you can create Windows shortcuts for opening the Troubleshooting applet and more specific troubleshooters in various ways. You can create a general Troubleshooting Control Panel desktop, taskbar, keyboard, or context menu shortcut for accessing all troubleshooting tools. Or set up shortcuts that give you more direct access to the specific troubleshooting tools you utilize more regularly.