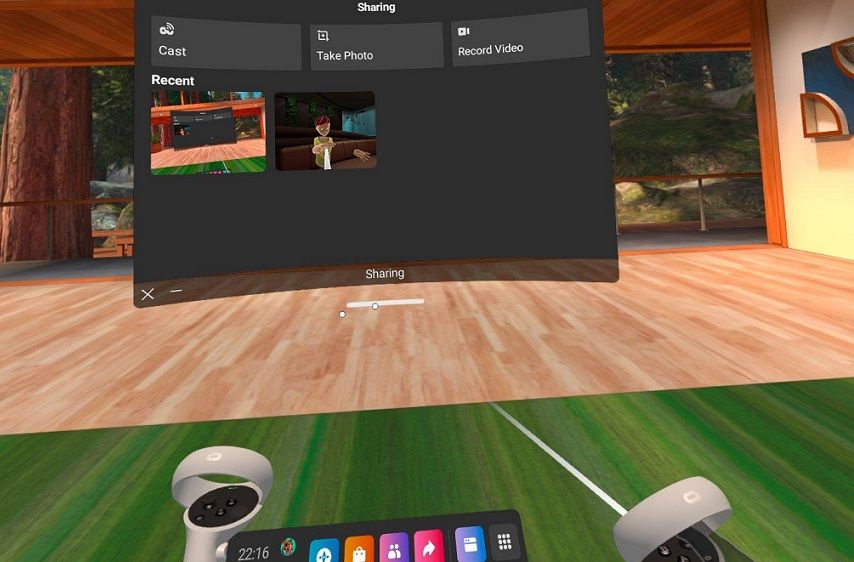
The Oculus Quest 2 is one of the best virtual reality headsets for gaming, web browsing, and general entertainment. You can capture screenshots and videos of your greatest gaming moments in that headset. Users can also download music and document files whilst browsing on Quest 2.
If you have a collection of files on a Quest 2, they need not remain stuck on the headset. You can transfer files from your Quest 2 to a Windows 11/10 PC in a couple of ways outlined below. Transferring files to a PC will give you more software options for opening them.
How to Transfer Files From the Quest 2 to PC With a Link Cable
Connecting an Oculus Quest 2 to a Windows 11/10 PC with a link cable is one way you can transfer files from that VR headset. To do so, you’ll need to purchase a suitable link cable first as one doesn’t come bundled with the Quest 2. The official Quest 2 Link cable is retailing at a somewhat overpriced $79.00 on Amazon (and most other places).
However, there are numerous better-value third-party link cables for the Quest 2. KIWI, VOOKO, and Amavasion link cables are good alternatives, and they can all be easily found in online stores.
When you’ve snapped up a link cable, you can discover a new world of PC VR content and transfer files between your Quest 2 and Windows PC. Transferring files between the headset and PC (and the other way around) is straightforward with a link cable.
Here is how you can transfer files from a Quest 2 VR headset to Windows PC via a link cable:
- Put on your Quest 2, and turn on the headset.
- Input your Quest 2 pattern, and confirm the Guardian boundary.
-
Take off the headset when you’re in the Quest 2 home environment.
- Turn on your Windows 11/10 PC, and then log in to your user account.
- Connect your Quest headset to the PC with the link cable. You can plug the link cable into a USB 2.0 or 3.0 slot on your PC.
- Put your Quest 2 headset back on.
- Then select the Allow option to permit the connected PC to access data on Quest 2.

You're done with the headset now, so put it down in a safe place before continuing.
- Open the Windows File Explorer app (click the taskbar button with a folder library icon).
-
You should now see a Quest 2 device in Explorer’s sidebar. Double-click Quest 2 to expand it.
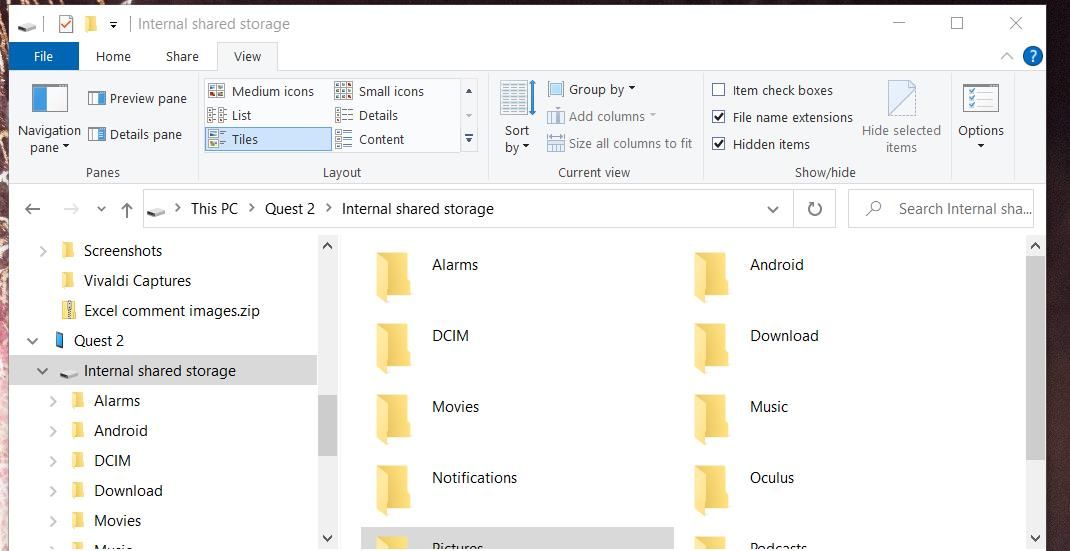
- Select Internal shared storage to view Quest 2 folders.
- Click a folder that includes some files you want to transfer to PC. For example, click Pictures > thumbnails to access captured screenshots.
-
Left-click a file to transfer, hold the mouse button, and then drag it into a folder on your PC.
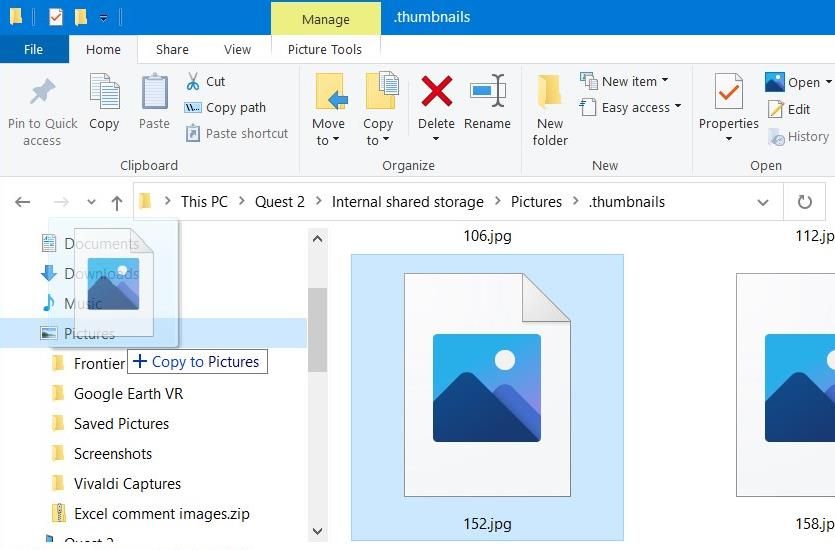
- Release the mouse when you see a Copy to tooltip.


Now you can access the file you selected to transfer from the Quest 2 on your PC. Bring up whatever folder you dragged the file to. Then double-click the transferred file to open it within a default app.

This transferring of files also works both ways. You can transfer files from your PC onto the Quest 2, but remember that the VR headset doesn’t support so many formats. The Oculus headset’s Files app recognizes JPG, PNG, TXT, DOCX, MP4, PPT, MOV, and M4V formats.
Drag and drop a file from a directory on your PC into one of the folders in Quest 2’s internal shared storage. Open Quest 2's Files app to access images, documents, and videos from there.
How to Transfer Files From the Quest 2 to PC With Google Drive
If you don’t have a link cable, you can still transfer files from your Quest 2 to a PC without one. Cloud storage services like Google Drive enable you to upload and store files on the internet, which you can then download to other devices via web browsers.
You can use a Google Drive account to transfer files from a Quest 2 headset to PC. It's a slightly less direct method for transferring files, but it’s a good way to do it for users who don’t have cables.
Of course, you’ll need to have a Google Drive account for this method. If you don’t have such a cloud storage account, open the Google page in your browser. Click the Create an account link, and fill out the required boxes. Then follow these steps to transfer files from the Oculus Quest 2 to your PC with Google Drive.
- Put on and start up the Oculus Quest 2 headset.
- Open the Meta Quest Browser app.
- Then sign in to your Google account in the browser.
- Open your Google Drive cloud storage account.
-
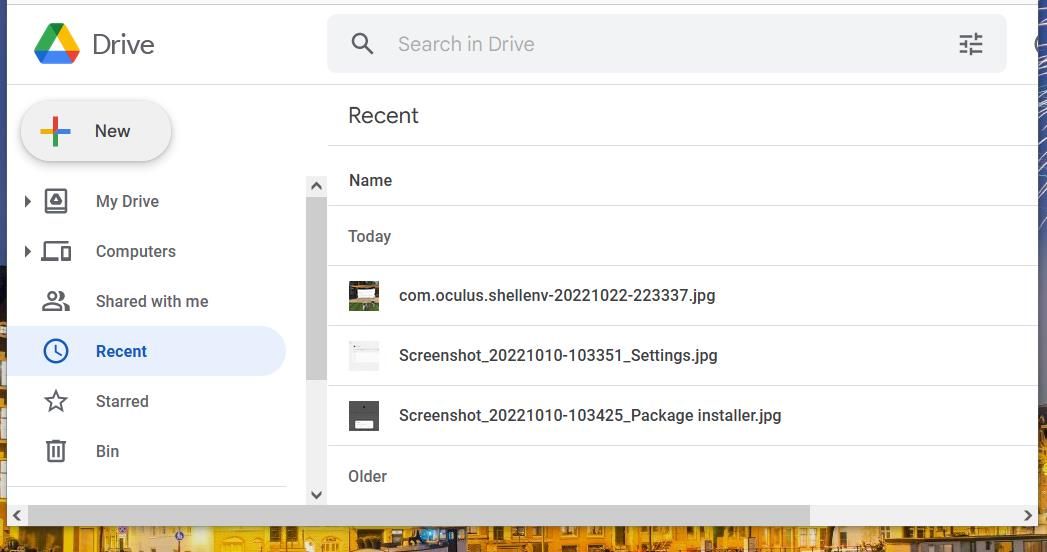
Press the New button on the left of the Google Drive page.
-
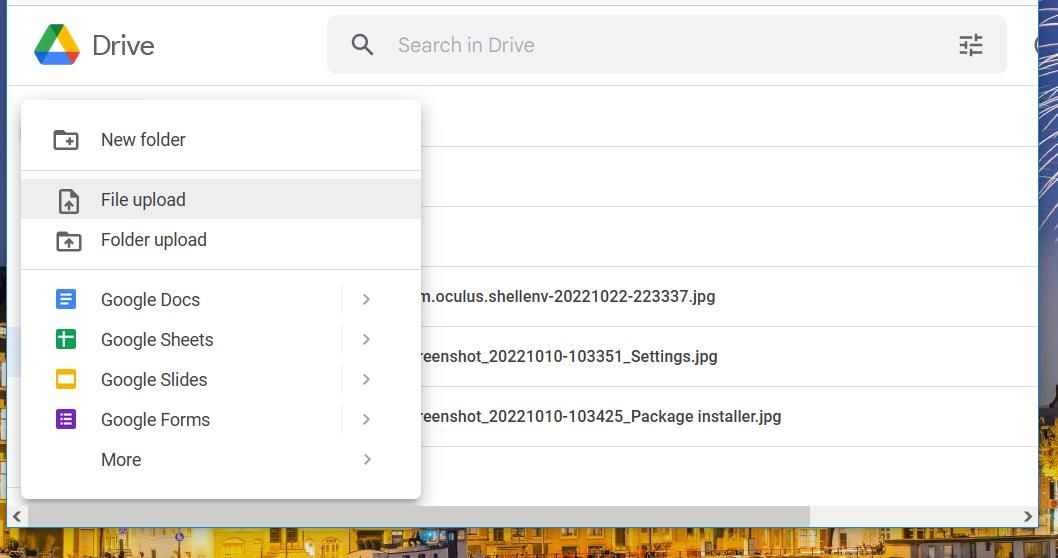
Select File upload on the menu.
- Next, select the Allow permission option for the Oculus Browser.
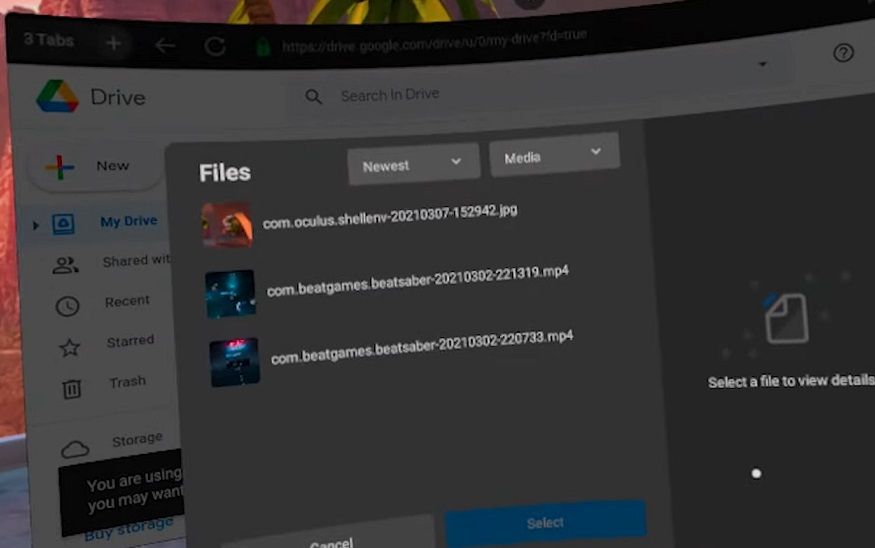
- Choose a file to upload to Google Drive on the selection menu that opens.
-
Press the Select button to upload it.
- After uploading some files on your headset to Google Drive, turn off the Quest 2.


We're done with the headset now, so feel free to put it away if you're done with it.
- Turn on your PC to enter your user account.
- Bring up your Windows web browser.
- Open your Google Drive could storage in the Windows browser.
- Click Recent to view uploaded files.
-
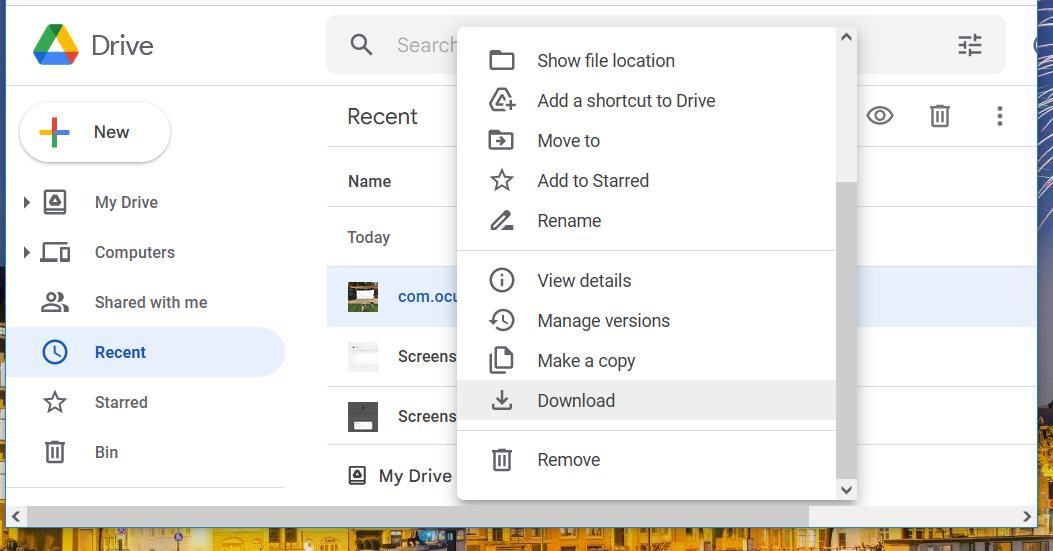
Right-click one of the uploaded Quest 2 files and select Download.
- Then press the Win + E to view Explorer.
- Open your browser’s default downloads directory.
- Double-click the downloaded Quest 2 file to view it in Windows software.

Google Drive gives you 15 gigabytes of free storage, which makes it one of the best free cloud storage providers. You can also download and install a Google Drive app on Windows to integrate the cloud storage with File Explorer. Then you’ll be able to navigate your cloud storage folders in Explorer. Check out our guide about adding Google Drive to File Explorer for further details.
Note that Google Drive needs to be in its desktop version on your Quest 2 browser to upload files. If you can’t see the New button in Google Drive, click the menu button at the top left. Then scroll down and select Desktop Version on the sidebar.

Accessing Your Quest 2 Files on a Windows PC
Transferring Quest 2 files will enable you to open, view, and edit them with a plethora of Windows software in ways you can’t on the VR headset. Using a link cable is the better way to transfer files since you won’t need to upload and download them. However, users who don’t have suitable VR-ready PCs for link cables can still transfer files from their headsets with the cloud storage method.