Whether you are a freelancer or a small business owner, time tracking apps are essential to maximizing your productivity. With Timely, you can keep track of time, projects, and team members. This app provides team planning and project management capabilities.
If you’re a gig worker or manage a creative professionals team, you can deliver maximum productivity using the Timely app. This article will describe how to implement automatic time tracking in your freelancing projects or businesses.
Getting Started With the Timely App
Timely app takes care of essential admin tasks that freelancers or business owners need to fulfill. You can subscribe to the free trial of the Timely app and explore its features to know if it is suitable for you or your business. To sign up, follow these steps:
1. You need to visit the Timely website home page.
2. You’ll find the Start 14-day free trial button on the upper-right side. Click on the button.
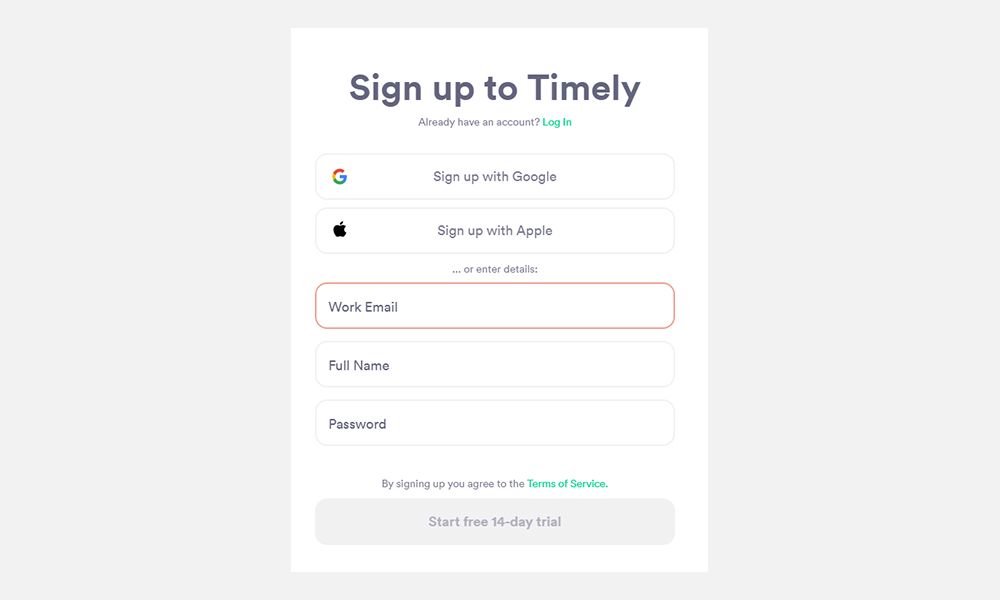
3. You should now see the Sign-up screen. You can sign up using Google or an Apple account. Alternatively, enter your Work Email, Full Name, and Password to start the free trial.
4. After signing up, you’ll see the Workspace Details screen. Enter basic information about your company and team, and then click on Next.
5. On the Set up your workspace screen, you can import existing project details from apps like Toggl and Harvest.
6. If you're not using Toggl, Harvest, or any other time-keeping apps, you can create a new project by entering the Client name and Project name.
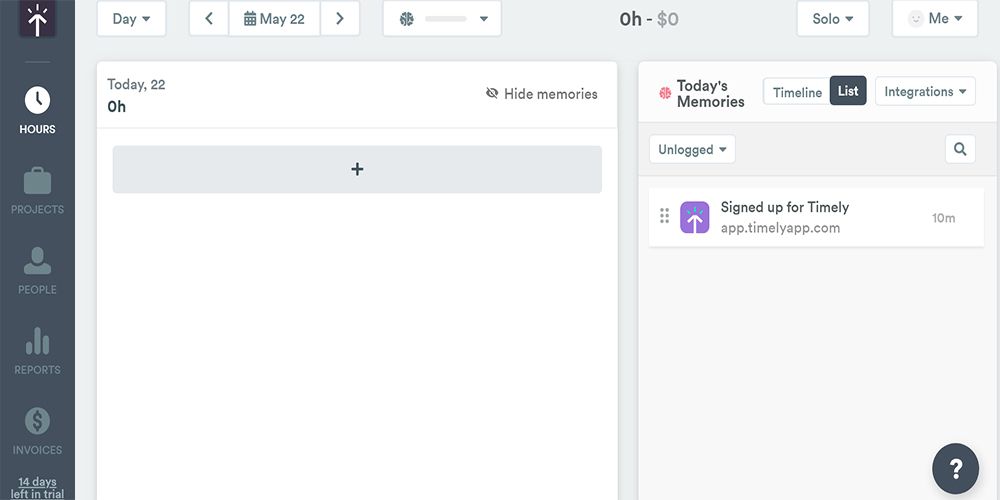
7. You’ll see the following dashboard:
8. You need to download the Memory AI by clicking a link on the blue ribbon located at the top of the 0h - $0 display.
9. On download completion, you can install the Memory AI app on your computer.
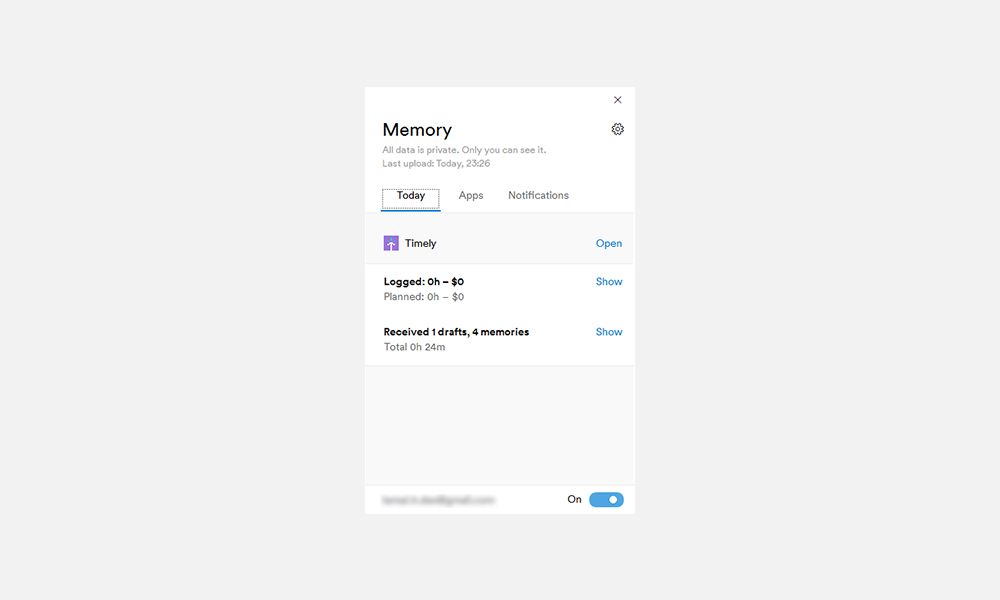
10. After the installation, open the app and allow it to sign in automatically. You’ll see the following screen after logging in to the Memory AI app:
11. You may close the Memory AI app. It will run in the background and stay hidden on the Show hidden icons menu of the Windows Notification area.
Create a Precise Work Record for Invoicing
The Timely Memory AI automates the task of capturing billable hours for ongoing projects. There is no need for you to activate the tracking system. Also, time logs are all kept in one Timeline so that you don’t have to assemble data from different documents.
Moreover, the Timely app suits the discontinuous work style of freelancers. It pieces together sporadic work timings in a single frame during the project. Try the following steps to get used to the Memory AI-generated log entries:
1. After you log in to your Timely workspace, click on the Hours icon at the left-side panel.
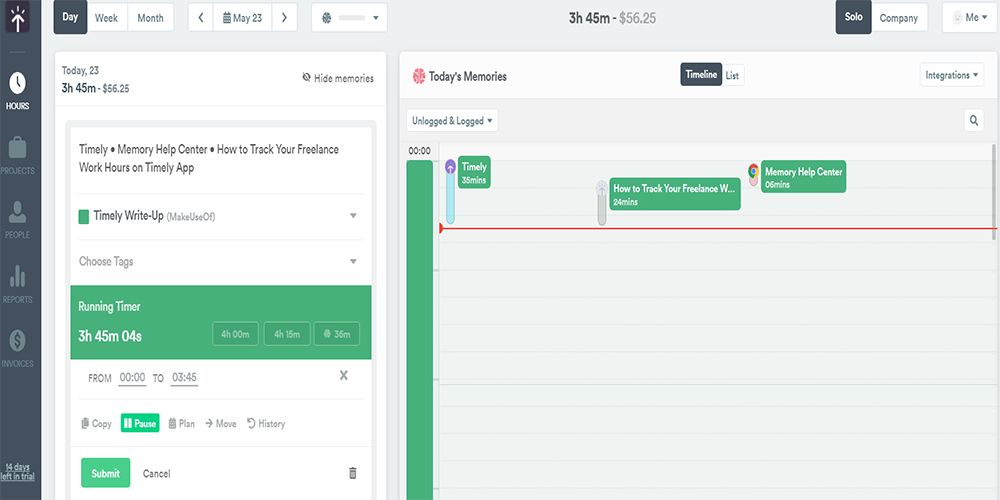
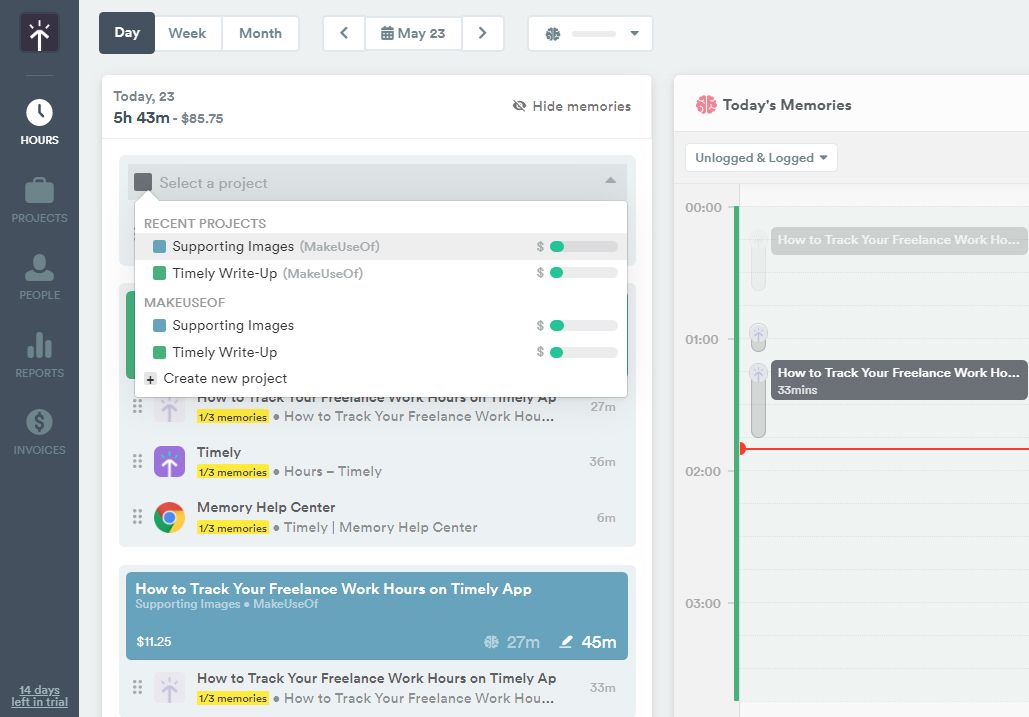
2. You’ll see two sections on the timesheet. The left-hand-side section shows auto-populated log entries by the Memory AI.
3. The right-hand side displays the List or Timeline display of the day’s activities.
4. On the Timeline section, click on the Integrations drop-down menu to import day’s tasks and time records from any other tool, like Asana, Jira, Zoom, Office 365, Gmail, etc.
5. The Timeline shows one-hour sprints of your activities. There is also a bar graph to visualize app usage comparison. Hover on any item on the Timeline to know app name, time spent, and project details.
6. If you notice that a specific item should not be on the Timeline, you can click on the Delete icon located in the upper-right side corner of an activity.
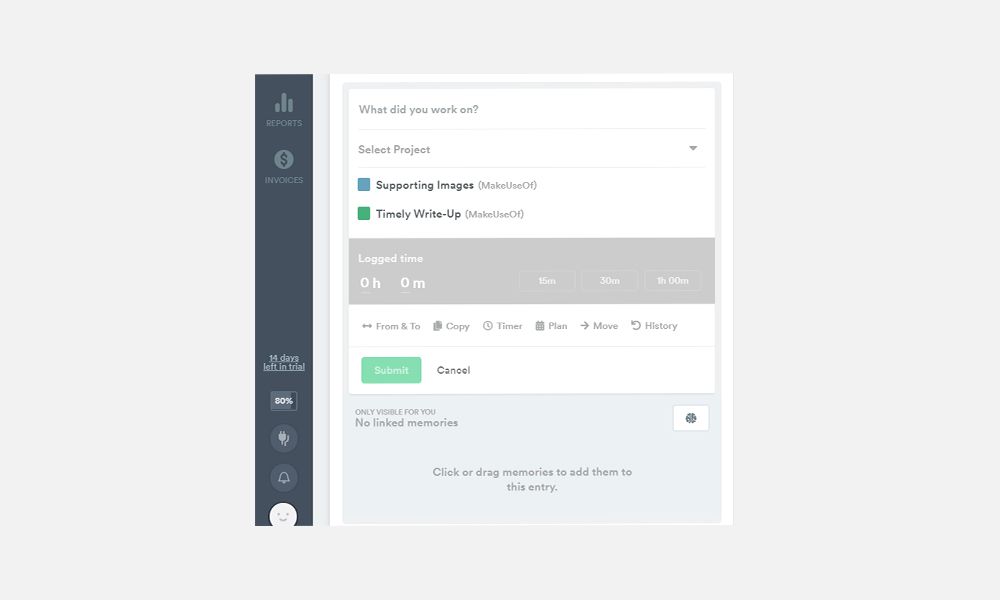
7. On the left side, click on any of the displayed items to open the customization panel. Now, you can edit several fields of the task like Task header, Project name, Tags, and Logged time.
8. Beneath the Logged time display, you’ll see items like From & To, Copy, Timer, Plan, Move, and History. You can use these options to implement changes in the auto-captured tasks.
9. You can edit the tasks as long as they are not marked as billed.
Manual Time Entries in Timely
To adjust with your work style, Timely allows you to make manual time entries as well. There are several ways to manually log a task in the timesheet, like timer, timestamps, plan time, a logged time, etc. To submit a manual time log, follow these steps:
1. Go to the Hours tab of your project workspace.
2. You can click on the Plus (+) or New Entry button to bring up the Hour Editor.
3. You can now enter your work notes and select the project. To log activity time, enter the hour and minute figures under Logged time and click on Submit to save the entry.
4. You can also enter time by clicking on From & To, Timer, and Plan.
5. You can follow these steps to add a new time on the Week and Month tabs as well. You can find them on the top left side of the screen.
Timesheets Navigation for Accurate Time Logging
Timely app logs all of the time tracking activities on the Timesheets. There are three different layouts for your timesheets:
1. Day View Tab
Day view records all planned and logged time for the current day. You can change the date of Day view by clicking on the Calendar icon on its right side. Memory AI logged time entries will also show up here.
Since the Memory timeline is private, you need to log the entries to record them on your timesheet. Click on any task within the Timeline, and an entry will appear on the left-side panel. Select project name, tags, and then review time to finalize the submission.
2. Week View Tab
You’ll need to use the Week view tab more often. It offers a holistic view of the current week’s planned and logged hours for a project. You can use the Calendar icon to switch to a different week. Additionally, you can drag and drop to move time entries within a week.
3. Month View Tab
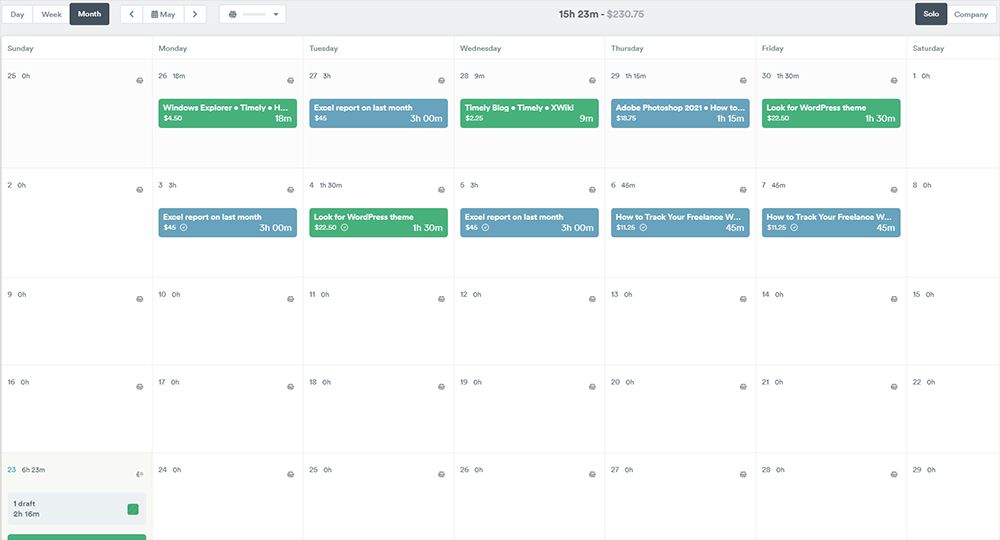
When you need to analyze your performance, you can switch to the Timely app Month view tab. You’ll see time entries for the entire month as well as hour vs. earned money projection. You can speed up your way of working if the month view shows deficiencies in your project goals.
Generate Invoices to Bill Clients
Creating invoices in the Timely app is effortless and intuitive. However, you’ll need a QuickBooks online subscription to send the invoice to the client. When QuickBooks online records payments against the invoice, the Timely app mirrors the invoice as paid.
If you don’t have QuickBooks online, you can take a screenshot of the invoice in Timely. Then share the file with your client to receive payment. To generate an invoice, follow these steps:
1. Click on the Invoices icon at the left-side panel.
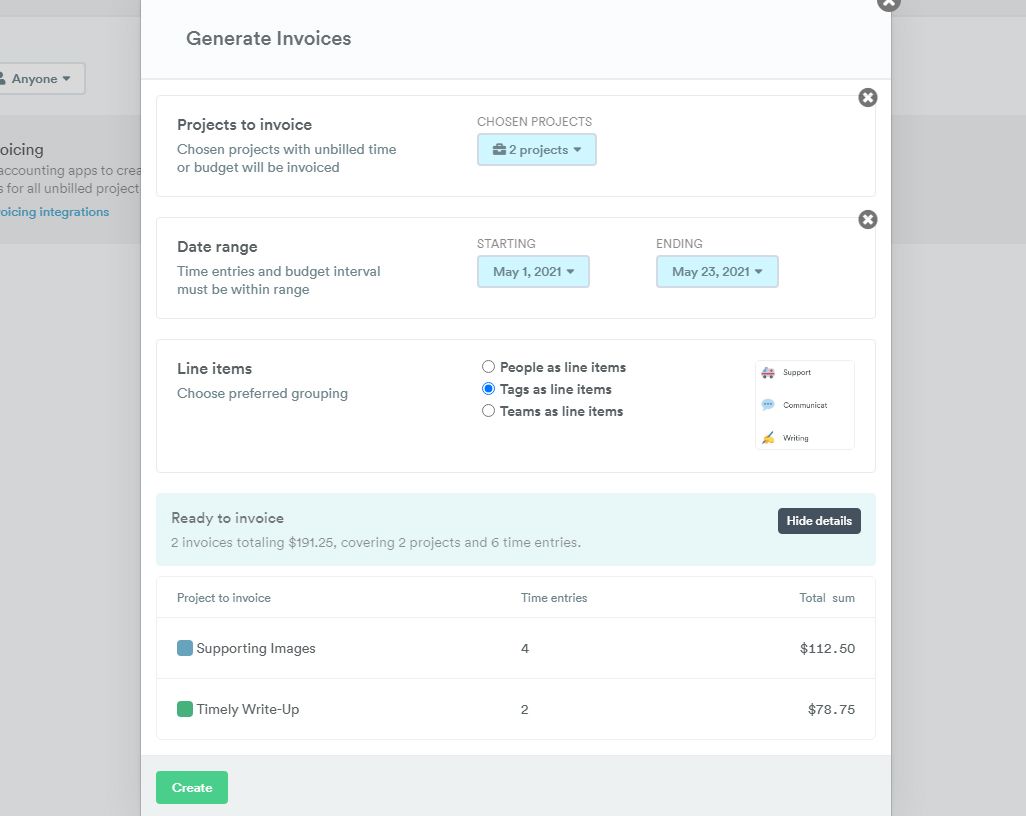
2. You’ll see a green New invoice button on the top right corner of the screen. Click on it to open the Generate Invoices panel.
3. Click on the Any project drop-down menu and choose the project.
4. Now, you need to select the Date range by clicking on Starting and Ending.
5. Select Line items from the list of three: People, Tags, and Teams.
6. Click on Create to finalize the invoice.
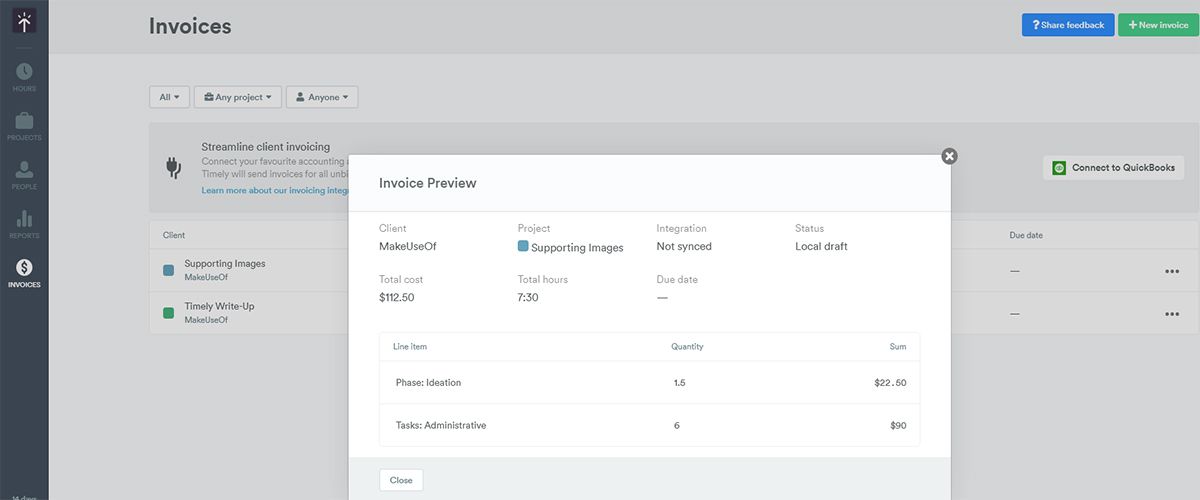
7. Once you create an invoice, you can see its preview as shown in the picture:
Boost Freelance Project Productivity Using Timely
Fully online and AI-powered time tracking tools have the potential to reduce time wastage by cutting down admin works. By relying on a trusted time tracking app like Timely, you’ll save productivity hours. You can further invest such time gains in learning new skills like visual collaboration.

