
As a student, you've probably found that your days are dominated by surfing the internet. Hence, it is necessary to have a reliable browser to properly work on our projects or study for exams.
While Chrome has been one of the top browsers for students worldwide, not all of them use it to its full potential. If you use Chrome as your primary browser, we'll show you how to set it up, so you can take full advantage of its features.
1. Create a Dedicated Chrome Profile
The first step in setting up your browser is to create a separate Chrome profile for studying. This way, you can only install the relevant extensions, keep your bookmarks organized, and optimize the browser settings, which will enhance your productivity.
Additionally, when you keep all personal browsing and information on separate profiles, you won't run the risk of sharing something personal while sharing the browser screen during virtual meetings, ensuring your privacy.
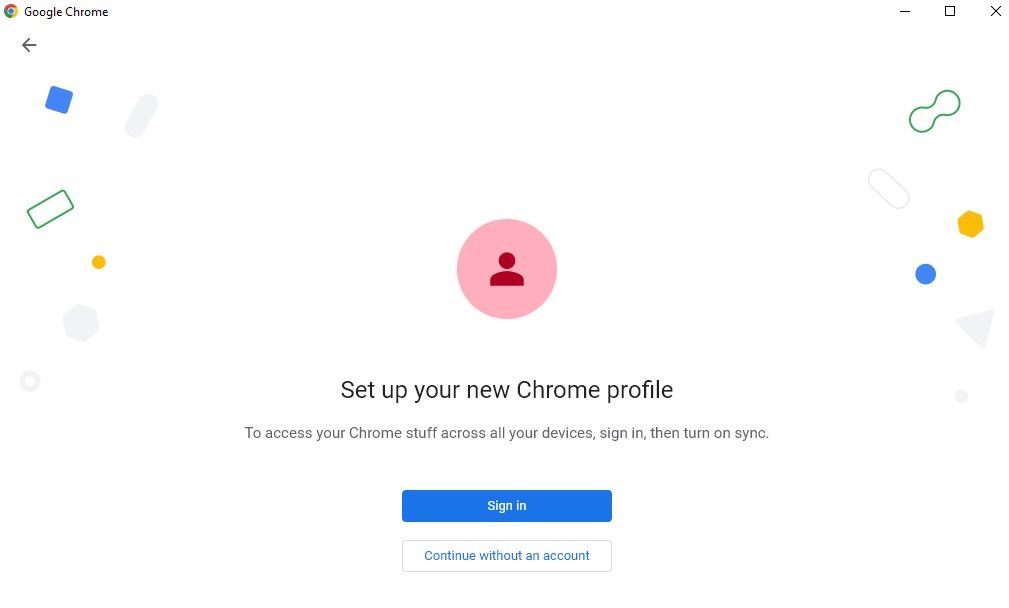
Follow the below steps to create a new profile:
- In the top-right corner, click on the profile icon.
- Under Other profiles, click on Add.
-
Sign in with your email, or click Continue without an account.
-
Choose a username and an avatar for your profile, then click Done.
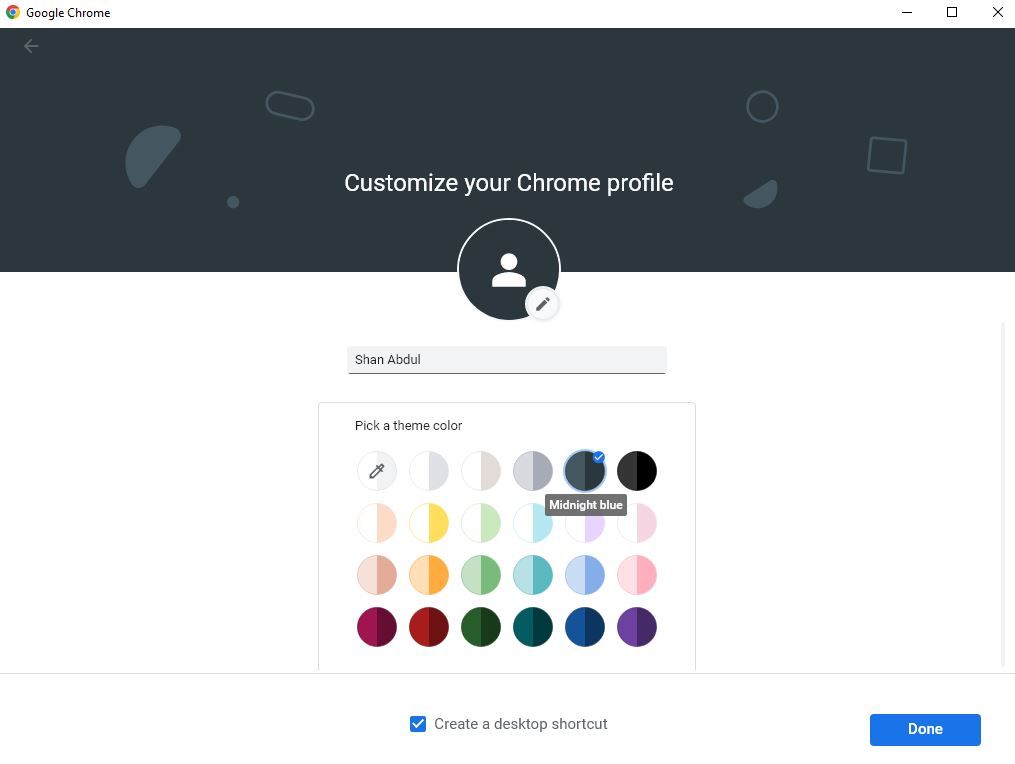


When creating a Chrome profile, you should also check the box for Create a desktop shortcut, which creates a shortcut on your desktop. It can help you access your browser directly after booting with your profile already logged in.
2. Install Relevant Extensions
After creating a Chrome profile, you should install relevant extensions to get the most out of the browser. You should read our article on extensions you should install to facilitate your studies. However, avoid overburdening the browser with too many extensions when you do so.
Follow the below steps to install any extension:
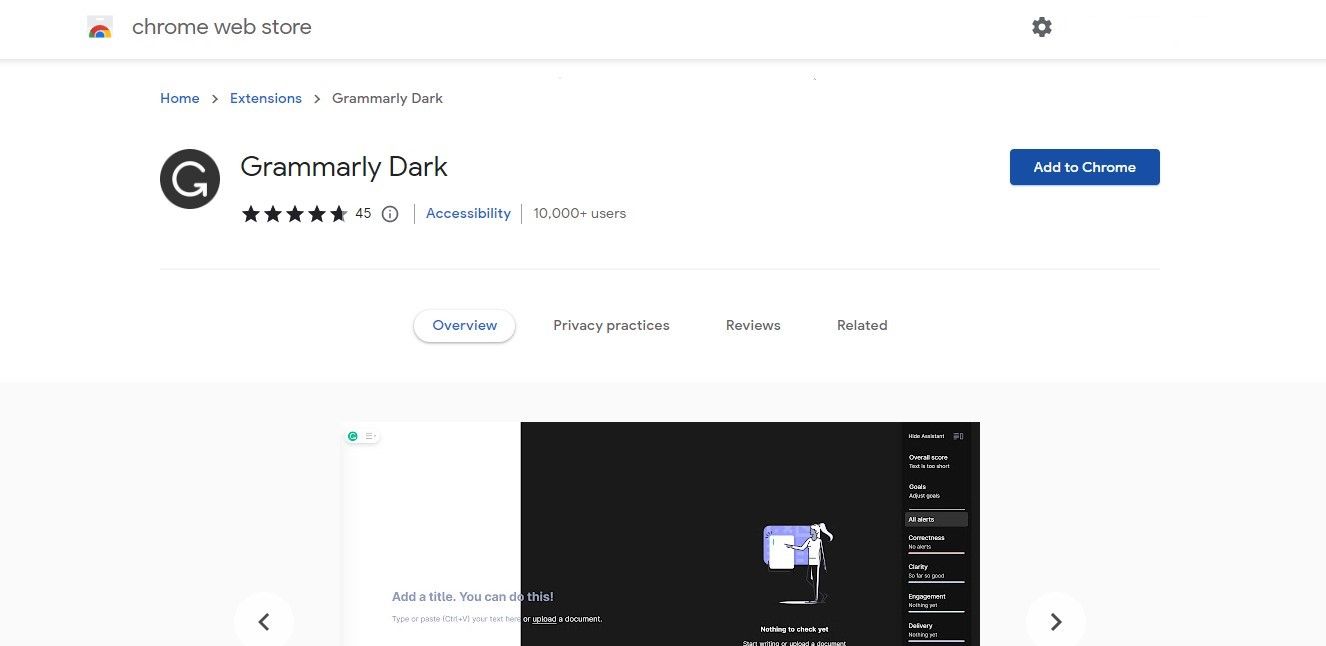
- Visit the Chrome Web Store.
- Type the extension's name into the search box in the top-left corner.
- From the search results, choose the relevant extension.
- Then click the Add to Chrome button.
-
In the popup, click on Add extension.

3. Leverage Chrome's Bookmarks Bar
Next, you should make full use of Chrome's bookmarks bar when configuring the browser to streamline your work management.
So start gathering the sources you go to most often and add them to your bookmark bar. With this, you can access your most frequently visited websites with just one click, saving you a great deal of time.
You can bookmark a page by clicking on the star icon at the right end of the Chrome search box, or clicking on the three vertical dots in the top-right corner, then clicking Bookmarks > Bookmark this tab… After that, drag and drop a bookmarked page onto the Bookmark bar.

In addition, you can also make dedicated folders for different projects and keep bookmarks of relevant sources within those folders. Afterward, you can add those folders to the bookmark bar to manage everything from one place.

4. Take Advantage of Chrome's Tab Groups
Next, you should organize your frequently used tabs into separate groups. The tab groups feature works the same as bookmarks and enable you to open all tabs included in one group at once.
Therefore, create multiple tab groups for your school projects and add relevant links and sources. To create a group, right-click on any tab and navigate to Add tab to group > New group. Then, name a group, select the group color, and press Enter.

Once the group is created, you can add tabs to it by clicking Add a tab to group and selecting the relevant group.

5. Turn On Sync in Chrome
The next step is to enable sync in Chrome. It allows you to keep your browser data consistent across your devices, such as installed extensions, bookmarks, saved passwords, browsed history, etc.
Hence, even if you wish to use a college computer temporarily, you will just need to sign on using your account, and you will be able to use a similar browser setup that you are used to. Any changes you make in the browser will be updated on any subsequent device you use with the same account.
To turn on sync in Chrome, follow these steps:
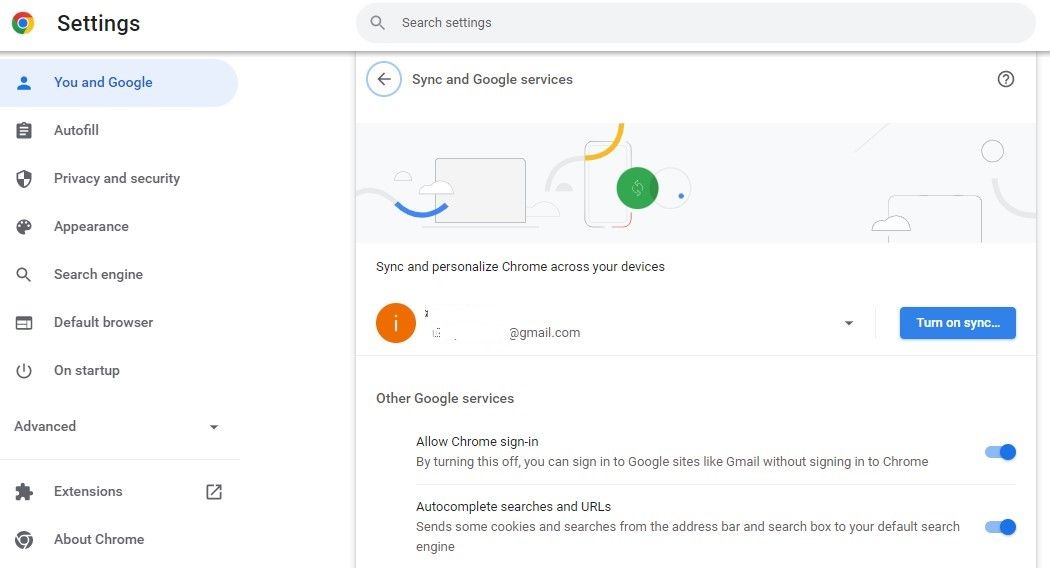
- Click on three vertical dots in the top-right corner and go to Settings.
- In the left-sidebar, click the You and Google menu.
- On the right-hand side, click Sync and Google services.
-
Click on Turn on sync…
- Add your email account.

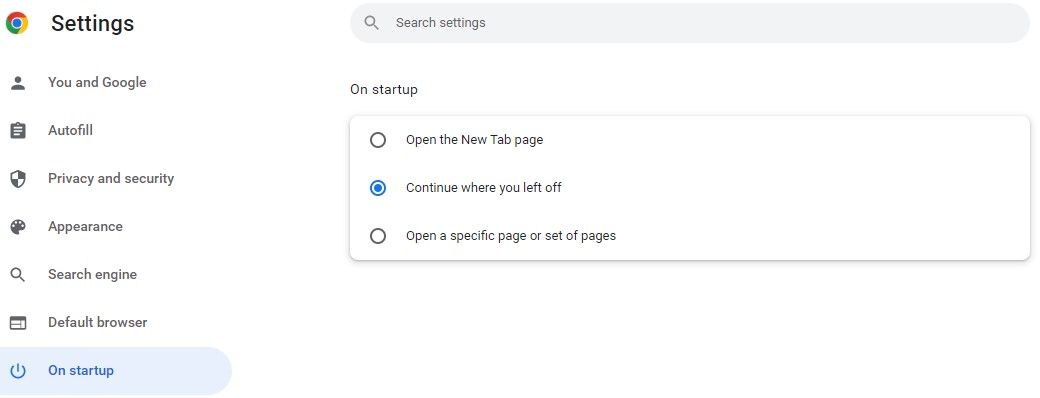
6. Enable the "Continue Where You Left Off" Option
It's pretty common for the browser to crash or your computer to restart without warning. When that happens, all of your open tabs shut down at once, and you have to reopen them all from scratch. It's painful, especially when a tight deadline looms over your head.
To prevent this from happening, you should enable a Chrome setting that automatically reopens all tabs you were working on when you accidentally close the browser. Follow the steps below to enable this setting:
- Click on three vertical dots and navigate to Settings.
- In the left-sidebar, click the On startup menu.
-
Click on the circle that says Continue where you left off.

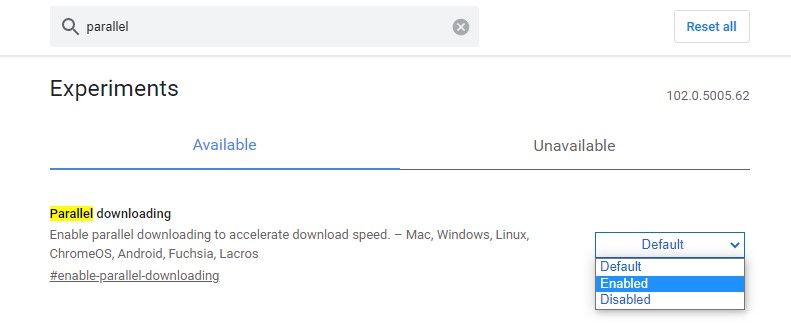
7. Enable Parallel Downloads in Chrome
Student life isn't complete without downloading files now and then. Unless you have a pretty decent internet connection with good speed, you should enable parallel downloading to expedite the download process.
When enabled, your downloads will proceed in multiple threads rather than one, improving download speeds significantly.
To enable it, follow these steps:
- Type Chrome://flags/ in Chrome's address bar and press Enter to go to Chrome's flags page.
- Search for Parallel downloading.
-
From the dropdown menu next to this experimental feature, select Enabled.

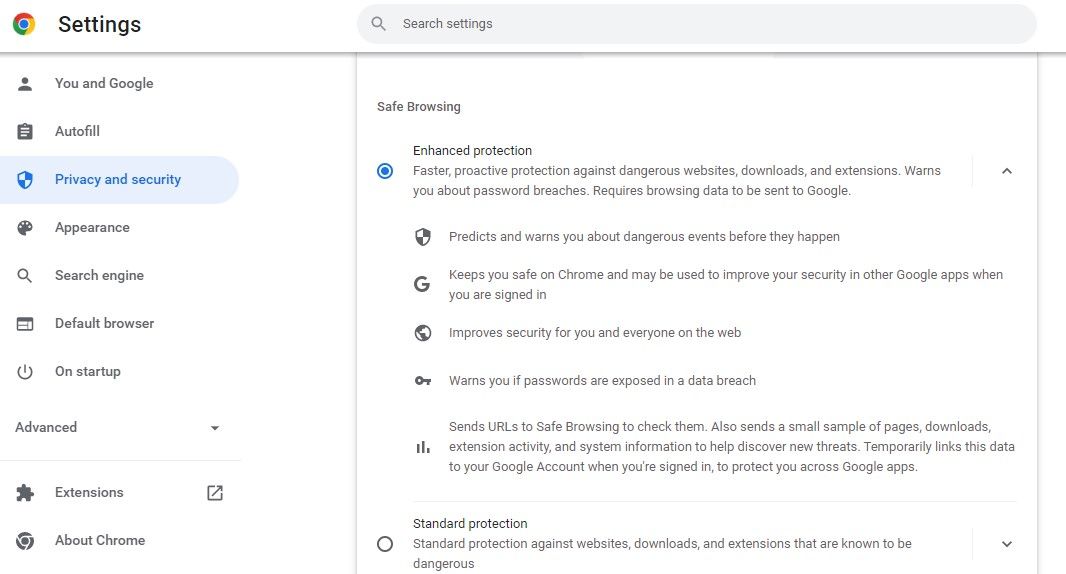
8. Make Your Security Fool-Proof
You may stumble upon a potentially harmful website, download a malicious file, or install a malicious extension as you work on a project. Additionally, you are susceptible to data breaches and virus attacks.
Therefore, to prevent compromising your security, you should switch your security setting to Enhanced Protection, a built-in security feature you can enable to guarantee your data's safety. You can enable it by following the below steps:
- Click on the three vertical dots in the top-right corner.
- Go to Settings.
- In the left-sidebar, click Privacy and security.
- In the right-hand pane, click Security.
-
Check the box to enable Enhanced Protection.

Get the Most Out of Chrome as a Student
With this guide, you should be able to set up your browser for studying the right way. Besides the features and settings mentioned above, Chrome lets you customize its appearance, change the language, and align accessibility settings to your preference. Therefore, try out all of them and keep those working best for you.