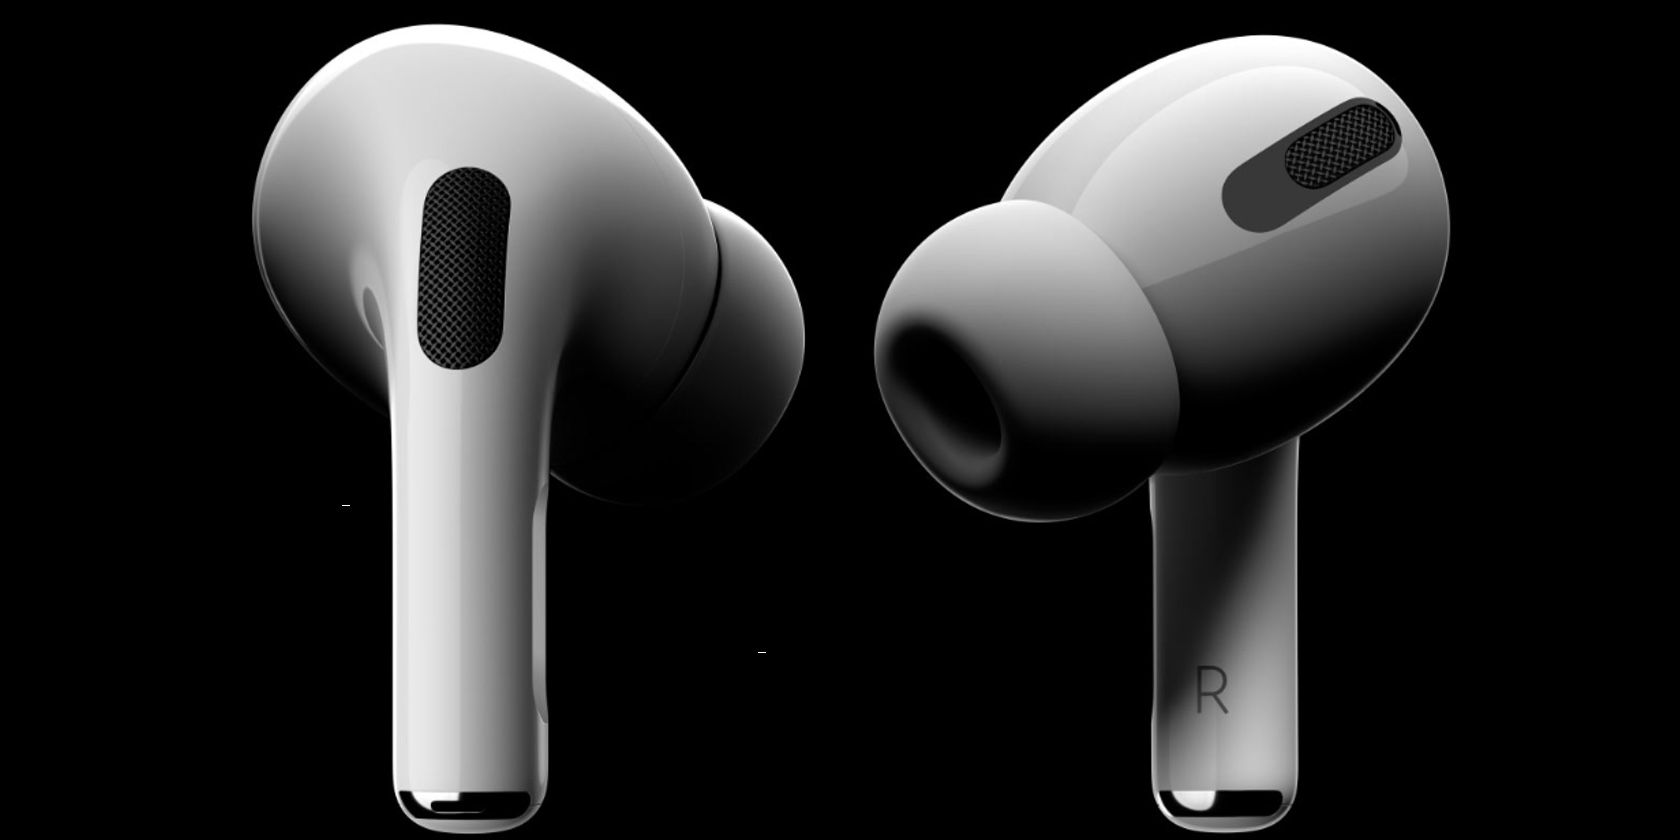
If you want portable noise-cancelling headphones and use an iPhone, the AirPods Pro are your best bet. But after buying the AirPods Pro, you won’t be doing justice to your purchase if you don’t make the most of the earbuds.
After using the AirPods Pro for some time, we wanted to highlight their best features and how you can make the most of them.
1. Customize the "Press and Hold" Action
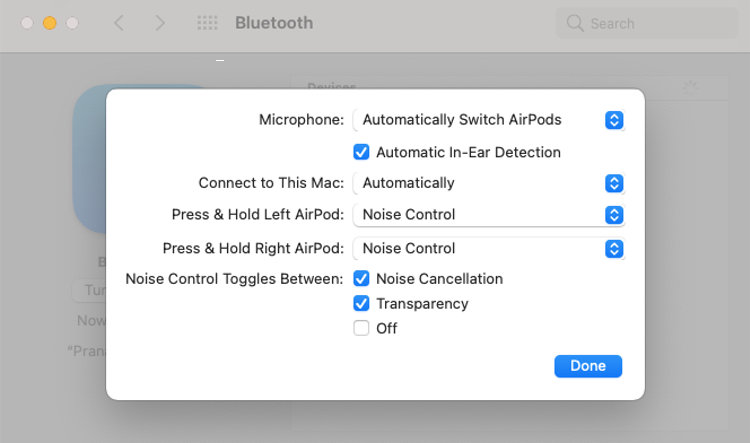
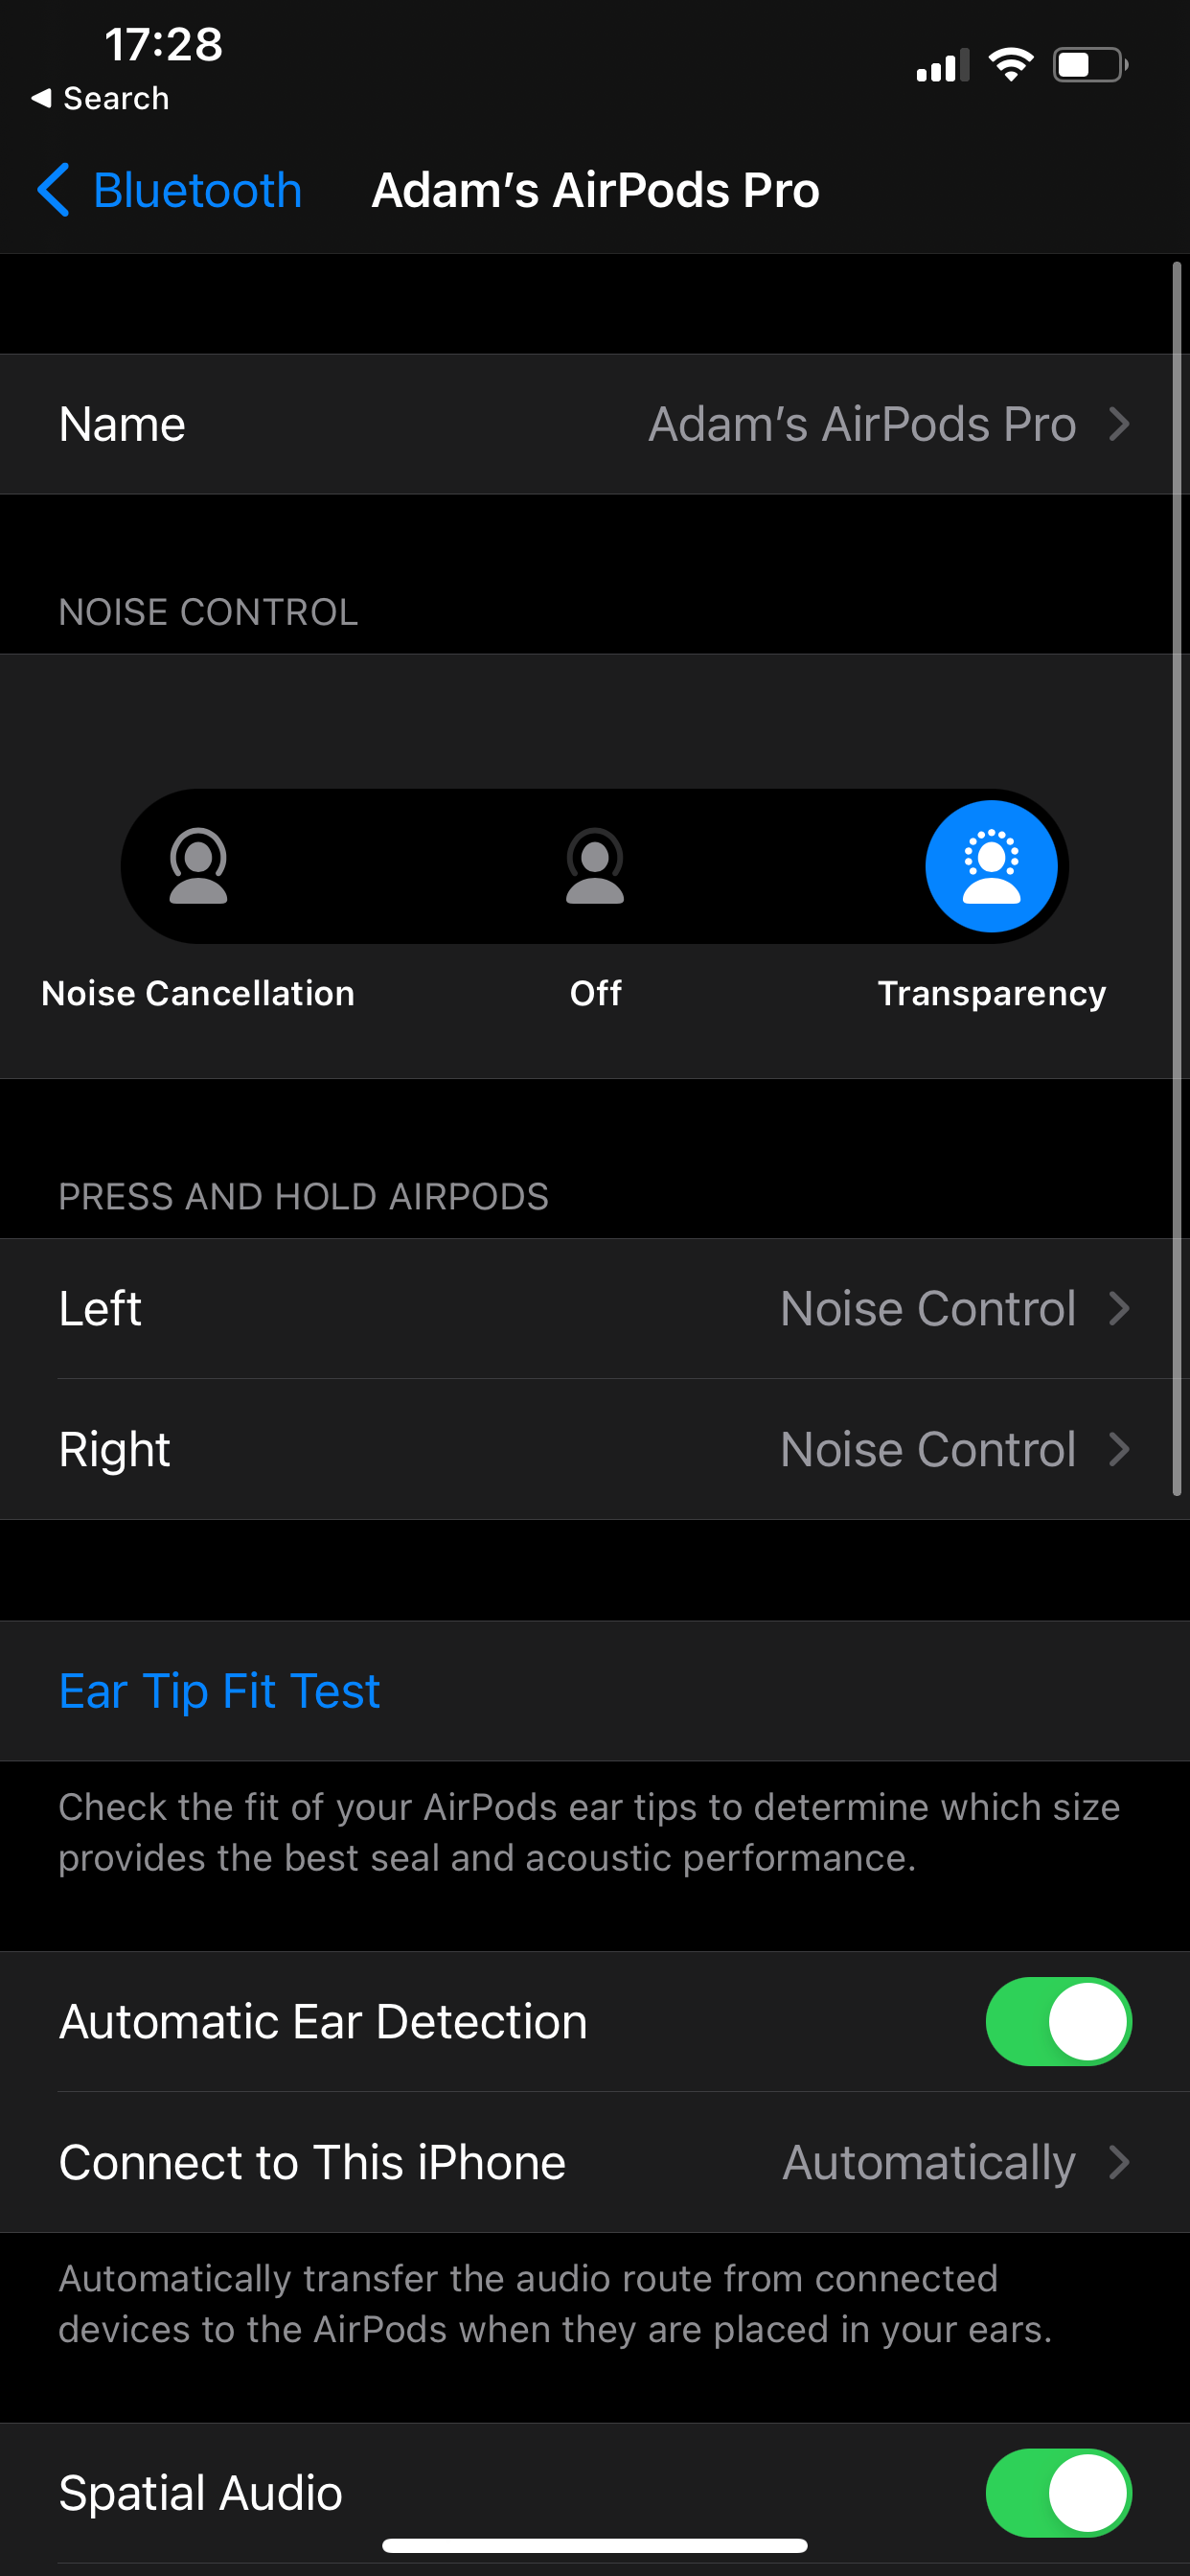
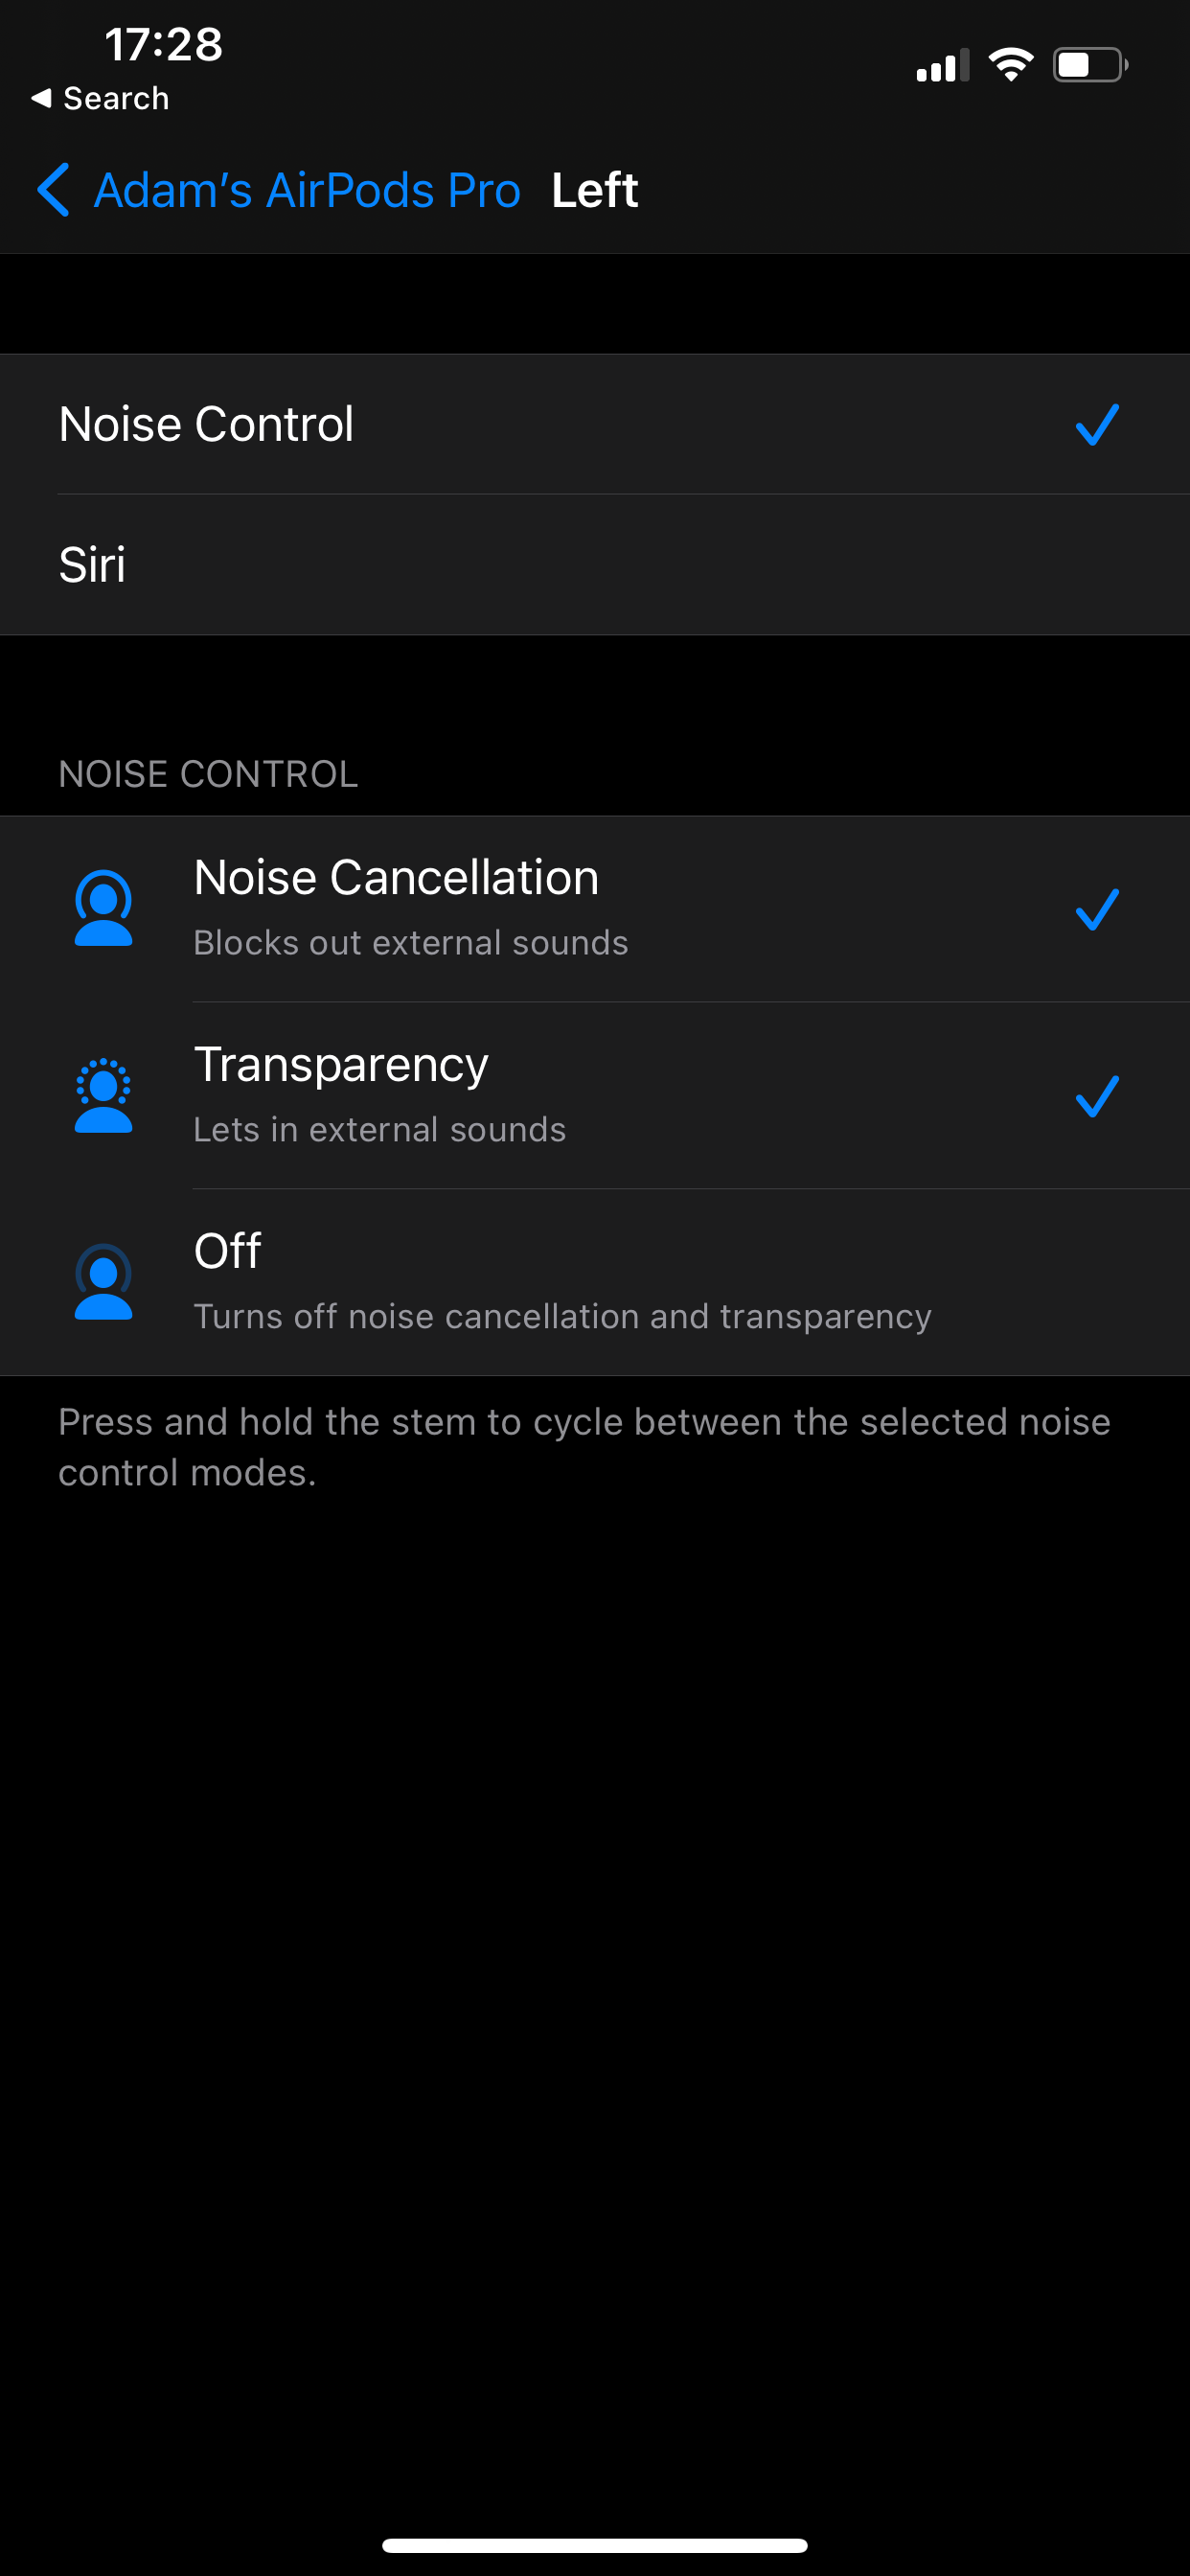
When you press and hold on an AirPod, you can toggle between various audio modes such as noise cancellation and transparency. However, you can change this to add Siri controls on one AirPod, and the option to switch off noise cancellation altogether via the other AirPod.
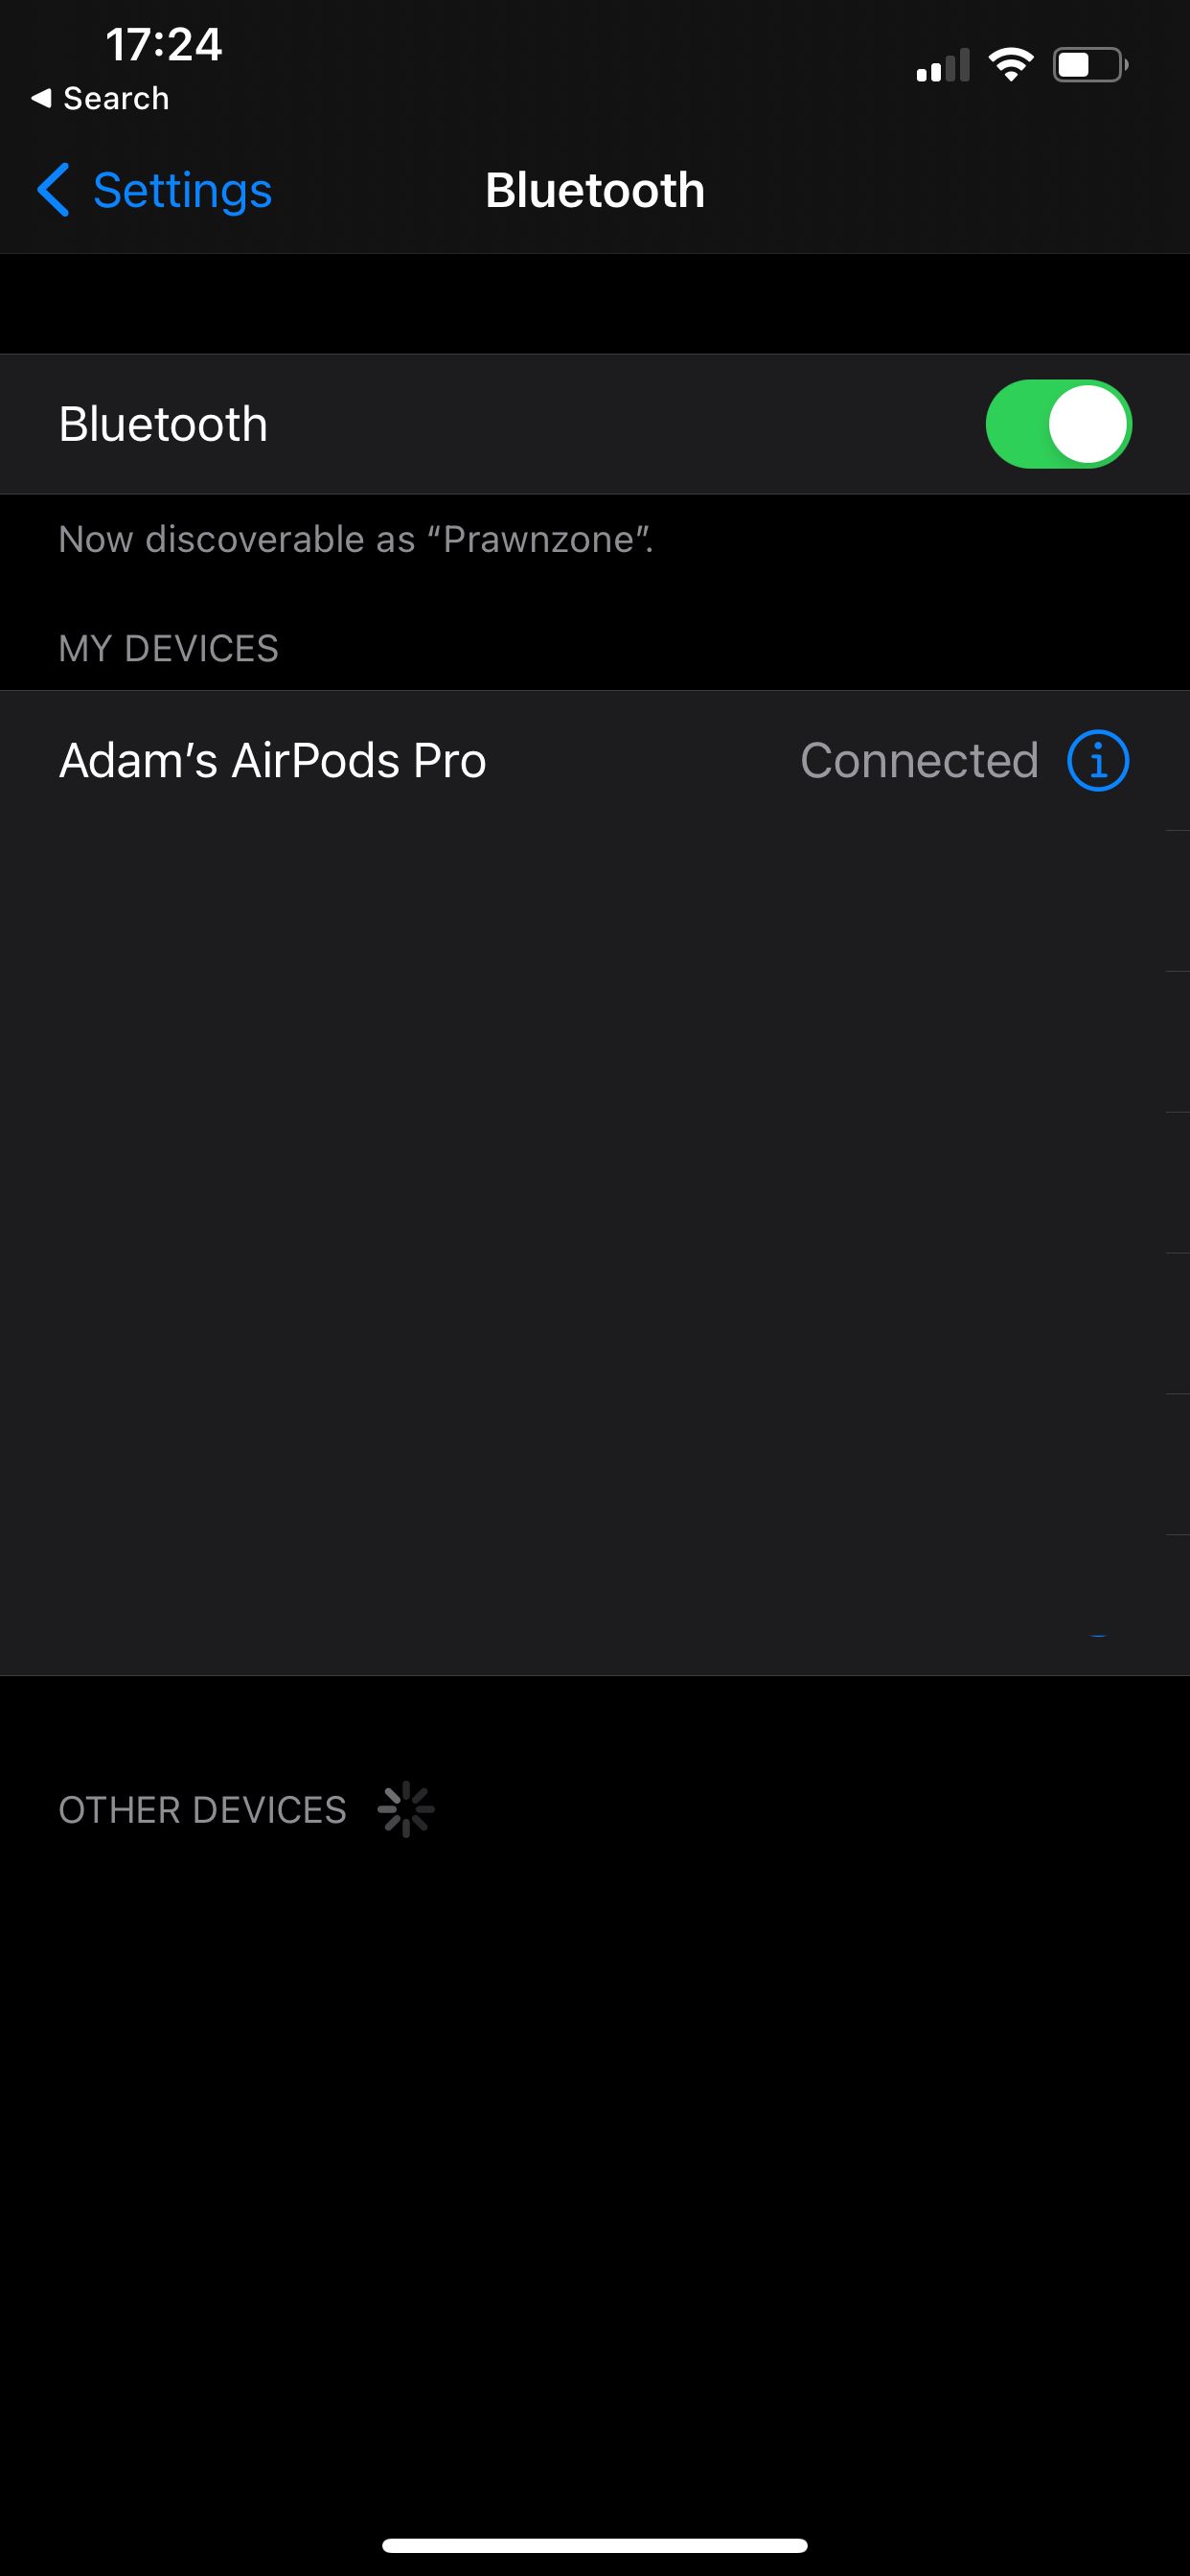
To do this, connect your AirPods Pro to your iPhone and go to Settings > Bluetooth. Now tap the i button next to AirPods Pro. Under Press and Hold AirPods, tap Left and select Siri. Now you can press and hold the left AirPod’s stalk to activate Siri.
Go back to the previous page and select Right. By default, Noise Control will be selected here. But if you look below, two of three options are enabled. The third option is Off; and you can either select that too, or enable it while removing one of the other two modes if you like.
2. Find the Best Fit for Your AirPods Pro
Apple allows you to take an "Ear Tip Fit Test" to ensure that you’re getting a good seal with your AirPods. With a proper seal, the AirPods Pro will be able to effectively cut out noise and deliver good sound quality.
You can take the Ear Tip Fit Test by going to Settings > Bluetooth and tapping the i button next to your AirPods Pro. Here, select Ear Tip Fit Test. If the seal is good according to the test, you’re set. If not, you can try a different set of tips that shipped with your AirPods Pro.
To go one step further, try all three sets of tips anyway and use whatever feels the most comfortable. In our testing, the Ear Tip Fit Test said that we had a good seal with the medium-size tips, but the AirPods Pro would keep falling out. Switching to the small size fixed this problem.
3. Enable Spatial Audio for an Immersive Sound Experience
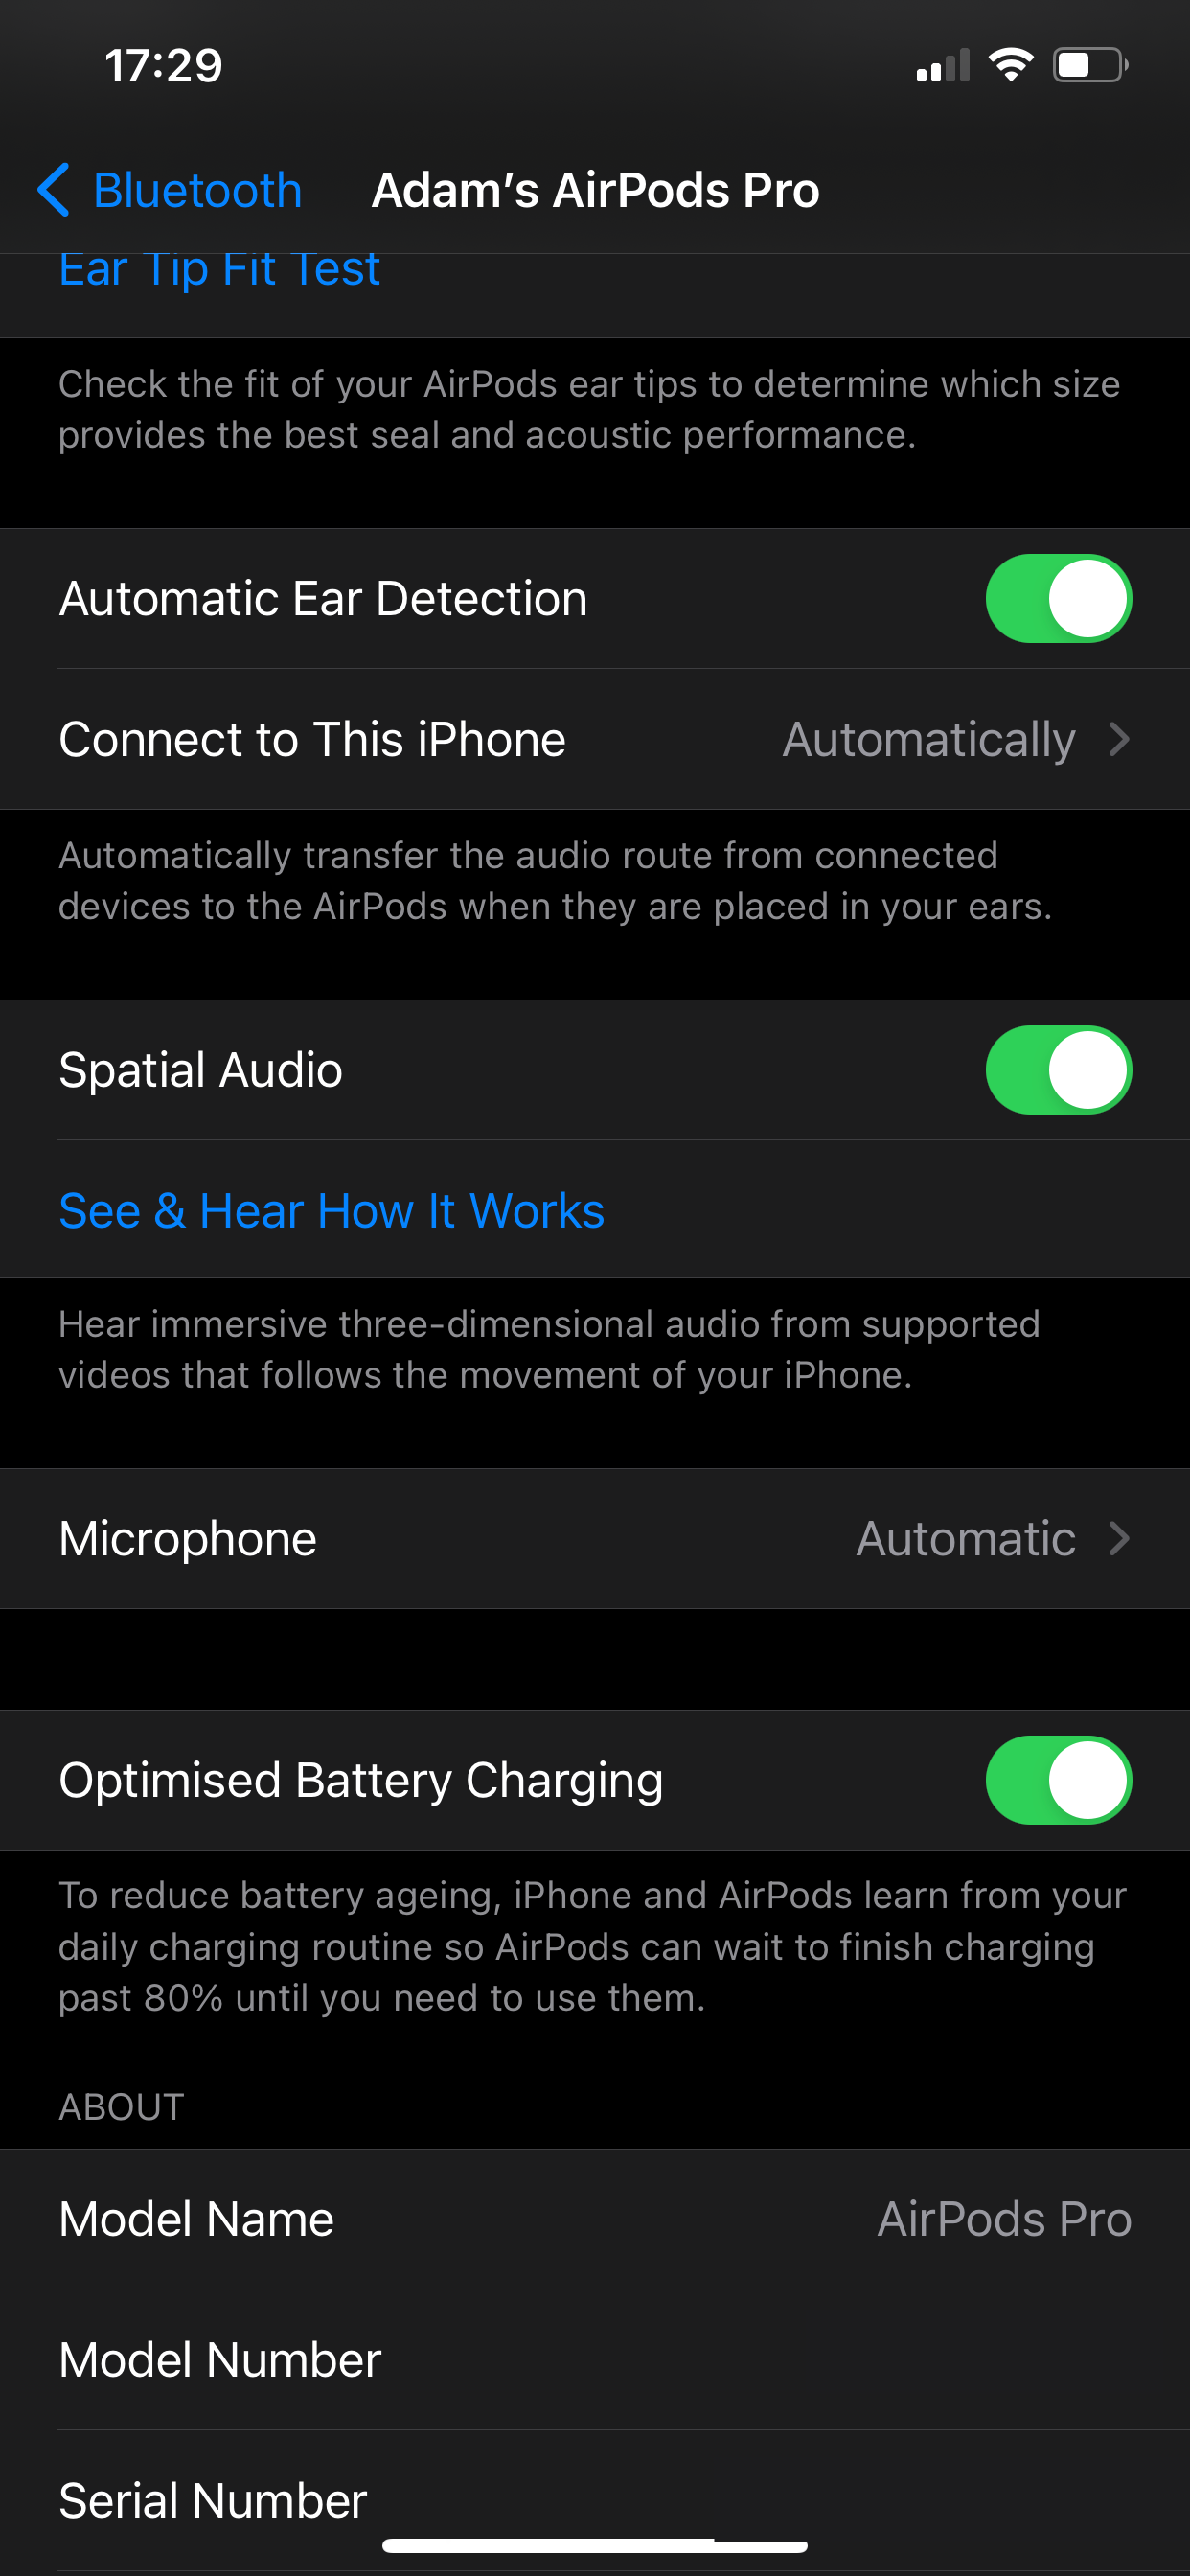
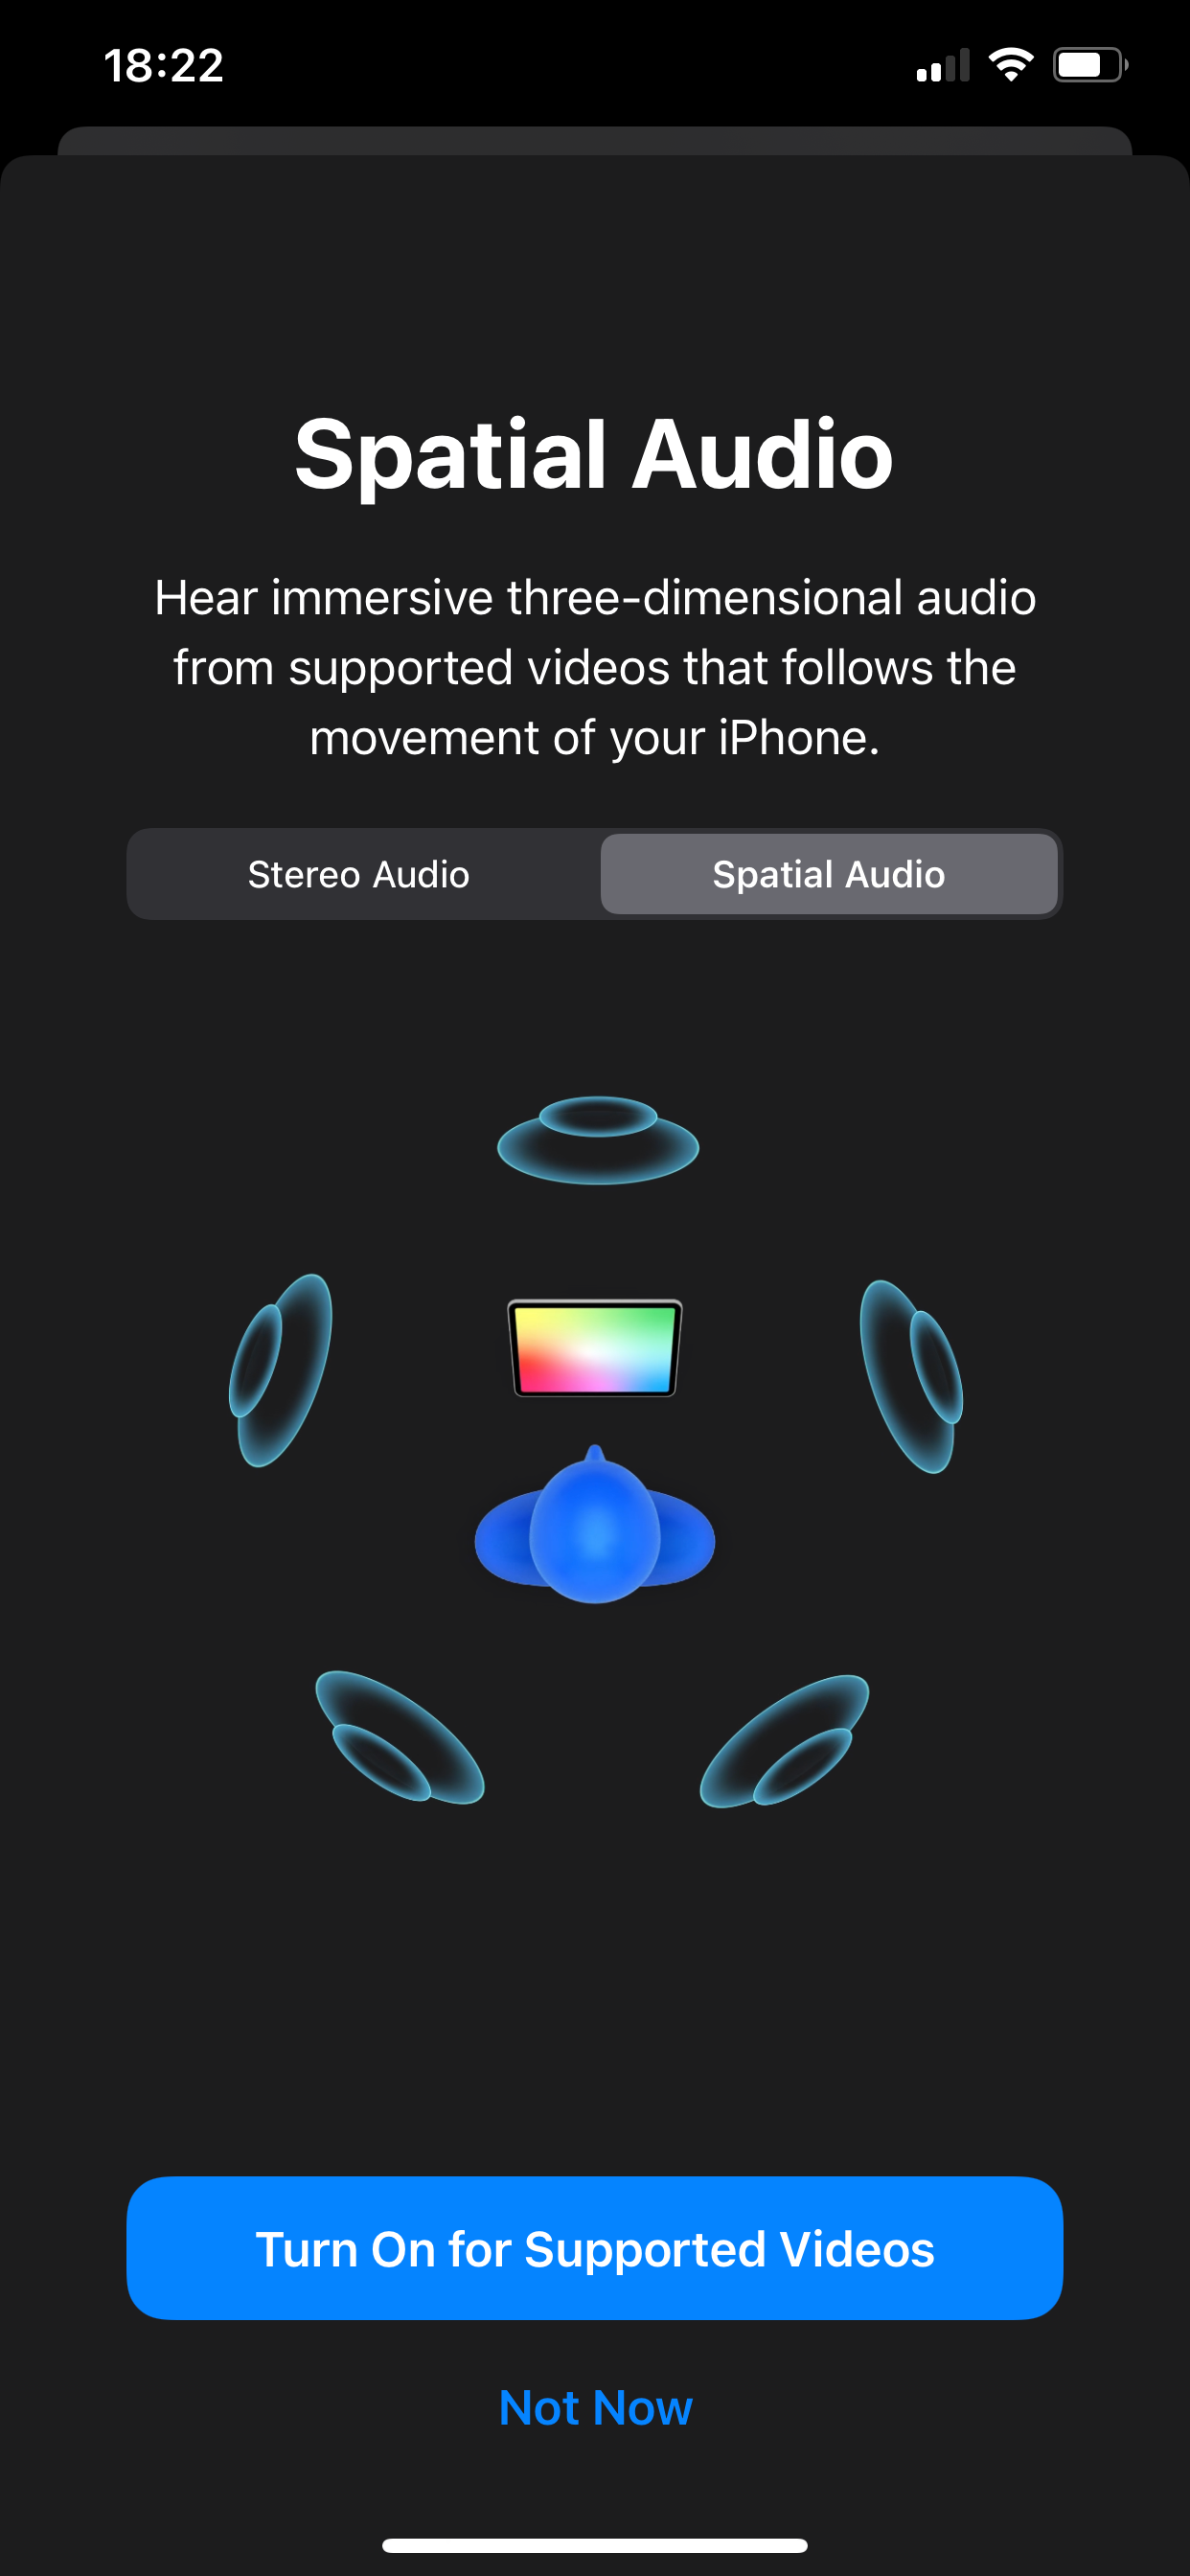
Spatial Audio creates an immersive three-dimensional sound effect on supported videos. You’ll feel like the audio is coming from different directions based on the source of the sound in the video you’re watching. Surprisingly, this excellent feature is disabled by default, but you can enable it by going to your AirPods Pro settings as discussed above.
Here you can select the toggle next to Spatial Audio and make sure it’s enabled.
4. Choose a Default AirPod Microphone
Each individual AirPod has its own microphone; the AirPods Pro allow you to control which one is used at any given point. If the battery is running low, or one AirPod is not working properly for some reason, you can exclusively use the microphone on the other AirPod.
Go to the AirPods Pro settings in the Bluetooth sub-menu once more. Here you need to hit Microphone and select Always Left AirPod or Always Right AirPod.


5. Don't Disable Optimized Battery Charging
In the settings for your AirPods Pro, you'll see an option labeled Optimized Battery Charging that's enabled by default. This option will slow down the charging speed a little bit in order to ensure that the battery stays healthy for longer.
The battery life of most gadgets will diminish over time, and this option helps your AirPods Pro deliver better battery life for longer.
6. Enable or Disable Automatic Switching Between Devices
If you have many Apple gadgets such as an iPhone, an iPad, and a MacBook, the AirPods Pro will automatically connect to the device you’re currently using.
When this works well, it almost feels like the buds are reading your mind and connecting the AirPods Pro to the device you want to use. However, it doesn’t always work well, which is why you might want to stop the headphones from automatically connecting to certain devices.
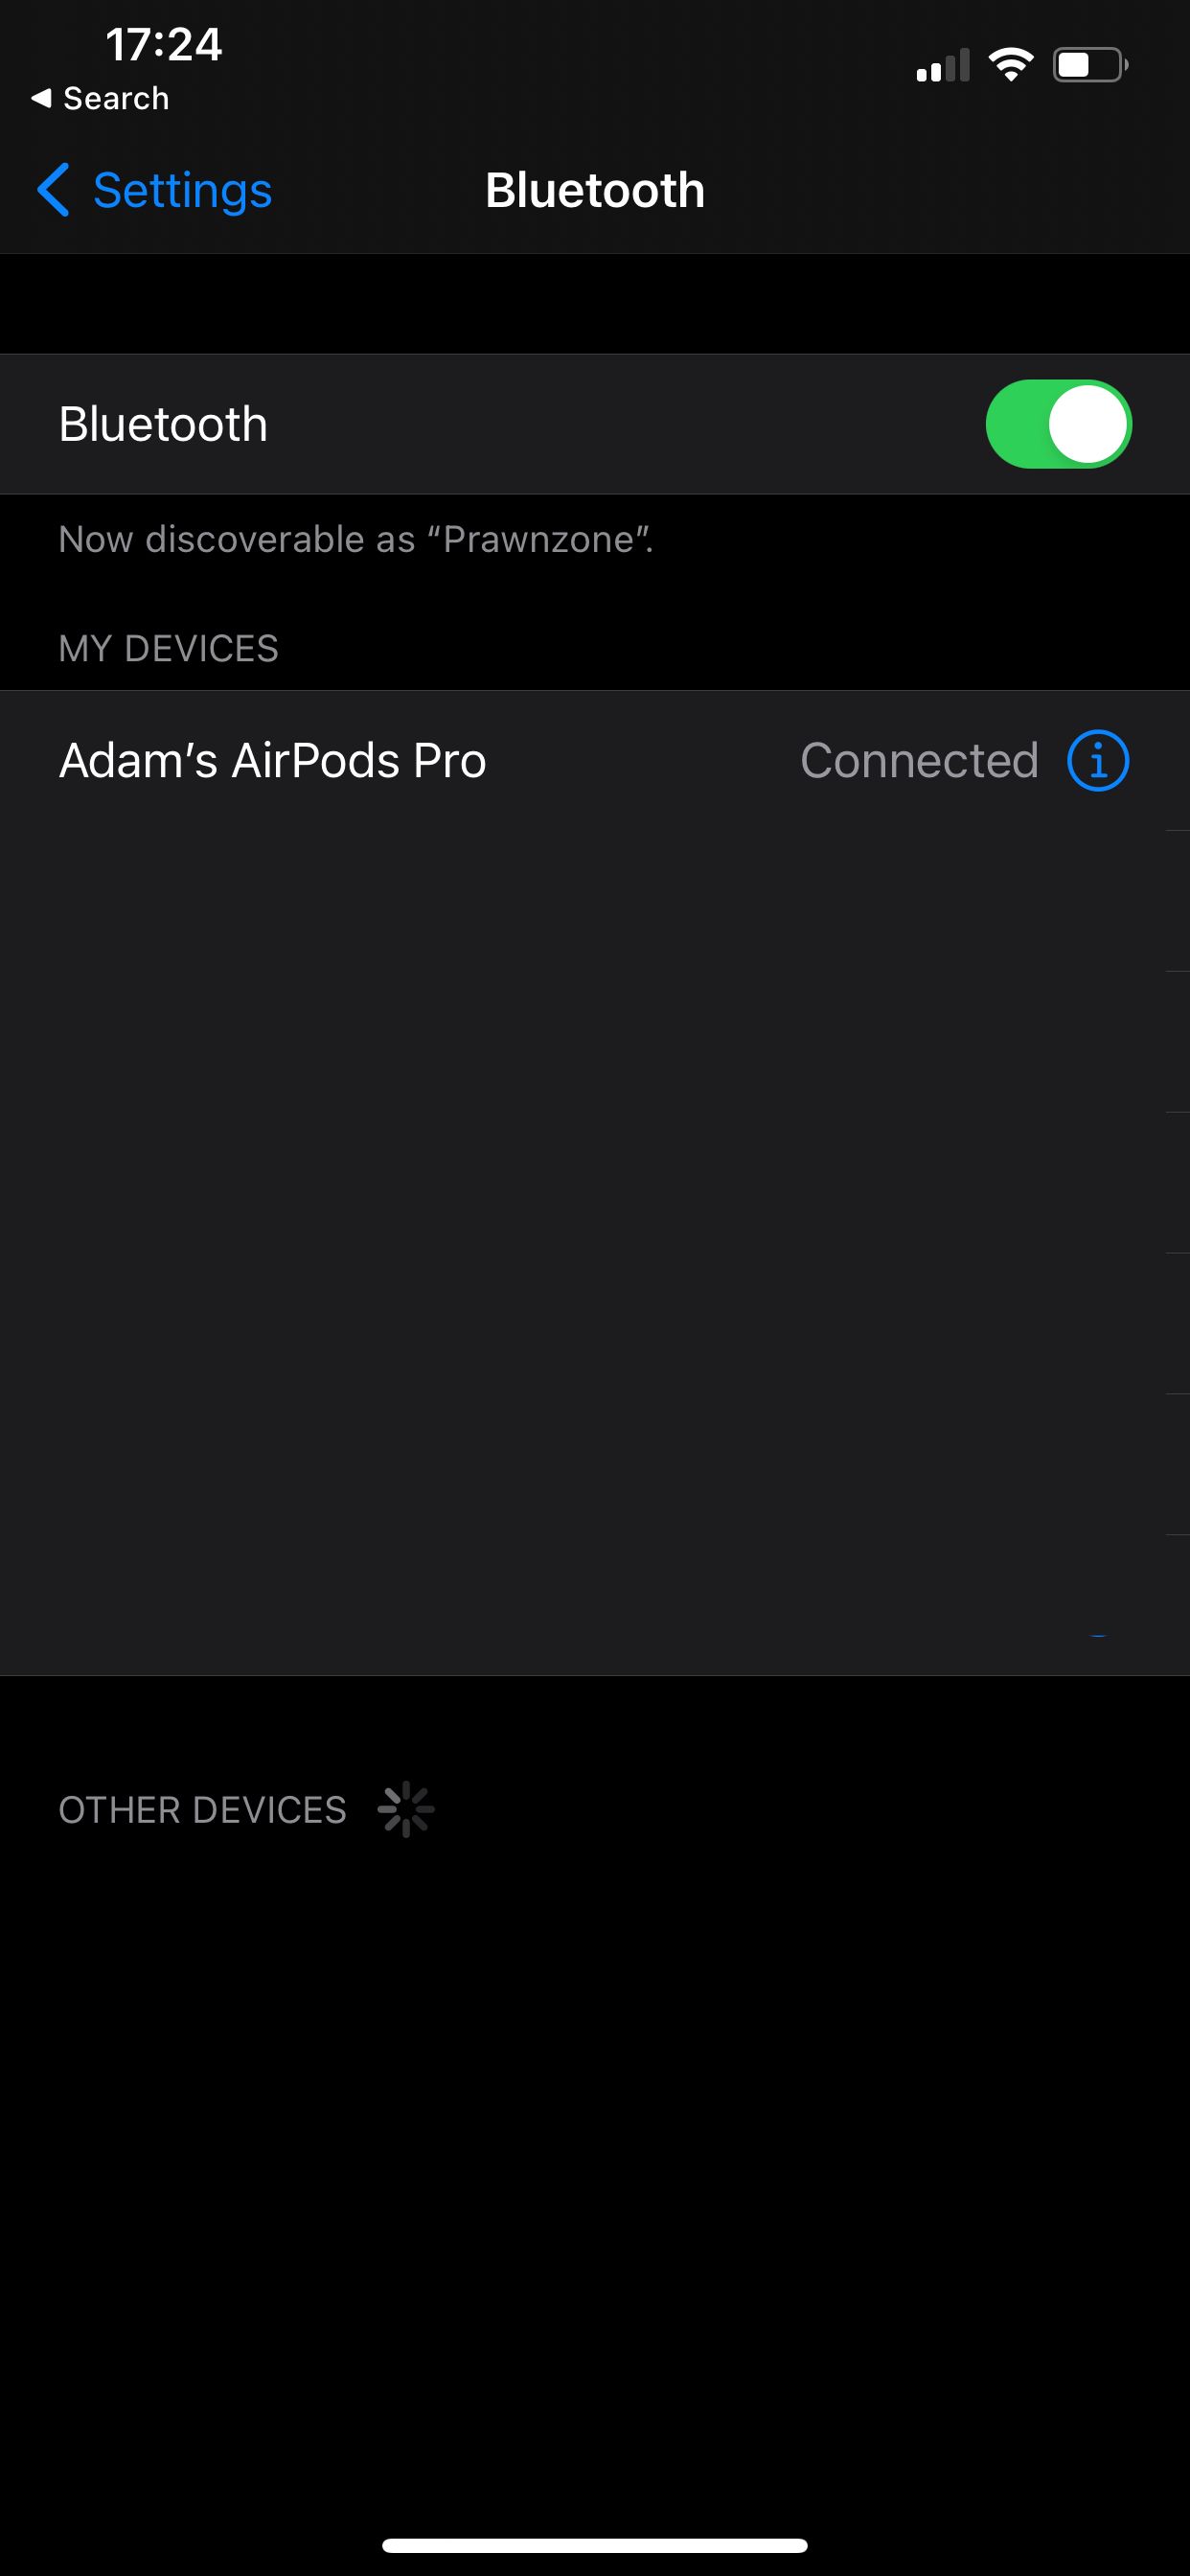
On iPhone and iPad, go to Settings > Bluetooth and tap the i button next to your AirPods Pro. Now select Connect to This iPhone/iPad and choose When Last Connected to This iPhone. This will make sure that it only automatically connects if it was the device most recently used to listen to audio.

On your Mac, go to the Apple menu > System Preferences > Bluetooth. Now click Options next to the AirPods Pro. Click the dropdown menu next to Connect to This Mac and select When Last Connected to This Mac.
7. Share Audio With Other AirPods
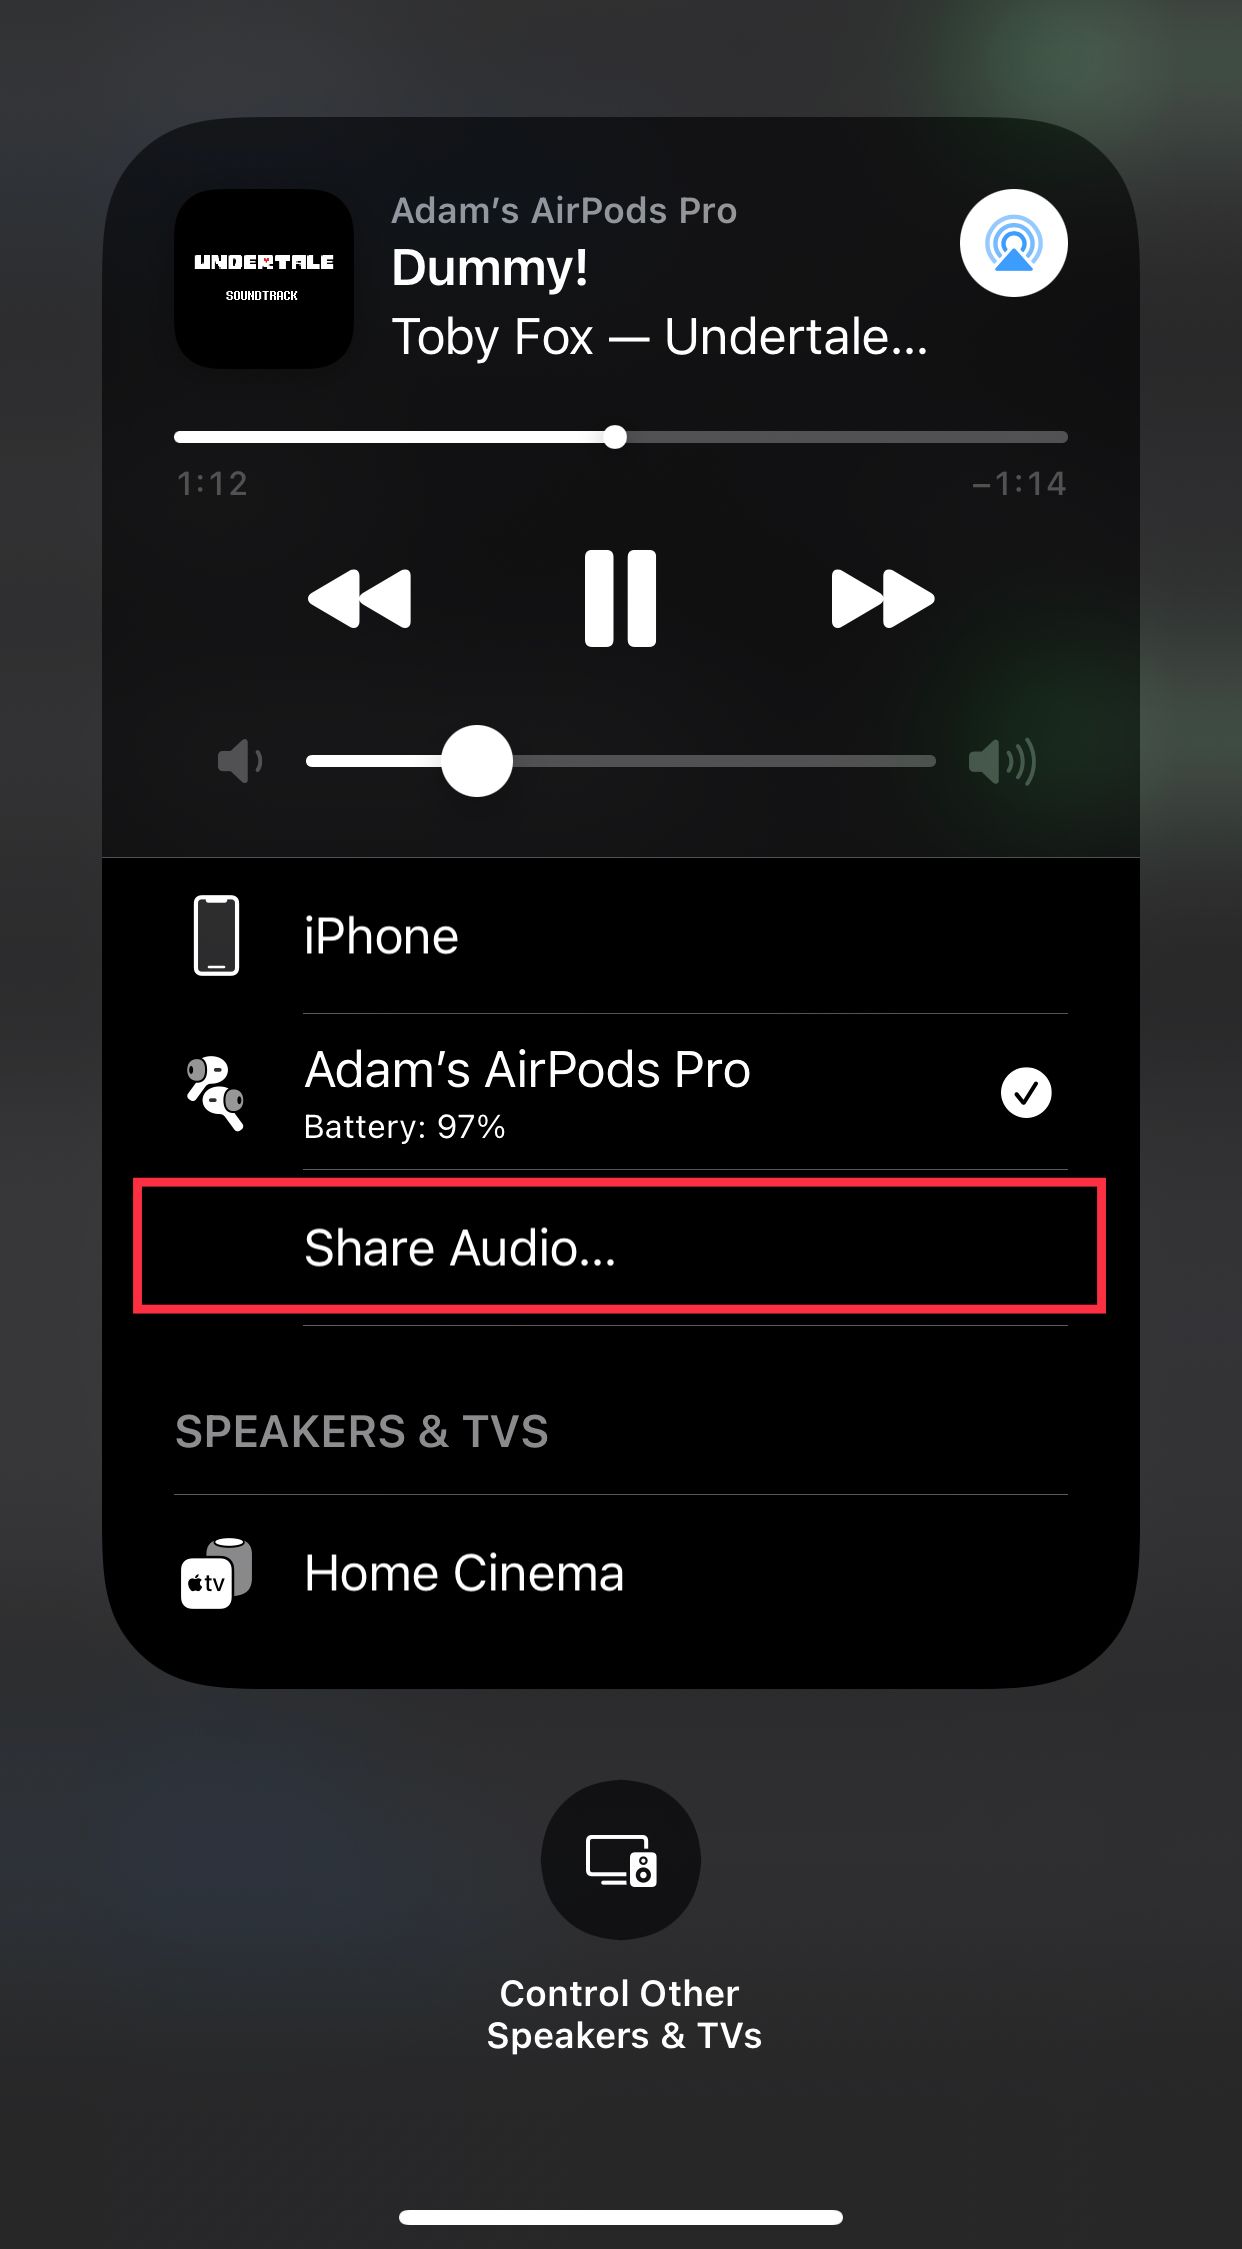
Gone are the days of the old headphone splitter. Nowadays, if you have two pairs of AirPods, you can have both of them play the same audio. This lets you, for instance, watch a movie with someone without playing the audio through a speaker. To enable this on your iPhone, connect your AirPods and play any song or movie.
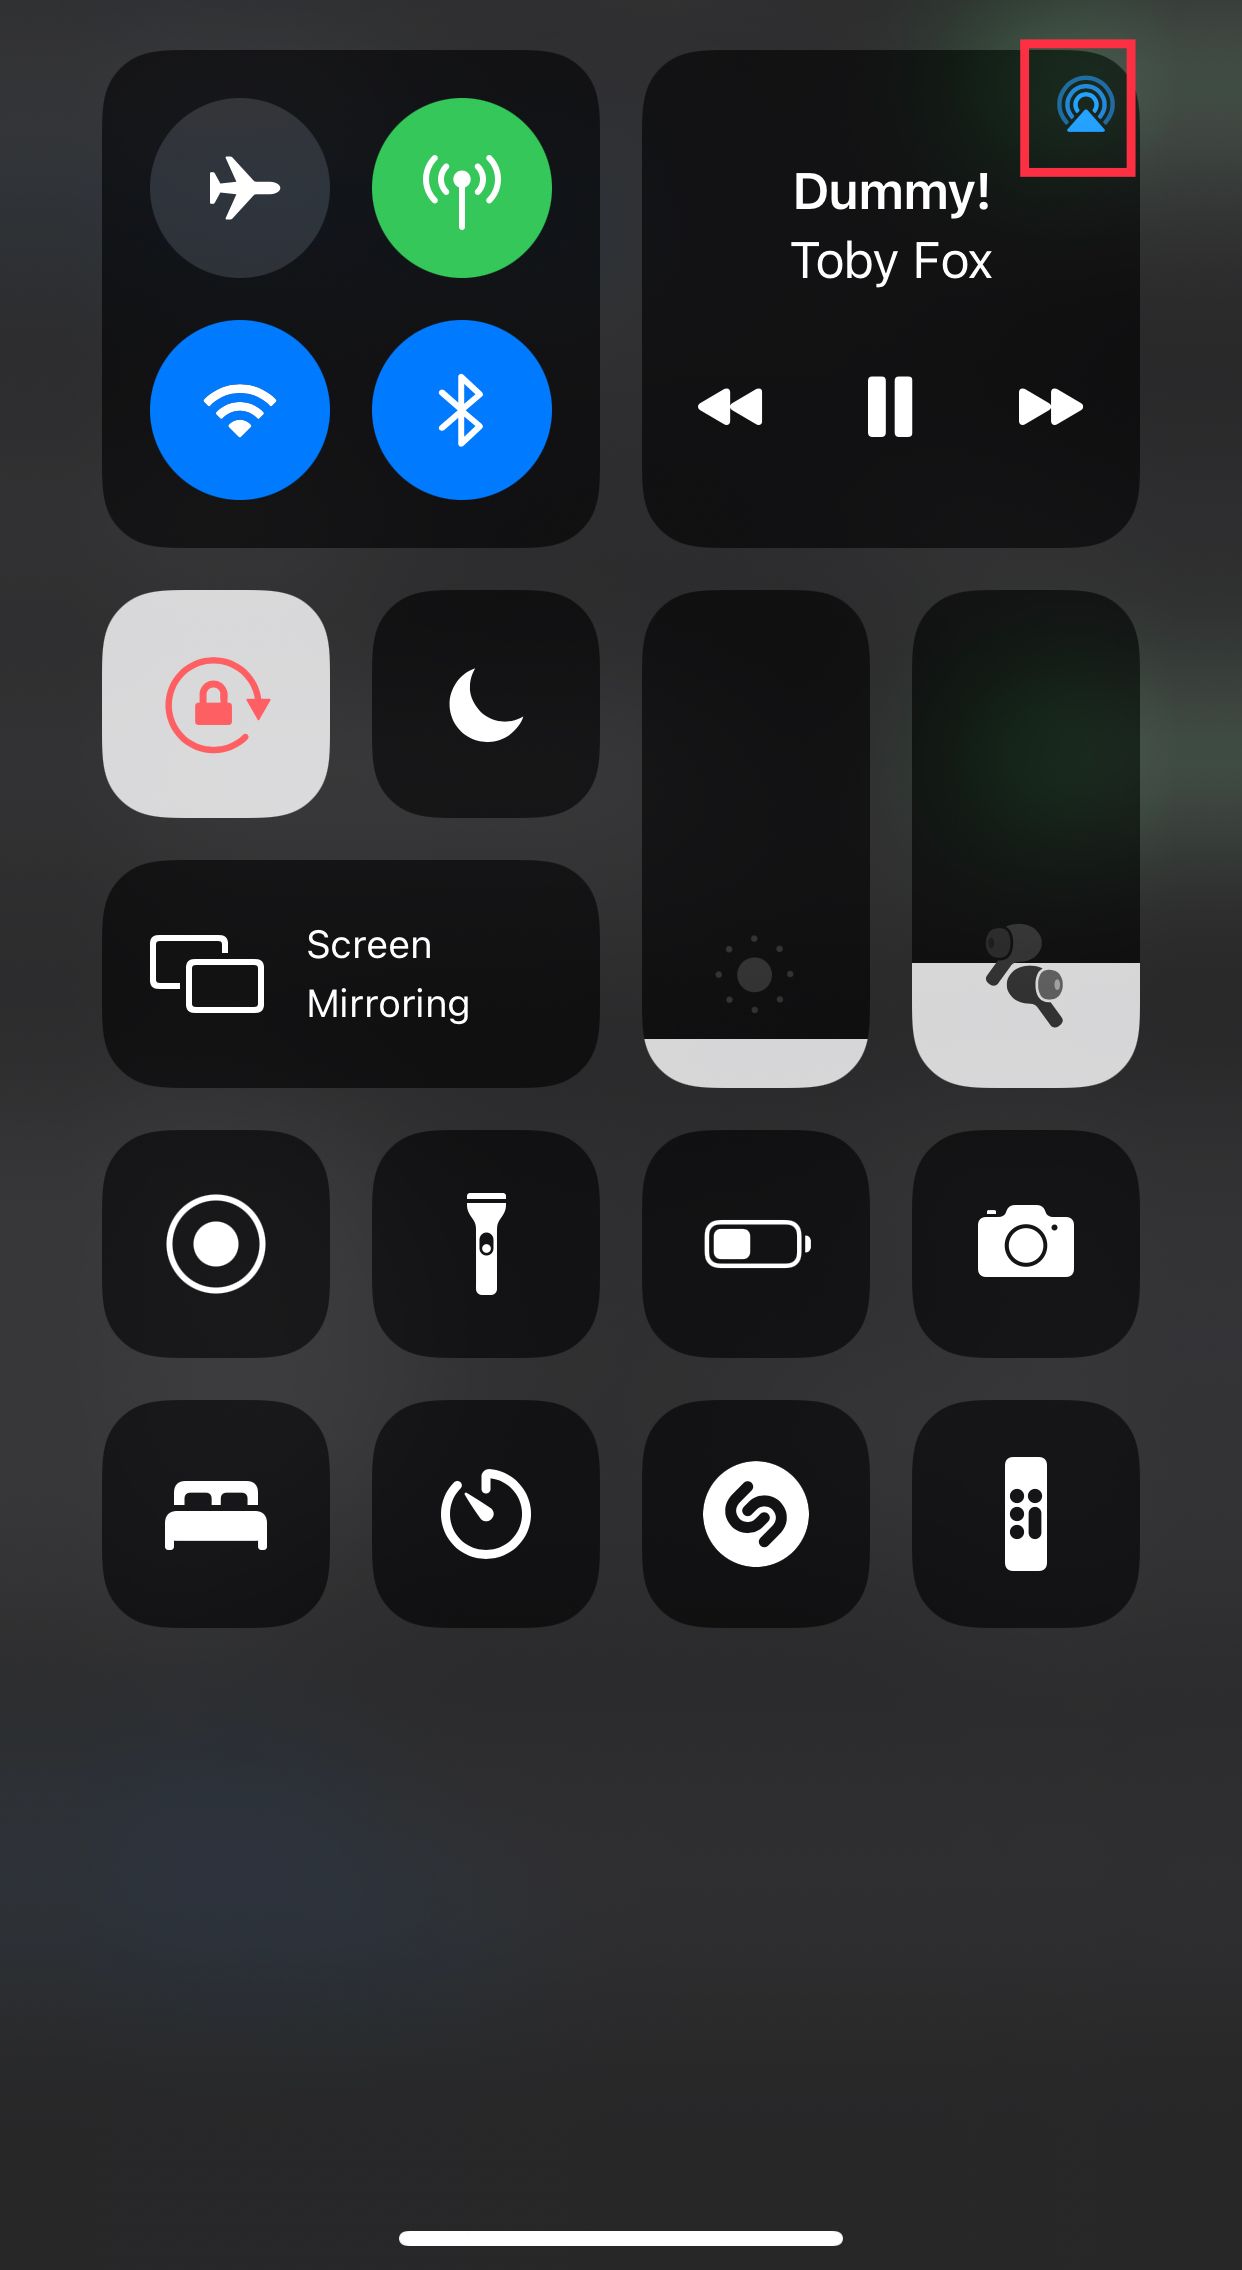
Next, open Control Center. To do this on iPhones with Face ID, swipe down from the top-right; on iPhones with a Home button, swipe up from the bottom of the screen. Now tap the blue AirPlay audio icon that’s at the top-right of the now playing box and select Share Audio.
Bring the second set of AirPods close to your iPhone and you can start sharing audio right away.
8. Optimize the Sound Quality of Your AirPods Pro
You can always tweak the equalizer settings to ensure that the sound quality of your AirPods Pro matches your taste. If you use Apple Music on your iPhone, go to Settings > Music > EQ and select a preset you like.
You’ll find similar options in other music streaming apps too.
9. Use the Find My App to Track Your AirPods
You can open the Find My app on your iPhone to track missing AirPods. Go to the Devices tab in the app and select your AirPods Pro. You’ll see the last known location of the AirPods, as well as an option that lets you play a sound on the earbuds.
Keep the Tunes Going With AirPods Pro
While the AirPods Pro are good enough to leave you with few complaints, these tweaks will make sure that you are using the best features of the earbuds regularly.
Now that you know the best settings to tweak for your new AirPods Pro, you should consider getting a case for them too. This will protect your charging case from damage.
Image credit: Apple

