Pop!_OS COSMIC is so well-packaged that it just works right out of the box without any tuning. However, if it's a fresh installation, you would want to check off a few recommended post-installation to-dos.
In this article, we list out the 10 things you should do after installing Pop!_OS to take it to stellar heights and set it up for the long haul. This list includes best practices, so don't miss out if you're a newbie!
1. Update and Upgrade Your System
To get the most out of your Pop!_OS desktop and to avoid being exposed to security flaws or software incompatibility, you should always check for updates and when available, upgrade your system.
Recently disclosed vulnerabilities like the Dirty Pipe exploit are harsh reminders as to what could potentially happen if you sleep on updating your system.
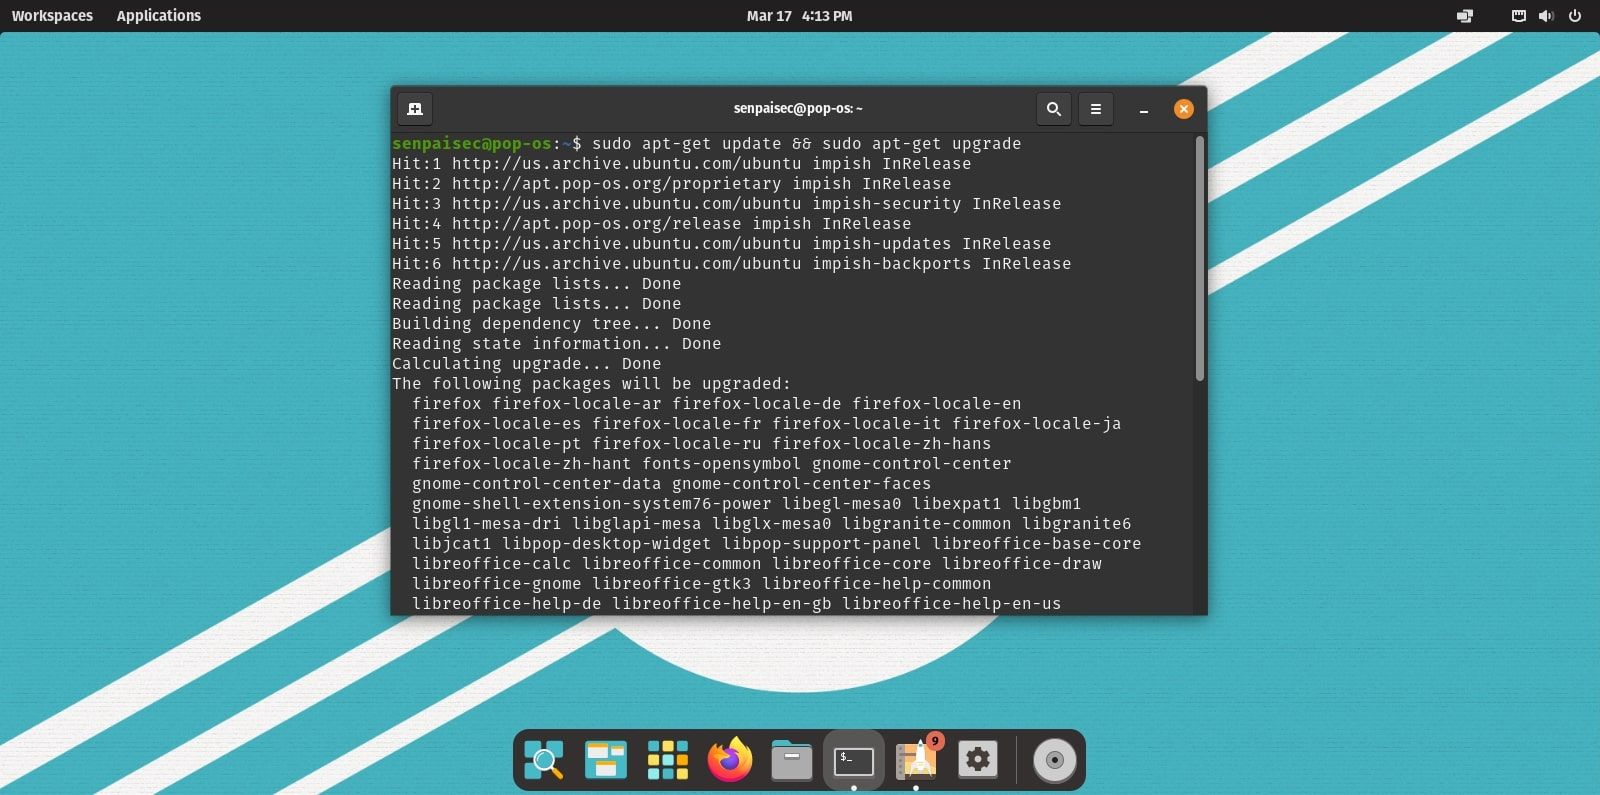
Here are the steps to update your Pop!_OS desktop:
- Fire up a terminal.
-
Check for available updates and upgrade the packages using APT:
sudo apt update && sudo apt upgrade - Hit Enter and type in "Y" when prompted for confirmation.
APT will automatically update the repositories and download and install the required upgrades for you.
2. Enable the Maximize Button
If you're migrating from Windows, macOS, or even another Linux distro, say, Ubuntu, you must have already caught on a minuscule but noticeable difference between them and Pop!_OS.
For reasons unknown, Pop!_OS windows, by default, do not have a maximize button on the title bar. Although not daunting, it can still feel uneasy to settle with after being used to having three title bar buttons.
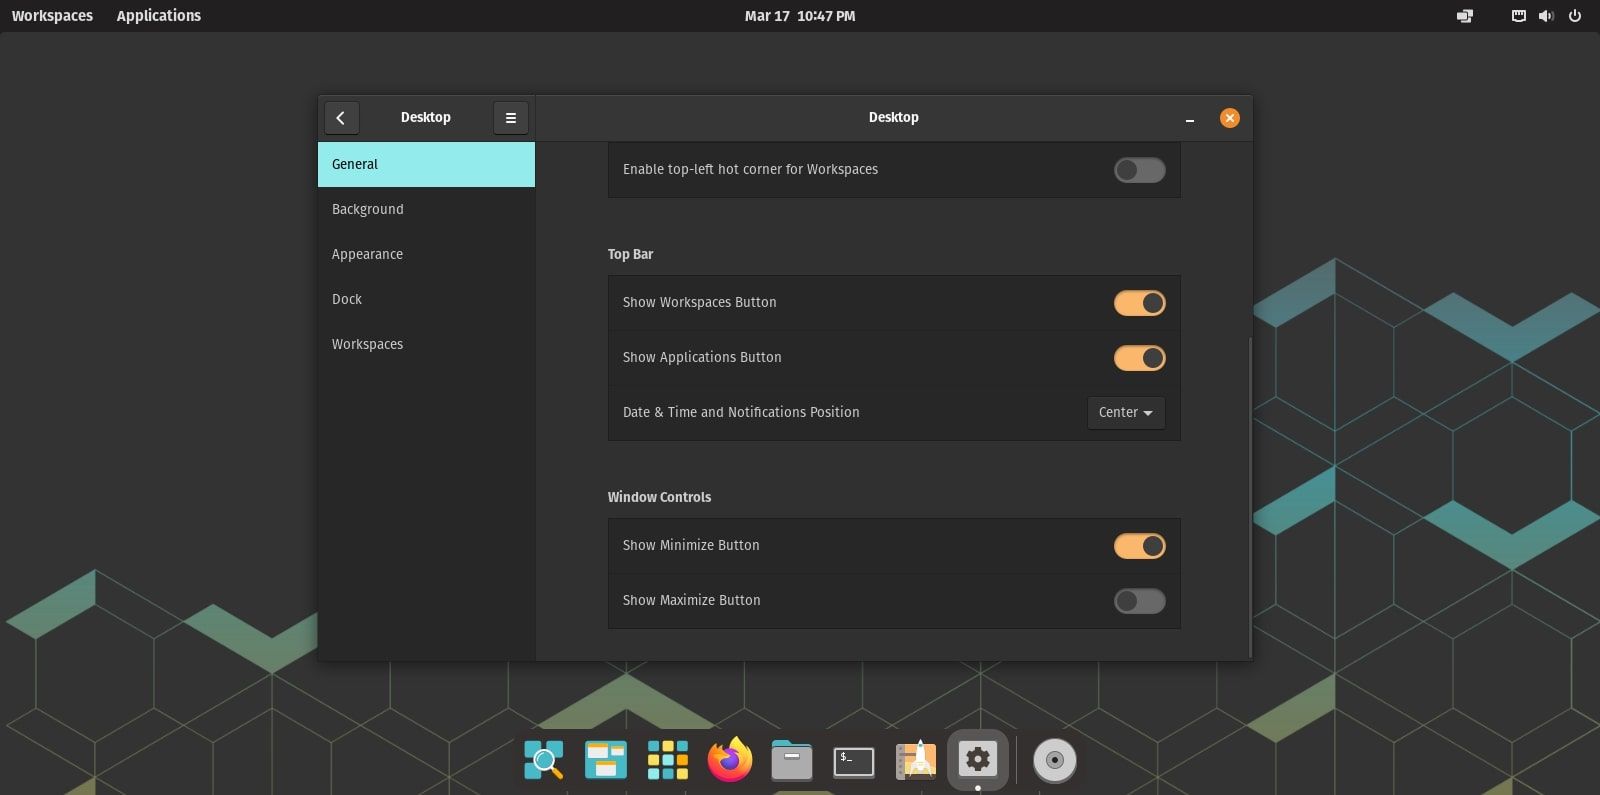
Here's how to enable the maximize button on the title bar in Pop!_OS:
- Open Settings.
- Navigate to the Desktop setting.
- Scroll down and under Window Controls, you will find the option to toggle on or off title bar buttons.
3. Set Up System Restore Points
A crucial "best practice" that beginners often neglect is creating backups of their system. Pop!_OS is a fairly stable distribution that won't give you any trouble. But with Linux, all it takes is one misconfiguration for your entire system to fall apart.
More often than not, these mishaps are introduced into your system through incompatible packages or even by you yourself whilst tinkering with system files.
To ensure that you can quickly rewind each time your system breaks, you can make use of utilities like Timeshift to create automated, scheduled snapshots of Pop!_OS.
Should you need it, you can choose from any of the best file backup apps for Linux.
4. Install VirtualBox Guest Additions
For the VirtualBox installations of Pop!_OS, the VirtualBox Guest Additions is a must-have add-on to streamline your virtualized Linux experience. It is a collection of device drivers and software which facilitate closer integration between the guest and host.
Installing the add-on unlocks features like bidirectional "drag and drop" and shared clipboard. It also opens up an array of display resolutions for the guest box. You can find a complete list of features in the official documentation.
Follow these steps to install VirtualBox Guest Additions on Pop!_OS:
- Install the VirtualBox Guest extensions on the host system.
- Fire up the Pop!_OS virtual machine.
- Under the Devices tab, click on Insert Guest Additions CD Image.
- Click on Run and wait for the process to finish.
- Restart your virtual machine and changes should be in effect.
Download: VirtualBox Guest Extensions (Free)
5. Install Proprietary Media Codecs and Fonts
In Pop!_OS, proprietary multimedia formats like MP3, DVD decoder, and fonts aren't included by default. However, Pop!_OS features a package that will install all available proprietary multimedia codecs and fonts including the Microsoft TrueType font.
Here are the steps to install Microsoft fonts and media codecs on Pop!_OS:
-
Fire up a terminal and install the "ubuntu-restricted-extras" package using APT.
sudo apt install ubuntu-restricted-extras - Hit Enter and type in "Y" when prompted for permission.
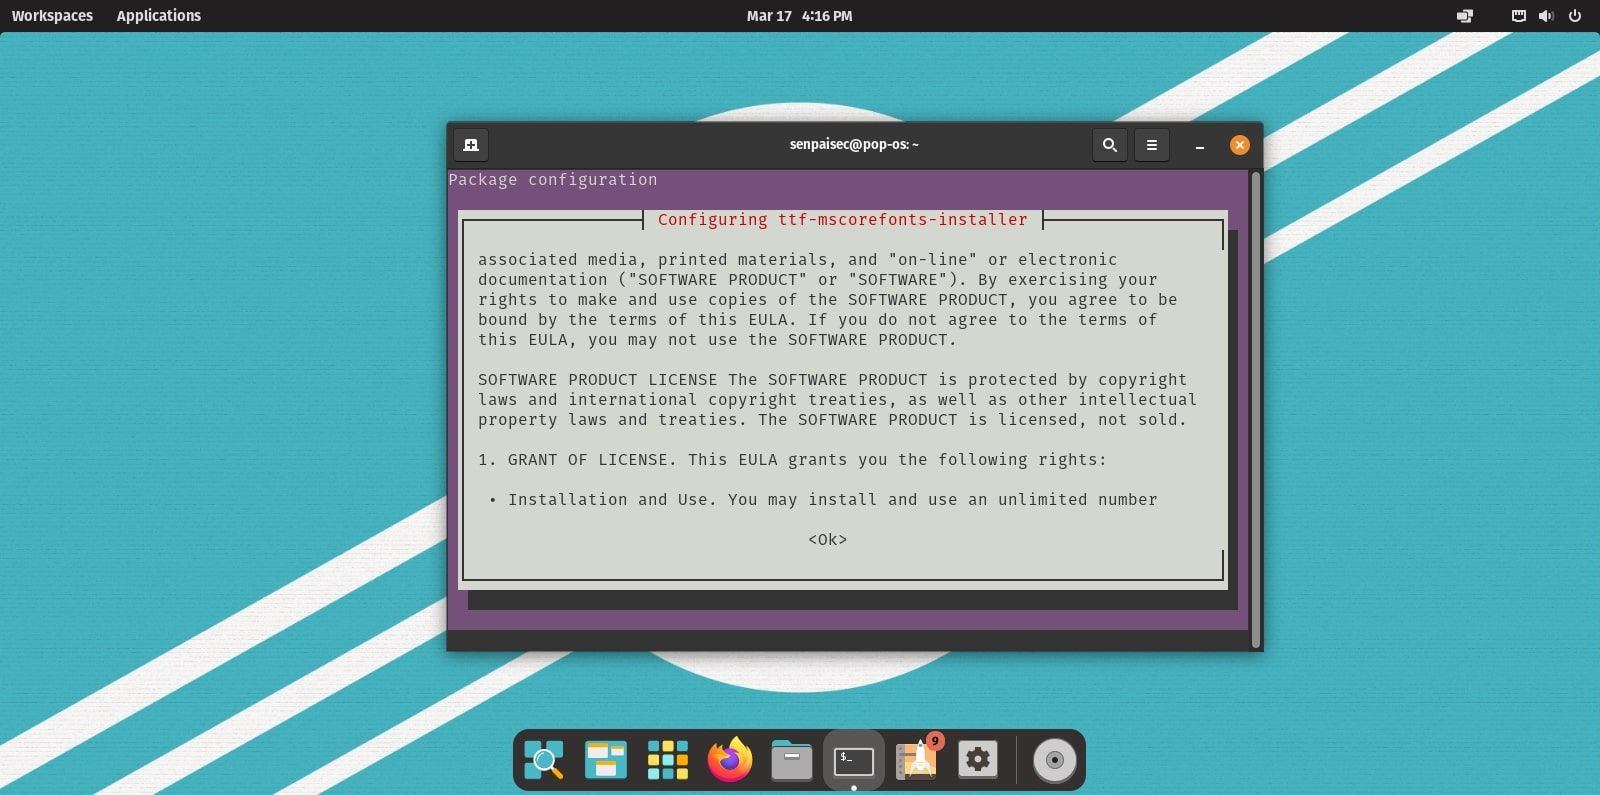
APT will download and install all the media codecs and fonts. However, you might have to agree to EULA terms and conditions to install the Microsoft fonts.
If you see a pop-up on your screen identical to this image, follow these steps:
- Press Tab on your keyboard.
- OK will now be highlighted.
- Press Enter to proceed with the installation.
6. Enable Snap Support
Pop!_OS inherently supports Flatpak and DEB packages. To install and run snap packages on your Pop!_OS machine, you will need to manually install and set up the Snap daemon service or, snapd.
To enable snap support in Pop!_OS, enter the following command in the terminal:
sudo apt install snapd
Once the download is complete, restart your system. You should now be able to install and use snap packages.
To test if everything's in order, you can run this command:
snap install hello-world && hello-world
If the output returns "Hello World!", you're good to go.
7. Theme Your Desktop With GNOME Tweaks
The default theme of Pop!_OS is as good as it gets. But why not personalize it and take it a step further? Since Pop!_OS features a refreshed iteration of the GNOME desktop environment, you can customize it to suit your taste by changing themes and adding extensions with the handy GNOME Tweaks tool.
To get you started, here's a guide on how to theme Pop!_OS with GNOME Tweaks and a list of the best GNOME shell extensions.
8. Play With the Configurations
Before the advent of Pop!_OS COSMIC, you'd have to go through the hassle of installing extensions and add-ons to make basic changes to your system, say, changing or customizing the dock, switching color scheme, etc. Now, you can do much more without adding any external plugins.
You can edit your dock, change the color scheme, edit the window and title bar, and so on directly from the settings. Linux gives you a freehand at customization. Make sure to explore the configurations and tweak your Pop!_OS desktop to your liking.
9. Explore Pop!_Shop
A standard Pop!_OS installation comes free from any bloatware. Although it may feel barren, this is intentional since Pop!_OS ships with the motive of keeping the desktop clean and minimal.
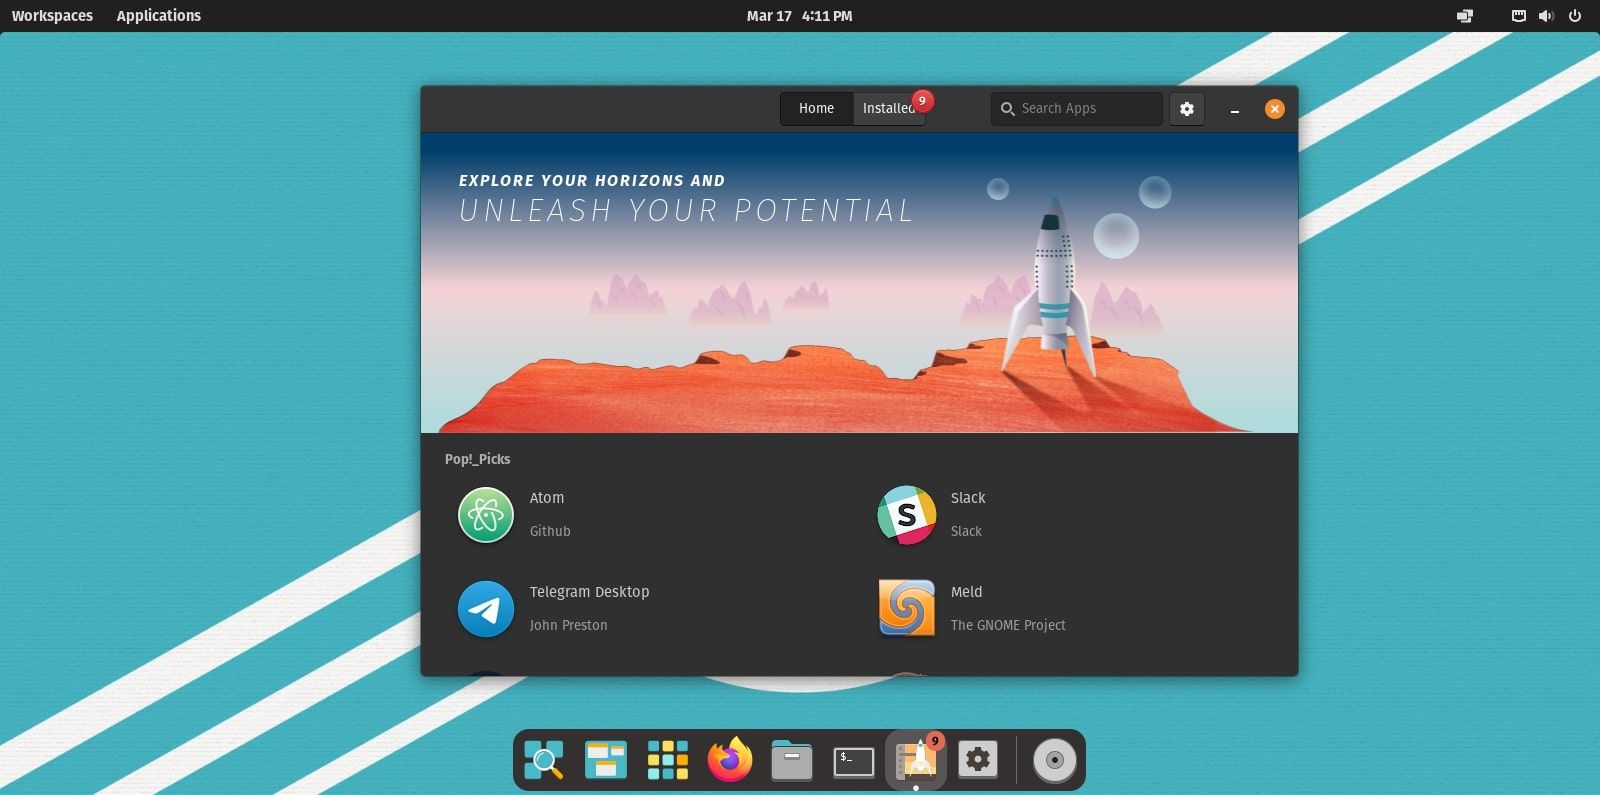
If you want to add applications to your system, you can make use of Pop!_Shop. It is the flagship software center of Pop!_OS that offers a wide range of apps to choose from in the format of Flatpak or DEB packages.
It features its very own recommendation page, Pop!_Picks. Under this section, you will find an array of applications targeted at developers and scientists. After all, Pop!_OS is intended for STEM practices.
10. Install Google Chrome
You'll find Firefox installed as the default browser on most Linux distros, and Pop!_OS is no stranger to this. However, if you are a longtime user of Google Chrome, it's natural that you would prefer it over Firefox.
Although you won't find it on the Pop!_Shop, you can still manually install Chrome through Pop!_OS's Debian package installer, Eddy.
First, you'll have to download the Chrome DEB package from the official website. Once downloaded, right-click on the file and click on Open with Eddy to install it.
Download: Google Chrome
Getting the Most Out of Your Linux Desktop
With Linux, there is no end to revving up your desktop experience with a few hacks and tweaks. Now that you're aware of all the things you need to do after installing Pop!_OS, you should be able to max out its performance and functionality.
It's important to remember that whichever distro you use, you must make sure to set yourself up after installing it.

