GPU overclocking is, for a lot of people, a scary concept. But it doesn't actually need to be one. As long as you know how to do it and where to limit yourself, you can push the envelope a little bit and get better performance without actually harming your hardware.
MSI Afterburner is not only one of the best GPU overclocking tools in town, but a great resource for all of your GPU tuning needs, whether those include overclocking, underclocking, undervolting, and a long etcetera.
Still, it can be hard to get into at first, especially if you're a beginner in this whole overclocking theme. What's MSI Afterburner exactly, and how do you use it?
What is MSI Afterburner?
MSI Afterburner is, quite possibly, one of the most used GPU overclocking tools available today for Windows. The first version of MSI Afterburner was released in 2010 and is developed by MSI, or Micro-Star International, a Taiwanese technology company specialized in computer hardware.
And yes, it's that MSI, the one who makes PC gaming gear, graphics cards, motherboards, and whatnot. So does MSI Afterburner only work on MSI-made graphics cards?
Not at all.
MSI's tool prides itself on being an all-in-one overclocking utility that works on any graphics card, no matter if it's an Nvidia card or an AMD Radeon card, and also works on graphics cards not made by MSI. And best of all, it's completely free and has a lot of additional functionality besides just being an overclocking tool.
The overclocking part of MSI Afterburner is actually based on a quite old overclocking utility called RivaTuner. That one actually came out in 1997, but it was last updated in 2009. RivaTuner provides the backbone for several overclocking utilities, including EVGA Precision X and ASUS GPU Tweak, but also MSI Afterburner.
Back in its day, RivaTuner was the bee's knees, but most people have settled on MSI Afterburner by now. RivaTuner is still around—while the main RivaTuner software is unmaintained (although nothing technically stops you from using it), RivaTuner Statistics Server, a frame rate and hardware monitor tool that was originally a companion to the main RivaTuner tool, is still actively maintained, and even ships with the MSI Afterburner installer.
How Do I Install MSI Afterburner?
You can grab the latest version of MSI Afterburner from MSI's website. You don't need to look for any special versions or anything of the sort—just grab the installer and go to town. If you happen to need an older version of the program, you can grab older versions from FileHorse.
From there, run the installer. It will ask you if you want to install MSI Afterburner and RivaTuner Statistics Server, or RTSS, which comes bundled with the installer. RTSS is actually not essential to the software's functionality, but it does allow you to show statistics and frame rates overlaid during games, which is a pretty cool functionality you have, especially if you're trying to document something. That's really up to you.
Once you've selected them, just run the installer, go through the rest of the instructions, and wait until it's finished. Congrats! You've now installed MSI Afterburner on your computer.
How Do I Use MSI Afterburner?
MSI Afterburner can do a lot of stuff. Here are some of the things you can do with it, and how you can do them.
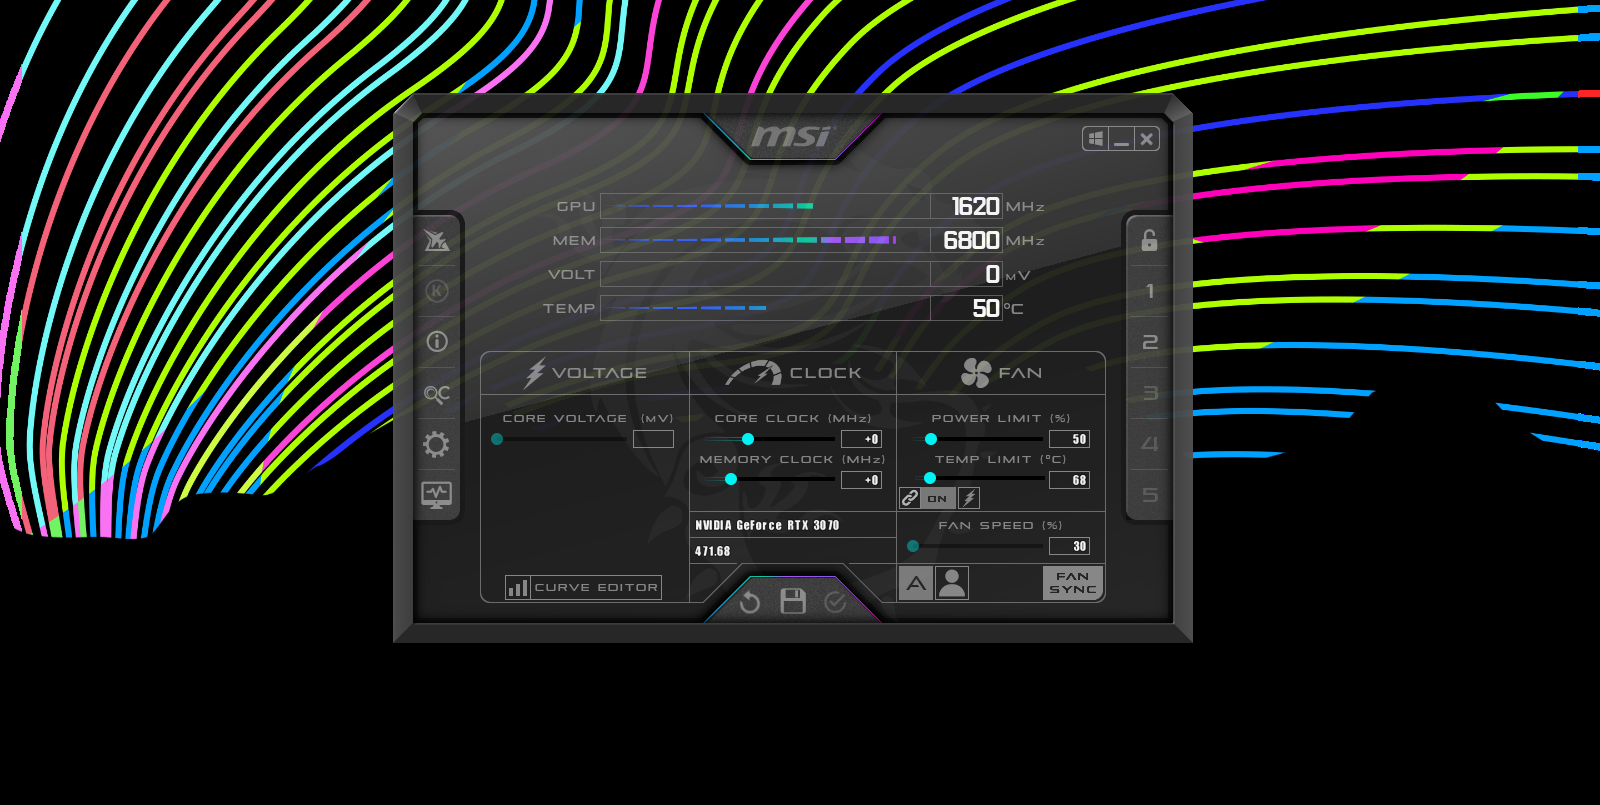
When first opening the program, you'll be greeted by a UI that kinda looks like a car dashboard. It has a heavy theme on top of it, which sort of reminds me of the kinds of themes Windows 98-era Windows Media Player used to have.
On top, you're going to see stats on your GPU—the clock speed it's currently running, and what temperature it's running at. The bottom part has some sliders, which we're going to get into in deeper detail in a little bit, but basically, those sliders are what will allow you to overclock and underclock your GPU, and do other things to it.
On the left side, you're going to see several buttons. The spaceship-looking logo will open the Afterburner website, the "K" logo will open MSI Kombustor, the information button will show you information about your CPU and GPU. From there, we have the OC Scanner tool, which is meant to automatically scan your GPU (using an algorithm made by Nvidia for RTX 20 series cards) and look for the highest possible overclock and apply that to your GPU. From there, we have the settings button and the "monitor" button, which will show you a graph of your graphics card's temperatures.
Then, the right side has a bunch of numbers. Those are called "profiles." Basically, whatever tweaks you do to your GPU, you can save them as a profile so you can just click it and quickly apply it at any time.
If the default layout is not good enough for you, you can also change that. Just go to Settings, User Interface, and select one of the many pre-loaded themes.
How to Overclock Your GPU With MSI Afterburner
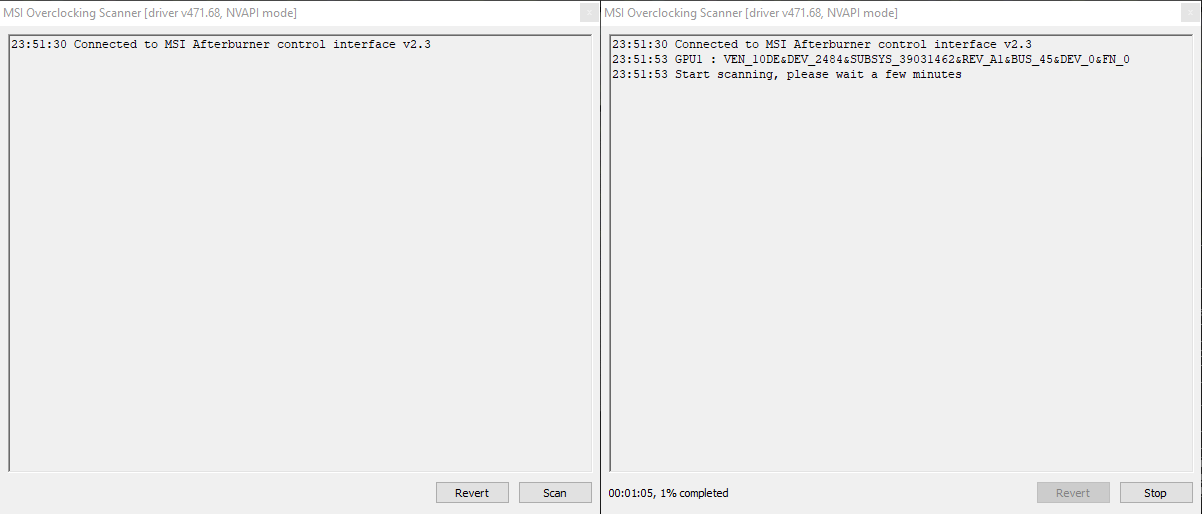
There are two ways to overclock your GPU using MSI Afterburner. The first one involves using the OC Scanner feature. As we said earlier, this is a tool that will automatically scan your GPU for the best overclocking settings.
First, click on the OC Scanner button, and tap on the Scan button. This process will take several minutes, so sit down and have some coffee while you wait for it to be done. Once it's done, it'll apply what it considers as the best possible settings for your GPU.
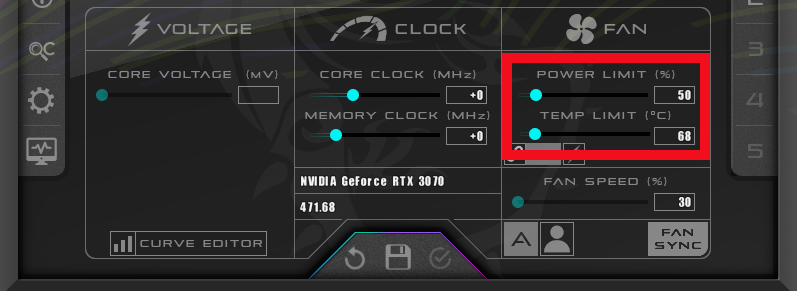
You can also manually tweak sliders to overclock your GPU. For that, move the Power Limit/Temperature sliders up in order to allow for headroom for overclocking (both sliders are pinned to each other by default, so moving one up will move the other).
Then, tweak the Core Clock (MHz) slider up. You can also tweak the Memory Clock. While doing this manually, it's good practice to do very light tweaks and play around to find a good balance between system stability and performance—without damaging your hardware.
How to Modify Your Fan Curve
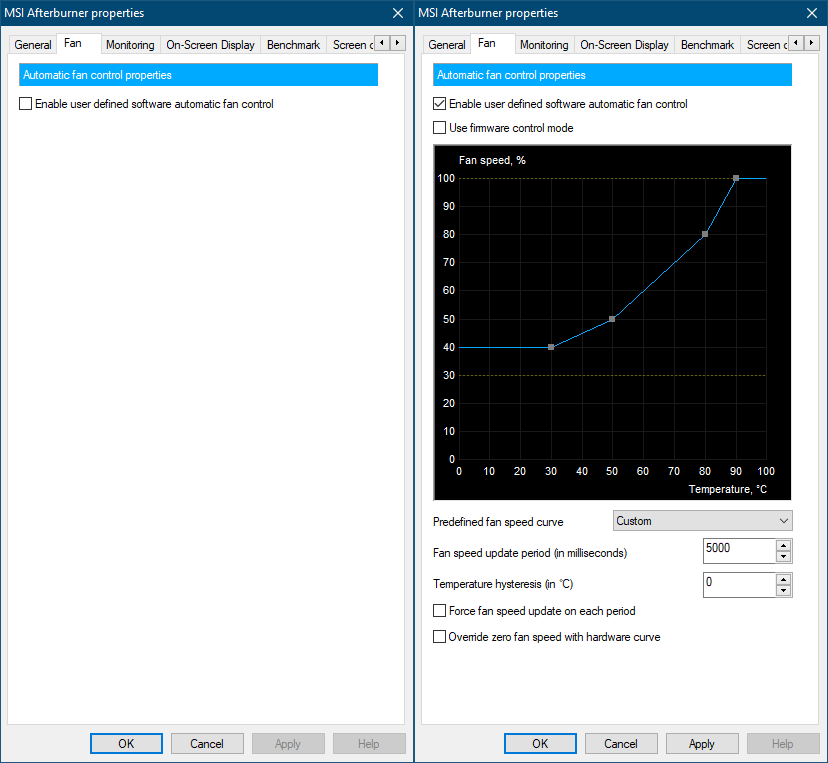
You can also use the program to modify your fan curve. You can tweak the speed your fan will go, and at what temperatures it will go off. To do this, just go to Settings, and click on the Fan tab. Then, toggle Enable user defined software automatic fan control on. This will make the fan curve graph show up.
You can add up to eight nodes in the fan curve and tweak it however you like. A steeper fan curve will keep GPU temperatures lower, but it can also put additional wear and tear on the fans themselves, so you'll need to find a good middle ground if you want to manually modify it.
How to Limit Your GPU by Power Consumption/Temperature
We mentioned earlier that you can use the Power Limit/Temperature sliders for overclocking purposes. But you can also use it for keeping power consumption or temperatures on check at not a lot of performance loss.
For doing this, instead of moving the sliders up, you'll want to move them down instead. For example, if you don't want your graphics card to consume a lot of power, you can move the Power Limit slider down to something like 75%, so the card won't go up from whatever limits you're establishing.
MSI Afterburner Opens the Overclock Floodgates
MSI Afterburner is a cool piece of software that I would say every PC gamer must have on their computer. It's light, and it allows you to not only overclock your GPU but tweak it to hell and back so it runs just the way you want it to run.
We just gave you a few tips on how can you use it, but really, this is pretty much a tinkerer's tool. It might have a slight learning curve to it at first, but it's meant for you to play around and figure out what you wish to do with it.


