While tablets are becoming increasingly popular, one of the features people truly miss is the Taskbar. A taskbar is a way to access your programs quickly and easily. Not having it can be quite inconvenient if you're used to it on your laptop or desktop.
Fortunately, adding a taskbar to your Windows tablet is easy and requires a few steps. Here’s how to do it.
How to Get the Taskbar for Tablets on Windows 11
There are two methods to enable or disable the Taskbar on Windows tablets. The first is to use the Windows Settings menu, while the second involves tweaking the Registry Editor. Let's discuss both methods in detail:
1. Using the Windows Settings Menu
It's relatively easy and quick to add a taskbar to your Windows tablet through the Settings menu. This is the preferred method as it doesn't require technical knowledge or tinkering with the Registry Editor.
Follow the below instructions to enable the Taskbar for tablets:
- Press Win + I on your keyboard to open the Settings menu. To learn more, see our guide on how to open System Settings on Windows.
- Select Personalization from the left sidebar.
-
Then go to the right pane and click on the Taskbar section.
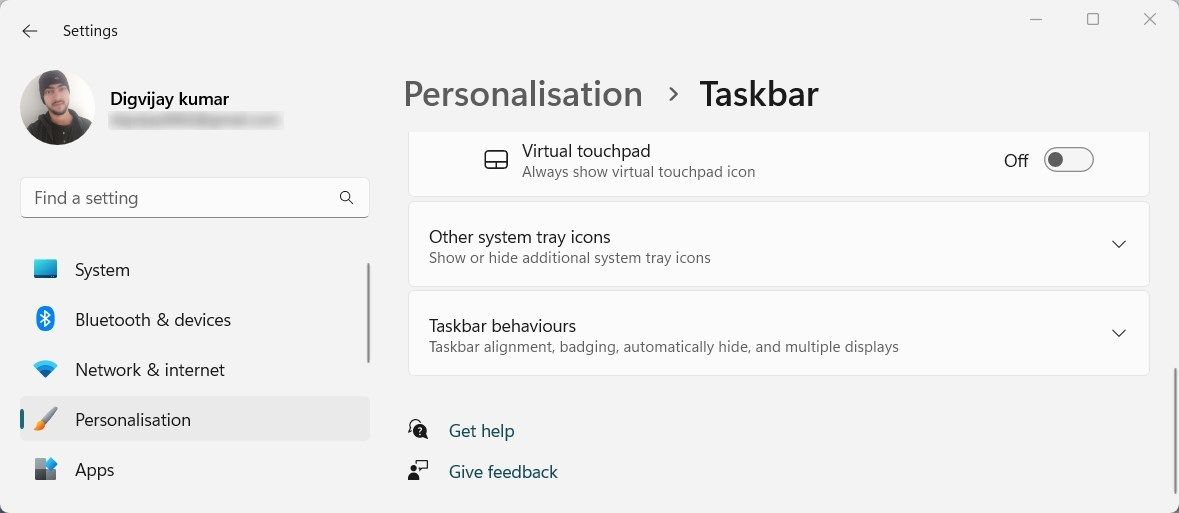
- Expand Taskbar behaviours and check the box next to Optimize taskbar for touch interactions when this device is used as a tablet.

If you ever need to disable the Taskbar for the tablet, simply repeat the above steps and uncheck the box.
2. Tweaking the Registry Editor
If you're comfortable tweaking the Registry Editor, this is another way to enable or disable the Taskbar on your Windows tablet. This method is slightly more complex, so it's critical to be careful when changing the registry. To avoid data loss, you must create a registry backup before continuing.
To enable the taskbar via Registry Editor, follow these steps:
- Right click on Start and select Run from the power user menu. You can also use the Win + R shortcut key to perform the same task.
- Type regedit in the dialog box and press Enter.
- If prompted, click the Yes button to open the Registry Editor.
-
From the left pane, navigate to the following:
Computer\HKEY_CURRENT_USER\Software\Microsoft\Windows\CurrentVersion\Explorer\Advanced
Also, you can copy and paste the path into the Registry address bar at the top of the window and hit Enter. This will take you directly to the Advanced folder.
- In the left sidebar, right-click on the Advanced folder and select New > DWORD (32-bit) Value.
-
Name the new value ExpandableTaskbar and press Enter to confirm.
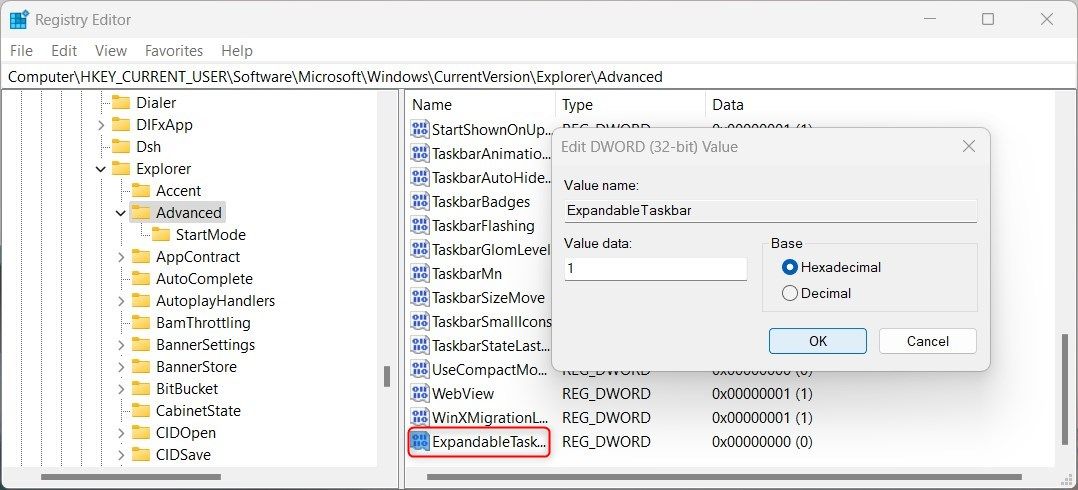
- Next, double-click on the newly created registry value and set its value to “1”.
- Click on the OK button to save your changes.
- Finally, close the Registry Editor and restart your computer.

Once your computer boots back up, you'll see the Taskbar enabled on your tablet.
If the Advanced key is missing, you will have to create it manually. For this, right-click on the Explorer key and select New > Key. Name it Advanced and follow the above steps from there.
To disable it again, navigate back to the same registry location and double-click on the ExpandableTaskbar value. When the Edit DWORD window appears, set its value to “0” and click OK. This will disable the taskbar on your tablet.
Windows 11 Tablets Now Feature the Taskbar
No matter what kind of computer you prefer, access to the taskbar is essential for easy and quick navigation. If you're using a Windows tablet, you now know how to access the taskbar for convenience.