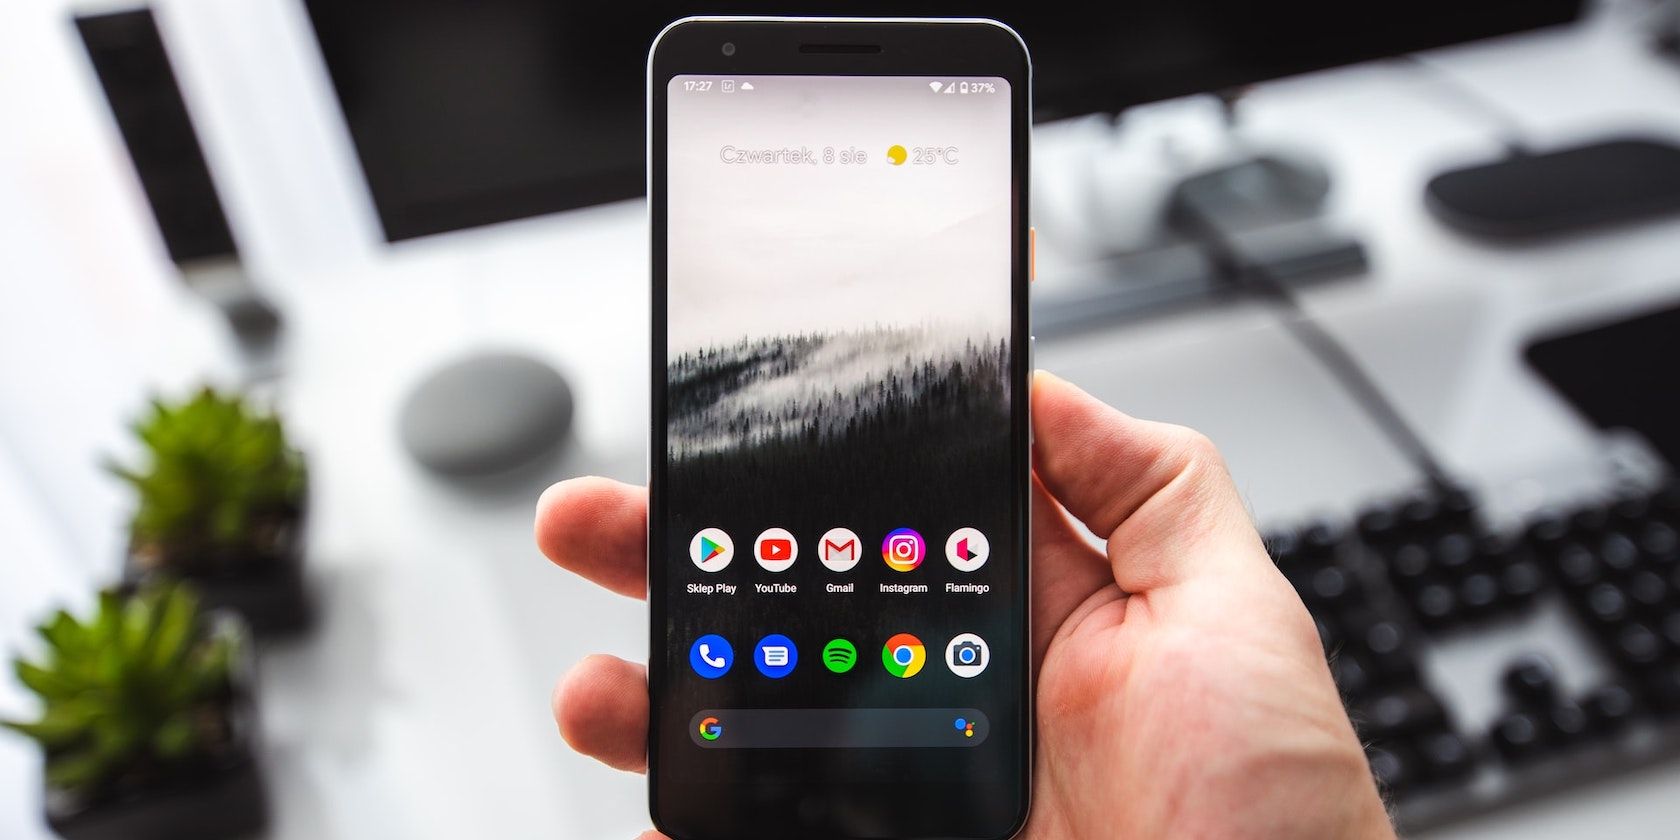
Taking screenshots on a Pixel smartphone is easy. Hardware buttons, the multitasking menu, Quick Tap, and Google Assistant are a few methods you can use to capture the screen on your Pixel phone.
But what if the content you want to screenshot is stretched vertically? Here's where a scrolling screenshot comes in. It allows you to capture vertically-stretched content on your screen, so you don't have to take multiple screenshots and stitch them together. And it's just as easy to capture as regular screenshots.
Follow along as we explain two ways to capture scrolling screenshots on a Pixel phone.
1. Take a Scrolling Screenshot on a Pixel Using the Built-In Screenshot Utility
Google's built-in screenshot utility on all newer Pixel phones supports capturing scrolling screenshots. You can take a screenshot using this native utility as shown in the following steps:
- Open the app/screen with the content you want to screenshot.
- Take a screenshot. Press the Power + Volume Down button combination and release it as soon as the screen flashes. Alternatively, you can bring up the multitasking menu and hit the Screenshot button or use Google Assistant and tell it to take a screenshot.
- All these methods take a regular-sized screenshot by default. Tap the Capture more button on the screenshot preview thumbnail in the lower-right corner of the screen to view a full snapshot of all the content you can capture.
- Drag the accent point along the top and bottom edge of the cropping tool to increase the capture area and select more content to include in your screenshot. Similarly, drag the accent point on the horizontal edge to adjust the capture area horizontally.
If you want to annotate the screenshot, tap the pen icon in the bottom-right corner of the screen. This will reveal all the markup options which you can use to modify the screenshot. Once you're satisfied with how your screenshot looks, hit the Save button to save it.
By default, all screenshots are saved to your phone's gallery. Open your favorite gallery app to access them. You can also edit or annotate them further or share them with others from there.
2. Take a Scrolling Screenshot on a Pixel With a Third-Party Screenshot App
If you're using a Pixel smartphone running on Android 11 or lower, the above method won't help you. Instead, you'll need to use a dedicated screenshot app to take scrolling screenshots on your phone.
There are various third-party screenshot apps on the Play Store that you can use for this. We recommend using the Screen Master app. It's free to use for the most part and packs in a bunch of tools to help you capture and edit/markup your screenshots. In a nutshell, it's a complete solution for your screenshot needs on Android.
Download: Screen Master (Free, in-app purchases available)
Get Started With Screen Master
Once installed, you need to grant Screen Master access to a few permissions. Start by launching the app, and when it asks for access to media on your device, hit Allow to proceed. Now, tap the Turn on Screen Capture button to enable Screen Master.
As soon as you do this, Screen Master will ask you to grant it access to draw over other apps. This is required for capturing the full-screen content on your device. Tap OK on the Hint pop-up to access the Display over other apps settings page.
Here, scroll to find the Screen Master app, select it, and toggle on the option for Allow display over other apps.
This setup process will add a semi-transparent screen capture button on the side of your screen. With everything set, follow these steps to take a scrolling screenshot with Screen Master:
- Go to the app or screen on which you want to take a scrolling screenshot.
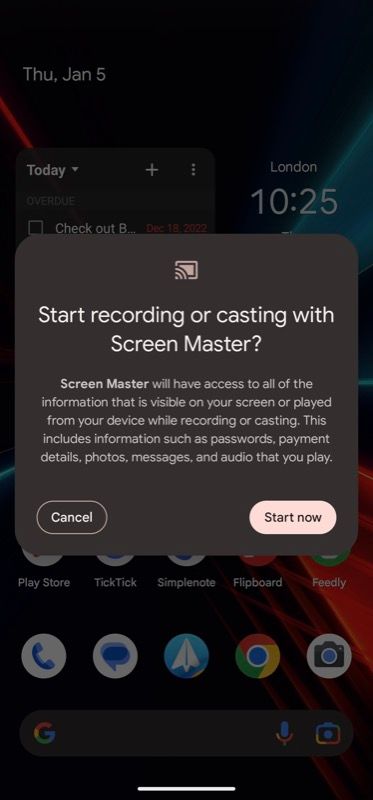
- Tap the floating button with the shutter icon, and when prompted to grant it access to record and cast your screen, click Start now.
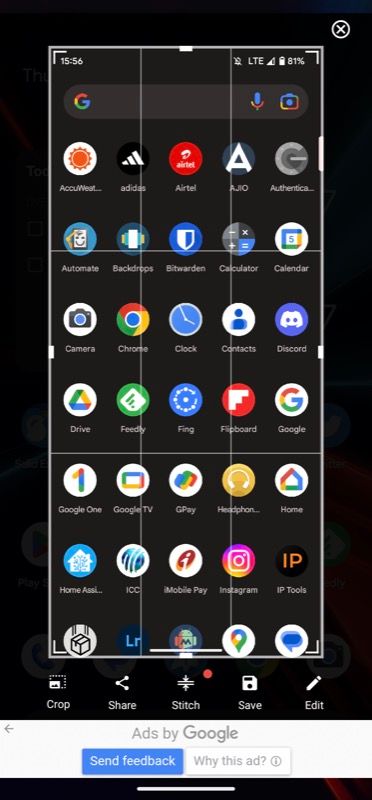
- Screen Master will now give you a cropping tool to adjust the area you want to capture. Do so and hit the Stitch button at the bottom.
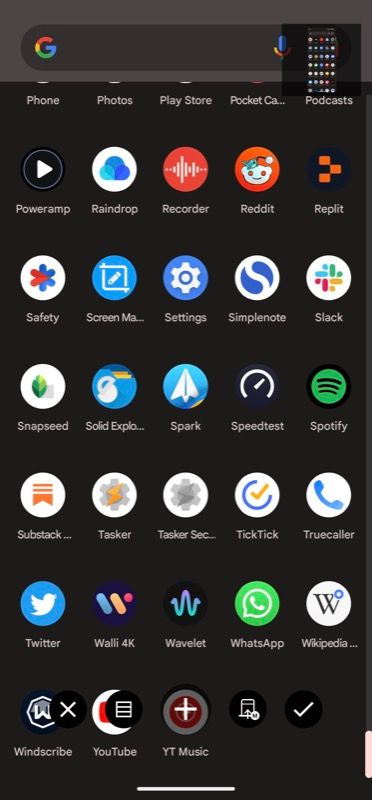
- Scroll down on the screen further to the area you want to capture—while ensuring the screen overlaps with the content in the previous screenshot—and hit the Plus (+) button at the bottom. Repeat this until you've covered the area on the screen you want to capture.
Now:
- Tap the tick button at the bottom of the screen.
- On the following screen, tap Auto Stitch to stitch the screenshots automatically.
- Finally, tap the Save button to save the screenshot.
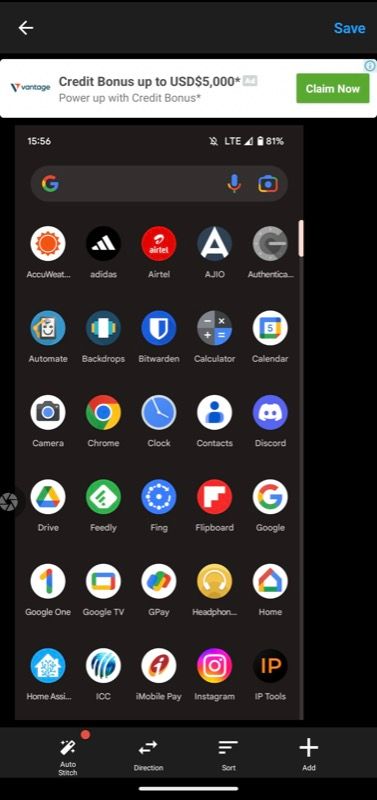
Screen Master will save the screenshot to your gallery. It will show a few app suggestions on the next screen to share the image right from the app itself.
There's also a pen icon in the top-right corner. Tapping it will take you to the Edit window where you can edit or annotate the screenshot, and export it in different formats.
[Optional] Take Screenshots Using the Quick Tap Gesture
Although Screen Master makes taking screenshots on Android easy by including a floating button on the screen, there's a way to streamline the process further. It involves using the Quick Tap gesture on Pixel phones, which is essentially a virtual button on the back of your phone.
Quick Tap is available on Pixel 4a (5G) and newer models. If you've got one of these phones, here's how you can assign it to take a screenshot with the Screen Master app:
- Launch Settings.
- Scroll down and select System.
- Tap on Gestures and select Quick Tap to start actions.
- Toggle on the button next to Use Quick Tap to enable it.
- Scroll down and select the Open app action. Tap the gear icon alongside it and select Screen Master.
- Tap the gear icon beside the app name and select Start Capture.
Now, once you've set the action, whenever you want to capture a screenshot of vertically-stretched content, open the content and double-tap the back of your phone. This will launch the Screen Master capture tool, where you can perform the steps listed earlier to take a scrolling screenshot.
Never Click Multiple Screenshots to Capture Extended Content Again
Using the methods we've just discussed, you can easily capture scrolling screenshots of long web pages, menus, lists, and more, in one go. Not only does this speed up the process when you've got to take multiple screenshots, but it also helps you save on storage space and effort that you'd otherwise spend if you were to go the traditional route.
After you've captured a screenshot, if you plan on using it somewhere or sharing it with others, there are a few tricks you can use to annotate it and highlight some of its key details for better presentation.

