Need to show someone what your Amazon Fire TV Stick's screen looks like? One way to do that is to take a screenshot and send it off. Sadly, the Fire Stick doesn't offer the option to take screenshots by default.
However, that doesn't mean it's impossible to take a screenshot. There are two third-party ways for you to capture screenshots on your Fire TV Stick; we show you them below.
1. Use an App to Take Screenshots on Your Amazon Fire TV Stick
If you use an Android device, there's an app that connects to your Fire Stick via Wi-Fi and helps capture screenshots on it. Once you've set this up initially, you can then take screenshots with a single tap in the app.
There are two phases to get it ready:
Setting Up the Fire Stick for Screenshots:
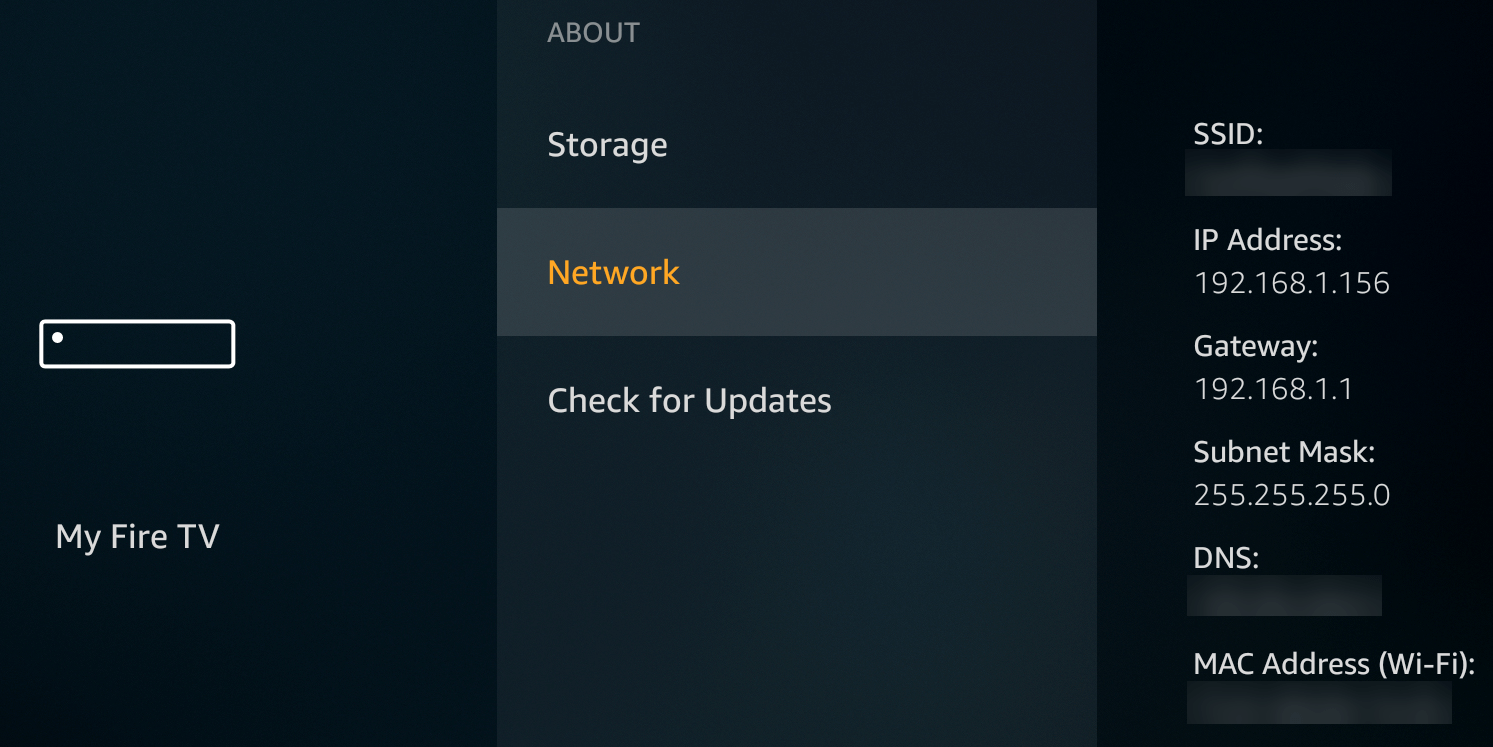
- Open the Settings menu on your Fire Stick and select My Fire TV.
- Select About and highlight Network.
-
Note the Fire Stick IP address from the right-side pane.
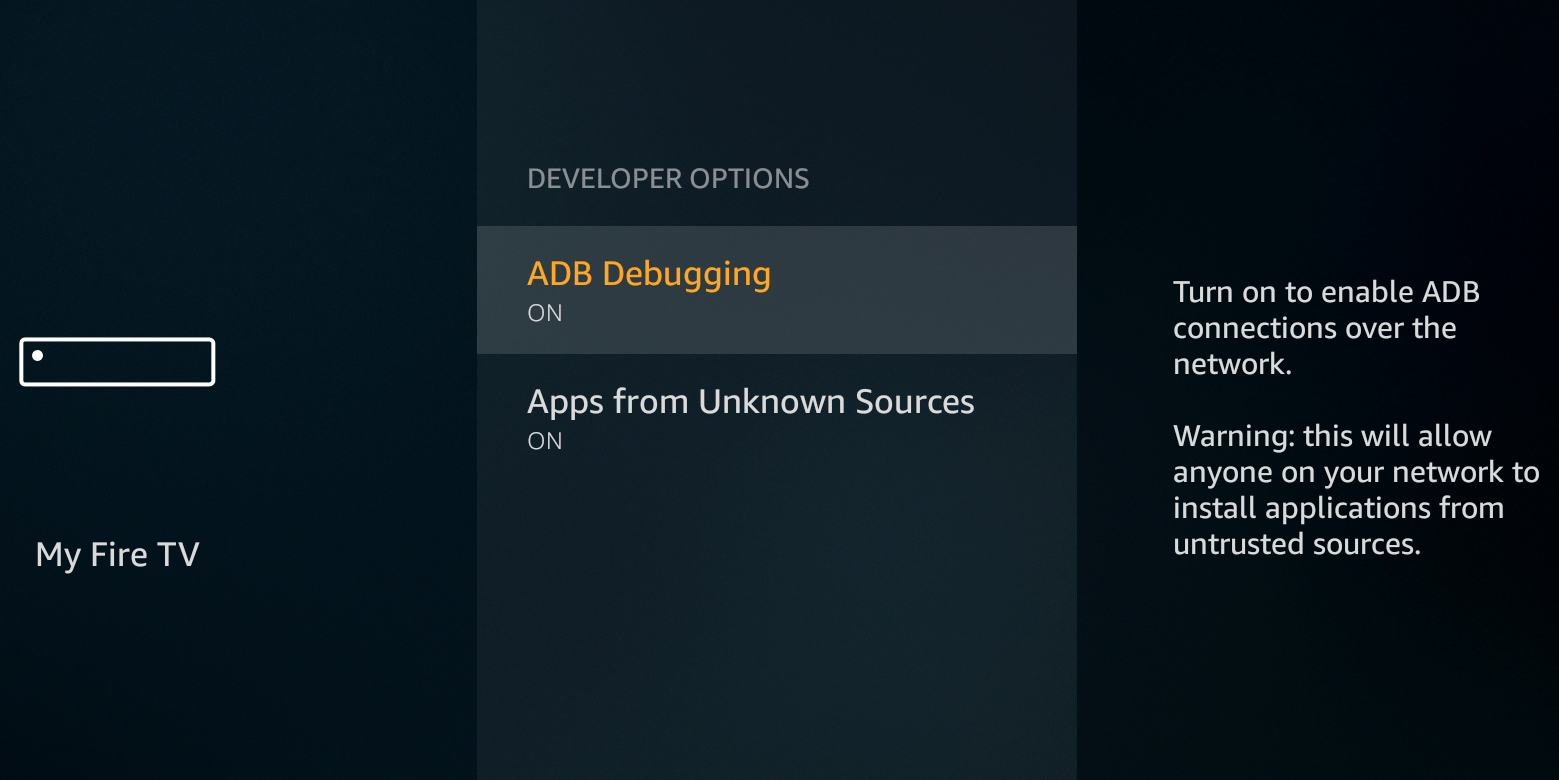
- Press the Back button on your remote and select Developer Options.
-
Enable the option that says ADB Debugging.


Taking Screenshots on the Fire Stick:
- Download and install the free Apps2Fire app on your Android device.
- Tap the three-dot menu at the top-right corner of the app and select Setup.
- Type the IP address you noted down earlier in the only field on the screen and tap Save.
- The app will let you know it's connected to the Fire Stick.
- Tap the three-dot menu at the top-right corner again and select Screenshot.
- Select OK in the prompt to take a screenshot.
- You'll see the screenshot's filename on your screen. Remember it, then tap OK.
- Select the Fire TV SD Card tab in the app and find your screenshot file by its name.[gallery link="none" columns="4" size="full" ids="987544,987546,987545,987547"]
- Tap on the file and choose Download to download the screenshot to your phone.
- You'll find the screenshot in the Downloads folder of your phone's file manager. Install an Android file browser app if you don't have one yet.
2. Use ADB to Take Screenshots on Your Amazon Fire TV Stick
If you don't use an Android device, or you're looking to capture a Fire Stick screenshot on your computer, you can use the Android Debug Bridge (ADB) utility to do that. This utility connects your computer to your Fire Stick and lets you execute various commands.
One of these commands lets you capture screenshots; here's how you use it:
- Head to Settings > My Fire TV > About > Network and note down the IP address.
- Head back one screen, select Developer Options, and enable ADB Debugging.
- Download and extract the free ADB platform tools on your computer.
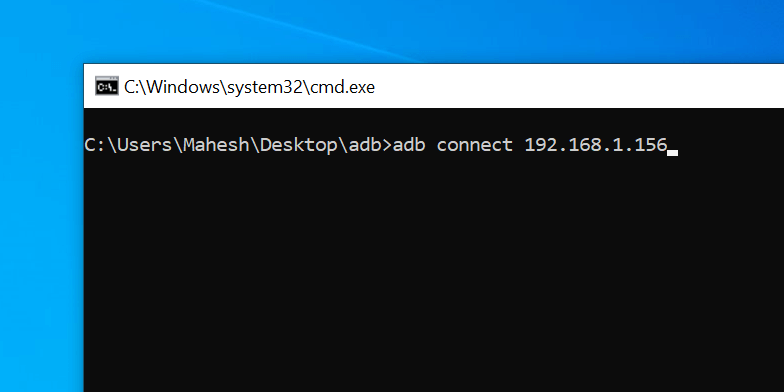
- Open the ADB folder, press and hold down the Shift key, right-click on an empty space, and select Open command window here. You can also type cmd into the address bar at the top to do this.
-
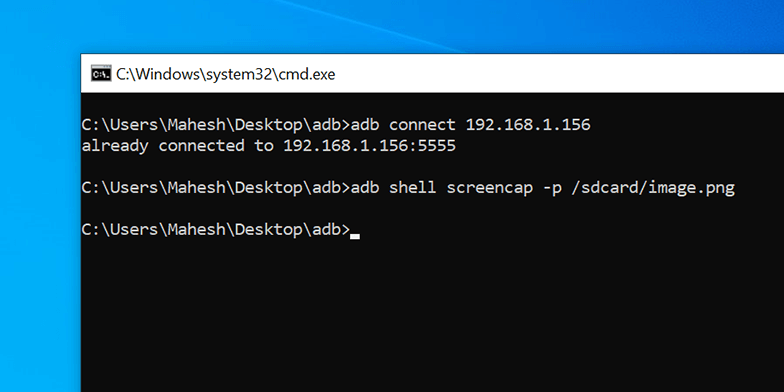
Type the following command, replacing IP with your Fire Stick's IP: adb connect IP
- Accept the prompt on your Fire Stick.
-
Run the following command to take a screenshot, replacing image with a filename if you prefer: adb shell screencap -p /sdcard/image.png
-
Use the following command to download the screenshot to your computer, replacing image if you changed the filename above: adb pull /sdcard/image.png
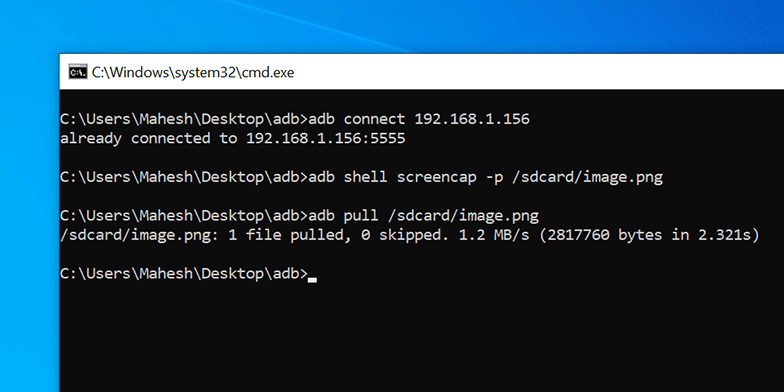
- Your ADB folder should now have the Fire Stick screenshot inside.


Take Fire Stick Screenshots Without a Built-In Option
No matter whether Amazon ever adds the option to take screenshots on the Fire Stick natively, you can use the above methods to get the task done without waiting around.
You can further enhance your Fire Stick's capabilities by jailbreaking your Fire Stick. This lets you add many more features than those it comes pre-loaded with.