If you've checked the Task Manager to see what's using up a lot of your PC's resources, you might have come across an entry named WSAPPX. This is notable for two reasons: its strange name can raise suspicion, and it often uses a lot of CPU and disk resources.
We'll explain what the WSAPPX process is, what it's for, and how you can deal with its high disk and CPU usage.
What Is WSAPPX?
WSAPPX is a process that handles installing, removing, and managing Universal apps through the Microsoft Store in Windows 8 and 10. Since these Universal/Modern apps didn't exist on Windows 7 and earlier, you won't see this process on those Windows versions.
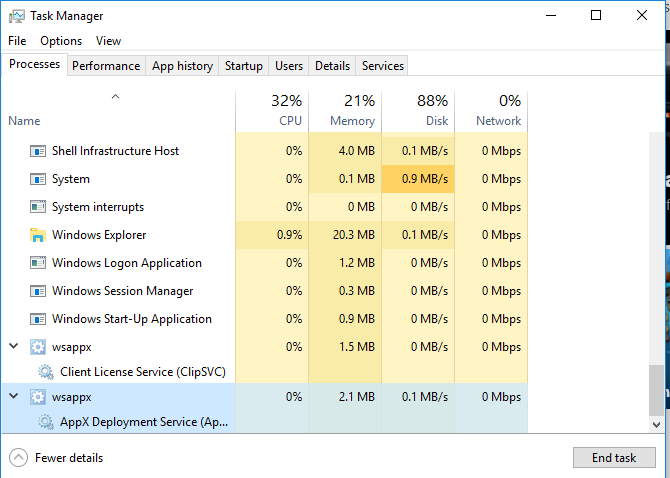
You can find it by opening the Task Manager (press Ctrl + Shift + Esc). Click More details if needed to expand to its full view, then select the Processes tab and scroll all the way to the bottom to find it.
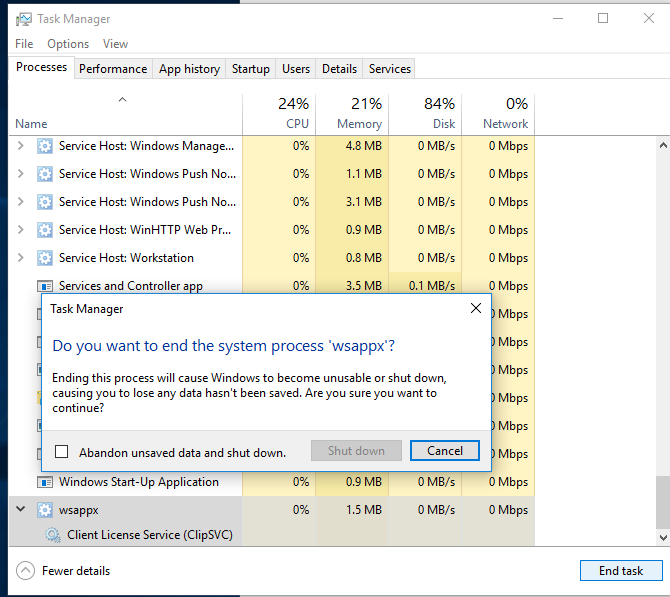
The process includes two sub-processes, which you can see by expanding it in the Task Manager. On Windows 8, there's a sub-process named WSService, or Windows Store Service. You'll find an essentially identical process on Windows 10 as ClipSVC, short for Client License Service.
Both Windows 10 and Windows 8 also include AppXSVC, the AppX Deployment Service.
What Do WSAPPX and Related Processes Do?
The technical names might make this sound complicated, but it's really not. According to their entries in the Services panel, ClipSVC and WSService both "provide infrastructure support for the Microsoft Store." If you disable them, Store apps won't work, because these processes handle licensing. They're designed to protect against piracy for Microsoft Store apps—if that even exists.
The other process, AppXSVC, works to deploy apps. This means that it runs whenever you install, remove, or update a Store app. Its name comes from the file extension for Store apps: AppX. Conversely, traditional desktop software usually runs from an executable file ending in EXE.
Like Android apps (with the APK file extension), you can grab AppX files from anywhere to sideload apps onto your PC. However, doing this could open you up to malware if you're not careful.
Because these sub-processes all run under the main WSAPPX process, you'll see its usage increase when any one of them is active.
Why Is WSAPPX Using System Resources?
In most cases, you'll only see WSAPPX active when you're using the Microsoft Store. Simply opening it and browsing around will cause the process to start. When downloading an app or installing an update, it will naturally use more resources, since it needs them for the install process.
This isn't unique to Store apps. When you install traditional desktop software, its installation process takes up resources, too. However, instead of running under the WSAPPX process, you'll see the new program's entry using your CPU and disk.
If you never use the Microsoft Store or its apps, yet still see WSAPPX active, it's almost certainly due to apps updating in the background automatically. Thankfully, you can prevent this.
How to Stop Store Apps From Automatically Updating
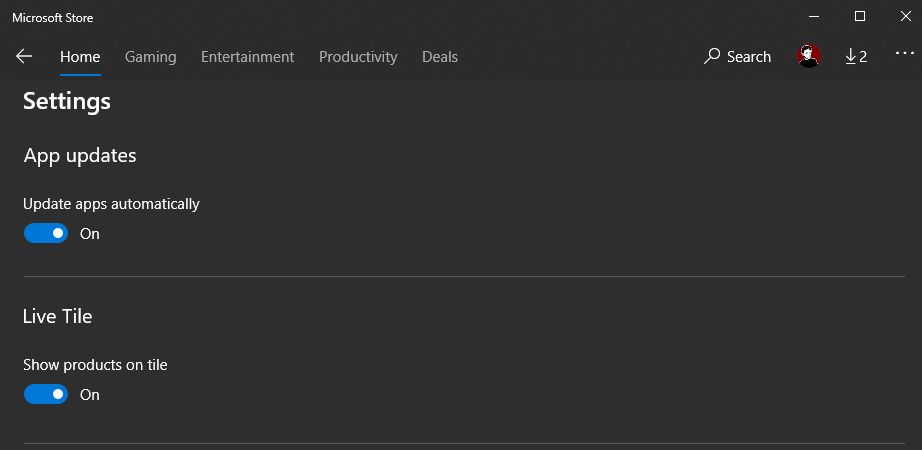
Disabling automatic updates for Store apps is easy. Type "store" into the Start Menu and open the Microsoft Store entry. Here, click the three-dot icon in the top-right, then select Settings. In the Settings menu, toggle the Update apps automatically slider to Off.
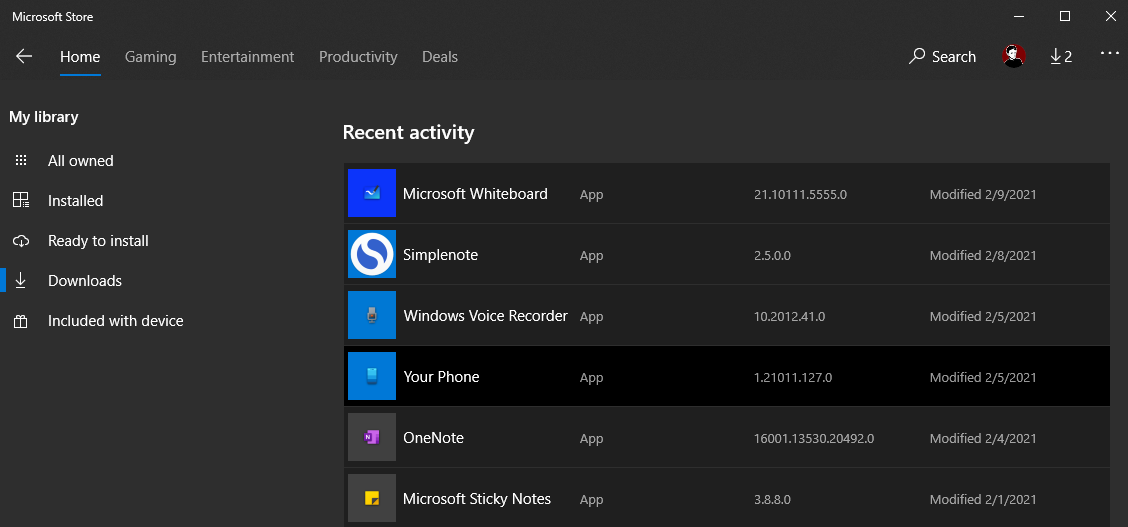
This will prevent app updates from happening in the future unless you manually trigger them. To check for updates, click the Menu button again and choose Downloads and updates. Hit the Get updates button to check for any, and install them as you see fit.
Do I Need Any Store Apps?
You can get by just fine in Windows 10 without ever using the Microsoft Store. But even if you don't download anything from the Store, there are several built-in Windows 10 apps that update through it.
The Xbox app has tons of features for gamers, the Calculator is now a Store app, and the Photos and Mail apps are decent defaults if you haven't swapped them out for something else. Apps like Your Phone, which let you access your phone's data right from your computer, also come from the Store.
Thus, if you use any of these, you'll see some extra usage from WSAPPX. Since installing updates is an important way to protect yourself on any platform, we don't recommend disabling automatic updates unless they're grinding your system to a halt.
For most people, remembering to check for updates manually is tough. Store apps have fewer permissions than desktop apps, so they don't pose as much of a security risk. But for the small amount of resources these updates take every once in a while, it's worth being up-to-date.
Remove Bloatware and Stop Background Apps
While we advise against disabling automatic updates, you can still take a few steps to prevent Store apps from running when you don't want them to.
The first is removing bloatware apps from your PC. As you've likely seen, Windows 10 comes with some pre-installed junk like Candy Crush Saga. If you never use these apps, having them update in the background is just a waste of resources.
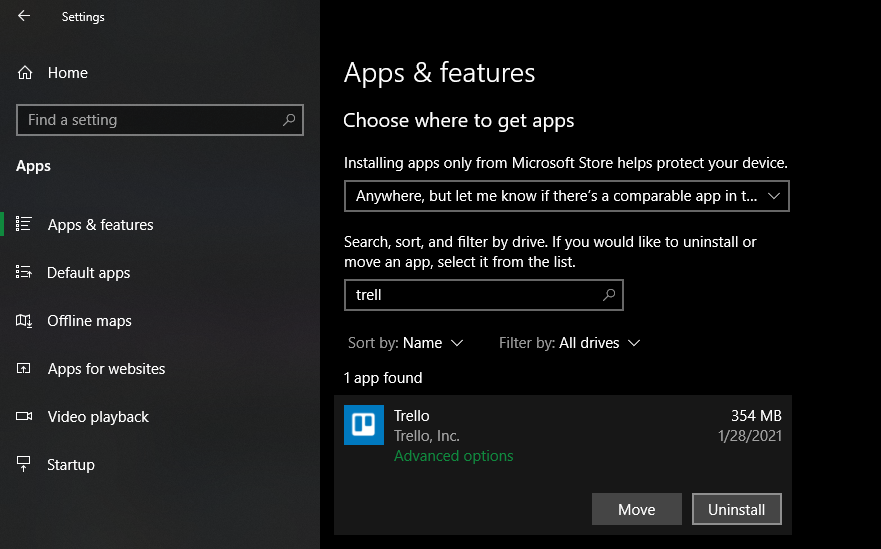
Visit Settings > Apps > Apps & features to browse everything installed on your PC. Click an app and choose Uninstall to remove it.
Once you cut out the apps you don't use anyway, only a handful of apps that you actually care about will remain. With fewer apps from the Store installed, WSAPPX won't need resources as often.
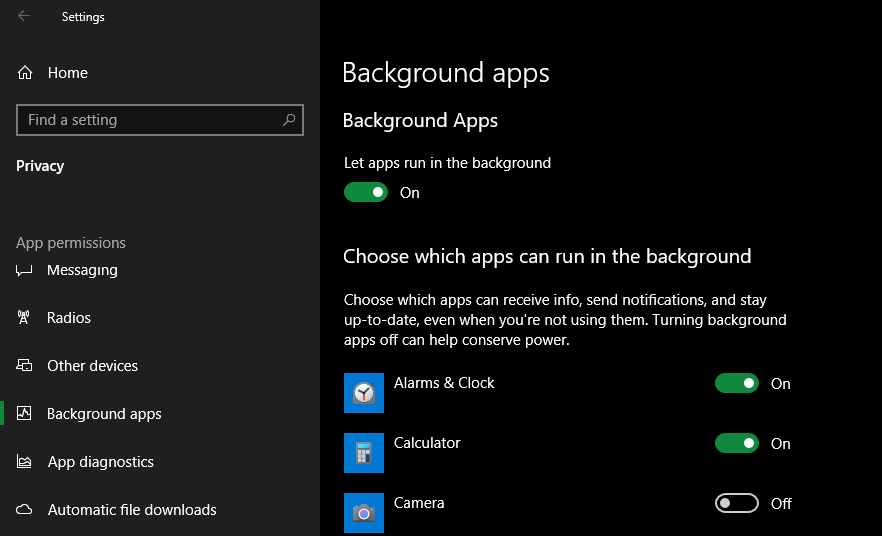
Another step you should take is preventing apps from running in the background. Visit Settings > Privacy > Background apps (under App permissions in the sidebar) to toggle this on a per-app basis.
If you disable an app from running in the background, it can't check for new notifications or do anything else when you're not using it. Feel free to disable ones you never use, but take care not to disable anything you actually rely on.
You can also toggle the Let apps run in the background slider at the top of the screen to completely disable background apps, though this is a nuclear option.
Can I Kill the WSAPPX Process?
Windows considers WSAPPX a vital system process. Thus, if you try to end it via the Task Manager, it warns you that ending the process can cause Windows to become unstable and shut down.
You don't have any control over when WSAPPX starts and stops. It will pop up when needed (if you're browsing the Microsoft Store or interacting with apps) and stop when it's done. Like other system processes, you don't need to micromanage this. Windows does a fine job on its own of handling processes, and the above steps should take care of any high resource usage you see from WSAPPX.
If you still have problems after trying these solutions out, see how to fix Microsoft Store and app issues for more troubleshooting help.
WSAPPX Is Essential and Simple
That's all there is to know about WSAPPX and what causes it to use resources. It's tied to Microsoft Store apps and only runs when needed. If WSAPPX uses a lot of your CPU or disk, uninstall any Store apps you don't use, prevent little-used apps from running in the background, and turn off automatic updates (if you want to go that far).
Remember that a system process running is a normal part of Windows operation, so you shouldn't worry unless WSAPPX constantly uses large amounts of resources.


