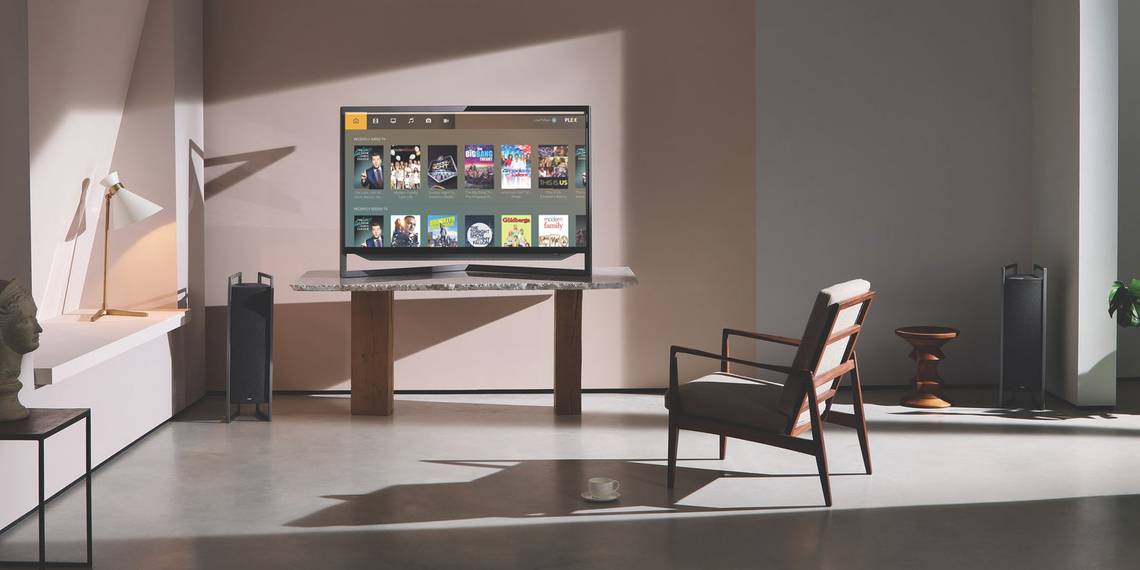
Since the advent of streaming services like Netflix and Hulu (here's how to watch live TV with Hulu), terrestrial TV has taken a backseat. However, if you still enjoy local broadcast TV and would like all the functionality of a DVR, without monthly fees, consider using Plex Live TV.
In this article, we'll show you how to watch and record live TV using Plex DVR. We'll also go over the things you should consider when choosing the equipment you need, as well as the settings required to enjoy the best viewing experience.
Prerequisites
There are three things you need to watch and record live TV on Plex.
- Plex Media Server with a Plex Pass.
- A compatible antenna.
- A compatible tuner.
A Plex Pass offers a lot more benefits over and above Live TV and can be purchased through a monthly subscription or as a one-off cost. Plex offers a 30-day trial along with a tool to see what channels are available in your area to help you validate your use case.

Before venturing any further it's worth noting that the viewing experience is not going to be the same as cable. This is especially true for certain sporting events which tend to only be available on paid-for channels.
Choosing an Antenna
To ensure you get the cleanest signal possible, there are a few things to take into consideration when choosing an antenna. First is deciding if you need a unidirectional or an omnidirectional antenna. TV Fool provides a handy tool to give you an idea of which direction signals are in relation to your address such as the following image.

The signals are represented by all the colorful lines closing in on your location. In this instance, signals are coming in from many directions so an omnidirectional antenna would be better. If your graph shows the signals coming from a single direction a unidirectional antenna might be better.
A bonus with unidirectional antennas is that they can typically reach further and have a clearer signal, but it might mean that you'll need to change its direction to pick up specific channels.
Mohu is a company that makes antennas for almost any application. The company even offers indoor antennas if you're unable to mount one to the outside of your property. The Mohu Sail, which is the antenna I use, has a 75-mile range and has the benefit of being amplified. Amplified antennas may provide improved reception and allows you to reach more distant stations, particularly when placed indoors.
It may be worth taking a drive around your neighborhood to spot if people have antennas on top of their houses and if they're pointing in a particular direction. However, if you already have an antenna, you should be able to use that, or you could even make your own.
Choosing a Tuner
The last piece of the puzzle is selecting a tuner. Which type of tuner you require will depend on two things. Namely, which operating system you have Plex installed on, and how many simultaneous streams you need. So if you would like to watch a channel on Plex Live TV while recording something simultaneously, that will count as two streams.

The Plex support pages provide a list of supported antennas along with operating system compatibility. The one at the top of the list is the the HD HomeRun Connect Duo. It's supported by all operating systems and is the only one which can be connected to your Network Attached Storage (NAS).
If you have many people in your home who need to watch TV simultaneously, you may want to consider the HD HomeRun Connect Quatro, which will allow four simultaneous streams. Once you have all of the necessary hardware it's time to do some testing...
Testing and Troubleshooting
Plug in the antenna to your TV tuner, and in the case of the HD HomeRun, connect the TV tuner to your network switch. Then use the software that came with your device to run a channel scan. This should populate the list with a number of channels that the tuner has found.

If for any reason the channels you wanted aren't found, or the quality of the feed isn't good, double check that the cables connecting the antenna to the tuner are secure. You can also try to adjust the position and direction of your antenna before scanning the channels again. Once you're happy, it's finally time to set up Plex.
Plex Libraries
When you're ready to start recording, Plex requires you to choose a library where you'd like to store a particular recording. So if you're recording a movie, you're probably going to want to save it in your movies library. Some recordings aren't going to be movies or TV shows, for example, a football match.

First, create a folder on the computer where your Plex Media Server is and then log in to Plex. Create a library and choose "TV Shows" as the type. Give it a name of your choosing and select the folder you've just created. You can always repeat the above steps if you need more libraries in the future.
Adding the Tuner to Plex
Now that you've done all the hard work it's time to tell Plex that you've added a tuner for it to get the feed from. In Plex, navigate to Settings > Manage > Live TV & DVR > Set Up Plex DVR. Plex will run a quick scan and detect the tuner that you've connected. If it does not find the tuner, make sure it's powered on or try to enter the network address manually to help Plex find it. Click Continue to advance to the next step.
Plex will summarise the channels it has found and ask you to confirm your country and postcode. The postcode is required to get an accurate program guide for your location as broadcasts can differ from region to region. The final step will allow you to filter any channels that you don't want cluttering your guide.

Simply uncheck any channel that you don't want and Plex won't bother getting it from your tuner. You can also choose a particular stream for a given channel. This is useful if a channel is received in both standard and high definition. By default, Plex will select the best stream for the channel, but if you do find something amiss later on, you can always come back and tweak these settings.
Finally, click Continue and that's it. Plex will start scanning each of the channels for their electronic guide, which includes current and future airings as well as the description and airing times. This does happen in the background so feel free to click Close and start watching some TV.
Using the Plex Guide and Recording
Now, it's time to reap the fruits of your labors. Click on Home > Live TV & DVR > Guide. Your Plex Media Server has been transformed into a fully functional DVR, with a complete channel selection and program guide.

To record a stream that you're watching, just click the Record button that is now available on the video controls. If you're trying to record a movie, Plex will only give you the option of which movie library you'd like to store the recording. If you're trying to record a TV show, then there are many more options at your disposal.

For TV shows, Plex will allow you to record either one particular episode or all episodes for that particular show. You're also able to set whether you'd like new and repeat airings as well as which library you'd like to store them. Click on Show Advanced to see how Plex really flexes its muscles. Some of the advanced recording settings you're able to tweak are:
- Specifying a resolution, for example, HD only.
- Duration to record before or after the show.
- Limit the recording to a particular channel.
- Choosing the maximum number of unwatched episodes to keep.
- Choosing if episodes should be saved or deleted after watching.
- Removing commercials.
You can set each these preferences for each show that you'd like to record and sit back and let Plex work its magic. To view your recording schedule navigate to Home > Live TV & DVR > Recordings.
From here you can see what's going to be recorded, play your recordings, and even set the priority in the event that you have many recordings that are going to overlap. This will ensure that your favorite shows take precedence over others when your tuner doesn't have adequate streams available.
Caveats to Consider
Plex does a fantastic job of saving your shows to your libraries along with the correct metadata and folder structure, but that does come at a price. Recordings will take up space, and you need to make sure that you're not going to fill up your drive.
To give you an idea of the space required, a single episode of The Simpsons consumed just over 400 MB. So be wise with how many recordings you'd like to keep.

One of the advanced options mentioned above is Plex DVR's ability to remove commercials. This is currently an experimental feature offered by Plex and is a CPU intensive task. On a reasonably fast CPU, a 30-minute recording takes around 3 minutes to process. This happens after a recording completes and before it is added to your library.
It's worth noting that this is a destructive process, so if Plex detects something resembling a commercial it will delete it forever. This includes something that was incorrectly detected. Commercial detection is not always perfect and for these reasons, the feature is disabled by default. If you choose to use commercial detection, add a few minutes to the end of your recording to ensure the end of your recording isn't cut off.
Cut That Cord
Plex has made it possible to enjoy a complete DVR experience and then some. You're able to watch live TV on any device that is connected to your Plex Media Server including mobile devices, from anywhere in the world.
For a small initial investment, you could significantly lower your monthly spending and still enjoy a live TV experience. If you're considering setting up your own media server, be sure to check out the complete guide to Plex.