Whether you're recording and editing your own music compositions, a podcast or radio show, a radio drama, or even sound effects for a video game, the chances are that you'll want to make your audio sound as good as possible.
Various audio editing tools are available to buy or download free. Perhaps the most versatile of the free options in Audacity, a tool we've featured on several occasions. The reason for this is simple: it's just a great audio editing application.
But without the right tricks and techniques, you could find yourself struggling to get the most out of Audacity. To help you here, we've compiled a list of the best five tricks for making your Audacity productions sound even better.
And if you're not already using Audacity, perhaps now is the time to download it.
1. Use the Editing Tools
We'll be looking at the tricks and tools available in the Effects menu later, but if you're getting to grips with Audacity, you should really become familiar with the basic editing tools.
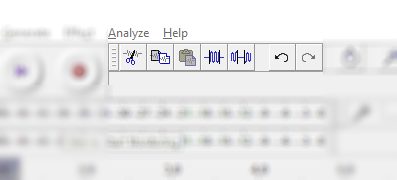
Along with the obligatory Cut, Copy, and Paste tools -- found in the Edit menu, or on the Edit Toolbar -- you'll also find Trim Audio and Silence Audio.
If you have a segment of audio you don't want across several tracks, you may wish to delete it (for timing reasons, it might not be suitable to cut from a single track). This is easily done by selecting the audio segment and clicking Cut. For complete deletion, you can tap your Delete key.
But if you prefer to simply silence some audio that is unsuitable, inappropriate, or distracting, the Silence Audio tool is ideal.
And if you want to capture a very specific piece of audio, perhaps to export for another project, select it, then click Trim Audio to remove the audio before and after the selection.
These tools can be used in so many ways to improve the quality of your audio production. Don't overlook them!
2. Level Your Audio
Several options are available in Audacity for leveling your audio so that nothing is too loud.
The simplest is to adjust the volume of each track. You'll find the volume slider (along with the balance slider) on the left-hand side of every track in your current Audacity project window. Use this along with the volume meter at the top of the screen to ensure your audio isn't hitting the maximum (shown as red). Instead, aim for the threshold between green and yellow.
It might be that the audio as a whole is too quiet. If this is the case, then the Effects > Amplify tool should be used. Simply select the track you wish to boost (clicking the left-hand panel will select the entire track) and open Amplify. Here, move the slider to set the desired amplification, and click OK to confirm. Too much? Hit Ctrl + Z to undo, and try again.
3. Remove Noise From Your Audio Tracks
Picked up some background noise that you don't like? Perhaps some hiss or buzz that is distracting in one of your audio tracks? This can easily be removed, using the Noise Reduction tool.
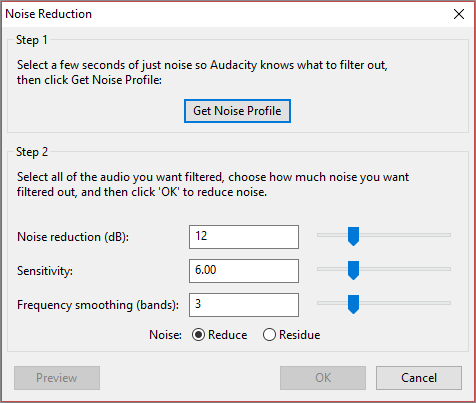
Begin by selecting a sample of the unwanted noise, as long as possible without interruption. Next, click Effect > Noise Reduction... then click on Get Noise Profile. This will pick up the selection, so without clicking anything else, go back to Effect > Noise Reduction... and click OK.
You can adjust the three sliders for Noise reduction, Sensitivity, and Frequency smoothing if you want, but generally the default settings for these will be enough. As ever, if you don't like the results, undo, then try again with slightly different settings.
4. Use Multitrack for a Polished Production
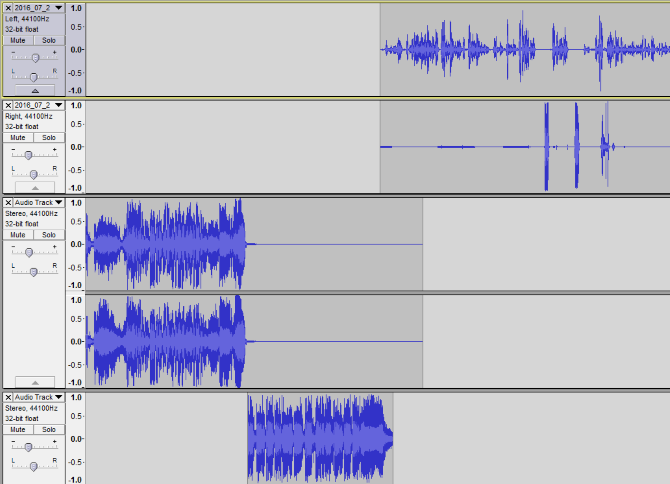
Want to have a tune fading out and overlapping some talking? You need to employ multiple tracks, just as you might when recording a song.
For instance, I use Audacity to produce podcasts. Each one has its own "theme tune" which will always fade out as I begin to talk. But rather than doing this live with a tool like Voicemeeter, I can use Audacity, and so can you.
All you need to do is have a track for your voice, a track for the intro music (or whatever you're overlapping) and apply the Effect > Fade Out function. As long as it is the first of your two tracks that is fading out, you'll be able to use the Time Shift Tool to drag the second track into position. Review the mix of the two tracks before moving on -- you might even add a fade in (Effect > Fade In) to the second track.
5. Quick Fixes on the Fly
If any of the above seems too complicated or fiddly, and you just want to get your audio fixed, exported, and uploaded (perhaps to Soundcloud), you're in luck. We've got a great way to apply a quick fix using two separate effects, used in quick succession.
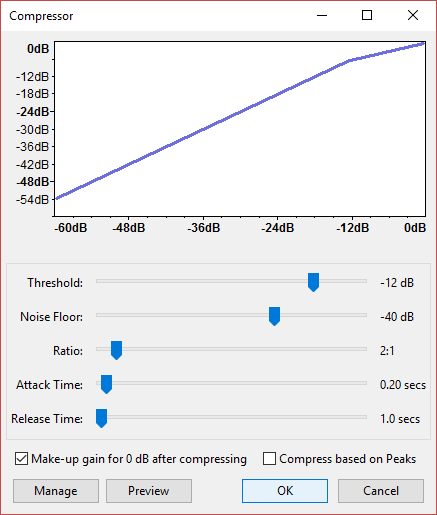
To so this, first open Effect > Compressor and click OK.
Next, go to Effect > Normalize, and again click OK (although you can adjust the offset here).
Finish by returning to Effect > Compressor, and hitting OK for the final time.
With these tools uses in tandem, you'll get a nice, polished audio file that automatically brings differences in volume into line.
All Done? Remember to Mix and Render!
When you're done with this, you'll need to export your audio, perhaps to MP3 format. But before you do this, you should open Tracks > Mix and Render to New Track and let Audacity work its magic. Your audio will be improved, leveled, polished… and ready to be exported.
We've given you five ways to make your Audacity productions sound even better, but what tricks do you use? Share your techniques in the comments.
Image Credits: Stokkete/Shutterstock


