While the Internet has evolved into a community where most of us converse and exchange ideas on articles we read within comment areas, forums and through email, there are also other cases where feedback is needed, and those methods aren't good enough. Sometimes a webmaster simply needs to provide the ability for a website visitor to send a file via email. If you think about it, providing a comment area or "guestbook" is simple these days.
If you just need a form with text fields so your visitors can provide feedback or send in requests and comments, take a look at the article I wrote on free contact form generators that should do the trick.
However, if you need the added functionality of a "file" field where your visitors can attach a file - then you're going to need to pull out a different bag of tricks. In this article I'm going to explain which approach to doing this that I feel is the most secure, and then I'm going to show you how to use a very cool free tool on your website which lets you embed this feature on your own website.
Methods To Send A File Via Email HTML Form
There are plenty of reasons why you may need your website visitors to send you a file. Maybe you're accepting job applications and resumes. Maybe you are a publisher and want to provide a fast way for authors to submit their short stories. Regardless of the reason, instantly transmitting files is both a convenience and a security hazard, so it has to be handled the right way.
There is an element of the FORM tag that lets you upload a file to your server through the POST method. You will need a script (ACTION) to process it and store it in a directory on your server. W3Schools provides a really useful example of how to do this using PHP, which I thought was well laid out and easy enough to follow if this approach suits you.
However, while I've always preferred PHP over other scripts, I don't really feel safe letting my visitors upload a file to my server. There are ways that you can make the process more secure and block spammers, but I still get a bit uneasy about the potential for viruses or other nasty files. For this reason, I really prefer having the form submission get packaged up in an email and sent off to me.
My email system has an excellent virus scanner for file attachments, so I know I can carefully handle files using this approach. This is why I turned to the free solution called PHPMailer-FE. This is one product that's part of a larger open source project (please donate if you use the form!)
I decided to go with a pre-developed solution, because in all honesty, even though I know how to create a form and pass it to a script that I could write to process the information - why reinvent the wheel when there are such well developed packages already out there, and PHPMailer is absolutely one of them.
Download & Configure PHPMailer
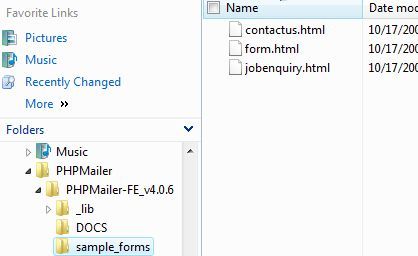
When you download the Zip file, you'll discover 3 folders - _lib, DOCS and sample_forms. Now, the developers offer an amazing amount of documentation on their site and in the developer forums. But, to be honest, you don't really have to change a whole lot to get a simple form working on your site.
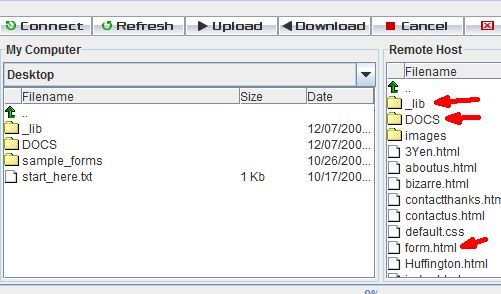
In the "sample_forms" directory, you'll find a few examples that the developers already created for you. In this article I'll install the sample form.html and get it working with just a very few minor configurations. If you don't have the ability to edit files on your web hosting account, then skip below to the edits before uploading the files. Otherwise, you can upload the files first.
Keep the same directory structure, and make sure that the HTML file with the form is only one directory up. If you want otherwise, you'll have to change how the form references the PHP script (see below). Actually - I messed up when I uploaded, you really only need the _lib folder and the HTML file - the DOCS folder is simply for your information.
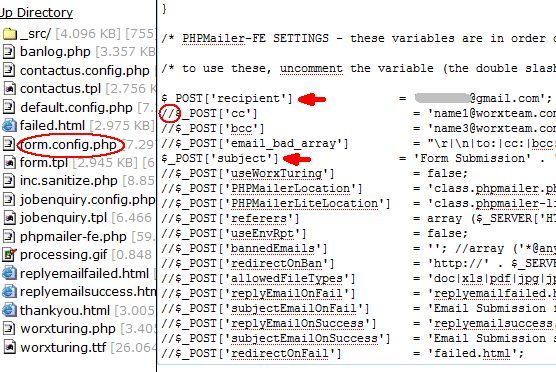
Go into the _lib folder and edit the form.config.php file. This is where you can really fine-tune how your form behaves. The only required edit is to configure where the post is going to go. I've also added the "subject" field, because I want to use this form on multiple websites, and when it arrives in my mailbox I want to know where it came from - the Subject line will tell you that.
To enable any of these features, all you have to do is remove the comment code "//" and you're good to go.
An Example Of The Form In Action
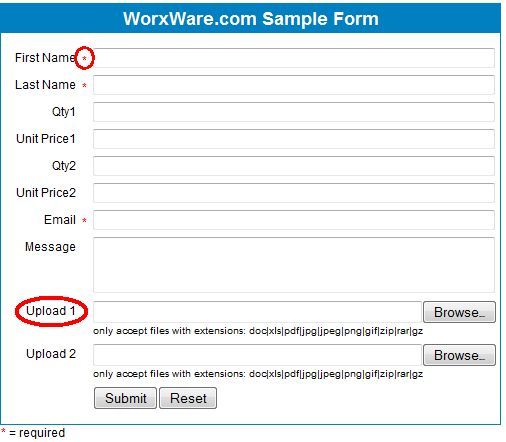
To demonstrate the form, I've copied the example form.html onto my website. This is what it looks like.
I love this...look how simple the form is, and you can embed it anywhere you want on your webpage. It has "required" field functionality so the user can't submit the form without at least offering their name and email address, and of course it has exactly what we're looking for - two upload fields where the visitor can attach up to two files. Here's what the sample FORM code looks like (this is the form you'll embed into your own web page).
There are two ways you can take this. Either copy all of the code in the form.html sample file from the <style> tag down, or you can pluck out just the FORM elements and insert them into your own customized form, formatted the way you want. This is most likely the approach I will take.
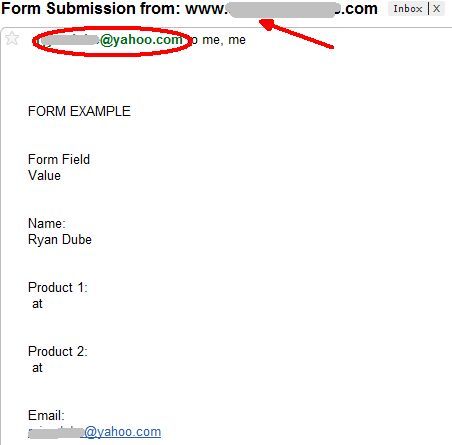
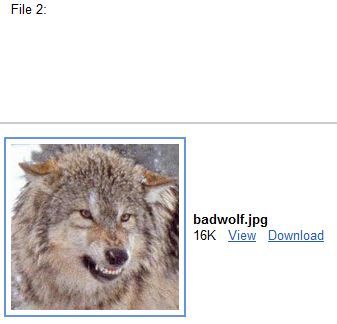
The only critical part of this is that the "action" should point to the location of the "phpmailer-fe.php" script. Now that I've got the form.html ready to go, and the form configuration file customized to send to my email address and include a subject, it's time to test and see what happens. I went to the form and submitted just my name, email, and attached a picture of a wolf. A second or two after submitting the form, this is what arrived in my Inbox.
You'll notice that the email header has the sender as the email address entered in the form, and the subject line tells you which website sent the form. Best of all, take a look at what's attached to the email.
Sweet! So, with just a couple very minor configuration file edits, you can now allow your visitors to send a file via email HTML form - and you didn't have to write a single line of code.
Customizing The Behavior Of Your Form
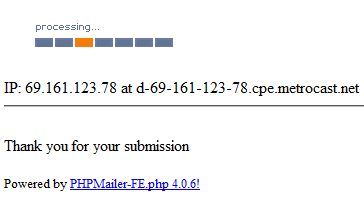
Before concluding, there is one little thing that's important to modify if you want the form to appear professional. Currently, upon successful submission, it refers the visitor to this funny-looking web page by default.
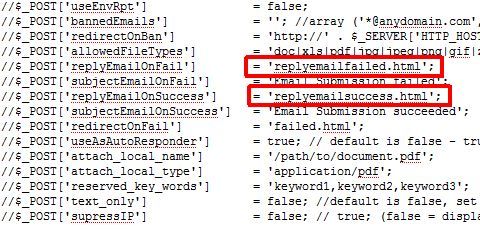
That animated "Processing..." bit is actually just an animated GIF - there's no magic behind it. This page is defined in the form.config.php file I referenced above. To customize the response pages, just open up that file again, remove the comment slashes "//" for those fields and replace the"replyemailfailed.html" entry and the "replyemailsuccess.html" entry with your own customized success or failure webpages.
I would definitely suggest going through that config file and exploring all of the ways that you can tweak how this form behaves. PHPMailer is a very versatile and useful pre-packaged form processing script that you can use for a wide variety of purposes on your website. Why reinvent the wheel when someone has already invented such a well-made and powerful car? All you have to do is get in and drive!
Do you have a use for PHPMailer on your website? Do you use your own tools or techniques to easily add forms to your site where visitors can attach files? Share your insight in the comments section below.


