In the overwhelming tool chest of Adobe Photoshop CC 2018, you probably missed one of the simpler features: the Notes Tool. Notes aren't just tiny bits of information. They are also reminders, records, and the rudder for navigating images.
Notes have been a part of Photoshop since several versions ago, adding metadata to images and serving as a roadmap and communication tool for any Photoshop project.
Adding Your First Note in Photoshop
Thanks to Notes, you can add comments, reminders, or instructions for your collaborator or even for yourself. The Notes are non-printable, so they don't affect your image. You can change, modify or even delete them anytime you want. Let's add your first note to a sample image:
-
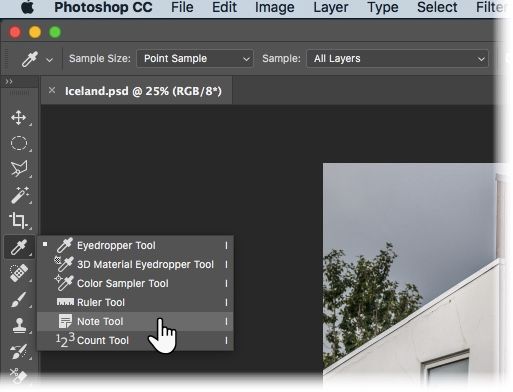
Select the Note tool from the toolbox on the left. It is a part of the Eyedropper toolset.
-
In the Options bar on top, add your name to the Author field and choose a Color for the note.

-
Click on the location in the image where you want to place the note. The Notes cursor adds the note marker.
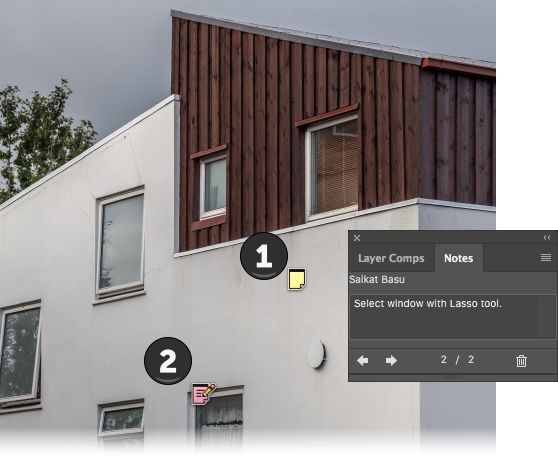
- The Notes panel is automatically displayed. This is the central location to add your comments to all the notes added to the image.
- Multiple people can also comment on a single document. Just change the author name in the Options bar and set a unique note color for each person.
- To delete a single note, click it in the image. Then, click the Delete Note icon in the Notes panel. To delete all notes, click Clear All in the options bar.


Documents with added notes can be saved in the Photoshop (PSD), PDF, or TIFF formats.
You can always toggle the visibility of the notes from View > Show > Notes. Choose Window > Notes to display the Notes panel, and click the back and forward arrows to browse through all notes in the image.
Do you use Notes as a habit? How does it save you time when you are working alone or in a team?
Image Credit: Yaruta/Depositphotos