Apple’s new Photos app for OS X and iOS is being pitched as being the only photography app you might ever need.
It enables you to manage your library, edit your images, and then share them to common online services. It’s also fully integrated with iCloud, so you can access all your images on all your Apple devices.
For most users, and in most use cases, it’s pretty good. But for more advanced users it falls short in a few areas, not least in its lack of support for external image editors like Photoshop and Pixelmator.
Fortunately, there is a workaround that allows you to get your Photos images into Photoshop and other editors when you need them. Let’s take a look at how to do it.
Photos Doesn’t Support External Image Editors
In iPhoto, using external editors was easy. You would either right-click on an image and select Edit with… and choose your application, or simply drag the image onto the Photoshop icon in the OS X Dock, and it would open there. You could then edit the image, save it, and see the changes reflected in iPhoto.
Photos doesn’t work like that at all. There’s no option to edit your image with third party software, and you cannot open an image in another app by dragging it to the Dock.
Instead, you need to manually export the files that you want to open in your external editor, edit them, and reimport them when done.
Beware the Wrong Settings
But even here there are issues to be aware of. Dragging and dropping a file from Photos onto your desktop does not automatically give you a full-size, maximum-quality version of the file.
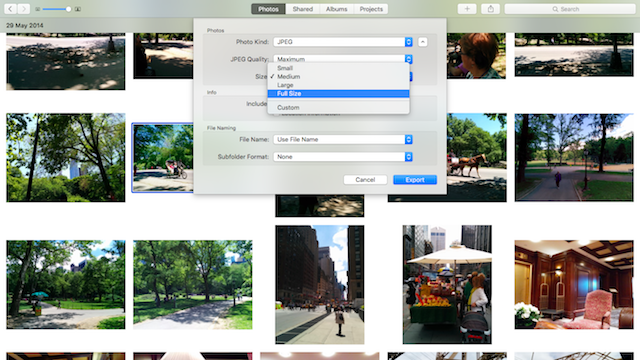
Dragging and dropping adopts the customizable settings from the File > Export > Export 1 Photo menu option, which we'll look at below. You’ll use these when preparing images for use on the web, or for uploading to an online photo album that isn’t offered directly through the Share menu. If you don’t check the settings every time, it’s easy to end up exporting smaller, or more compressed, versions of your photos by mistake.
There's a hidden trick here. To drag and drop the original version of your image — and the same applies to your videos as well — hold the option key (also known as the alt key) as you click and drag your images to the desktop. Even screenshots will need to be exported as originals, as Photos converts them from .PNG to .JPEG.
How to Open an Image from Photos in Photoshop, Pixelmator or Any Other Image Editor
Photos has a good set of editing functions for quickly touching up and correcting your images. But sometimes you want to process an image more heavily, or use a specific plugin or filter. In these cases you will need to use a manual workaround to open your image in Photoshop, Pixelmator, Affinity or the editor of your choice.
To export images through the menu, click on the image (or command + click to select several images) that you want to open in your external editor.
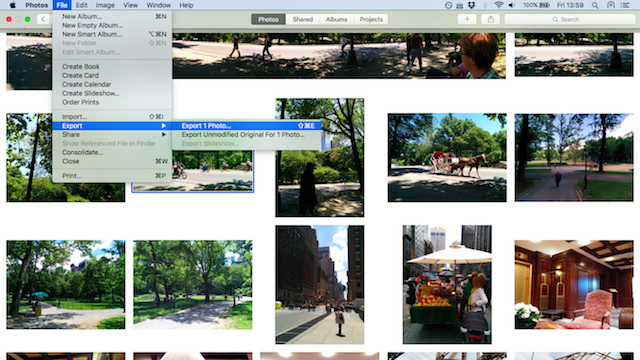
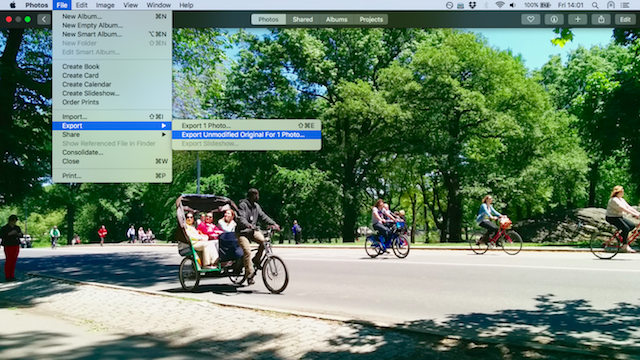
Go to File > Export. The sub-menu that opens give you two options:
Export 1 Photo (or however many you have selected) enables you to export the images at quality levels of your choosing. Click the downward arrow alongside Photo Kind to set a size and quality — these are the settings that will also be applied when you drag and drop an image to the desktop.
Any edits you have made within Photos will also be applied to the images you export in this way, from simple cropping and straightening to full on color corrections.
Export Unmodified Original For 1 Photo exports a copy of the original version of the image, at maximum quality and with no edits applied. It's most likely you'll want to choose this option when making serious edits, to preserve the accuracy of the original exposure and maintain quality.
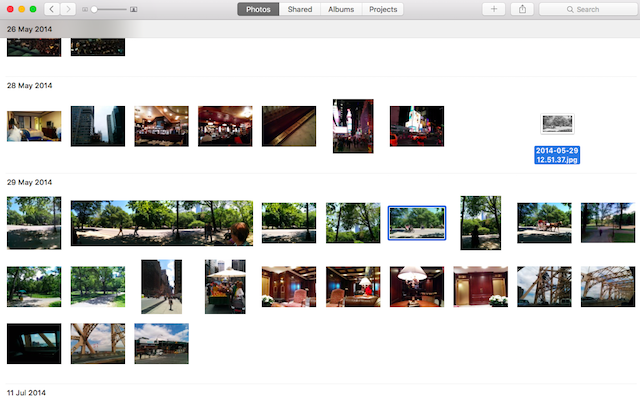
Choose a location to export your files. For easy access, particularly if the image will only be used temporarily, the desktop makes a good holding place.
Now locate your exported files. You can open them in your chosen editor by right-clicking (or control + click) and selecting Open With from the menu. Alternatively, you can drag it onto the icon for your image editor in the Dock.
The image will open in your chosen photo editor. Make the edits and save the file. You can overwrite the exported file on your desktop, since the original is still stored in Photos.
Get Your Edited Image Back Into Photos
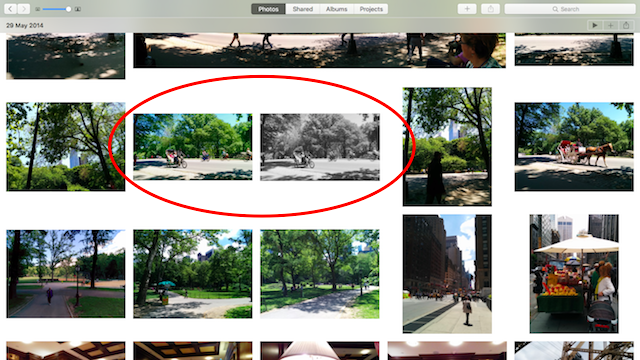
There’s no need to change the filename when you re-import the image back into Photos. It won’t overwrite the original, and so long as the metadata (including the date it was shot) is still in tact it will be placed near the original in the library.
This means you get a duplicate, which is not as bad as it first seems as this ensures you still have access to the original.
Photos is a non-destructive image editor. Every edit you make to a photo can be undone, and you can always revert back to the untouched original file. When editing in Photoshop, or any other editor, the changes you make are written directly to the file. The moment you save the changes and exit the app, they cannot be undone.
Therefore, it’s a good idea to keep the original alongside an externally edited version as backup.
To import your edited photo go to File > Import and select the image, or simply drag it from your desktop onto the Photos dock icon or into the app window.
Click on the Photos view to see that the image has been added alongside the original. Click on the Albums button to add the new version of the image to any albums you want to include it in (you might want to remove the original from these, too).
An Improvement For the Future
Photos is not a replacement for Lightroom or the now-defunct Aperture. It works well as a consumer-friendly photo management tool, but it falls short for enthusiasts and pros that want to include more advanced editing apps in their workflow.
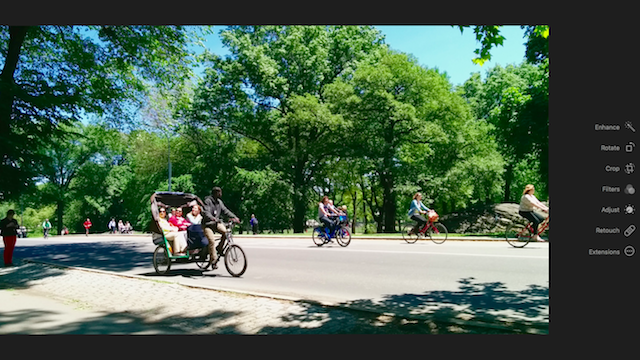
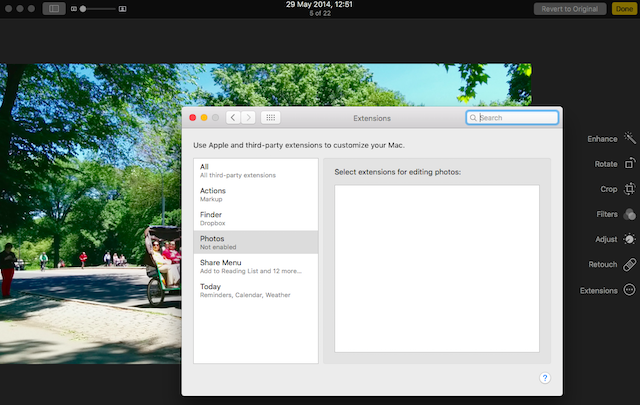
There is an option for the developers of third-party programs to build extensions for Photos in future, to add a level of integration for their tools. This is available through the Extensions options in the Edit screen of Photos.
It would be better, though, for the functionality to be built in directly. Until then, this workaround is the way to go.
What do you think about this limitation? Do you still use Photos, or have you switched to something else?

