The word "glyph" comes from Greek and can be translated as "carving". You can find these special characters outside the basic alphabets. For instance, currency symbols, the copyright symbol, and the ampersand are glyphs.
Every font has its own glyphs that you can creatively use in your graphic artwork in Adobe Photoshop CC.
How to Use Glyphs in Adobe Photoshop

Use glyphs as shortcuts for instant decorations in your graphic design project. Just start with the right font. You will come across several cursive fonts with the best glyphs. You can browse through the extended character set on Photoshop's Glyph panel or the Windows Character Map. Then, launch Adobe Photoshop CC.
- Create the Text layer you want to work on.
-
Go to Windows > Glyphs and open the Glyphs panel.
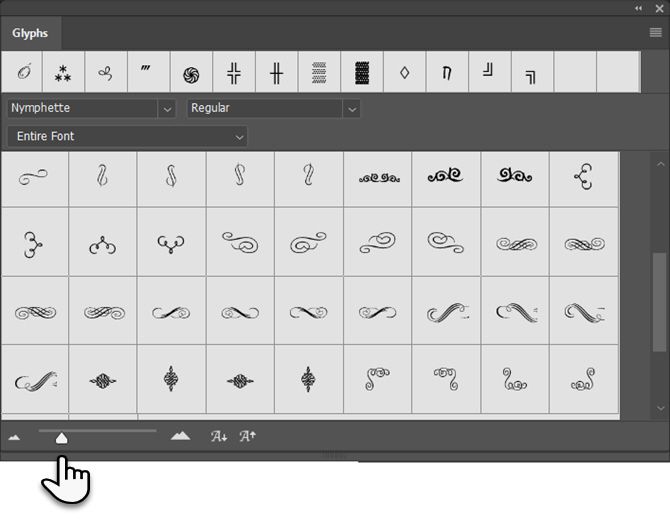
- You can work with the font selected for the Text layer or choose a new font from the dropdown in the Glyphs panel. I have downloaded a true type free font called Nymphette. Use the slider to make the font tiles larger or smaller.
-
Select the Text layer and the letter you want to replace with a glyph. Alternatively, type and then select any letter on the layer. When you select a letter, the Glyph Panel will automatically find that letter in the list.
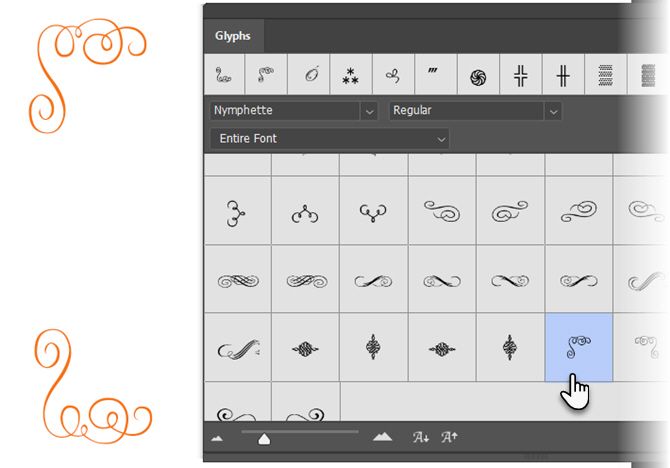
- Go through the special characters in the panel and double-click the glyph you want to use. The basic letter is replaced with the glyph you just selected.
- Click the checkmark to finalize the text.
- Right-click on the type layer to rasterize the text. Now, you can treat this as a separate image layer.
- You can use a single glyph or a combination of glyphs to create your own logos, emojis, borders, frames, and other beautiful design elements for any project.


The Adobe support page will also help you dive into the details of glyphs and how to work with them. In the end, just choose the best font for your project and go to work with your creativity!
Image Credit: Yaruta/Depositphotos