We showed you how to use Evernote as a Bullet Journal. Now it's time to show you how to turn Trello -- if that's your primary note-taking app -- into a Bullet Journal.
Of course, why you might want to use an app like Trello as a bullet journal is simple: it's easier to keep your notes on your phone than in a paper notebook these days. You know which one you carry around all the time!
The Bullet Journal Advantage
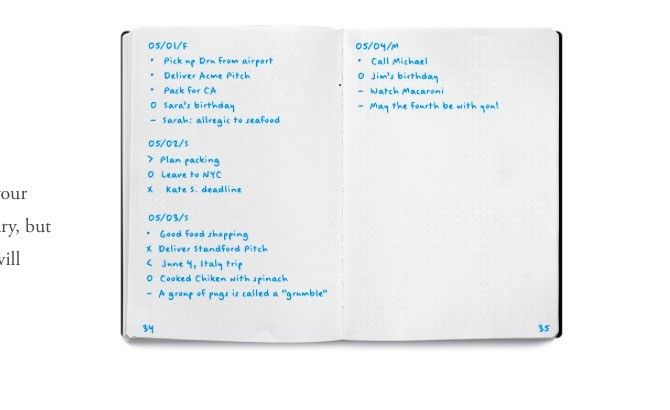
What is a Bullet Journal? It can be anything you want it to be: a to-do list, diary, calendar, notepad, anything. The creator of the Bullet Journal (BuJo), Ryder Carroll, describes it as "the analog system for the digital age":
The Bullet Journal method emphasizes quick "bullet-point" logging as opposed to detailed notes. The result? Faster note-taking, not to mention easier-to-decipher notes.
Instead of outlining the basics of the Bullet Journal method first -- Nancy has already done a great job of it -- I'll dive right into the bit where we help you set up Trello as a bullet journal. I'll still elaborate on the core components of the Bullet Journal and how they work together, but one Trello board, list, and card at a time.
Read the original overview of the Bullet Journal and familiarize yourself with it to get the most out of your Trello adaptation of the method.
Note: What follows is one way you can bring the Bullet Journal to Trello. You're free to tweak it, tame it, put your name on it!
Turn Modules Into Boards
A bird's eye view of your bullet journal modules shows you tasks and events lined up for specific days and months. Day-to-day listings go under the Daily Log module and monthly listings under the Monthly Log module. If you're scheduling months ahead, the corresponding listings go under the Future Log module. Feel free to use this module as a catch-all for items that you want to get around to "someday".
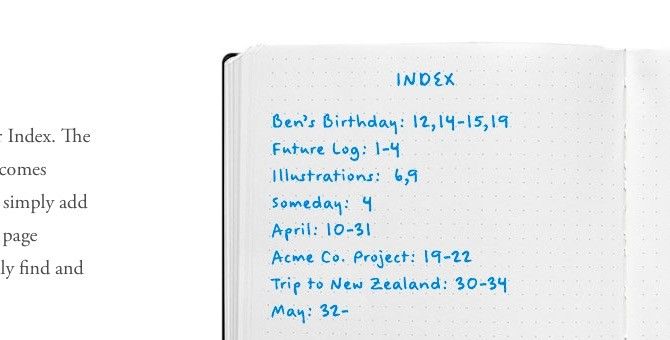
There's a fourth module called Index, which tells you where you'll find a particular entry in your bullet journal. We'll discuss it in the next section.
Now, it's time to turn the basic Bullet Journal modules into Trello boards. You have plenty of leeway to add or remove modules as you see fit.
You could stick with the standard module format and create four boards, one each for Index, Daily Log, Monthly Log, and Future Log. Or, you could replace Monthly Log with Weekly Log if you prefer to work in a "weekly bubble". Of course, there's no one stopping you from having a Weekly Log board and a Monthly Log board.
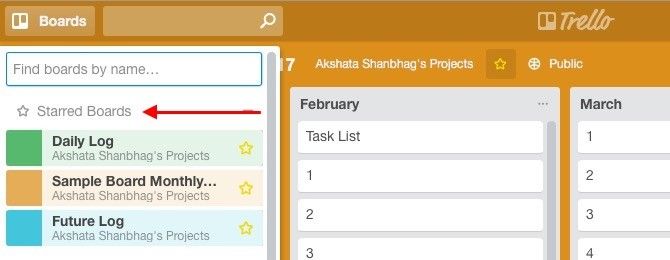
Once you create Trello boards for the modules of your choice, star those boards to line them up at the top in the left sidebar menu.
Index, Page Numbers, and Topics
I would suggest skipping the Index module. Yes, that module is invaluable when you want to find specific items in a paper notebook without having to flip back and forth through a bunch of pages. But when you're dealing with a digital app with a decent search mechanism and easy page navigation, an Index board is sure to feel redundant. With the Index module out of the way, you can ignore page numbers too!
Topics are short and descriptive titles that go at the top of each entry to help you identify it when you're scanning your bullet journal notes. These titles, i.e. topics, can translate to list names in Trello.
Setting Up the Monthly Log Board
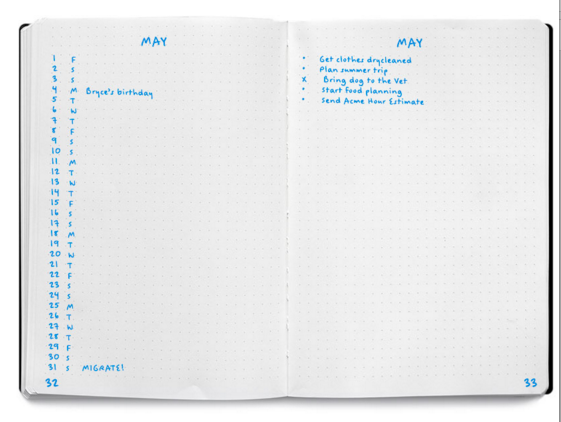
The paper version of the Bullet Journal suggests a two-page layout for the Monthly Log module, with a calendar on the left and a task list on the right.
The calendar is a list of the days for a specific month and you can log tasks and events in it for quick reference. In the task list, you're free to list tasks you have planned for the current month as well as ones carried over from the previous month(s).
With this format, you'll dedicate two pages for each month's Monthly Log. For moving this setup to Trello, I suggest the following approach.
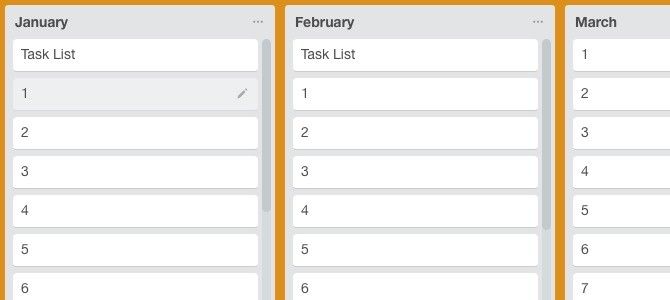
Instead of creating a fresh Trello board for the Monthly Log module each month, have a single board for this module for an entire year. On this board, dedicate one list for each month of the year and create cards equal to the number of days in that month. That is, a list with 31 cards for January, one with 28 cards for February, and so on.
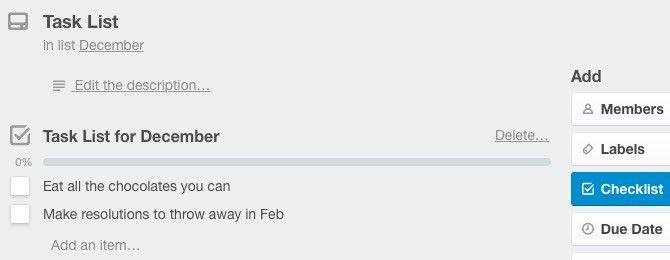
Now, let's focus on the Monthly Log list for, say, December. It has 31 cards -- one for each day of the month. Next, we need a task list for this month. Instead of creating a separate Trello list for it, create a single Trello card called Task List under the December list and move it to the top. Click on this card to open it. You'll see a Checklist button in the Add section at the right. Click on that button to create your task list for December.
This approach keeps your Monthly Log board as well as your Trello setup lean. It would be quite complex if you created lists and boards to closely match the paper version of Bullet Journal.
Grab a Pre-Made Monthly Log Board
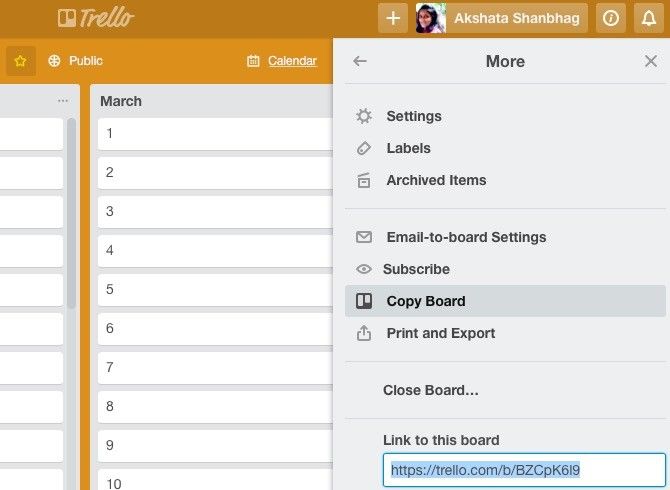
I have created a sample Monthly Log board to save you some time. To copy the board to your Trello account, click on More > Copy Board from the fly-out sidebar menu at the right on that sample board. The copy will get classified as a Private board automatically!
A Useful Way to See Your Monthly Tasks at a Glance
To see the tasks and events for any month, all you should do is scan its list on the Monthly Log board or open its Task List card.
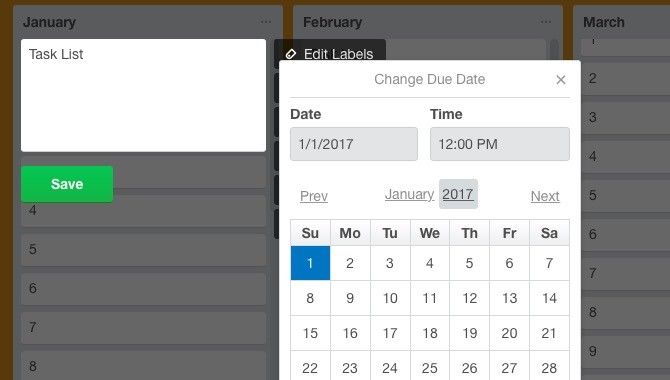
If you'd prefer to see your tasks laid out in a proper calendar view, you'll first have to assign due dates for each card. Trello keeps the due date feature to highlight deadlines, but who says you can't use that feature to highlight dates in your bullet journal modules.
You can assign a due date for any card via the Change Due Date option hidden behind the card's "pencil" icon. Doing this for 30-odd cards per list can be tedious, I must say. Why not assign dates for only a week's worth of cards at a time? That is if you find the calendar view indispensable and insist on having one.
Here comes the part where you activate the calendar view. First click on the Show Menu button at the top right on the current Trello board.
Next, select Power-Ups from the fly-out sidebar and click on the Enable button next to Calendar from the list of Power-Ups available. Now when you look to the left of the Show Menu button, you'll see a Calendar button. Click on it and there's your calendar view for your bullet journal's Daily Log or Monthly Log.
Setting Up a Daily Log Board
Depending on the complexity of your day and your logging habits, you can:
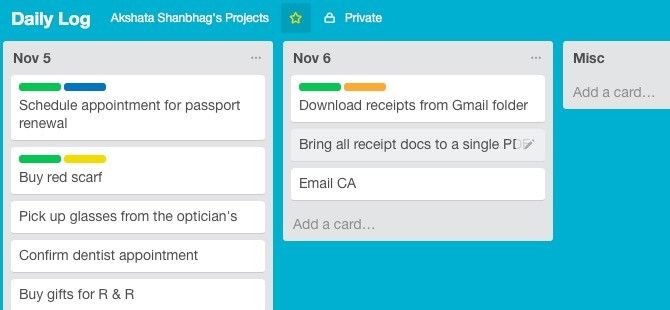
- Limit the Daily Log module to a single board with 30-31 lists corresponding to the number of days of the current month,
- Or create a fresh Daily Log board for each day and divide up tasks/notes into lists based on type (day job, personal project, money related, "must do", and so on).
I would recommend the first approach, because it's easier to have all your notes for the day in a single list. If you want to add more context to each note, you can do so using labels, checklists, and card comments.
I'll leave it to you to set up the Future Log board based on the possibilities I have shown for the Monthly Log and Daily Log boards above.
Replace Bullets and Signifiers With Labels
In the analog Bullet Journal, you use bullets and signifiers to add context to each entry. For example, "*" adds priority to a task, "O" indicates an event, "X" marks a task as complete. You can bring these markers to your Trello bullet journal by using punctuation symbols. The problem is that their visual appeal and effectiveness gets lost in translation from paper to screen. As an alternative, I suggest you use color-coded labels to correspond to the bullets and signifiers.
Here are the items you'll need labels for:
- Task (•)
- Task Complete (X)
- Task Migrated (>)
- Task Scheduled (<)
- Event (O)
- Notes (-)
- Reminders (Optional) - if you want to highlight tasks with due dates
- Priority (*)
- Inspiration (!)
- Explore ("eye" icon) - requires research, information, or discovery
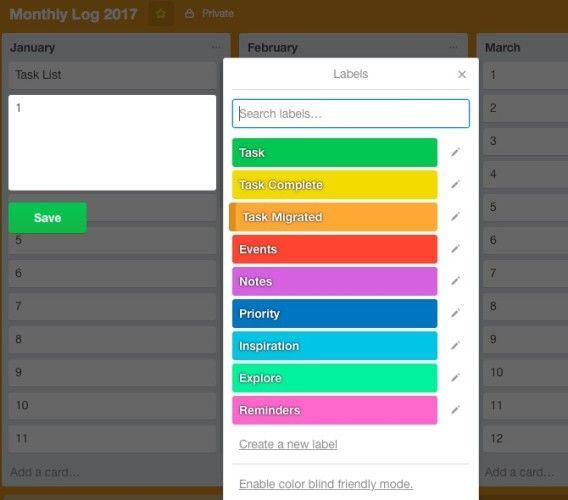
To create labels and name them, first click on the "pencil" icon for any card and select Edit Labels from the list of actions that appears. From here on, it's easy to figure out! Here's a sample snapshot of the labeling system you'll end up with.
With this system in place, when you come across a card with, say, a dark blue label and a yellow one, you know it indicates a high priority task that you have completed.
You're Ready to Start Logging in Your Bullet Journal
With your Trello boards all set up to match the Bullet Journal, you can add cards to schedule tasks, mark events, and note down any kind of information.
Trello gives you the flexibility to add, edit, remove, rearrange, and duplicate cards anytime. This makes it easy to create several Daily Logs ahead of time. I would still recommend setting up logs one day or week at a time to keep complexity and confusion away.
Using the right productivity system can turn your workflow around. The problem is that you should pick one first. This is where it gets tricky, because you have so many options to choose from.
Find yourself flitting from one productivity system to another every few days or months? Maybe you need to tweak your productivity habits instead of adopting a new system. After all, the best productivity hack is self-discipline.
Have you tried moving your paper note-taking system to Trello or any other web app? How did it work out for you? What do you ultimately prefer for note-taking -- paper, screen, or both?

