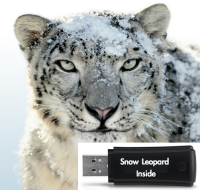

The latest Mac OS X - version 10.6 - was released to the public on August 28. Mac users who pre-ordered Snow Leopard should already have their copy delivered and surely have upgraded their Mac to Leopard by now. The Mac communities' discussions are filled with the post installation experiences and thoughts and comments about the latest feline from Apple.
One of the afterthoughts I have with another Mac user friend is about the installation process for Macbook Air which has no optical drive. It was a short discussion closed by a "using Remote Disc of course" statement and a few chuckles. But then I wondered whether it's possible to install Snow Leopard (or any other version of Mac OS X) using a USB thumb drive (something like creating a portable Ubuntu installation USB that we've discussed here before). This would be useful for Mac users who have no access to a physical optical drive.
For the sake of curiosity, I did a little Googling followed by a little experiment. Less than one and a half hours later, I knew the answer.
Utilizing the Disk Utility
Some readers have pointed out in the Ubuntu article that the whole process of creating a USB installation disk can be done the "GUI-way" using the Disk Utility (Applications/Utilities/Disk Utility.app), so we'll try that route in creating our USB installation drive for upgrading your Mac to Leopard.
As the installation DVD is almost 7 GB in size, we'll need a USB thumb drive with at least that amount of space. I used an 8 GB thumb drive, but larger types or even a USB external drive with an empty partition above 7 GB could also be used.
The first thing to do is to format the drive. Select the drive from the left pane of Disk Utility then click the "Erase" tab. Choose "Mac OS Extended (Journaled)" from the "Format" option, then give a name to the disk and click the "Erase" button.

After the formatting process is finished, go to the "Restore" tab to 'restore' the content of the installation disc into the USB drive. Select then drag and drop the source image (Snow Leopard) and the destination (the USB drive) from the left pane to the corresponding place. Note: you can choose a disk image from a physical disc, an image file - on the hard drive or web location - as the source.

Then click the "Restore" button to start the process, which will roughly take about half an hour.

After the restoring process is finished, we can see that the USB drive has been transformed into an installation disk.

However, we can't do the installation by clicking the "Install Mac OS X" logo. You'll just get the warning sign 'The application "Install Mac OS X" cannot be used from this volume'.

Now, let's continue with the real deal.
The installation process
Eject the DVD but leave the USB plugged in. Restart the system and press the "Alt" key on the keyboard during restarting. You will have the option to boot from the hard disk or a USB disk; I guess you know which one to choose, right? :)
The whole installation - or upgrade, some would say - process took about 50 minutes. Then you'll get the thank you window saying that everything's done.

There are some applications that are still incompatible with Snow Leopard, which is to be expected at the early stage of every new OS. They are moved to the "Incompatible Software" folder in the start up disk. If you'd like to find out who they are, click the "More Info" button.
And I think now is the time to say hello to our new OS.
