Okay, hands up: Who really knows what an XPS file is?
For the uninitiated, it's Microsoft's answer to the PDF file format. Sad thing is, it never took off. By the time Microsoft unveiled the XPS format in Windows Vista, PDFs had already been around for more than a decade and everyone was already using them.
However, the XPS format lived on. Windows 7, Windows 8, and Windows 10 all shipped with a dedicated XPS viewer called, umm, XPS Viewer.
Alas, all good things must come to an end. In the April 2018 Update (Build 1803) for Windows 10, Microsoft officially retired the XPS format and removed XPS Viewer. But what if you still use the format? Well, you're in luck. We're going to show you how to re-enable XPS Viewer on your system without using any dangerous hacks.
How to Unlock XPS Viewer on Windows 10
To unlock XPS Viewer after the April 2018 Update, follow the step-by-step instructions below:
- Open the Settings app (accessible via the Start menu).
- Select Apps.
- In the menu on the left-hand side of the screen, choose Apps and Features.
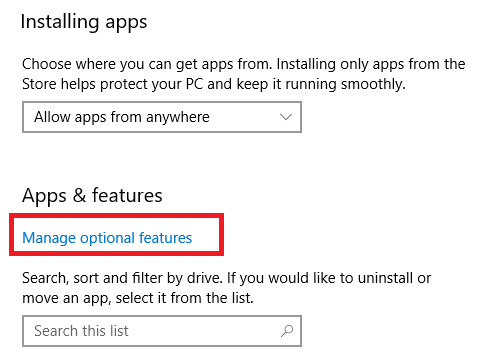
- Scroll down to Apps and Features > Manage optional features.
- Click on Manage optional features.
- Select Add a feature.
- Scroll all the way to the bottom of the list and select XPS Viewer.
- Click on the Install button.
Theoretically, that's it. However, you might need to restart your machine for the app to become fully active. You will find the app in the Start menu or by using the search function. And if you change your mind about the app, don't worry: it's easy to remove XPS Viewer again.
If these instructions don't interest you and you've decided to leave XPS files behind forever, make sure you read our guide to the best PDF readers for Windows.


