A major part of our time is spent on the web, but for a lot of people the computer file system makes for a close second. Finder, Apple's file browser, provides a very slick way to do this by default, and you'll be able to clock good time even if you don't know all the finer points of the application.
Getting to know those fine points, however, can provide an additional (and always much welcome) boost to your productivity and overall file-handling speeds.
You'll likely know a few of those already—like the copy-paste shortcuts, and different view options. But other features are slightly better hidden. Browse through these tips to get an even more intimate knowledge of Mac OS X's Finder application.
1. Show Path Bar
In Finder's View menu, toggle on the "Show Path Bar" option. This path bar—which is added to the bottom of your Finder window—shows the extended file path, from your computer's hard drive partition to the currently selected file.
Double-click any of the intermediary folders to open it in your current Finder window, or hold the command (cmd) key while double-clicking to open it in a new Finder window. You can also right-click on any of the path components to view more options and folder-related services.
2. Show Status Bar
Another useful view option is the Status Bar, which can be enabled by toggling the "Show Status Bar" option in Finder's View menu. Like the Path Bar, this Status Bar manifests at the bottom of your Finder window.
Although there isn't a lot of interactivity possible, the Status Bar let's you quickly reference the number of items selected in the current folder, and the available disk space on your hard drive partition.
3. Arrange By...
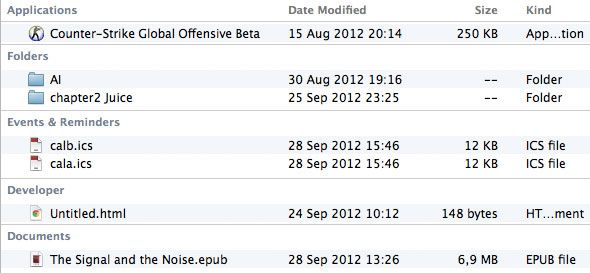
You probably already know how to sort files in specific folder views. Ever since Mac OS X 10.7 Lion, this feature was complemented by the ability to "Arrange" files by a number of characteristics, by going to the Arrange By section of Finder's View menu.
As can be seen in the above screenshot, this groups the files under one of a number of descriptors, rather than just sorting it in one big pile. This can also be done in any of the different view modes.
4. Change the Default Finder Folder
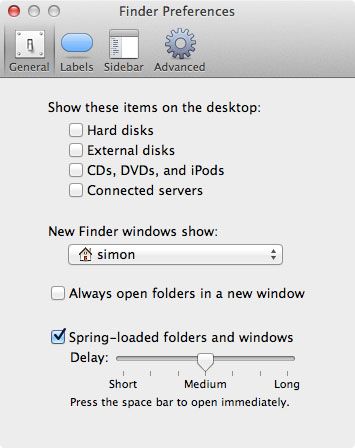
The default finder folder—that is, the folder shown when you create a new window in Finder—is set by default to All My Files as introduced by Mac OS X 10.6 Snow Leopard. While All My Files is very useful as an overview to which files were most recently used on your computer, you might want to view a different folder in new Finder windows instead, like your Documents or your User folder.
This is quite easily achieved by going to the General tab in the Finder Preferences pane. A drop-down menu allows you to substitute All My Files with any given folder on your computer.
5. New Folder With Selection
If you select any number of files and right-click the selection, you'll see an interesting feature pop up in the context menu.
"New Folder with Selection" does exactly what it says; it creates a new folder in the current directory, moves the selected files to it, and allows you to type in the folder name. This can be done even faster by pressing the Command-Control-N keys after making your selection.
6. Copy-Move
Although there is technically no cut and paste functionality in Finder, there's a lesser known feature that does largely the same.
After copying a file, go to the Finder's Edit menu and hold the Option (alt) key. You'll notice that the "Paste Item" button changes to "Move Item Here". Similar to cut and paste functionality on other operating systems, this moves the copied file instead of duplicating it. To use this option on the fly, you can use the Command-C and Option-Command-V keyboard shortcuts to copy and move a file, respectively.
What tricks do you use while working with Finder? Let us know in the comments section below the article!


