<firstimage="https://www.makeuseof.com/wp-content/uploads/2010/07/torrentbox5.jpg">

Chances are if you're reading this article you're the type with an attic full of silicone chips, sticks of RAM and old bits of printer. I'd hazard a guess and say you've got more spare tech equipment up there than Christmas decorations, and it's time to revolutionize your filesharing with a torrent box.
Put simply a torrent box allows you to queue, manage and share all your torrent data via a network connection. You can leave this old PC in the corner, silently chipping away at your downloads and seeding like a trooper whilst you take your laptop out and about for more practical reasons. You won't need a monitor once you've set up the box, which means you can put it anywhere it will fit.
Setting Up
It's always best to start with a fresh operating system, so format and re-install your chosen OS on the PC's hard drive. As we'll be using uTorrent to administer everything remotely, you'll need a copy of Windows 2000 or above. If you've never installed your particular copy of Windows on this machine before, you may need to call Microsoft to validate your key with use on your new (old) machine.
Don't forget that system requirements for Microsoft Windows XP are very low by today's standards - a Pentium 233 MHz with 64 MB of RAM may sound a little choppy, but will function fine. As you're going to be using the machine to store data, you'll need a fairly large hard drive depending on your plans.
If you'd like to use the box as a share for all members of your household, the more storage you've got the better. However if you're using the box as a go-between, before transferring your downloads to shares or backup locations, then space is not so much of an issue. External hard drives can make for easy space upgrades, and provides a very mobile solution when transferring data, though be sure to update any older copies of Windows for USB 2.0 compatibility.
It's important to remember to format the drive on which you will be downloading your torrent data to NTFS, and not the older FAT32 file system. NTFS will allow you to download files greater than 4GB, a constraint when using FAT32 devices.
Make sure you have at least one shared and accessible location from which to access the data. Simply create a folder on your main download drive, right click and choose Share. This is where all your downloaded data will go. It's best to test this on another machine within your network first, just in case. If you make this share writeable, you'll be able to add your own data to the drive and share it straight from the box itself.

Installing uTorrent & The Web UI
The latest version of uTorrent comes with everything you need to configure remote access. Simply download and install it from the official download page, and boot it up. You may want to adjust a few settings, including your connection settings for optimal download and upload performance. Check out this guide to speeding up your torrents for a few tricks you might not have thought of.
Hit Ctrl+P to bring up the Preferences dialog, and within the General tab check Start uTorrent on System Startup. This means if you ever need to restart or move your box you can resume your torrents by simply turning it on. Under Web UI, check Enable Web UI and create a username and password.

You can also specify an Alternative listening port for connecting to your remote interface. If you have trouble remembering your connection port under the Connection tab, stick in some numbers you're bound to remember.
That's it, you're good to go. Now for the easy bit!
Remote Access
Make sure your torrent box is turned on, connected to the network and running uTorrent. Using any machine on your network visit http://192.168.0.x:port/gui/ from a web browser, where x is the computer's location on the network and port is either your uTorrent client's connection port or alternative listening port.
To find out your computer's location on the network, log into your router and check the attached devices, or you can just use a process of elimination! If all goes well you will be prompted for the username and password you created under uTorrent's Web UI preferences.

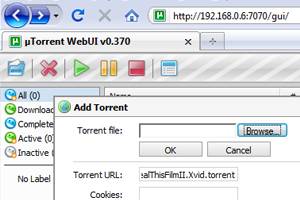
Log in and you will be presented with uTorrent's web user interface. From here you can add, remove and manage your torrents, as well as update your preferences. It's quite literally uTorrent, within your web browser.

Accessing your Web UI is all well and good on your network, but what about when you're not at home?
Well if you have a static IP - no problem, simply visit http://yourip:port/gui/. You can get your IP from What Is My IP on your home network. If your internet service provider rotates your IP then you can use a service such as DynDNS which provides you with a domain name for your home network. There is an excellent guide about doing this here.
Conclusion
I'm always searching for new ways to use old technology, and a torrent box fits my needs and costs nothing to set up. If you've already got an existing media centre or file server, adding torrent functionality is another simple step you can take to streamline your home setup. Remote access gives you the freedom to peruse from afar and have your downloads ready for you and the rest of your network the second you get home.
If you are looking for more information on torrents, check out Saikat's The FREE Torrent Guide. Also check out some of the numerous torrents articles that we have done in the past -
How To Use RSS Feeds To Download Torrents Automatically - by Varun
Top 6 Torrent Alternatives To The Pirate Bay - by Will
5 Ways To Bypass Torrent Connection Blocking - by Jeffry
Find Torrents Of Your Favorite TV Shows With TED - by Sharninder
Top Torrent Search Engines for All Torrent Downloaders - by Varun
Do you have a dedicated torrent box sitting in the corner? Have you combined it with a media centre or file server, or do you simply use your main PC with Web UI? Let us know in the comments below.