Have you ever wanted a speaker that could stream it's own music? What about one that's connected to Spotify, Google Music and SoundCloud? AirPlay support sound good? In this project I'll show you how to get just that with an old speaker and a Raspberry Pi.
You'll need basic electronics skills but otherwise it's really easy to make.
We've said it time and time again at MakeUseOf. Raspberry Pis are awesome. I've made one into a media centre, Christian turned his into a wireless printer and James used his to browse the Internet anonymously. This project is my favourite by far.
Step 1: What You Need
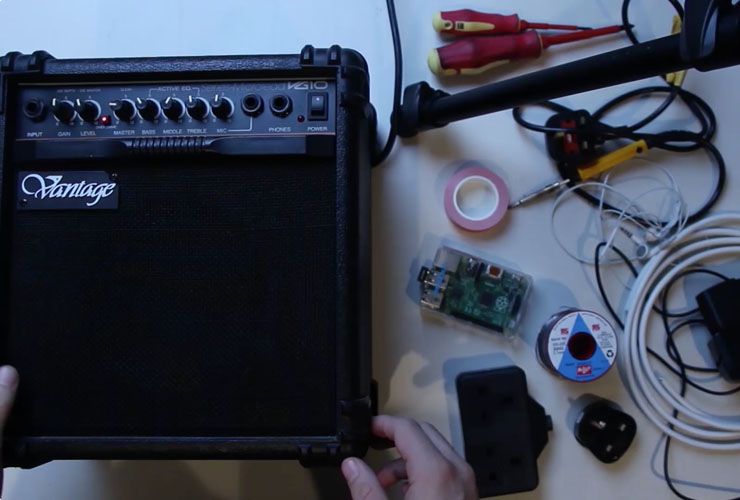
For this project you need a Raspberry Pi; preferably a B+ but any model will do with a USB wireless dongle, a Micro USB power cable, a case and a MicroSD Card. I used this kit from Amazon.
You also need an old speaker. I used a Vantage guitar speaker with a built in amplifier that I had lying around. You can pick up similar models for about $50 but any old speaker should work. The Raspberry Pi's sound output isn't great so if the speakers don't have a built in amplifier like mine did, you'll need to add one to your Pi. I like this one from HiFiBerry although it doesn't support the B+ yet.
You'll also need:
- An aux cable
- A two-plug socket
- A plug
- Two metres of three-core cable
- Insulating tape or heat shrink
- Heavy duty mounting tape
- Solder and a soldering iron
- Various screwdrivers
- Wire strippers
- Clippers
Step 2: Flashing The Pi
Before starting with the build, it's important to get the Raspberry Pi working properly. For this project I'm using Wouter van Wijk's Pi MusicBox operating system.
Download and extract the .zip file from Wouter's site.
There are many ways to flash — or install a disk image — on an SDCard for a Raspberry Pi. The GUI interfaces are easier but aren't as surefire as doing it yourself via the command line. The Embedded Linux Wiki has a full guide on the different methods available for each platform. Follow the steps they provide. If one method doesn't work, try another.
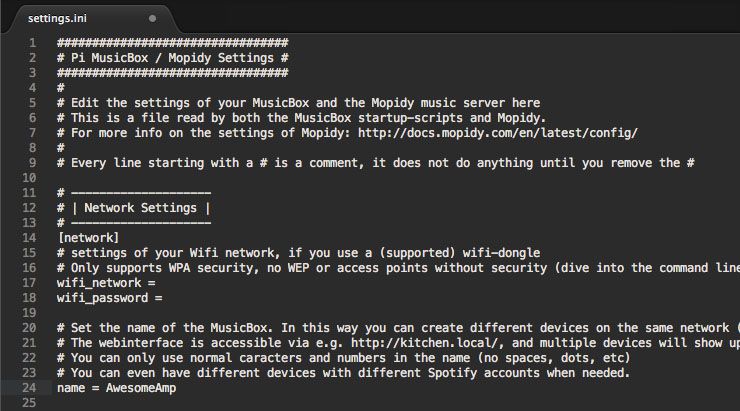
Once the MicroSD card is flashed, use Windows Explorer or Finder to navigate to the config folder and open settings.ini in a text editor.
Under Network Settings enter your WiFi details and save the file. You can also name your speaker; the default name is MusicBox but I called mine TheAmp. My first choice, TheAwesomeAmp was too long.
It's possible to configure everything now but it's easier to do it through the web interface.
Step 3: Configuring Pi MusicBox
Insert the MicroSD card into the Pi. Put some headphones in the audio-out port and connect it to the power. Wait about 90 seconds for it to fully boot up.
On your computer, point your browser to [speakername].local. In my case it's theamp.local. If all went well, you should connect into the speaker through the Music Player Daemon (MPD) web interface. If it didn't, get trouble shooting!
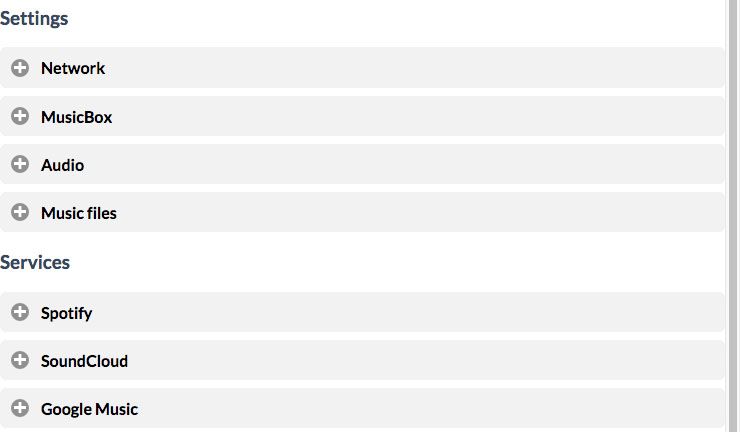
Open the settings menu and configure your services. You generally just need to add login details though for some, like SoundCloud, you'll need to follow the steps they provide to get an authentication token.
If you are just using the Pi's audio-out like me, under the Audio menu select Analog for Audio output.
Click Update settings and wait while the Pi restarts.
Reconnect using the web interface and, with the headphones in, play something. After a couple of seconds you should hear your chosen song.
The Pi is now ready so it's time to set up the speaker.
Step 4: Disassemble the Speaker
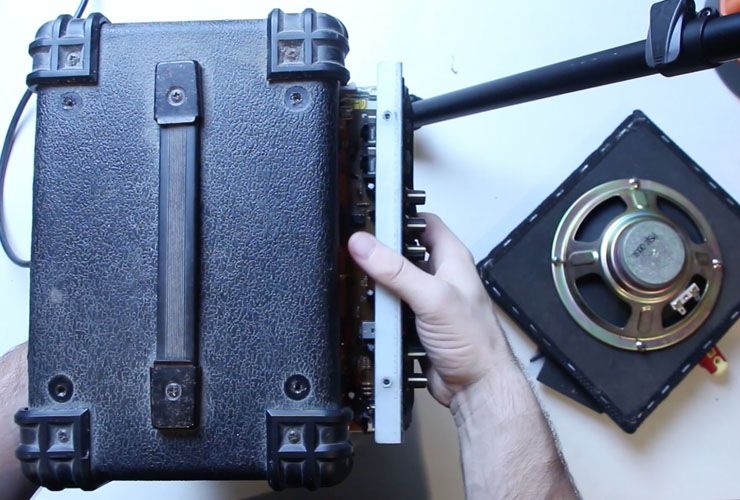
Carefully disassemble the speaker. Take your time, take photos of where each screw goes and don't break anything. The speaker I used was very easy to take apart. I disconnected the speaker from the amp, removed all the screws at the back then, holding the amp securely, unscrewed the top screws.
With all the screws removed, the amp and front plate could be pushed forward.
Step 5: Examine the Electronics
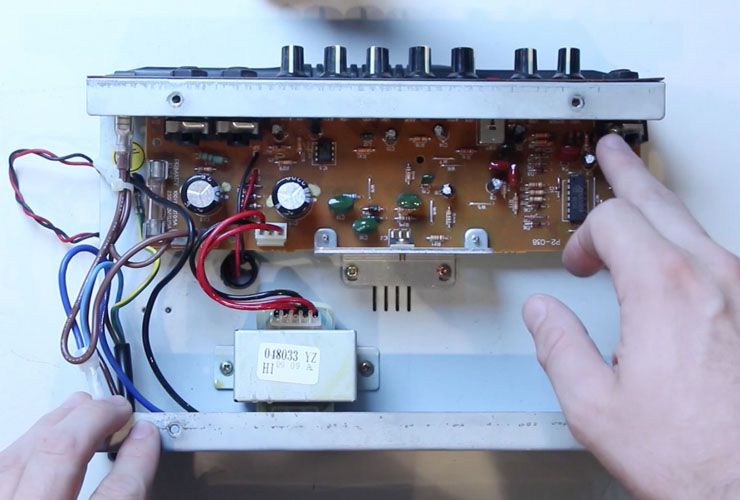
Before doing anything with an unfamiliar circuit, it's important to work out what it does. It was easy to spot the auxiliary audio input on my amp because the exterior socket was clearly labeled. Yours might be a little harder to find. Originally, I'd planned to connect the Pi through a step-down transformer to the speaker's mains connection. That wasn't feasible because of how it was wired.
I decided to run the Pi and amp on separate power circuits. The Pi takes a while to boot up and draws very little power when not in use so I wanted it always on. The amp produces transformer hum when it's connected to the power and not playing music so I wanted it easy to turn off. Examining the board helped me to make decisions about how to proceed.
Step 6: Connecting to the Input
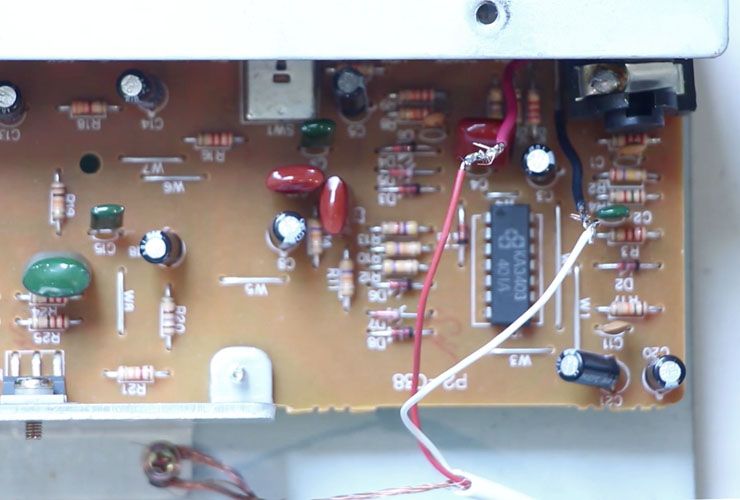
Take your aux cable, cut off one end and strip a good portion of the remaining outer layer. There should be two cables inside wrapped in copper wire. You need to connect the two wires to the amps input and the copper wire to the metal case for grounding.
On my amp, the input socket had two wires that ran to the amp. I disconnected these wires at the input socket — I just clipped them off — and soldered the aux cable's wires to them. I sealed the connection with insulation tape though heat shrink would also have worked. If there are two wires of the same colour, connect them together. They'll usually be red.
I connected the copper wire to the case by making a loop, loosening a case screw, wrapping the wire loop around it and then tightening the screw again.
Step 7: Adding the Pi
It's now time to add the Pi to the amp.
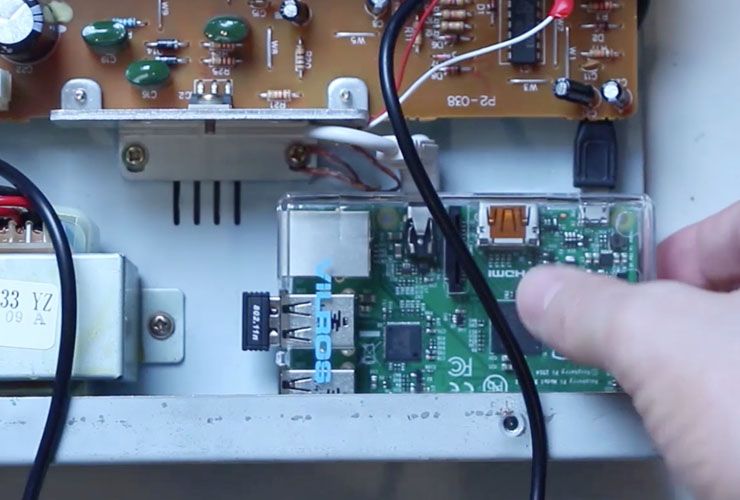
Run the power cable up through the same hole that the speaker output wires use.
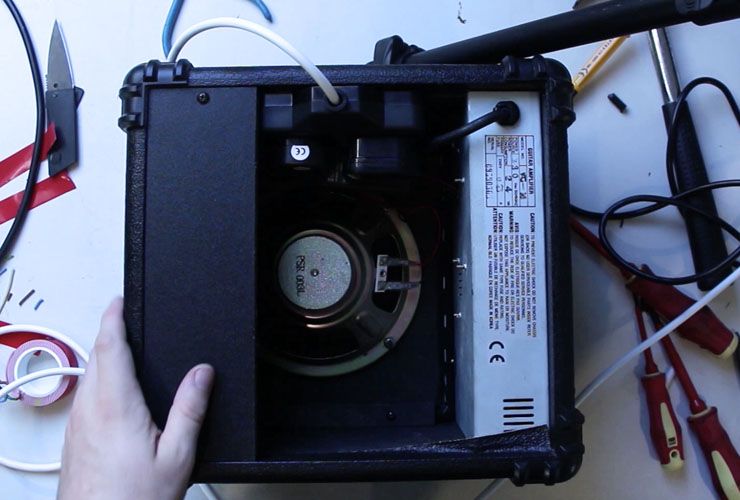
Using a couple of strips of double sided mounting tape, attach the Pi to the amp case. Plug the power cable and aux input into the Pi before sticking it down. It's easier than trying to connect them later. Position it so that it's not interfering with any of the amps components or causing any shorts.
Double sided mounting tape is perfect for situations like this. The Pi is never likely to be under significant mechanical load. We just want it to stay where it is. Trying to mount it to a metal case any other way would be far more effort than it's worth.
Step 8: Shorten the Power Cord
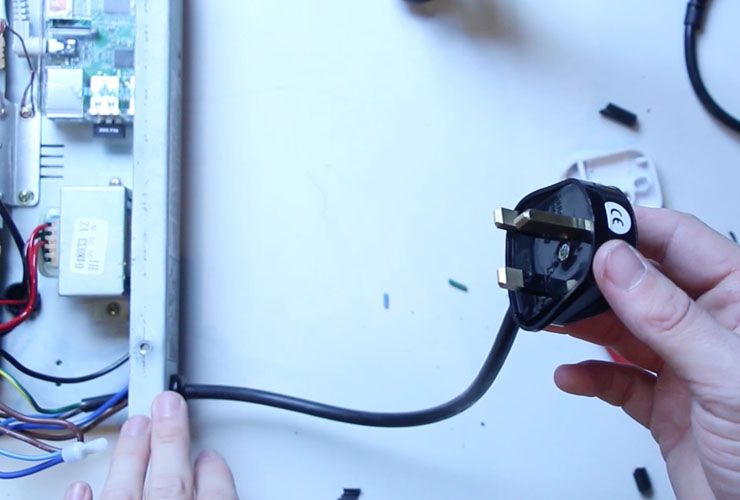
You're going to add two plug sockets inside the speaker body so the amp doesn't need a long power cord. Cut the cord down to about 15 or 30 centimetres. Reattach the plug to the now shortened cable. Be careful wiring the plug and follow a local guide.
Step 9: Make and Mount the Extension Cord
Connect the two-plug socket, 2 metres of three-core cable and plug together to form an extension cord. Again, be very careful to attach the correct wires to the correct pins.
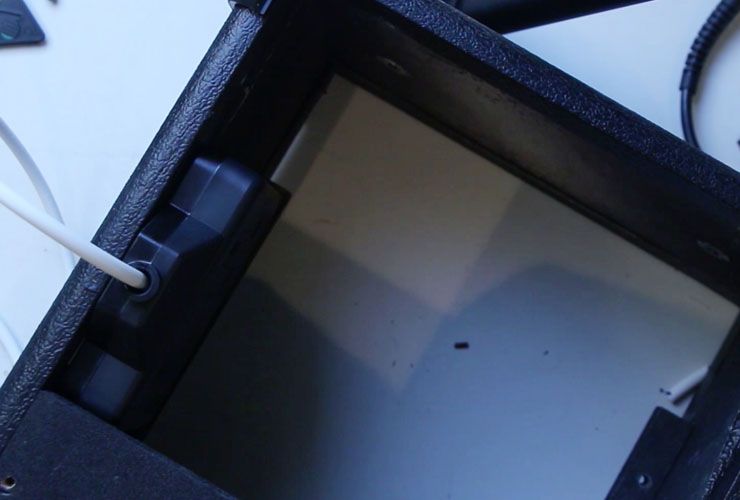
Attach the two-plug socket to the side of the speaker casing using mounting tape. Make sure that everything else can be assembled around it.
Step 10: Reassemble the Speaker
Reverse the procedure from step 4. Carefully reassemble the speaker, this time with the Raspberry Pi wired into the amp's input and housed inside its case.
Plug both the speaker and the Pi power leads into the two power sockets. Use cable ties to tidy up any excess wires.
Plug the extension cord into a mains outlet and wait for the Pi to boot up.
Step 11: Enjoy!
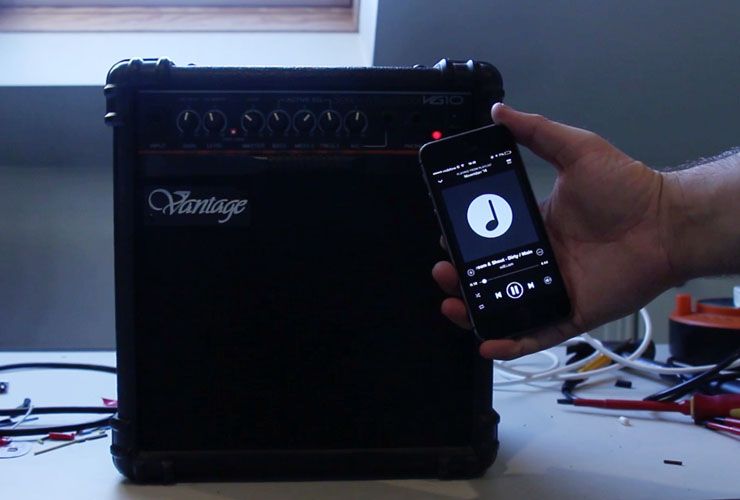
With the speaker plugged in and running, you're able to control it from the web client. You should download a smartphone client like MPod for iOS [No Longer Available] or MPRemote for Android.
On iOS devices, the speaker should also appear under the Airplay menu. On Android you can use an app like AllStream Cast to enable it.
If you followed this build please share your results with me in the comments. Or, if you're having any difficulties let me know.
Image Credit: piqbg via Shutterstock.com

