Photoshop is a wonderful tool. Expensive, but wonderful. With it you can smooth out Gran's chin, hide your ex or bring shame upon a local politician. Photoshop's forte however is fixing photos.
As a generation of photographers, we've accepted Photoshop as an "always there" resource for salvaging shaky shots but to really improve as a photographer, it's important to look at mistakes and learn how to take good photos.
Try and cut down on your Photoshop habit with these Adobe-busting tips on what to look out for.
Read Your Histogram
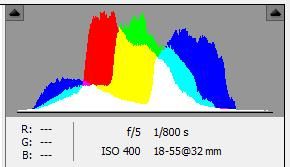
The histogram is a graph-like visual representation of light within an image, and an important aspect of digital photography to master. Digital SLRs, bridge cameras and some compacts will offer a histogram view after an image has been taken. A nicely balanced histogram will look something like this:
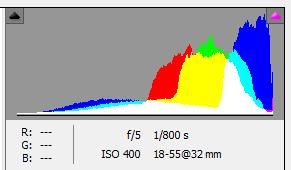
All the colours within the image are correctly exposed, there is no clipping (loss of detail) and the histogram resembles a centralised curve. If I had overexposed the same image then the histogram would read:
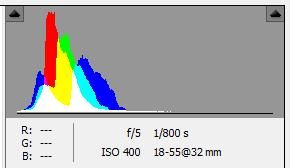
Much of the recorded data has been blown out of exposure and now appears on the right (light side) of the histogram. Underexposed images follow the opposite pattern:
Reading your histogram in the field will give you a much better idea of whether your exposure is correctly balanced, and whether you have lost any detail. Unfortunately reviewing your images on the small LCD just isn't enough - especially in bright conditions.
Use Filters
There are an array of filters that come in all shapes and sizes to help your camera capture that perfect image. A simple UV filter will not only protect the lens, but will help cut through hazy conditions for shots with greater clarity.
Graduated neutral density filters are perfect for landscapes, and are used to reduce the brightness of the sky within the photo. This provides balanced exposures, with a high range of detail that Photoshop's Graduated Filter tool can struggle with (especially if the sky is badly overexposed). For deep blue skies and reflection-free waterways then a circular polarising filter is a must.
Watch The Horizon
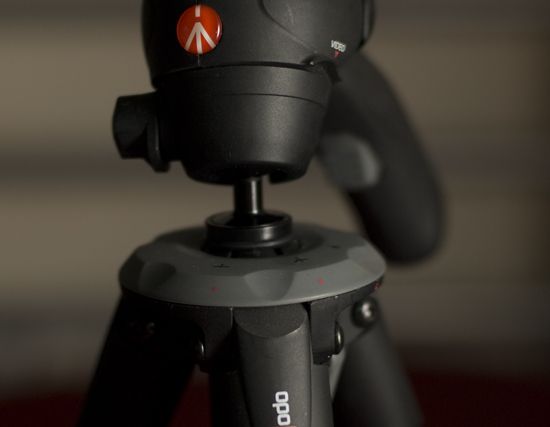
Don't forget to check that horizon before pressing the shutter. A slightly wobbly horizon can ruin a good shot, and if you're not prepared to mess about in Photoshop then it's probably worth investing in a tripod. Many come with spirit levels built into the head to indicate whether the camera support is straight or not, allowing you to tweak and fiddle to your heart's content before hitting the shutter.
Delaying the exposure with the camera's timer (or using a remote trigger) will ensure there's no wobble when the shutter opens, giving you a blur-free shot.
Use A Custom White Balance
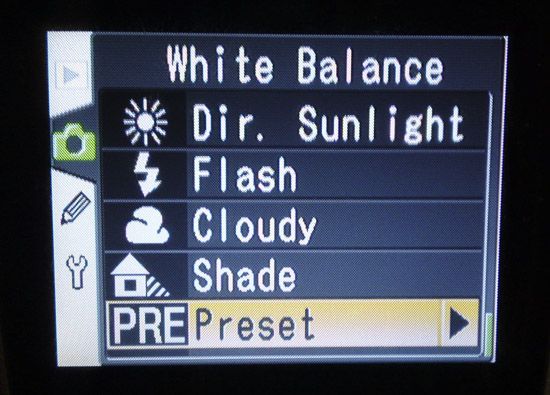
Using a piece of white or grey card it is possible to take a custom white balance, meaning your whites will be white for as long as you're shooting in those conditions. This is key to nailing skin tones first time, a fine-tuning process that can be very time consuming if you're using Photoshop.
If your camera supports it, then you'll need to consult the manual to find out exactly how to do this. Generally, the process involves positioning your chosen card beneath a well-lit area, selecting a custom white balance and photographing the card. The camera will use your sample as a base for all other shades.
Preventing Red-Eye
Red-eye is the bane of many photos, and despite being a quick fix is still a problem many of us would rather avoid altogether.
When shooting with a flash, first ask yourself if you really need it. Many compact cameras default to an "auto" mode which is all-too-happy to fill the room with strobes, so try turning it off. If the room is fairly light or you are outside then it may be worth asking your subject to remain still and practicing your steadiest hand.
Digital SLR users with bounce flashes should use them to their full potential and bounce light onto their subject, which will deliver a softer overall exposure as well as reducing the likelihood of red-eye.
If all else fails, there's a great online alternative to Photoshop for fixing red eye.
Know Your Lenses
I've got a couple of zoom lenses I find will always provide a pesky black ring around the edges of my photos at their widest angles, known as a vignette. Taking note of what your equipment can realistically achieve will reduce your processing time and avoid disappointment. So if you discover that trusty old 18-55mm vignettes at its widest point (as mine does), stop short of the mark.
Don't forget having filters and lens hoods on your glass may cause this to happen more frequently, so removing these extras will reduce your need for Photoshop's vignette fixer.
Conclusion
Don't be content with the few shots you've already got, if you spot something worth the effort then keep that trigger finger itchy. It sounds like an obvious point to make, but digital photography (once you've bought your camera) is essentially free. Therefore use every byte on your memory card, you'll be amazed how sometimes you get about 10 good shots from the 200 on your card.
Remember Photoshop isn't a sin, it's just time consuming. Hopefully by paying a little more attention to the very basics of how to take good photos you will be able to spend more time on the web reading articles like these and less time cursing the straighten tool for crashing Camera Raw yet again.
Be sure to check out our downloadable ultimate guide to Photoshop if you've not already, it's all you need to become a Photoshop guru. Also, take a look at our Essential Guide to Digital Photography for some great photography tips. And of course, any other tips you can offer us in the comments section below would be greatly appreciated.

