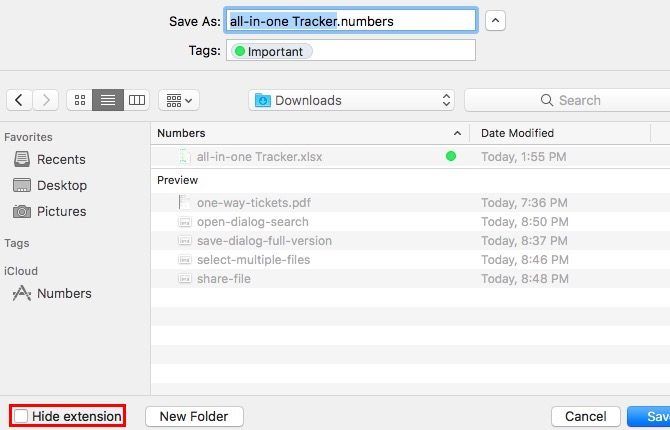
macOS' Open and Save dialogs are mini versions of Finder, but it's easy to gloss over that fact. When you're dealing with them, you probably head straight to picking out the file you need or saving the current one, as the case may be.
It's time you paid more attention to those Finder-like dialogs. We'll show you a few productive ways to use them.
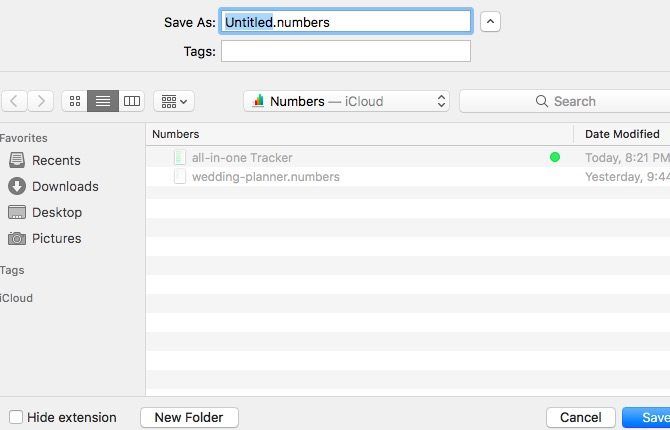
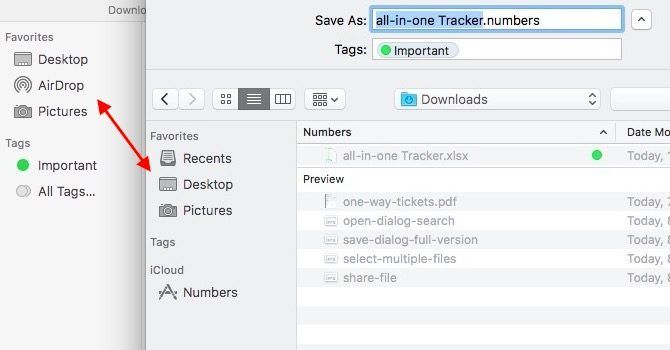
You'll need to activate the full version of the Save dialog (see screenshot below) to access most of the functions we'll list. To do so, click on the "down arrow" button next to the Save As: or file name field within the dialog.
Preview Files With Quick Look
Every time I wanted to preview a file before opening it, I navigated to its location in Finder to use the Quick Look feature. It never occurred to me that I could preview files as I opened them i.e. from the Open dialog. In hindsight, that seems like such an obvious solution. Now you're aware of it, too, in case you missed it before.
Using Quick Look to preview files is one Finder trick every Mac user needs to know. You select a file and hit spacebar to view the file without opening it inside the appropriate application. (Hit Esc to make the preview disappear.) Does Quick Look save time and your Mac's resources? You bet!
Keep in mind that anything that requires selecting a file first -- such as Quick Look -- won't work with the Save dialog.
Use Search to Find Files Faster
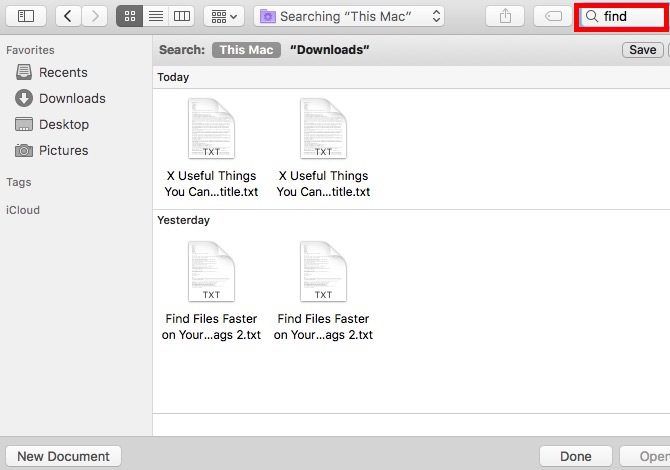
If you can't locate a specific file in the Open dialog of an application, hit Command + F and let macOS Search find it for you. Actually, it's much easier and quicker to let the search mechanism find the file for you every time than navigating from folder to folder looking for it.
If you rely only on search to bring up files and folders, feel free to let the sidebar stay hidden. Click on the toolbar button at the extreme left in any Open/Save dialog to toggle the sidebar. For some reason, Finder doesn't have this button. But hey, you can still hide/display the sidebar using Option + Command + S.
Using search also comes in handy when you're saving a file. There's no need to fiddle with folder hierarchies in this case either. Search for the enclosing folder (i.e. the location where you want to save the file), open it, and save the file with a suitable name.
You can even move files by dragging and dropping them into the right location from the Open dialog!
Use Keyboard Shortcuts
In Finder, you can use keyboard shortcuts to create and delete folders, toggle hidden items, jump to specific folders, and so on.
You know what's coming next, right? If it works in Finder, it (usually) works in the Open and Save dialogs. These keyboard tricks, for example:
- Create a new folder -- Command + Shift + N
- Delete a file or folder -- Command + Delete
- Move focus to the Applications folder -- Command + Shift + A
- Move focus to the Home folder -- Command + Shift + H
- Display the Go to Folder dialog -- Command + Shift + G
- Toggle the display of hidden files -- Command + Shift + Period
While you're memorizing these shortcuts, you'll also want to memorize another important one: Command + R. When you have a file (or folder) selected in an Open dialog, hitting this key combo brings up that file in Finder.
Add and Edit Tags
Tags are a smart way to organize your Mac and speed up file searching. Did you know you can create them from an application's Open and Save dialogs?
In the Open dialog, tag creation works pretty much like it works in Finder. You select a file and create tags either from the toolbar, the context menu, or File Inspector. If you aren't sure what any of these methods involve, you will be after you discover the various ways to create tags.
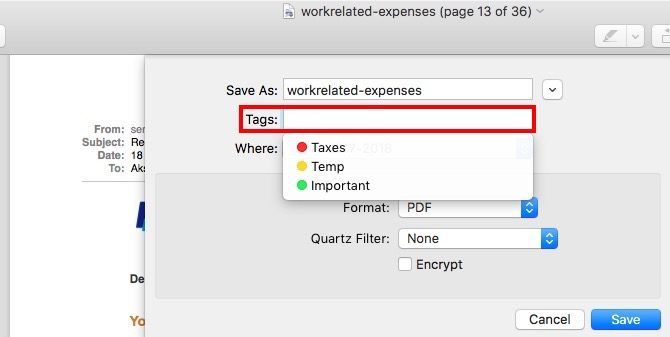
In the Save dialog, the Tags: field appears right below the field for the file name. Before you hit the Save button to save the file with a new name, type in a tag name and hit Enter to create a new tag or pick one from the list of available tags.
Open Multiple Items Together
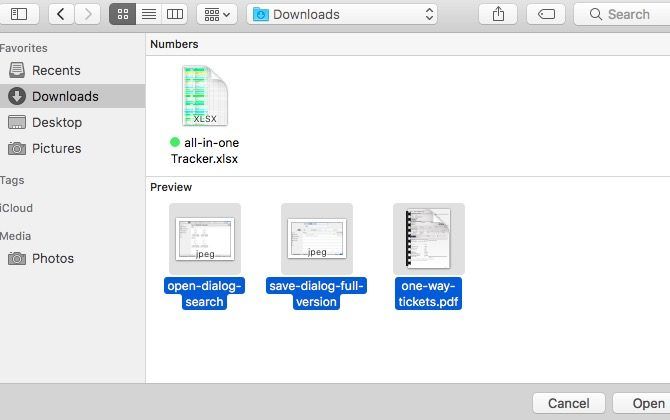
If you hold down the Shift key or the Command key when you're viewing an Open dialog, you get to select multiple files and open them all at once. It doesn't matter if the files are of different types -- you can select them just the same. Of course, files in formats that aren't compatible with the current application appear grayed out and you can't select them.
As expected, Command + A selects all the files in the current folder.
Edit the Sidebar
If you thought the sidebar in the Open/Save dialogs is only a reflection of the sidebar in Finder, think again! You can customize the sidebar in either of those dialogs and the changes show up in the other one, not to mention across all apps. What's more, the changes stick even if you close and reopen the app.
In the case of Open/Save dialogs, adding and removing sidebar items works only with "drag and drop". Drag a folder into the sidebar and it shows up there. To delete a sidebar folder, drag it out and let go when you see an "X" mark show up next to the folder.
You can even rearrange sidebar items by dragging and dropping them into the desired locations. Only the Recents sidebar listing is uneditable.
Share Files
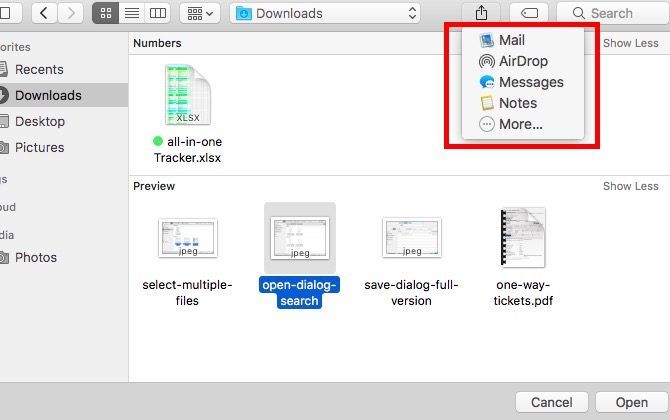
Click on the Share toolbar button in the Open dialog of an application and you'll see the standard macOS Share menu. It's the same one you see in various common apps including Safari, Notes, and Preview.
Of course, the sharing options listed in the Share menu will appear tailored for the app you're in. You can customize this menu across macOS from System Preferences > Extensions > Share Menu.
A Few Other Things to Remember
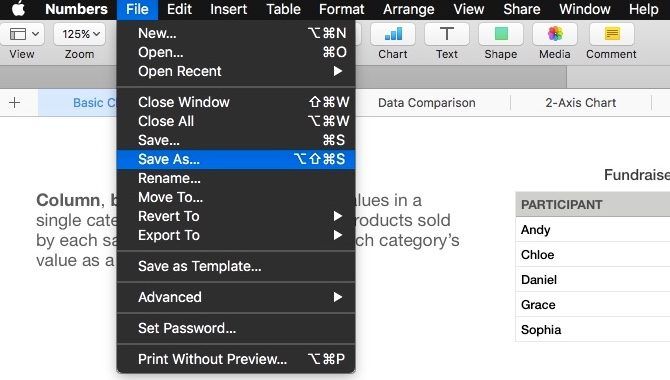
Everything that works with the Save dialog also works with the Save As dialog. To bring up the latter in a supported application, use the shortcut Option + Shift + Command + S. If you prefer to use the menubar instead, click on the Save As... option that appears in the File menu when you're holding down the Option key.
Certain changes you make to the Open/Save dialogs are app specific. For example, let's say you have selected the Hide extension checkbox in the Save dialog of Preview and left it unselected in the Save dialog of Numbers. Those preferences will stay that way unless you change them again for each app one by one.
On the other hand, certain changes are reflected across the board. If you list files by, say, type or size using the Arrange toolbar icon inside the Open dialog of one app, that arrangement shows up in the Open dialog for every other app.
Another Win for macOS
macOS has many handy features hidden in plain sight. Every time I discover another one of these gems, I'm delighted! And then I see why people love their Macs so much.
Do you make full use of these "extra" features that come with the Open and Save dialogs in macOS? Which ones have you discovered and wish more people knew about? Let us know in the comments!
Image Credits: Bohbeh/Shutterstock

