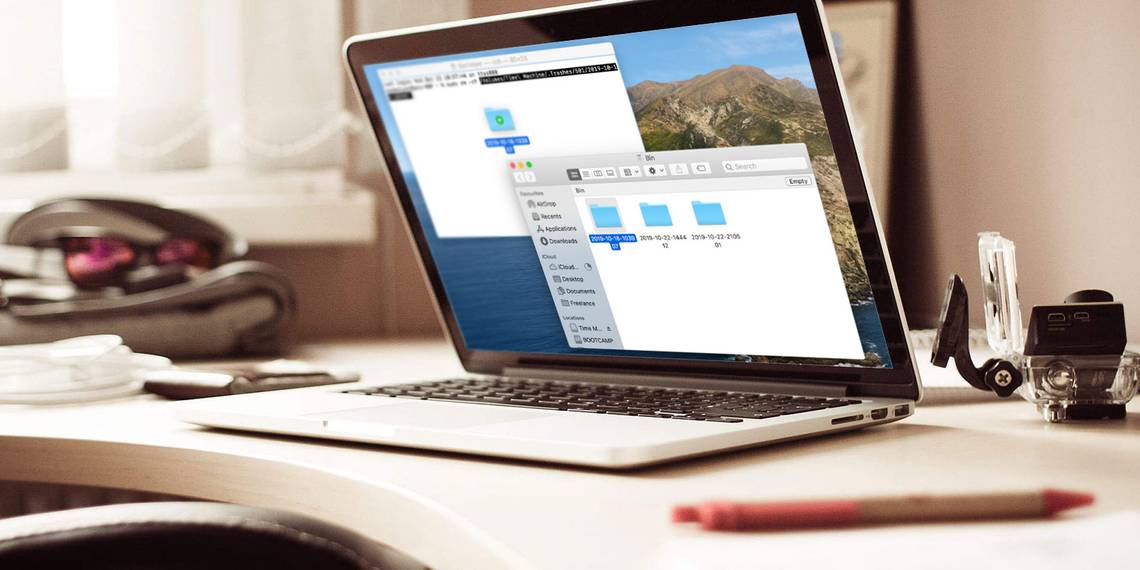
It turns out there's a right way and a wrong way to delete Time Machine backups on macOS. You might think it makes sense to drag them to the Trash---like everything else on your Mac---but that's actually the "the wrong way." If you tried it, you probably found out why it's a problem.
When you move Time Machine backups to the Trash, they often get stuck there. You'll find you can't empty the Trash, you can't put them back where they came from, and doing so hasn't freed up any more space on your external drive.
It's a nightmare scenario, but there are a couple of ways to remedy it.
Why Time Machine Backups Get Stuck in the Trash
Most of the time, you can't delete Time Machine backups from the Trash because of macOS's System Integrity Protection (SIP). This is a security feature in macOS that stops you or anyone else from damaging important parts of the operating system. Apple introduced it in OS X El Capitan in response to a growing number of malware threats directed at macOS.
You can't delete these backups because they contain copies of your system files, which SIP protects. You might see an error message explaining this when macOS fails to empty the Trash.

Other times, you might be unable to delete Time Machine backups even when there's no problem with SIP. This can happen with particularly large backups that regularly hold tens or hundreds of thousands of files.
When you empty the Trash, macOS takes a long time to work through each file. If any of them are corrupt, you can't empty the Trash.
How to Remove Time Machine Backups From the Trash
The best method for removing Time Machine backups from the Trash depends on whether SIP is getting in the way or not.
If an error message told you that "some items in the Trash cannot be deleted because of System Integrity Protection," then you need to temporarily disable SIP. Otherwise, you can immediately remove anything from the Trash using Terminal.
Temporarily Disable System Integrity Protection
Before we start on these instructions, it's important to note that SIP makes your Mac safer. You can turn it off to delete Time Machine backups from the Trash, but we highly recommend you turn it on again when you're done. Otherwise, your Mac is more vulnerable to malware attacks.
Follow these instructions to temporarily turn off SIP:
- Boot into Recovery Mode by holding Cmd + R while your Mac powers on.
- Release both keys when you see an Apple logo appear.
- If prompted, log in to an administrator account on your Mac.
-
When you see the macOS Utilities window, select Utilities > Terminal in the menu bar.

-
Enter the following command exactly as you see it here:
csrutil disable; reboot - Hit Return and wait for your Mac to restart.
- SIP is now turned off; you should be able to empty the Trash as normal.
-
When you're finished, go back to step one and use this command to turn SIP on again:
csrutil enable; reboot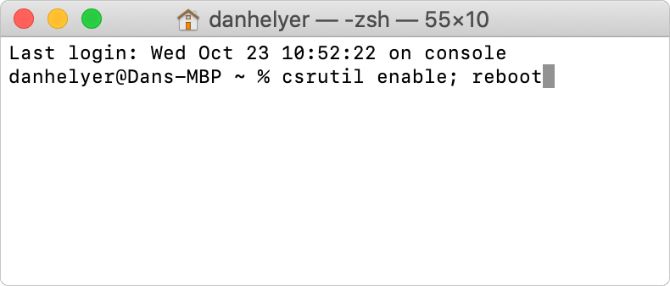


If it takes a long time to empty the Trash (which is possible if you deleted a large backup) make a reminder on your Mac so you don't forget to turn on SIP again. In the meantime, avoid downloading or installing anything while your Mac is less protected.
Check the Status of System Integrity Protection
If you're unsure, check if your Mac has SIP turned on or off by looking at the System Report. Go to Apple menu > About This Mac > System Report. Select Software from the sidebar to reveal your System Integrity Protection status.

Use Terminal to Immediately Empty the Trash
You can bypass the Trash using Terminal commands. When you do this, macOS immediately deletes the selected file, even if it's restricted or corrupt.
Make sure you're familiar with how to use the Terminal before you follow these instructions. If you make a mistake or type a command incorrectly, you could damage the software on your Mac.
We're going to use these simple commands:
-
sudo -
rm -
-rf
Follow these instructions to empty the Trash using Terminal:
- Open Terminal using Spotlight search. Press Cmd + Space and type terminal to find it.
-
Enter the following command, including a space at the end, but don't press Return yet:
sudo rm -rf - Double-click the Trash icon in your Dock to view its contents.
- Drag and drop your Time Machine backup from the Trash into the Terminal window; it should automatically fill the file path into your command.
- In Terminal, press Return to delete the file.
- If prompted, enter your administrator password and press Return again. Your password doesn't show up on screen as you type it.
- Keep Terminal open while it processes your command. It might take a while to delete large Time Machine backups. You'll know it's finished when the backup disappears from your Trash.

Delete Time Machine Backups the Right Way
In an ideal world, you wouldn't need to delete Time Machine backups at all. Apple designed Time Machine to automatically remove old backups so it can make space for new ones, but this doesn't always work as well as you need it to. Sometimes you want extra space on your drive for other files or a second computer backup.
If you found this useful, check out macOS folders you should never mess with, and why.